


OSRS Hunter Guide 1–99: Rumours, Birdhouses and Fast XP
Hunter 1–99 guide covering birdhouse runs, Hunter Rumours, chins, herbivores, and how to mix AFK profit with fast XP methods.
Why Hunter Is Worth 1–99
Hunter is the only skill where the correct use of an hour is sometimes ninety seconds of work followed by nothing at all. A birdhouse run on Fossil Island takes somewhere around 73 to 90 seconds of actual play, and the four traps then need fifty minutes to fill before there is anything to collect. That is not a training session in any recognisable sense; it is a farm run. Played as one — set, walk away, come back when the timer says so — birdhouses give the fastest Hunter experience in real time effectively as far as level 80, and they stay viable all the way to 99 for anyone who is not racing.
The second thing that separates Hunter from the other gathering skills is that your level is not just a permission slip for better creatures. It is also the number of traps you are allowed to lay: one at level 1, two at 20, three at 40, four at 60 and five at 80, with one extra than usual anywhere in the Wilderness. Four specific levels therefore change how a hunting spot physically plays, and every level between them changes almost nothing about it. That is why the levels immediately below 20, 40, 60 and 80 are the ones worth drinking a hunter potion through rather than earning honestly.
Then there is the Hunter Guild, which opens at 46 Hunter in the Avium Savannah and brought rumours with it. A Guild hunter names a creature, you hunt that creature until it drops a rare creature part, and you hand the part in for experience calculated from your level and the tier of the hunter who set the task. Rumours gave Hunter something it had never had: an assignment, a way to block the assignments you hate, and a reward stream you accumulate rather than sell — the quetzal whistle, the guild hunter outfit, quetzal feed, and Quetzin from expert and master tiers only.
What the skill still lacks is a comfortable middle. Birdhouses, herbiboar and maniacal monkeys ask almost nothing of your attention; black chinchompas with tick manipulation, a shooting alt and a Wilderness escape plan ask for all of it. Working out which of those two you will genuinely sit down and play is most of what planning a Hunter 1–99 actually involves.
Bils Services offers hand-done Hunter training if you would rather outsource the grind. This article stays educational first — use the service link only if it fits your plan.
We have not put XP per hour or supply costs in this guide. Hunter rates move whenever Jagex adjusts a method, and the cost of the hunter supplies below moves with the Grand Exchange — a frozen number here would mislead you into budgeting the wrong bank. The OSRS Wiki carries live figures.
Quest XP and the Unlocks That Matter
| Quest or unlock | Hunter XP | What it opens |
|---|---|---|
| Natural History Quiz (miniquest) | 1,000 | Speak to Orlando Smith in the Varrock Museum basement. No level requirement at all, and it takes you straight from 1 to 9 — which is the level birdhouses become the plan. |
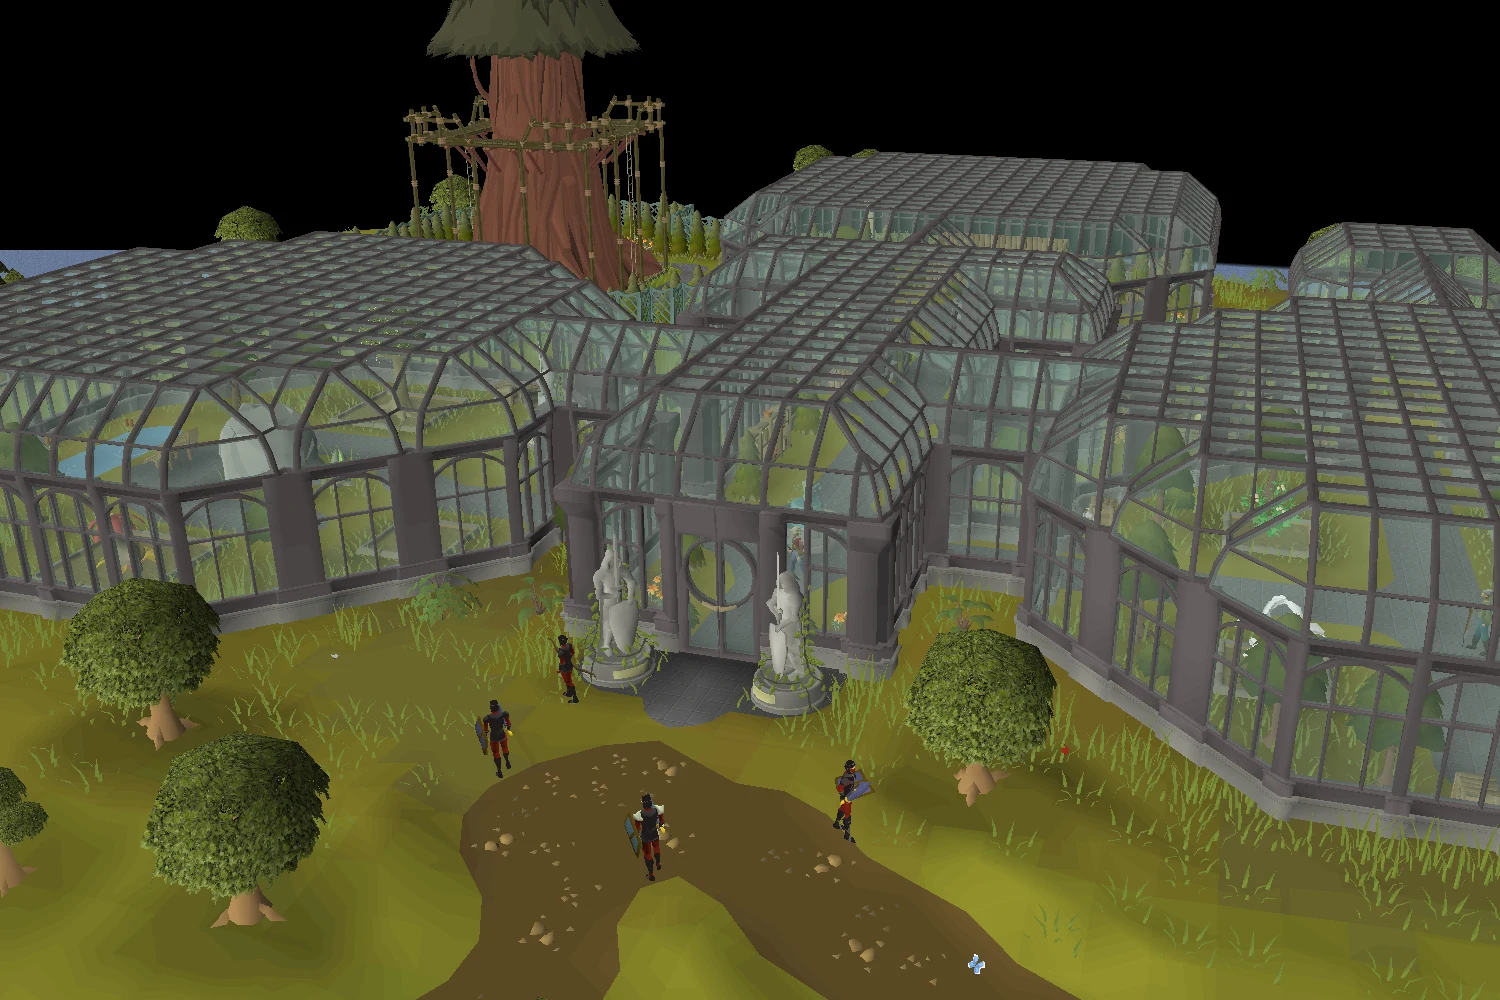
| Bone Voyage | — | Fossil Island, and with it the four birdhouse sites, the underwater area for drift net fishing, and the Mushroom Forest where herbiboar are tracked. Nothing on this page's passive route works without it. |
| Eagles' Peak (partial is enough for traps) | 2,500 | Box traps. No box trap means no chinchompa of any colour and no embertailed jerboas. Full completion also opens the eagle transport system to the snow, jungle and desert areas. |
| Fairytale II - Cure a Queen (started) | — | Fairy rings. AJP drops you beside Locus Oasis, AKQ at Piscatoris for the falconry and the razor-backed kebbits, DKS at Rellekka, AKP at the Necropolis salamanders. |
| The Ascent of Arceuus | 1,500 | Needs 12 Hunter. Small, early, and worth taking on the way past. |
| Perilous Moons | 5,000 | Needs 20 Hunter. Also unlocks the Make-Cuppa action at the Neypotzli cooking stove, which fully restores run energy where the moonlight moths are. |
| Shadows of Custodia | 4,000 | Needs 36 Hunter, plus 41 Construction, 45 Fishing and 54 Slayer. |
| At First Light | 4,500 | Needs 46 Hunter — the same level the Hunter Guild opens at, so the two tend to arrive together. |
| Defender of Varrock | 15,000 | Needs 52 Hunter and 55 Smithing. |
| Secrets of the North | 40,000 | Needs 56 Hunter, 69 Agility and 64 Thieving. One of the two largest single Hunter rewards below level 60. |
| Monkey Madness II | 50,000 | Needs 60 Hunter. Not optional if you want maniacal monkeys: the Kruk monkey greegree is how you get into Glough's Laboratory in Kruk's Dungeon. |
| While Guthix Sleeps | 50,000 | Needs 62 Hunter and a long list of other requirements. |
| Song of the Elves | 40,000 | Needs 70 Hunter. Strongly recommended — with the hard Western Provinces Diary as the alternative — for anyone planning to hunt carnivorous chinchompas. |
| Hunter Guild (46 Hunter) | — | Rumours at four tiers, Imia's Supplies, and moonlight moths in the basement next to a bank. |
| Recipe for Disaster — Freeing Pirate Pete | — | Fishbowl helmet and diving apparatus. With flippers from mogres, that is the drift net fishing kit. |
| Hard Wilderness Diary | — | Fast access to the Wilderness Hunter area, which matters more than it sounds when the alternative is a long run through level 32–36 Wilderness. |
- Quest or unlock
- Natural History Quiz (miniquest)
- Hunter XP
- 1,000
- What it opens
- Speak to Orlando Smith in the Varrock Museum basement. No level requirement at all, and it takes you straight from 1 to 9 — which is the level birdhouses become the plan.
- Quest or unlock
- Bone Voyage
- Hunter XP
- —
- What it opens
- Fossil Island, and with it the four birdhouse sites, the underwater area for drift net fishing, and the Mushroom Forest where herbiboar are tracked. Nothing on this page's passive route works without it.
- Quest or unlock
- Eagles' Peak (partial is enough for traps)
- Hunter XP
- 2,500
- What it opens
- Box traps. No box trap means no chinchompa of any colour and no embertailed jerboas. Full completion also opens the eagle transport system to the snow, jungle and desert areas.
- Quest or unlock
- Fairytale II - Cure a Queen (started)
- Hunter XP
- —
- What it opens
- Fairy rings. AJP drops you beside Locus Oasis, AKQ at Piscatoris for the falconry and the razor-backed kebbits, DKS at Rellekka, AKP at the Necropolis salamanders.
- Quest or unlock
- The Ascent of Arceuus
- Hunter XP
- 1,500
- What it opens
- Needs 12 Hunter. Small, early, and worth taking on the way past.
- Quest or unlock
- Perilous Moons
- Hunter XP
- 5,000
- What it opens
- Needs 20 Hunter. Also unlocks the Make-Cuppa action at the Neypotzli cooking stove, which fully restores run energy where the moonlight moths are.
- Quest or unlock
- Shadows of Custodia
- Hunter XP
- 4,000
- What it opens
- Needs 36 Hunter, plus 41 Construction, 45 Fishing and 54 Slayer.
- Quest or unlock
- At First Light
- Hunter XP
- 4,500
- What it opens
- Needs 46 Hunter — the same level the Hunter Guild opens at, so the two tend to arrive together.
- Quest or unlock
- Defender of Varrock
- Hunter XP
- 15,000
- What it opens
- Needs 52 Hunter and 55 Smithing.
- Quest or unlock
- Secrets of the North
- Hunter XP
- 40,000
- What it opens
- Needs 56 Hunter, 69 Agility and 64 Thieving. One of the two largest single Hunter rewards below level 60.
- Quest or unlock
- Monkey Madness II
- Hunter XP
- 50,000
- What it opens
- Needs 60 Hunter. Not optional if you want maniacal monkeys: the Kruk monkey greegree is how you get into Glough's Laboratory in Kruk's Dungeon.
- Quest or unlock
- While Guthix Sleeps
- Hunter XP
- 50,000
- What it opens
- Needs 62 Hunter and a long list of other requirements.
- Quest or unlock
- Song of the Elves
- Hunter XP
- 40,000
- What it opens
- Needs 70 Hunter. Strongly recommended — with the hard Western Provinces Diary as the alternative — for anyone planning to hunt carnivorous chinchompas.
- Quest or unlock
- Hunter Guild (46 Hunter)
- Hunter XP
- —
- What it opens
- Rumours at four tiers, Imia's Supplies, and moonlight moths in the basement next to a bank.
- Quest or unlock
- Recipe for Disaster — Freeing Pirate Pete
- Hunter XP
- —
- What it opens
- Fishbowl helmet and diving apparatus. With flippers from mogres, that is the drift net fishing kit.
- Quest or unlock
- Hard Wilderness Diary
- Hunter XP
- —
- What it opens
- Fast access to the Wilderness Hunter area, which matters more than it sounds when the alternative is a long run through level 32–36 Wilderness.
The Hunter experience from quests totals 209,500 on the wiki's own reckoning. That is a meaningful shove through the early levels and close to irrelevant by the eighties, so treat the table above as an access list first and an experience list second. Three entries genuinely reorder the guide: Bone Voyage, because Fossil Island is where the passive route lives; Eagles' Peak, because a box trap is the gate on every chinchompa in the game; and starting Fairytale II - Cure a Queen, because a surprising number of the hunting areas below are addressed by fairy ring code rather than by teleport.
Two more are worth settling before you commit to a high-level method rather than discovering them at level 60. Maniacal monkeys need Monkey Madness II and the greegree, full stop. Carnivorous chinchompas at the Tlati Rainforest spot need Varlamore through Children of the Sun, and the quetzal to Tal Teklan through Twilight's Promise; without both you are running to a worse spot with sparser spawns.
Diaries are a smaller but real part of this. The hard Wilderness Diary is the recommended access for black chinchompas, and the skill is itself a requirement on a long list of diary tasks — 5 for Desert easy, 9 for Western Provinces easy, all the way up to 69 for Western Provinces hard. If you are diary-hunting anyway, several Hunter levels are already spoken for.
Hunter 1–99 Level Path
| Level band | What to do | What actually changes here |
|---|---|---|
| 1–9 | The Natural History Quiz in the Varrock Museum basement. | One conversation, 1,000 experience, no traps and no travel. There is no reason to catch anything below level 9 by hand. |
| 9–15 | Feldip weasels in the Feldip Hunter area with a noose wand and rings of pursuit. Start birdhouse runs the same day. | Tracking rather than trapping, so the one-trap limit does not bite. A ring of pursuit reveals the whole trail at once, which is the difference between the method being tolerable and not. |
| 15–21 | Ruby harvests at Piscatoris with a butterfly net, while bird snares catch copper longtails beside you. | The birds alone are nearly worthless; the point is that the snares work while your hands are busy netting. This is the first band where the trap count is doing something for you. |
| 21–39 | Red crabs at the Pandemonium. Alternatives: sapphire glacialis at Rellekka from 25, swamp lizards near Slepe from 29. | Red crabs need partial completion of the Pandemonium and 10 Construction to build two traps from a hammer, saw, two planks, four nails and two buckets — after which you only carry fish offcuts. Crab traps cannot fail, which is unique among Hunter traps. |
| 39–43 | Embertailed jerboas at Locus Oasis with box traps. Fairy ring AJP lands beside the area. | The third trap arrives at 40, so this short band is worth boosting into rather than crawling through with two. |
| 43–49 | Falconry in the Piscatoris falconry area, east of fairy ring AKQ. Rent a gyr falcon from Matthias for 500 coins. | Your weapon, shield and hands slots must be empty, which means no traps and no trap count at all. Work the three spotted kebbit spawns in the south-eastern corner; they respawn four seconds after retrieval. |
| 44–99 (parallel) | Drift net fishing on Fossil Island underwater, if Fishing also needs training. | 44 Hunter and 47 Fishing, both unboostable. The experience is split between the two skills, so this is the right call only while you want the Fishing as well. |
| 49–72 | Razor-backed kebbits at Piscatoris — fairy ring AKQ, then east to the bushes and burrows before the falconry. | Noose wand and ring of pursuit again, and the Huntsman's kit is what lets you carry rings in bulk. Working the east-most burrow every time is the small habit that removes most of the downtime. |
| 47–73 (lower intensity) | Orange salamanders from 47 at Uzer or the Necropolis, red salamanders from 60 south of the Ourania Cave, black salamanders from 67 at the Bone Yard. | Net traps need a rope and a small fishing net each, and carrying one spare set lets you reset a trap before picking up the collapsed one. The Bone Yard is in the Wilderness, so you get the extra trap there — but the wiki notes it is not a popular spot for player killers. |
| 60–99 (near-passive) | Maniacal monkeys in Glough's Laboratory, deadfall traps baited with bananas. | One interaction every 25 to 30 seconds and 1,000 experience per catch. An inventory of banana baskets lasts about fifty minutes, which is conveniently one birdhouse cycle. |
| 72–91 | Expert rumours from the Hunter Guild. | Rumours exist from 46, but the wiki is explicit that novice and adept tiers are not worth taking for experience. Expert is the tier where the activity becomes a training method rather than a reward grind. |
| 73–99 (fastest, Wilderness) | Black chinchompas in the Wilderness Hunter area, level 32–36 Wilderness. | The fastest experience in the skill from 73 onward and profitable with it, at the cost of hunting in a known player-killing hot spot. Tick manipulation and a shooting alt are part of the method, not garnish. |
| 75–99 (alternatives) | Moonlight moths in the Earthbound Cavern at Neypotzli, or in the Hunter Guild basement. Rainbow crabs at 77 with 64 Sailing. Carnivorous chinchompas properly from 80. | Three very different shapes: moths are click-intensive with nets claimed from nearby supply crates, rainbow crabs are five permanent traps and a pestle and mortar, and carnivorous chins want the fifth trap before they are worth starting. |
| 80–99 (low effort) | Herbiboar in the Mushroom Forest. Needs 80 Hunter, 31 Herblore and Bone Voyage. | You spend the entire method running, so Agility, weight-reducing clothing and stamina potions are the real requirements. Harvesting with magic secateurs adds herbs and passive Herblore. |
| 91–99 | Master rumours, if you are running the guild route. | The last tier unlock, and unboostable like the other three. Everything else on this list is already open by now. |
- Level band
- 1–9
- What to do
- The Natural History Quiz in the Varrock Museum basement.
- What actually changes here
- One conversation, 1,000 experience, no traps and no travel. There is no reason to catch anything below level 9 by hand.
- Level band
- 9–15
- What to do
- Feldip weasels in the Feldip Hunter area with a noose wand and rings of pursuit. Start birdhouse runs the same day.
- What actually changes here
- Tracking rather than trapping, so the one-trap limit does not bite. A ring of pursuit reveals the whole trail at once, which is the difference between the method being tolerable and not.
- Level band
- 15–21
- What to do
- Ruby harvests at Piscatoris with a butterfly net, while bird snares catch copper longtails beside you.
- What actually changes here
- The birds alone are nearly worthless; the point is that the snares work while your hands are busy netting. This is the first band where the trap count is doing something for you.
- Level band
- 21–39
- What to do
- Red crabs at the Pandemonium. Alternatives: sapphire glacialis at Rellekka from 25, swamp lizards near Slepe from 29.
- What actually changes here
- Red crabs need partial completion of the Pandemonium and 10 Construction to build two traps from a hammer, saw, two planks, four nails and two buckets — after which you only carry fish offcuts. Crab traps cannot fail, which is unique among Hunter traps.
- Level band
- 39–43
- What to do
- Embertailed jerboas at Locus Oasis with box traps. Fairy ring AJP lands beside the area.
- What actually changes here
- The third trap arrives at 40, so this short band is worth boosting into rather than crawling through with two.
- Level band
- 43–49
- What to do
- Falconry in the Piscatoris falconry area, east of fairy ring AKQ. Rent a gyr falcon from Matthias for 500 coins.
- What actually changes here
- Your weapon, shield and hands slots must be empty, which means no traps and no trap count at all. Work the three spotted kebbit spawns in the south-eastern corner; they respawn four seconds after retrieval.
- Level band
- 44–99 (parallel)
- What to do
- Drift net fishing on Fossil Island underwater, if Fishing also needs training.
- What actually changes here
- 44 Hunter and 47 Fishing, both unboostable. The experience is split between the two skills, so this is the right call only while you want the Fishing as well.
- Level band
- 49–72
- What to do
- Razor-backed kebbits at Piscatoris — fairy ring AKQ, then east to the bushes and burrows before the falconry.
- What actually changes here
- Noose wand and ring of pursuit again, and the Huntsman's kit is what lets you carry rings in bulk. Working the east-most burrow every time is the small habit that removes most of the downtime.
- Level band
- 47–73 (lower intensity)
- What to do
- Orange salamanders from 47 at Uzer or the Necropolis, red salamanders from 60 south of the Ourania Cave, black salamanders from 67 at the Bone Yard.
- What actually changes here
- Net traps need a rope and a small fishing net each, and carrying one spare set lets you reset a trap before picking up the collapsed one. The Bone Yard is in the Wilderness, so you get the extra trap there — but the wiki notes it is not a popular spot for player killers.
- Level band
- 60–99 (near-passive)
- What to do
- Maniacal monkeys in Glough's Laboratory, deadfall traps baited with bananas.
- What actually changes here
- One interaction every 25 to 30 seconds and 1,000 experience per catch. An inventory of banana baskets lasts about fifty minutes, which is conveniently one birdhouse cycle.
- Level band
- 72–91
- What to do
- Expert rumours from the Hunter Guild.
- What actually changes here
- Rumours exist from 46, but the wiki is explicit that novice and adept tiers are not worth taking for experience. Expert is the tier where the activity becomes a training method rather than a reward grind.
- Level band
- 73–99 (fastest, Wilderness)
- What to do
- Black chinchompas in the Wilderness Hunter area, level 32–36 Wilderness.
- What actually changes here
- The fastest experience in the skill from 73 onward and profitable with it, at the cost of hunting in a known player-killing hot spot. Tick manipulation and a shooting alt are part of the method, not garnish.
- Level band
- 75–99 (alternatives)
- What to do
- Moonlight moths in the Earthbound Cavern at Neypotzli, or in the Hunter Guild basement. Rainbow crabs at 77 with 64 Sailing. Carnivorous chinchompas properly from 80.
- What actually changes here
- Three very different shapes: moths are click-intensive with nets claimed from nearby supply crates, rainbow crabs are five permanent traps and a pestle and mortar, and carnivorous chins want the fifth trap before they are worth starting.
- Level band
- 80–99 (low effort)
- What to do
- Herbiboar in the Mushroom Forest. Needs 80 Hunter, 31 Herblore and Bone Voyage.
- What actually changes here
- You spend the entire method running, so Agility, weight-reducing clothing and stamina potions are the real requirements. Harvesting with magic secateurs adds herbs and passive Herblore.
- Level band
- 91–99
- What to do
- Master rumours, if you are running the guild route.
- What actually changes here
- The last tier unlock, and unboostable like the other three. Everything else on this list is already open by now.
Read that table as the active column of a two-column plan. The other column is birdhouses, and it runs from level 9 to whenever you stop caring, independently of everything above. Four traps, fifty minutes, roughly a minute and a half of play — you can lay them before a Slayer task and collect them after it, and the experience arrives regardless of what the rest of your evening looked like.
The trap breakpoints deserve to be planned around rather than noticed in passing. Twenty, forty, sixty and eighty are the levels that change a spot's layout, and a hunter potion taken in the levels just below any of them buys you the extra trap early. Blackbird red and Trapper's tipple do the same job with a smaller boost and a single dose each, which makes them situational — worth it when the next level is a breakpoint, not worth it as a habit. The same potions also let you catch creatures a few levels before they are properly available, which is how the awkward bands between methods get shortened.
One thing the level bands hide: falconry ignores the trap count entirely, because your hands have to be empty to carry the bird. That is why it slots neatly into 43–49 despite sitting either side of no breakpoint at all, and why it feels so different from the trapping methods on either side of it.
- 1–9/20: quest XP + early catches
- Birdhouses: start as soon as unlocked and never stop on a main
- Mid: butterfly/bird/chinchompa ladder depending on goal
- Rumours: use as structured progression + reward loop when available
- High: maniacal monkeys / herbiboar / red chins style methods by preference
Fastest XP Methods
The fastest route splits at level 73, and the split is about where you are willing to stand rather than what you are willing to click. Below that, it is the active ladder above — weasels, ruby harvests with snares running, red crabs, jerboas, falconry, razor-backed kebbits — with birdhouses collected alongside because they cost you almost no time to run.
From 73, black chinchompas in the Wilderness Hunter area are the fastest experience in the skill, and the method is a genuine technique rather than a location. Traps go down a tick faster with tick manipulation, and with correct timing you can lay a trap immediately after picking one up, which the wiki calls trap resetting: check a filled trap, delay the skilling timer with a knife on a teak or mahogany log, cancel by clicking under yourself, lay the trap, and walk to the next one on the same tick. A knife and logs need two inventory slots where herb and tar need three, which is why that particular combination is the recommended one.
Two supporting habits carry more weight here than they look like they should. Shooting stray chinchompas with a ranged weapon forces a new one to spawn, and the fresh spawn walks into a trap far faster than the wanderer did — which is the whole argument for a second account holding a crystal bow or a magic shortbow. That alt can also carry your box traps, brews and spare logs, freeing inventory space on the account actually doing the hunting.
If none of that appeals, expert and master rumours are the wiki's stated alternative for players who will not tick manipulate, will not enter the Wilderness, or will not run an alt. You give up the chinchompas and their profit; you keep almost all of the speed.
Maniacal monkeys and other intensive methods define the XP ceiling.
Red chinchompas are the classic mid/high XP + profit hybrid.
Herbiboar is excellent XP with Herblore side benefits for many accounts.
Cheapest / Budget Approach
Hunter's costs are unusually easy to control, because most of the equipment is either permanent or nearly free. Ropes, small fishing nets, box traps, bird snares and butterfly nets come back to you when you pick them up. Crab traps at the Pandemonium and on the Crown Jewel are built once and stay built. The falconry costs a flat 500 coins per rental and nothing else. There is no consumable equivalent of bars or herbs anywhere in the skill except drift nets, which are destroyed on collection.
The one recurring bill is birdhouse seeds, and it is a bill you choose the size of. Each birdhouse takes forty seeds of any kind, or twenty if you use wildblood seeds or herb seeds of ranarr and above — so the cheap play is to feed them potato or onion seeds and keep the valuable ones for the Farming patches they belong in. The other input is a clockwork, and the clockwork comes back every time you collect, so you are really only buying logs and seeds.
The genuinely budget route to a high level is birdhouses and nothing else, and it is a legitimate plan rather than a consolation prize: the wiki describes them as viable to 99 provided you are not in a hurry. The cost is calendar time instead of gold, which is a trade a lot of accounts should take.
Where money quietly disappears is transport. Digsite pendants are the fast way onto Fossil Island and they are charges you spend, though you can make them yourself by enchanting ruby necklaces with Lvl-3 Enchant once you have shown a clean necklace to a Varrock Museum archaeologist. Stamina potions are the other recurring cost, and they matter most on the running-heavy methods — herbiboar, falconry and the kebbit tracking bands.
Birdhouses are among the best passive GP/XP habits in OSRS.
Chins can be sold or used for ranged — decide before you dump inventory space.
Do not ignore hunter potions/boosts for milestone creatures.
AFK & Lower-Intensity Options
Hunter's low-attention options are unusually good, and they are low-attention in three different ways worth telling apart. Birdhouses are not AFK at all — they are absent. You are not at the keyboard during the fifty minutes; you are doing something else entirely, and the experience accrues because the traps are filling without you.
Maniacal monkeys are the closest thing the skill has to conventional AFK. One deadfall trap, one banana, and an interaction every twenty-five to thirty seconds. Because an inventory of banana baskets lasts around fifty minutes before you bank, the trip length lines up neatly with a birdhouse cycle, which is a pleasant accident rather than a design.
Herbiboar is low-effort in the sense of being forgiving rather than idle. You are tracking constantly, but nothing punishes a slow click, and the harvest gives herbs and Herblore experience for the trouble. Rainbow crabs sit in a similar band: five traps that catch at a consistent rate and cannot fail, with the caught crabs ground into stackable paste so you are not banking.
Drift net fishing deserves a mention here for a different reason. It is not especially AFK, but it is the only method that trains a second skill properly rather than incidentally, and for an account that needs both Hunter and Fishing it removes an entire project from the list.
Birdhouses are the AFK/passive backbone — do them every run.
Some box traps are low intensity compared to active rumour routes.
Goat Hunting on Wyrmscraig is a lure-based option in the 60–80 band, gated behind 60 Hunter and Sheep Herder. It launched in July 2026 and the wiki's Hunter training page had not absorbed it as of our last check, so our Wyrmscraig guide is the more current description of it.
The Profitable Route
Three methods pay while they train, and they pay in different currencies. Black chinchompas are the headline: the fastest experience from 73 and profitable at the same time, sold as ranged ammunition rather than as a raw material. Carnivorous chinchompas do the same thing outside the Wilderness at the cost of some speed, and become properly worth doing at 80 when the fifth trap arrives rather than at 63 when the creature does.
Rainbow crabs are the quiet one. Five permanent traps on the Crown Jewel, fine fish offcuts as bait, and a pestle and mortar to grind catches into stackable paste — a method where the profit is the difference between what the bait costs and what the paste sells for, and where banking the crabs instead lowers your experience substantially.
Then there are the by-products. Birdhouses return bird nests, feathers and raw bird meat every fifty minutes for nothing. Herbiboar hands over grimy herbs, more of them with magic secateurs, and a 1/6,500 chance at Herbi on each harvest. Maniacal monkeys drop a damaged monkey tail on every catch and an intact monkey tail at 1/5,000. Moonlight moths can be jarred for Prayer restoration or sold. Aerial fishing is the only source of the pearl rods, the fish sack and the golden tench.
We have not put a number on any of that, and the reason is specific to this skill rather than a general disclaimer: chinchompa and crab paste values are set by how many people are currently training the method, which changes every time the meta moves. The current figures live on the wiki.
Equipment Progression
| Item | Where it is used | What it changes |
|---|---|---|
| Box trap | Chinchompas, embertailed jerboas, ferrets, letvek | Needs Eagles' Peak. Below the creature's level requirement the trap always fails, so there is no partial credit for trying early. |
| Rope and small fishing net | Salamanders, on young trees | One pair per trap. Carrying a spare pair lets you set the next trap before collecting the collapsed one, which is where the rhythm of net trapping comes from. |
| Noose wand and ring of pursuit | Tracked kebbits — weasels at 9–15, razor-backs at 49 onward | The wand catches; the ring reveals the entire trail at once instead of one step at a time. Search a burrow without the ring on and the practical fix is to hop worlds, equip it, and search again. |
| Butterfly net, or magic butterfly net | Butterflies, implings, and the Chambers of Xeric bats | From ten levels above a creature's requirement you can catch butterflies and implings barehanded — which is why hunters at sapphire glacialis unequip the ordinary net from level 35 for a better catch rate. |
| Clockwork, hammer, chisel and a log | Birdhouses | One clockwork makes one house and is returned when you collect. Carrying one extra lets you build the next house while running between sites rather than standing still to do it. |
| Digsite pendant | Everything on Fossil Island | The fast way in. Enchant ruby necklaces with Lvl-3 Enchant to make your own, which first requires showing a clean necklace to a Varrock Museum archaeologist. |
| Gyr falcon (rented, 500 coins) | Spotted, dark and dashing kebbits at Piscatoris | Weapon, shield and hands slots must be empty to carry it, so falconry is the one method where your trap count is irrelevant. |
| Drift net | Fish shoals, Fossil Island underwater | Consumed on collection — the only genuinely consumable trap in the skill. Annette stores up to 2,000 of them if you bring the nets as banknotes. |
| Guild hunter outfit | Everywhere, once earned from rumours | The full set raises your catch rate on every creature by 2.5% and the chance of rare creature parts from rumours by 5%. It is the only clothing in the skill with a mechanical benefit. |
| Camouflage and larupia/graahk/kyatt gear | Made from furs at the Fancy Clothes Store | It does not improve your catch chance, whatever the name suggests. Tops and legs shed 3kg and 2kg of weight, and the larupia, graahk and kyatt sets cut damage taken from hunted creatures by 20%, 40% and 60%. |
| Spotted and spottier capes | Any running-heavy method | Weight reduction, made from kebbit furs you catch anyway. The dark kebbit furs from falconry make gloves of silence instead, which help Thieving rather than Hunter. |
| Hunter potion, Blackbird red, Trapper's tipple | Approaching 20, 40, 60 and 80, or a creature you are a level or two short of | The boost buys an extra trap or an earlier creature. Blackbird red and Trapper's tipple boost less and give one dose per drink, so they only make sense when the next level is worth a lot. |
| Huntsman's kit | Storage, from hunters' loot sacks | Holds Hunter gear, and specifically enough rings of pursuit to make long razor-backed kebbit sessions possible without a supply trip. |
| Weight-reducing clothing and stamina potions | Falconry, kebbit tracking, herbiboar, salamanders | Run energy is the hidden resource in every method where you chase rather than wait. On herbiboar it is effectively the whole method. |
| Bonecrusher necklace and a chisel | Kebbit methods | The necklace buries bones for Prayer experience so you are not dropping them. The chisel turns long kebbit spikes into stackable long kebbit bolts for Fletching experience — done between the furthest bushes and the burrow, where it costs no ticks. |
- Item
- Box trap
- Where it is used
- Chinchompas, embertailed jerboas, ferrets, letvek
- What it changes
- Needs Eagles' Peak. Below the creature's level requirement the trap always fails, so there is no partial credit for trying early.
- Item
- Rope and small fishing net
- Where it is used
- Salamanders, on young trees
- What it changes
- One pair per trap. Carrying a spare pair lets you set the next trap before collecting the collapsed one, which is where the rhythm of net trapping comes from.
- Item
- Noose wand and ring of pursuit
- Where it is used
- Tracked kebbits — weasels at 9–15, razor-backs at 49 onward
- What it changes
- The wand catches; the ring reveals the entire trail at once instead of one step at a time. Search a burrow without the ring on and the practical fix is to hop worlds, equip it, and search again.
- Item
- Butterfly net, or magic butterfly net
- Where it is used
- Butterflies, implings, and the Chambers of Xeric bats
- What it changes
- From ten levels above a creature's requirement you can catch butterflies and implings barehanded — which is why hunters at sapphire glacialis unequip the ordinary net from level 35 for a better catch rate.
- Item
- Clockwork, hammer, chisel and a log
- Where it is used
- Birdhouses
- What it changes
- One clockwork makes one house and is returned when you collect. Carrying one extra lets you build the next house while running between sites rather than standing still to do it.
- Item
- Digsite pendant
- Where it is used
- Everything on Fossil Island
- What it changes
- The fast way in. Enchant ruby necklaces with Lvl-3 Enchant to make your own, which first requires showing a clean necklace to a Varrock Museum archaeologist.
- Item
- Gyr falcon (rented, 500 coins)
- Where it is used
- Spotted, dark and dashing kebbits at Piscatoris
- What it changes
- Weapon, shield and hands slots must be empty to carry it, so falconry is the one method where your trap count is irrelevant.
- Item
- Drift net
- Where it is used
- Fish shoals, Fossil Island underwater
- What it changes
- Consumed on collection — the only genuinely consumable trap in the skill. Annette stores up to 2,000 of them if you bring the nets as banknotes.
- Item
- Guild hunter outfit
- Where it is used
- Everywhere, once earned from rumours
- What it changes
- The full set raises your catch rate on every creature by 2.5% and the chance of rare creature parts from rumours by 5%. It is the only clothing in the skill with a mechanical benefit.
- Item
- Camouflage and larupia/graahk/kyatt gear
- Where it is used
- Made from furs at the Fancy Clothes Store
- What it changes
- It does not improve your catch chance, whatever the name suggests. Tops and legs shed 3kg and 2kg of weight, and the larupia, graahk and kyatt sets cut damage taken from hunted creatures by 20%, 40% and 60%.
- Item
- Spotted and spottier capes
- Where it is used
- Any running-heavy method
- What it changes
- Weight reduction, made from kebbit furs you catch anyway. The dark kebbit furs from falconry make gloves of silence instead, which help Thieving rather than Hunter.
- Item
- Hunter potion, Blackbird red, Trapper's tipple
- Where it is used
- Approaching 20, 40, 60 and 80, or a creature you are a level or two short of
- What it changes
- The boost buys an extra trap or an earlier creature. Blackbird red and Trapper's tipple boost less and give one dose per drink, so they only make sense when the next level is worth a lot.
- Item
- Huntsman's kit
- Where it is used
- Storage, from hunters' loot sacks
- What it changes
- Holds Hunter gear, and specifically enough rings of pursuit to make long razor-backed kebbit sessions possible without a supply trip.
- Item
- Weight-reducing clothing and stamina potions
- Where it is used
- Falconry, kebbit tracking, herbiboar, salamanders
- What it changes
- Run energy is the hidden resource in every method where you chase rather than wait. On herbiboar it is effectively the whole method.
- Item
- Bonecrusher necklace and a chisel
- Where it is used
- Kebbit methods
- What it changes
- The necklace buries bones for Prayer experience so you are not dropping them. The chisel turns long kebbit spikes into stackable long kebbit bolts for Fletching experience — done between the furthest bushes and the burrow, where it costs no ticks.
Two of those rows correct beliefs that persist anyway. Camouflage gear does not help you catch anything; its value is weight and, for the three big-cat sets, damage reduction from the creatures that fight back. And bait and smoking are real but tiny: bait adds 3% to a trap's catch rate and a lit torch adds 2%, which is generally not worth the inventory space or the clicks except at very low levels where a failed trap is a large share of your session.
The guild hunter outfit is the exception worth chasing. It is the only Hunter clothing with a stated mechanical effect, and its second bonus compounds with the activity that awards it — a better rare creature part rate makes rumours shorter, which makes more rumours, which makes more outfit pieces. If you intend to spend any real time in the guild, finish the set early rather than treating it as a completion goal.
The three Hunter shops — Aleck's Hunter Emporium in Yanille, Imia's Supplies in the Hunter Guild, and the Nardah Hunter Shop — all carry the same stock, so buy at whichever one your route already passes. If you have 71 Magic and Dream Mentor, the Hunter Kit spell on the Lunar spellbook produces a kit containing a bird snare, box trap, butterfly net, impling jar, noose wand, rabbit snare, teasing stick and unlit torch, which quietly solves most of the equipment table above in one cast.
Where to Train
| Location | What you catch | Getting there, and the catch |
|---|---|---|
| Fossil Island — four birdhouse sites | Bird houses, on a fifty-minute cycle | Digsite pendant, then the Mushtrees to Verdant Valley, Mushroom Meadow and the Sticky Swamp entrance. Needs Bone Voyage and one careful setup run before it becomes fast. |
| Feldip Hunter area | Crimson swifts, feldip weasels, tropical wagtails, spined larupias, barb-tailed kebbits, black warlocks, carnivorous chinchompas | A Feldip Hills teleport scroll then south towards the dungeon icon. The widest level spread of any single area, which makes it the default early stop. |
| Piscatoris Hunter area | Common kebbits, copper longtails, ruby harvests, wild kebbits, ferrets, white rabbits, prickly kebbits, razor-backed kebbits, chinchompas | Fairy ring AKQ. It covers levels 3 to 53 and then hosts the razor-backed kebbits that carry you to the seventies, which is why the ring code is worth memorising. |
| Piscatoris falconry area | Spotted, dark and dashing kebbits | East of AKQ, and a 500-coin rental from Matthias. Hands must be empty, and you drop the loot as you go — the bonecrusher exists to reduce how much dropping that is. |
| Rellekka Hunter area | Polar kebbits, cerulean twitch, sapphire glacialis, snowy knights, sabre-toothed kebbits and kyatts | Fairy ring DKS. The butterfly spawns are dense enough that catching from the north or east pushes them south-west and cuts your running. |
| The Pandemonium | Red crabs | Needs partial completion of the Pandemonium and 10 Construction for the traps. A bank sits nearby, and crab traps cannot fail, which makes it the most predictable band on the ladder. |
| Locus Oasis | Embertailed jerboas | Fairy ring AJP lands beside the hunting area. A short band, and one of the cleanest. |
| Uzer and Necropolis Hunter areas | Golden warblers, desert devils, orange salamanders | Shantay Pass and south-east, fairy ring DLQ, or the eagle to Uzer; the Necropolis needs Beneath Cursed Sands, fairy ring AKP and 62 Agility. Both demand desert clothing and waterskins, or a charged Circlet of Water. |
| Ourania and Bone Yard Hunter areas | Red and black salamanders | Ourania is south of the cave entrance. The Bone Yard is Wilderness — burning amulet to the Chaos Temple then north-east, or a games necklace to the Corporeal Beast lair then east — and grants the extra Wilderness trap without the usual player-killer traffic. |
| Wilderness Hunter area | Black chinchompas | Wilderness Obelisk to level 35 then south-east, a revenant cave teleport then south, a waka canoe from Edgeville with 57 Woodcutting, or the Hunter cape at 99. Level 32–36 Wilderness and a known player-killing hot spot. |
| Avium Savannah and the Hunter Guild | Embertailed jerboas, pyre foxes, sunlight moths, sunlight and moonlight antelopes, moonlight moths, tecu salamanders | The guild opens at 46. Its basement holds moonlight moths next to a bank, which trades some experience for the convenience of jarring them. |
| Tlati Rainforest, Varlamore | Carnivorous chinchompas | Quetzal to Tal Teklan then north-east, beside the teak trees east of the Tal Teok temple. Other carnivorous chinchompa spots have sparser spawns and are not recommended. |
| Kruk's Dungeon | Maniacal monkeys | Gnome glider to Ape Atoll, investigate the jungle grass to the south, then north across the monkeybars with the Kruk monkey greegree equipped. |
| Neypotzli — Earthbound Cavern | Moonlight moths | Nets come from the supply crates nearby, and three moths sit close enough together that a third respawns while you catch the first two. With Perilous Moons done, the cooking stove refills run energy. |
| The Crown Jewel | Rainbow crabs | South-west of Deepfin Point, and needs 64 Sailing alongside 77 Hunter. Bring a saw, hammer, five buckets, five planks and ten nails once; the five traps then stay there permanently. |
- Location
- Fossil Island — four birdhouse sites
- What you catch
- Bird houses, on a fifty-minute cycle
- Getting there, and the catch
- Digsite pendant, then the Mushtrees to Verdant Valley, Mushroom Meadow and the Sticky Swamp entrance. Needs Bone Voyage and one careful setup run before it becomes fast.
- Location
- Feldip Hunter area
- What you catch
- Crimson swifts, feldip weasels, tropical wagtails, spined larupias, barb-tailed kebbits, black warlocks, carnivorous chinchompas
- Getting there, and the catch
- A Feldip Hills teleport scroll then south towards the dungeon icon. The widest level spread of any single area, which makes it the default early stop.
- Location
- Piscatoris Hunter area
- What you catch
- Common kebbits, copper longtails, ruby harvests, wild kebbits, ferrets, white rabbits, prickly kebbits, razor-backed kebbits, chinchompas
- Getting there, and the catch
- Fairy ring AKQ. It covers levels 3 to 53 and then hosts the razor-backed kebbits that carry you to the seventies, which is why the ring code is worth memorising.
- Location
- Piscatoris falconry area
- What you catch
- Spotted, dark and dashing kebbits
- Getting there, and the catch
- East of AKQ, and a 500-coin rental from Matthias. Hands must be empty, and you drop the loot as you go — the bonecrusher exists to reduce how much dropping that is.
- Location
- Rellekka Hunter area
- What you catch
- Polar kebbits, cerulean twitch, sapphire glacialis, snowy knights, sabre-toothed kebbits and kyatts
- Getting there, and the catch
- Fairy ring DKS. The butterfly spawns are dense enough that catching from the north or east pushes them south-west and cuts your running.
- Location
- The Pandemonium
- What you catch
- Red crabs
- Getting there, and the catch
- Needs partial completion of the Pandemonium and 10 Construction for the traps. A bank sits nearby, and crab traps cannot fail, which makes it the most predictable band on the ladder.
- Location
- Locus Oasis
- What you catch
- Embertailed jerboas
- Getting there, and the catch
- Fairy ring AJP lands beside the hunting area. A short band, and one of the cleanest.
- Location
- Uzer and Necropolis Hunter areas
- What you catch
- Golden warblers, desert devils, orange salamanders
- Getting there, and the catch
- Shantay Pass and south-east, fairy ring DLQ, or the eagle to Uzer; the Necropolis needs Beneath Cursed Sands, fairy ring AKP and 62 Agility. Both demand desert clothing and waterskins, or a charged Circlet of Water.
- Location
- Ourania and Bone Yard Hunter areas
- What you catch
- Red and black salamanders
- Getting there, and the catch
- Ourania is south of the cave entrance. The Bone Yard is Wilderness — burning amulet to the Chaos Temple then north-east, or a games necklace to the Corporeal Beast lair then east — and grants the extra Wilderness trap without the usual player-killer traffic.
- Location
- Wilderness Hunter area
- What you catch
- Black chinchompas
- Getting there, and the catch
- Wilderness Obelisk to level 35 then south-east, a revenant cave teleport then south, a waka canoe from Edgeville with 57 Woodcutting, or the Hunter cape at 99. Level 32–36 Wilderness and a known player-killing hot spot.
- Location
- Avium Savannah and the Hunter Guild
- What you catch
- Embertailed jerboas, pyre foxes, sunlight moths, sunlight and moonlight antelopes, moonlight moths, tecu salamanders
- Getting there, and the catch
- The guild opens at 46. Its basement holds moonlight moths next to a bank, which trades some experience for the convenience of jarring them.
- Location
- Tlati Rainforest, Varlamore
- What you catch
- Carnivorous chinchompas
- Getting there, and the catch
- Quetzal to Tal Teklan then north-east, beside the teak trees east of the Tal Teok temple. Other carnivorous chinchompa spots have sparser spawns and are not recommended.
- Location
- Kruk's Dungeon
- What you catch
- Maniacal monkeys
- Getting there, and the catch
- Gnome glider to Ape Atoll, investigate the jungle grass to the south, then north across the monkeybars with the Kruk monkey greegree equipped.
- Location
- Neypotzli — Earthbound Cavern
- What you catch
- Moonlight moths
- Getting there, and the catch
- Nets come from the supply crates nearby, and three moths sit close enough together that a third respawns while you catch the first two. With Perilous Moons done, the cooking stove refills run energy.
- Location
- The Crown Jewel
- What you catch
- Rainbow crabs
- Getting there, and the catch
- South-west of Deepfin Point, and needs 64 Sailing alongside 77 Hunter. Bring a saw, hammer, five buckets, five planks and ten nails once; the five traps then stay there permanently.
Which Route Should You Actually Pick?
Answer one question first and most of the rest follows: are you willing to hunt in the Wilderness? If yes, your route ends at black chinchompas from 73 and the only remaining decisions are how much tanking gear you are prepared to risk and whether you will run an alt. If no, your route ends at expert and then master rumours, with carnivorous chinchompas as the profitable substitute, and the wiki itself frames rumours as the alternative for exactly this player.
The second question is whether Fishing is also on your list. Drift net fishing splits its experience between the two skills, which makes it a poor Hunter method and an excellent way to close two projects at once. If Fishing is already done, the split is pure loss and you should be somewhere else the moment you notice.
The third question is about your calendar rather than your account. If your play happens in long uninterrupted sessions, the active ladder is straightforwardly better and the trap-count breakpoints are worth potion-boosting through. If your play happens in scattered ten-minute windows, birdhouses are not a compromise — they are the method that best fits the shape of your time, and they are competitive on real-time experience up to level 80 anyway.
Where the answers conflict, let the trap count break the tie. Sitting at 57 with three traps deciding between red salamanders and falconry is a different question from sitting at 60 with four, and the same is true at 79 versus 80 for carnivorous chinchompas. When you are within a few levels of a breakpoint, the correct move is usually to finish reaching it with whatever you are already doing and then reconsider, because the spot you were evaluating is about to play differently.
Finally, if you are within reach of a rumour tier, the tier is worth waiting for. The completion formula multiplies your level by 50 for novice and adept, 55 for expert and 60 for master, so a rumour handed in one level and one tier later is worth meaningfully more for the same hunting. That is not true of any other method here, where an extra level changes nothing until the next breakpoint.
Practical Tips That Actually Matter
- Hunter outfit pieces and magic secateurs-style account habits: small gains, big over 99.
- Rumours add structure; treat them like contracts, not random teleports.
- Track which creatures you still need for diary/collection goals.
Tools worth turning on:
- The Herbiboar Helper plugin on the official client — the only such tool the wiki names outright. It highlights the correct object to search on a herbiboar trail, which is the entire skill ceiling of that method.
- Menu entry reordering, set on the kebbit bushes so the default left click is "attack" rather than "search". At razor-backed kebbits you make that click hundreds of times an hour, and the wrong default costs a tick each time.
- The same reordering on raw beast meat, set to "drop", so clearing your inventory between catches does not open a menu.
- Menu reordering again at net traps, changing the newly-set net's default from "Dismantle" to "Walk here". It stops you accidentally taking down a trap you just reset, and it lets you spam-click under yourself to cancel the set animation.
- Butterfly spawn tile marking at the glacialis and moth spots, so you are clicking a known tile rather than hunting for the creature that just moved.
- The trap-smoking chat message filter, which has been filterable since 2018 and is worth turning off once you have decided that a 2% catch bonus is not part of your method.
- PK Skull Prevention, if you are hunting black chinchompas. It exists to stop you being skull-tricked while you are watching traps rather than watching players.
- A timer for the fifty-minute birdhouse cycle, in whatever form you will actually respond to. The method's entire advantage is that the traps fill without you, and it evaporates if you collect them ninety minutes late.
- Note that most of the list above is client configuration rather than a plugin as such. This is a skill where the winning tools change which menu option sits under your cursor, because the methods that pay best are the ones where a single click is repeated several thousand times a session.
Common Mistakes
| The mistake | What it costs you |
|---|---|
| Collecting birdhouses whenever you happen to remember | The seed is depleted after about fifty minutes and the trap then sits finished, doing nothing. A run collected two hours late is not a slower run, it is the same run with an hour of dead time attached — and the whole argument for the method is that it costs almost no real time. |
| Rushing the first birdhouse trip and skipping the Mushtrees | The initial run exists to register the Fossil Island teleport on your digsite pendant at the Strange Machine and to unlock the House on the Hill, Mushroom Meadow and Verdant Valley Mushtrees. Miss them and every later run pays the walking cost you were supposed to have removed permanently. |
| Grinding the levels just below 20, 40, 60 or 80 | Those four levels are the only ones that change how many traps you can lay. A hunter potion taken a few levels early buys the extra trap immediately, and the difference between four and five traps at a chinchompa spot is far larger than the levels between them suggest. |
| Taking novice rumours the moment the guild opens at 46 | The tier multiplier is 50 for novice and adept against 55 for expert and 60 for master, and the wiki recommends starting at expert from 72 for exactly that reason. Rumours below expert are a reward activity, not a training method. |
| Starting carnivorous chinchompas at 63 because that is when they unlock | At 63 you are hunting with four traps, and both the experience and the profit are much lower than they become at 80 with five. The creature being available is not the same as the method being worth doing. |
| Feeding birdhouses with valuable seeds | A house takes forty seeds of any kind, or twenty if you use wildblood or herb seeds of ranarr and above. Using good seeds halves the count but spends stock your Farming patches want, and the experience does not care which seed went in. |
| Bringing exactly four birdhouses and no spare clockwork | The extra clockwork is what lets you build the next house while running between sites instead of standing still doing it. Over a run repeated hundreds of times, that is the difference between the method costing you ninety seconds and considerably more. |
| Buying camouflage gear expecting a better catch rate | It does not affect catch chance at all. What it does is reduce weight, and for the larupia, graahk and kyatt sets, reduce the damage the creature deals you. The only clothing that improves catching is the full guild hunter outfit. |
| Entering the Wilderness Hunter area with a teleport that does not work at level 32 | The chinchompas sit in level 32–36 Wilderness and most escape items stop working above 30. A royal seed pod or an amulet of glory covers the gap; discovering you do not have one while a player killer is teleblocking you does not. |
| Assuming a blocked rumour creature stays blocked | The block works because two Guild hunters can never assign the same creature, so the task you are holding is the one being excluded. It only holds while you leave that rumour assigned and complete others — hand it in and the creature returns to the pool. |
- The mistake
- Collecting birdhouses whenever you happen to remember
- What it costs you
- The seed is depleted after about fifty minutes and the trap then sits finished, doing nothing. A run collected two hours late is not a slower run, it is the same run with an hour of dead time attached — and the whole argument for the method is that it costs almost no real time.
- The mistake
- Rushing the first birdhouse trip and skipping the Mushtrees
- What it costs you
- The initial run exists to register the Fossil Island teleport on your digsite pendant at the Strange Machine and to unlock the House on the Hill, Mushroom Meadow and Verdant Valley Mushtrees. Miss them and every later run pays the walking cost you were supposed to have removed permanently.
- The mistake
- Grinding the levels just below 20, 40, 60 or 80
- What it costs you
- Those four levels are the only ones that change how many traps you can lay. A hunter potion taken a few levels early buys the extra trap immediately, and the difference between four and five traps at a chinchompa spot is far larger than the levels between them suggest.
- The mistake
- Taking novice rumours the moment the guild opens at 46
- What it costs you
- The tier multiplier is 50 for novice and adept against 55 for expert and 60 for master, and the wiki recommends starting at expert from 72 for exactly that reason. Rumours below expert are a reward activity, not a training method.
- The mistake
- Starting carnivorous chinchompas at 63 because that is when they unlock
- What it costs you
- At 63 you are hunting with four traps, and both the experience and the profit are much lower than they become at 80 with five. The creature being available is not the same as the method being worth doing.
- The mistake
- Feeding birdhouses with valuable seeds
- What it costs you
- A house takes forty seeds of any kind, or twenty if you use wildblood or herb seeds of ranarr and above. Using good seeds halves the count but spends stock your Farming patches want, and the experience does not care which seed went in.
- The mistake
- Bringing exactly four birdhouses and no spare clockwork
- What it costs you
- The extra clockwork is what lets you build the next house while running between sites instead of standing still doing it. Over a run repeated hundreds of times, that is the difference between the method costing you ninety seconds and considerably more.
- The mistake
- Buying camouflage gear expecting a better catch rate
- What it costs you
- It does not affect catch chance at all. What it does is reduce weight, and for the larupia, graahk and kyatt sets, reduce the damage the creature deals you. The only clothing that improves catching is the full guild hunter outfit.
- The mistake
- Entering the Wilderness Hunter area with a teleport that does not work at level 32
- What it costs you
- The chinchompas sit in level 32–36 Wilderness and most escape items stop working above 30. A royal seed pod or an amulet of glory covers the gap; discovering you do not have one while a player killer is teleblocking you does not.
- The mistake
- Assuming a blocked rumour creature stays blocked
- What it costs you
- The block works because two Guild hunters can never assign the same creature, so the task you are holding is the one being excluded. It only holds while you leave that rumour assigned and complete others — hand it in and the creature returns to the pool.
Ironman Notes
Hunter is one of the few skills where an Ironman is barely disadvantaged, because the skill produces its own inputs. Bird nests from birdhouses contain seeds, and seeds are what birdhouses need. Ropes, nets, snares and box traps are returned when collected. Crab traps are built once. The only genuinely consumable equipment is the drift net, and Annette will store two thousand of them for you.
The two things an iron does have to plan are Crafting and transport. Assembled bird houses are uncommonly traded, so the Crafting level to build your own is a real requirement rather than a convenience, and it climbs as you move up the birdhouse tiers. Transport means digsite pendants, which you can make yourself with Lvl-3 Enchant on ruby necklaces once a clean necklace has been shown to a Varrock Museum archaeologist — a small errand that pays for itself within a handful of runs.
The Ironman route through Hunter is unusually clean, because almost nothing in the skill has to be bought. What it does need is a short setup sequence done in the right order, and doing it wrong costs you weeks rather than minutes.
Start with Bone Voyage and the initial birdhouse run, and do that run properly: it is not four traps, it is four traps plus three Mushtrees and the Strange Machine. Use the digsite pendant on the southern machine at the House on the Hill to add the Fossil Island teleport to the pendant, and click the Mushtrees at the House on the Hill, Mushroom Meadow and Verdant Valley to register all three. Skip any of that and every subsequent run costs you the walk you were supposed to have removed.
Then solve seeds and logs, since those are the only recurring inputs. Low-level allotment seeds arrive from bird nests, which birdhouses themselves produce, so the loop closes on itself surprisingly quickly. A Crafting level high enough to build the houses matters more for an iron than for a main, because assembled bird houses are uncommonly traded and you will be making all of your own.
After that, the skill mostly funds itself. Rumours are worth taking seriously on an iron for the rewards rather than the experience — the quetzal whistle, the guild hunter outfit, and the Huntsman's kit that comes out of hunters' loot sacks and stores your rings of pursuit. That last one is the difference between razor-backed kebbits being sustainable and being a bank trip every few minutes.
When Paid Training Makes Sense
The case for buying Hunter rests on what it is blocking. The cost of a gathering skill is hours rather than gold. Worth buying if those hours are the only thing between you and the content you actually log in for; not worth buying if you find the rhythm of it relaxing, which plenty of people genuinely do.
If you do order it, the thing to specify is the route as well as the level range: rumours and birdhouses and fast XP are different jobs on this skill, with different timelines and different supply bills for the same 99. Our Hunter page lists what we need from you, and the work is played rather than botted.
FAQ
Can birdhouses really take me to 99?
Yes, with a caveat the wiki states plainly: they are the fastest Hunter experience in real time effectively up to level 80, and viable to 99 as long as getting there quickly is not the point. Four traps, fifty minutes, roughly a minute and a half of play per cycle. The limit is calendar time rather than anything mechanical.
When should I start rumours?
The guild opens at 46 and the four tiers unlock at 46, 57, 72 and 91, all unboostable. The wiki recommends ignoring the first two tiers for training purposes and starting with expert rumours at 72, because razor-backed kebbits are the better use of the levels in between.
Do I have to go into the Wilderness?
No. Black chinchompas are the fastest experience from 73 and they are also the only method on this page that puts you in a player-killing hot spot. The wiki names rumours as the alternative for players who will not enter the Wilderness, will not tick manipulate, or will not run a second account, and it treats the two as similar in speed.
Is drift net fishing worth it?
Only if you want the Fishing levels too. It needs 44 Hunter and 47 Fishing, neither boostable, and it splits its experience between the two skills — so as a pure Hunter method it is beaten by things you could be doing instead. As a way to finish two skills in one activity it is the most efficient thing in the game for that pair.
What does the guild hunter outfit actually do?
The full set raises your catch rate on every creature by 2.5% and your chance of receiving rare creature parts from rumours by 5%. The second bonus is the interesting one, because rare creature parts are what end a rumour — the outfit makes the activity that awards it faster.
Should I bait and smoke my traps?
Rarely. Bait adds 3% to the catch rate and smoking with a torch adds 2%, which the wiki describes as usually inefficient given the clicks and inventory space involved. At very low levels, where failures are a large share of your attempts, it can be worth it.
How many traps can I use, and can I cheat the limit?
One at level 1, two at 20, three at 40, four at 60 and five at 80. Training anywhere in the Wilderness grants one more than usual, and temporary boosts let you reach a breakpoint early — which is the standard reason to drink a hunter potion here rather than to catch something.
Which quests should I do before starting?
Bone Voyage first, since Fossil Island carries birdhouses, drift nets and herbiboar. Then at least partial Eagles' Peak for box traps, and start Fairytale II - Cure a Queen for the fairy rings that reach half the hunting areas. Monkey Madness II and the Varlamore quests can wait until you are choosing a high-level method.
What is the lowest-attention way to train Hunter?
Birdhouses, because you are not present for them at all. If you want something to do while they fill, maniacal monkeys need one interaction every twenty-five to thirty seconds and an inventory of banana baskets lasts about fifty minutes — which happens to be one birdhouse cycle.
Final Takeaway
Hunter rewards a plan made of two independent parts. The first is birdhouses, started at 9 and collected on their fifty-minute cycle for as long as you can be bothered; they cost you almost no real time and carry the fastest experience in the skill up to level 80. The second is whatever active method your appetite for risk and clicking actually supports — the kebbit and salamander ladder to the seventies, then either the Wilderness for black chinchompas or the Hunter Guild for expert and master rumours.
Between those two, the numbers to keep in your head are small and specific: 20, 40, 60 and 80 for traps, 46, 57, 72 and 91 for rumour tiers, and fifty minutes for the birdhouses. Almost every real decision in a Hunter 1–99 is a question about which of those thresholds you are closest to.
If the level itself is what is blocking you — a diary task at 69, the Hunter Guild at 46, or the 80 that makes herbiboar and the fifth trap possible — that is a training problem rather than a knowledge one, and our Hunter training is played by hand on the same methods described above. Everything on this page was read from the wiki rather than from memory, and the current experience rates and item values belong there too.
Browse Hunter training, more skill guides, or the full blog for related progression help.
XP rates and prices change — verify details on the Old School RuneScape Wiki. Level thresholds, unlocks, tool tiers and outfit bonuses on this page were checked against Hunter training and Hunter on 4 August 2026.
Need a trusted team? Bils Services
Enjoyed the guide?
Drop a like — it helps other Adventurers find the good stuff.
Community
Comments
Silence in the hall…
Be the first Adventurer to leave a mark.
Join the thread
Add a comment
Tips, drops, or “this carried my account” — keep it useful.
bilsservices · bils services · bilsservices.com

