


OSRS Desert Treasure II Guide: Requirements and Walkthrough
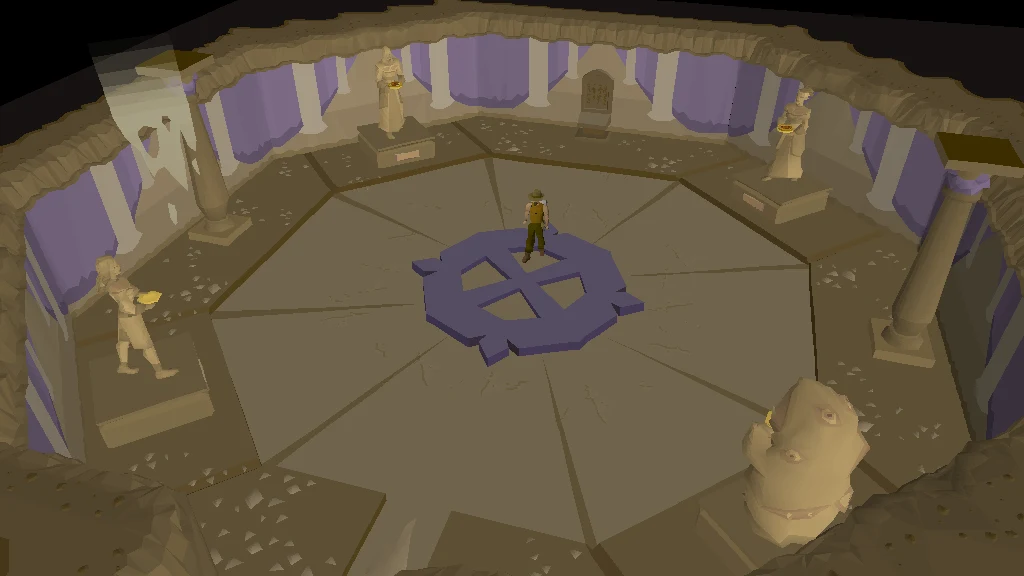
Desert Treasure II is the Grandmaster sequel that gates four major bosses. Quest-route preparation, medallion order, and the mistakes that force full section redos.
Overview
Desert Treasure II - The Fallen Empire is Grandmaster, Very Long, and widely treated as the hardest quest currently in Old School. It continues the Mahjarrat story after Desert Treasure I and unlocks repeatable access to Vardorvis, the Leviathan, Duke Sucellus and the Whisperer — the sources of Virtus pieces, soulreaper axe components and ancient rings.
Unlike a single-boss finale, DT2 is four nearly separate campaigns glued by medallions and the Ancient Vault. Each path has its own puzzles, travel tax and quest-version boss, then a final vault sequence with Sliske's wights that restarts as a set if you leave.
This walkthrough overlay is for the quest itself. For post-quest kill strategies and gear breakpoints, use the DT2 bosses hub — the quest fights teach the arenas, but farm setups diverge quickly.
| Detail | Value |
|---|---|
| Difficulty | Grandmaster |
| Length | Very Long |
| Quest points | 5 |
| Quest number | 157 |
| Released | 26 July 2023 |
| Starting point | Investigate the Ancient Vault north-east of Nardah. |
| Members | Yes (unless noted otherwise on the Wiki) |
| Updated / fact checked | 2026-08-04 |
- Detail
- Difficulty
- Value
- Grandmaster
- Detail
- Length
- Value
- Very Long
- Detail
- Quest points
- Value
- 5
- Detail
- Quest number
- Value
- 157
- Detail
- Released
- Value
- 26 July 2023
- Detail
- Starting point
- Value
- Investigate the Ancient Vault north-east of Nardah.
- Detail
- Members
- Value
- Yes (unless noted otherwise on the Wiki)
- Detail
- Updated / fact checked
- Value
- 2026-08-04
Requirements and Prerequisites
Skill and quest gates below are taken from the OSRS Wiki quest-details block for this quest. Boostability notes follow the Wiki markers — if a level is unboostable, train it before you start.
| Skill | Level | Boostable? |
|---|---|---|
| Firemaking | 75 | No |
| Magic | 75 | No |
| Thieving | 70 | No |
| Herblore | 62 | No |
| Runecraft | 60 | No |
| Construction | 60 | No |
- Skill
- Firemaking
- Level
- 75
- Boostable?
- No
- Skill
- Magic
- Level
- 75
- Boostable?
- No
- Skill
- Thieving
- Level
- 70
- Boostable?
- No
- Skill
- Herblore
- Level
- 62
- Boostable?
- No
- Skill
- Runecraft
- Level
- 60
- Boostable?
- No
- Skill
- Construction
- Level
- 60
- Boostable?
- No
Quest prerequisites (chains can be longer than this summary):
- Desert Treasure I — verify chain on the Wiki
- The Dig Site — verify chain on the Wiki
- Temple of Ikov — verify chain on the Wiki
- The Tourist Trap — verify chain on the Wiki
- Troll Stronghold — verify chain on the Wiki
- Death Plateau — verify chain on the Wiki
- Priest in Peril — verify chain on the Wiki
- Waterfall Quest — verify chain on the Wiki
- Secrets of the North — verify chain on the Wiki
- Making Friends with My Arm — verify chain on the Wiki
- My Arm's Big Adventure — verify chain on the Wiki
- Eadgar's Ruse — verify chain on the Wiki
- Druidic Ritual — verify chain on the Wiki
- Troll Stronghold — verify chain on the Wiki
- Death Plateau — verify chain on the Wiki
- The Feud — verify chain on the Wiki
- Jungle Potion — verify chain on the Wiki
- Swan Song — verify chain on the Wiki
- One Small Favour — verify chain on the Wiki
- Rune Mysteries — verify chain on the Wiki
- Shilo Village — verify chain on the Wiki
- Garden of Tranquillity — verify chain on the Wiki
- Creature of Fenkenstrain — verify chain on the Wiki
- Priest in Peril — verify chain on the Wiki
- The Restless Ghost — verify chain on the Wiki
- Cold War — verify chain on the Wiki
- Romeo & Juliet — verify chain on the Wiki
- The General's Shadow — verify chain on the Wiki
- Curse of the Empty Lord, for full ghostly robes — verify chain on the Wiki
- Fight Arena — verify chain on the Wiki
- Devious Minds — verify chain on the Wiki
- Wanted! — verify chain on the Wiki
- Recruitment Drive — verify chain on the Wiki
- Black Knights' Fortress — verify chain on the Wiki
- Druidic Ritual — verify chain on the Wiki
- The Lost Tribe — verify chain on the Wiki
- Goblin Diplomacy — verify chain on the Wiki
- Rune Mysteries — verify chain on the Wiki
- Priest in Peril — verify chain on the Wiki
- Troll Stronghold — verify chain on the Wiki
- Death Plateau — verify chain on the Wiki
- Doric's Quest — verify chain on the Wiki
- Enter the Abyss — verify chain on the Wiki
- Hazeel Cult — verify chain on the Wiki
- Enakhra's Lament — verify chain on the Wiki
- Temple of the Eye — verify chain on the Wiki
- Enter the Abyss — verify chain on the Wiki
- Rune Mysteries — verify chain on the Wiki
- The Garden of Death — verify chain on the Wiki
- Below Ice Mountain — verify chain on the Wiki
- His Faithful Servants — verify chain on the Wiki
- Priest in Peril — verify chain on the Wiki
If the Wiki lists alternate item unlocks instead of a skill (for example a gas mask instead of Slayer), either option is valid.
Items to Bring
Pack required items before the first travel segment. Recommended gear is comfort, not a hard gate, unless a fight forces a specific style.
Required
- Be on the Ancient Magicks spellbook
- Runes to cast Blood Burst, Ice Burst, Smoke Burst, and Shadow Burst
- 8 Death runes
- 16 Chaos runes
- 2 Fire runes
- 3 Air runes
- 4 Water runes
- 2 Soul runes
- 2 Blood runes
- Ring of visibility
- Tinderbox (obtainable during the quest)
- Pestle and mortar (obtainable during the quest)
- Pickaxe (obtainable during the quest)
- Facemask or Slayer helm
Recommended
- Combat 100
- Digsite teleport
- Desert heat protection
- Desert amulet 4 or Nardah teleport
- Xeric's talisman or access to it in POH
- Stamina potions
Ultimate Ironmen should split heavy deliveries across trips where the Wiki notes that is allowed.
Where to Start
Starting location: Investigate the Ancient Vault north-east of Nardah.
Use the travel method that fits your unlocks — games necklace, fairy rings, spirit trees, carpets, or spellbook teleports — and keep a teleport out for deaths during combat sections.
Quest List blurb (paraphrased intent): During Gielinor's Second Age, the world was dominated by an empire the likes of which had never been seen. The areas now known as Asgarnia, Misthalin and even the Wilderness all once flourished under the banner of the Empty Lord. With the grand city of Senntisten at its heart, th…
Walkthrough, Stage by Stage
Numbered steps follow the Wiki quick-guide order, rewritten for BILS readers. Dialogue choices that gate progress are called out inline. For puzzle tiles or randomised layouts, use the dedicated puzzles section and the Wiki map if a step still feels unclear.
- Familiar Faces. Enter the Ancient Vault, found south-east of fairy ring or north-east of Nardah.) (Teleport: , ) (dialogue: Yes.)
- After finishing the conversation, inspect the four statues and the plaque.
- Speak with Asgarnia Smith.
- Make your way to the Exam Centre and speak to Terry Balando. (Teleport: )
- Operate the winch at the easternmost part of the Digsite. (Teleport: or )
- Speak with Dr Banikan. Once the option to mine the rocks is available, you do not need to ask him any more questions.
- Prepare for combat, and mine the nearby rocks when ready. A bronze pickaxe can be found in the crate to the north if needed.
- The Ancient Guardian. Enter the crevice and kill the Ancient Guardian.
- Speak with Dr Banikan.
- Inspect the golem machine.
- Search the crates for uncharged cells.
- Cast burst spells or greater on the matching totems.
- Use cells on altar to get charged cells.
- Use the charged cells on the golem and solve the puzzle as seen below: File:Desert Treasure II - golem puzzle solution.png
- Search "Vardorvis", "Perseriya", "Sucellus", and "Whisperer".
- Operate the golem machine once more.
- Exit the military installation and speak to Elissa north of the winch.(dialogue: I hear you visited Lovakengj recently.)}}
- =Middle/Central passage=. Axon Terminal:
- Groups of lightning will appear and strike randomly during this puzzle (DO NOT AFK).
- Hit the creatures to navigate them to their corresponding terminal.
- Continue through the remaining mid-quest objectives in order (see the OSRS Wiki quick guide for the exact mid-section checklist if you get stuck).
- Picklock the chest from within the Shadow Realm for one half of the icon segment.
- Enter the Shadow Realm from the Science District.
- Head south to the building next to the South Science District teleporter.
- Destroy the tentacle there and open the chest inside.
- Use the icon segments on one another to create the strange icon and then talk with Ketla.
- Enter the drain in the centre of the Residential District.
- Go through the door in front of you and down the ladder to the east.
- Interact with the ancient pillar.
- After finishing the conversation with Ketla, search the workbench for the perfected shadow torch.
- Enter the Shadow Realm and destroy the tentacles blocking the entrance to the cathedral.
- Run towards the water of the Sunken Cathedral in the real world.
- The final boss is weak to Magic. You will need to Prayer switch often. See The Whisperer for specific details on the boss fight.
If a mid-quest fight sends you to your respawn, return with the same key items — several quests do not store progress for partially completed combat.
Puzzles and How They Work
Puzzle sections in modern quests are often randomised per account. The table below covers the puzzle types you should expect; exact tile solutions belong on the Wiki when they change per player.
| Puzzle | Type | How it works |
|---|---|---|
| Light / mirror / beam puzzles | Spatial | Rotate emitters until the beam hits the target; reset if you over-rotate |
| Agility / pathing sections | Movement | Fail-safe by banking food; some obstacles drain run energy only |
| Dialogue / logic gates | Conversation | Pick the options listed in the walkthrough — wrong branches usually loop safely |
| Combat puzzles | Fight | Correct prayer or attack style matters more than DPS |
- Puzzle
- Light / mirror / beam puzzles
- Type
- Spatial
- How it works
- Rotate emitters until the beam hits the target; reset if you over-rotate
- Puzzle
- Agility / pathing sections
- Type
- Movement
- How it works
- Fail-safe by banking food; some obstacles drain run energy only
- Puzzle
- Dialogue / logic gates
- Type
- Conversation
- How it works
- Pick the options listed in the walkthrough — wrong branches usually loop safely
- Puzzle
- Combat puzzles
- Type
- Fight
- How it works
- Correct prayer or attack style matters more than DPS
Skip this section emotionally if the quest is combat-only — still skim for any mid-quest door puzzles.
Boss Fights
Combat encounters listed on the Wiki quest-details block. Death usually means a run-back with lost unprotected items outside safe instances — check each fight before you commit expensive gear.
| Fight | Attacks with | Pray | What decides the fight |
|---|---|---|---|
| Ancient Guardian | See fight notes | Match the attack style that works | Preparation and prayer switches |
| Vardorvis | See fight notes | Match the attack style that works | Preparation and prayer switches |
| Kasonde | See fight notes | Match the attack style that works | Preparation and prayer switches |
| A number of lesser demons, black demons, and abyssal creatures | See fight notes | Match the attack style that works | Preparation and prayer switches |
| The Leviathan | See fight notes | Match the attack style that works | Preparation and prayer switches |
| Jhallan | See fight notes | Match the attack style that works | Preparation and prayer switches |
| Duke Sucellus | See fight notes | Match the attack style that works | Preparation and prayer switches |
| The Whisperer | See fight notes | Match the attack style that works | Preparation and prayer switches |
- Fight
- Ancient Guardian
- Attacks with
- See fight notes
- Pray
- Match the attack style that works
- What decides the fight
- Preparation and prayer switches
- Fight
- Vardorvis
- Attacks with
- See fight notes
- Pray
- Match the attack style that works
- What decides the fight
- Preparation and prayer switches
- Fight
- Kasonde
- Attacks with
- See fight notes
- Pray
- Match the attack style that works
- What decides the fight
- Preparation and prayer switches
- Fight
- A number of lesser demons, black demons, and abyssal creatures
- Attacks with
- See fight notes
- Pray
- Match the attack style that works
- What decides the fight
- Preparation and prayer switches
- Fight
- The Leviathan
- Attacks with
- See fight notes
- Pray
- Match the attack style that works
- What decides the fight
- Preparation and prayer switches
- Fight
- Jhallan
- Attacks with
- See fight notes
- Pray
- Match the attack style that works
- What decides the fight
- Preparation and prayer switches
- Fight
- Duke Sucellus
- Attacks with
- See fight notes
- Pray
- Match the attack style that works
- What decides the fight
- Preparation and prayer switches
- Fight
- The Whisperer
- Attacks with
- See fight notes
- Pray
- Match the attack style that works
- What decides the fight
- Preparation and prayer switches
Item-loss risk: standard death rules apply unless the quest instance is a safe minigame-style fight. Do not bring items you cannot afford to lose into dangerous multi-combat areas.
Rewards and Unlocks
Rewards below summarise the Wiki reward scroll. Experience amounts and unlock text can change with updates — re-check before you plan a grind around them.
| Reward | Detail |
|---|---|
| Quest points | 5 |
| Difficulty | Grandmaster |
| Length | Very Long |
| Reward | Three ancient lamps, each offering 100,000 experience in Attack, Strength, Defence, Hitpoints, Ranged, Magic, or Prayer at level 60 or above. |
| Reward | Access to Scar essence mine |
| Reward | Ring of shadows |
| Reward | The ability to wear ancient rings. |
| Reward | The ability to repeat the Forgotten Four encounters as boss fights, along with the ability to challenge their awakened variants. |
| Reward | The ability to fight Demonic Brutus using abyssal potatoes. |
- Reward
- Quest points
- Detail
- 5
- Reward
- Difficulty
- Detail
- Grandmaster
- Reward
- Length
- Detail
- Very Long
- Reward
- Reward
- Detail
- Three ancient lamps, each offering 100,000 experience in Attack, Strength, Defence, Hitpoints, Ranged, Magic, or Prayer at level 60 or above.
- Reward
- Reward
- Detail
- Access to Scar essence mine
- Reward
- Reward
- Detail
- Ring of shadows
- Reward
- Reward
- Detail
- The ability to wear ancient rings.
- Reward
- Reward
- Detail
- The ability to repeat the Forgotten Four encounters as boss fights, along with the ability to challenge their awakened variants.
- Reward
- Reward
- Detail
- The ability to fight Demonic Brutus using abyssal potatoes.
What it opens up
- Three ancient lamps, each offering 100,000 experience in Attack, Strength, Defence, Hitpoints, Ranged, Magic, or Prayer at level 60 or above.
- Access to Scar essence mine
- Ring of shadows
- The ability to wear ancient rings.
- The ability to repeat the Forgotten Four encounters as boss fights, along with the ability to challenge their awakened variants.
- The ability to fight Demonic Brutus using abyssal potatoes.
Fact checked 2026-08-04 against the OSRS Wiki quest page and quick guide.
Common Mistakes and Warnings
DT2 punishes leaving mid-section more than almost any other quest.
- Entering The Scar puzzles without a banking plan — leaving The Scar resets completed puzzle rooms.
- Carrying a medallion without an emergency teleport when the Mysterious Figure can appear.
- Under-gearing the final wight gauntlet and teleporting out, which forces a full restart from the first clone.
- Skipping Ancient Magicks before start day; several steps expect burst/shadow tools already unlocked from DT1.
- Treating quest Leviathan or Whisperer like post-quest farm kills and bringing the wrong style mix.
- Forgetting facemask or Slayer helmet for Scar passages that require it.
- Banking the wrong combat style before Kasonde or the assassin segments.
- Ignoring strangler serum timing in The Stranglewood and getting rooted into a death spiral.
Ironman Notes
Quest bosses are softer than awakened farms, but supply cost is still real — stage food and prayer per medallion path rather than one mega-inventory.
Shadow blocker and torch schematics in Lassar are easy to mis-order; map teleporters as you unlock them.
Expect multiple style swaps across the four paths; plan switches before you boat into Stranglewood or drop into the Scar.
FAQ
Is this the same as the DT2 bosses guide?
No. That hub covers farm gear and mechanics. This page is the quest walkthrough and requirement path.
Do I need Desert Treasure I first?
Yes. Ancients and the story beat are prerequisites, not optional flavour.
Which medallion path should I do first?
Pick based on your strongest style. Many accounts clear Vardorvis or Duke earlier and save Whisperer for when magic setups are comfortable.
What happens if I die to the final wights?
You restart the entire multi-fight sequence. Do not soft-test with a thin inventory.
What does the quest unlock?
The four DT2 bosses as repeatable content, plus the associated drop tables that feed Virtus, soulreaper pieces and ancient rings.
How long should I block out?
A Very Long Grandmaster. Plan multiple sessions unless you already know every puzzle room.
Related Guides
Bottom Line
DT2 is four quests wearing one quest cape tick. Clear each medallion path as its own prep cycle, then treat the vault finale as a no-teleport exam.
If you only need the boss unlocks and not the puzzle evenings, BILS quest services can hand-complete the run.
Updated and fact checked 2026-08-04. Primary sources: OSRS Wiki — Desert Treasure II - The Fallen Empire and its quick guide. Requirements and rewards change with game updates.
Need a trusted team? Bils Services
Enjoyed the guide?
Drop a like — it helps other Adventurers find the good stuff.
Community
Comments
Silence in the hall…
Be the first Adventurer to leave a mark.
Join the thread
Add a comment
Tips, drops, or “this carried my account” — keep it useful.
bilsservices · bils services · bilsservices.com
