


OSRS Vardorvis Guide: Axe Mechanics, Gear, Strategy & Drops
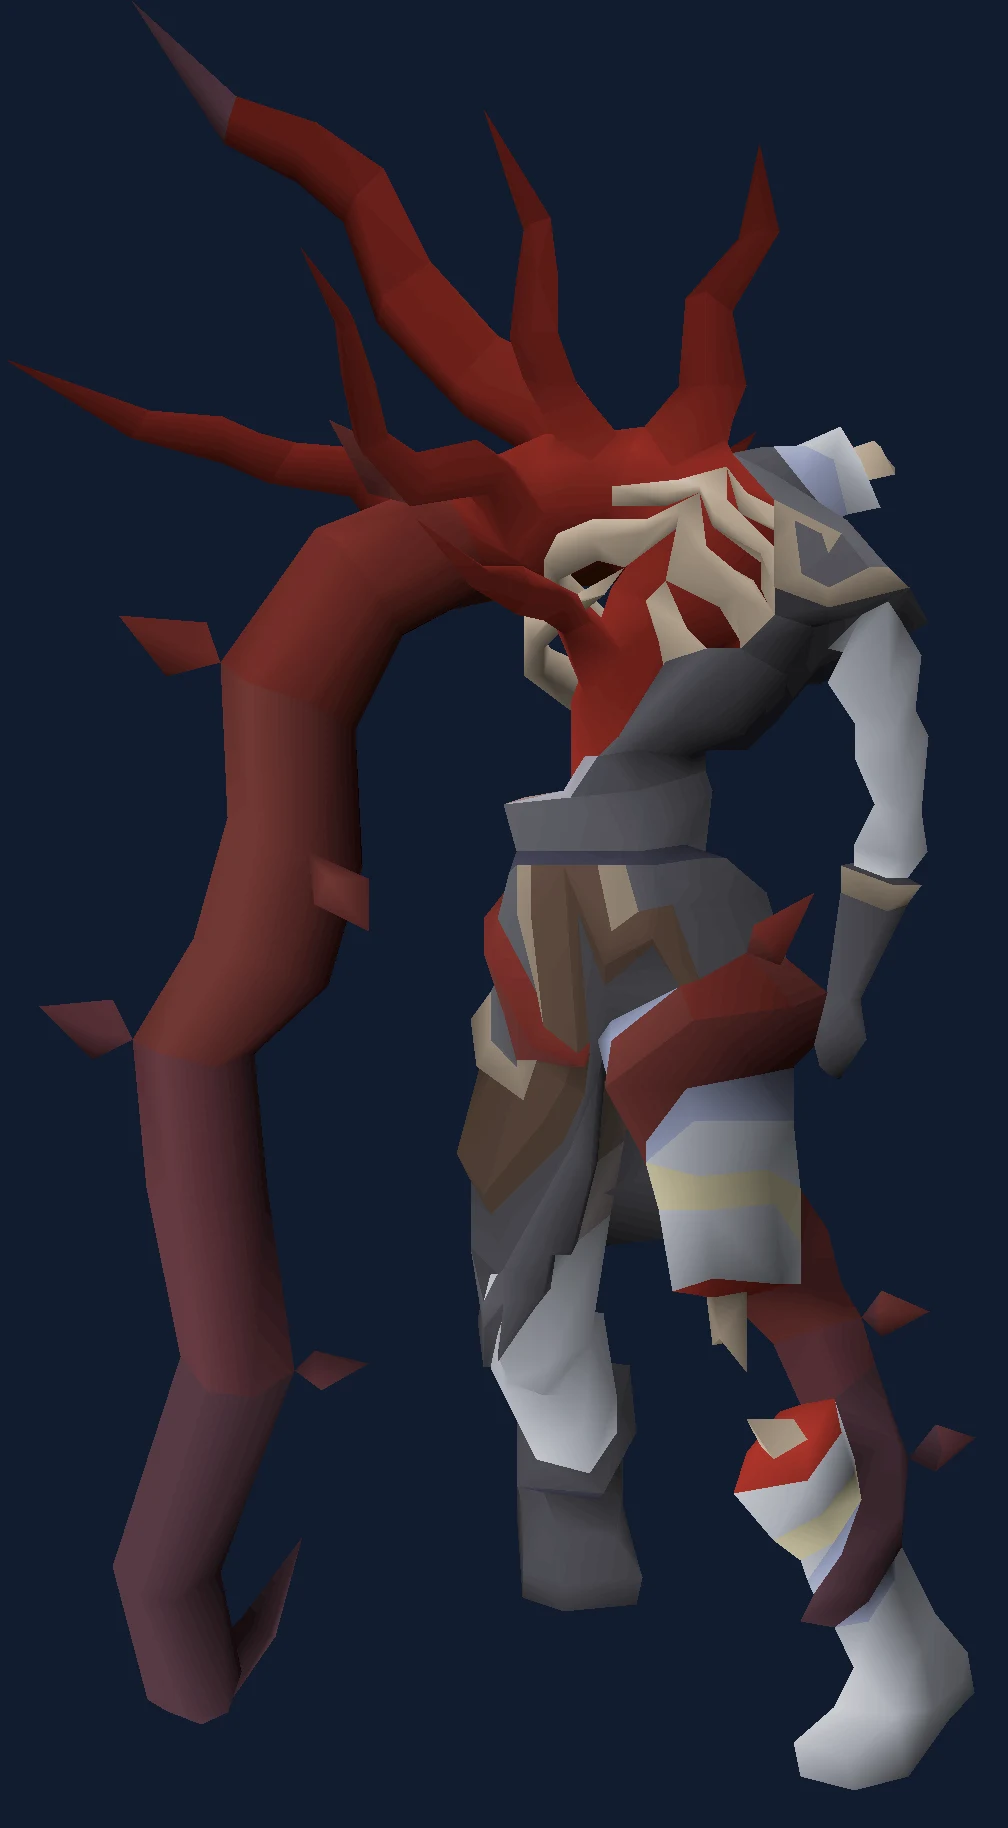
Vardorvis guide focused on axe swings, melee setups, and DT2 unique chase.
Why People Fight Vardorvis
Above 690 hitpoints Vardorvis throws one axe across the arena. From 690 down to 231 he throws two, sometimes three. Below 231 he throws three every time, and the sets start arriving as soon as the last one has cleared the edge. That escalation is the shape of the whole fight, and it explains why so many players describe him as fine for two minutes and then suddenly unsurvivable — nothing changed about their movement, the arena simply started filling faster than they could read it.
People come here for two things: the executioner's axe head and the ultor vestige. It is a fitting pair, because one is a quarter of a weapon you have to visit four different bosses to assemble and the other has no alternative source in the game. There is a small joke buried in the wiki's own recommended setup for him, which names the Bellator ring and the Ultor ring in its top ring slot. The best gear for killing Vardorvis is partly made out of things Vardorvis and his siblings drop.
What makes him genuinely different from the other three fights unlocked by Desert Treasure II — The Fallen Empire is that he has no rotation. Duke Sucellus, the Leviathan and the Whisperer all run their special attacks on predictable schedules or health thresholds you can count towards. Vardorvis uses his at random. You can know exactly what each mechanic does and still be caught, because knowing the answer is not the same as knowing when the question arrives.
He also inverts the usual sense that a boss gets safer as it dies. His Strength and Defence levels scale linearly with his remaining health: as you take him down he becomes easier to hit and harder to survive, with his melee maximum climbing from 32 to 43 once his health is critically low. The last quarter of the kill is the dangerous quarter, every time.
Its own attack is melee (slash), so Protect from Melee is the prayer it asks for.
In our index it sits in the Desert Treasure II group at difficulty 5 of 5, where kill times come down to axe swing mechanics.
| Field | Detail |
|---|---|
| Classification | DT2 boss (Boss) |
| Group | Desert Treasure II |
| Difficulty | 5 / 5 |
| Solo or team | Solo |
| Access requirement | Desert Treasure II |
| Notable reward | Executioner's axe head, ultor vestige |
| Signature mechanic | Axe swing mechanics |
| Hitpoints | 700 |
| Max hits | 32-43 (Melee), 35 (axes) |
| Released | 26 July 2023 |
- Field
- Classification
- Detail
- DT2 boss (Boss)
- Field
- Group
- Detail
- Desert Treasure II
- Field
- Difficulty
- Detail
- 5 / 5
- Field
- Solo or team
- Detail
- Solo
- Field
- Access requirement
- Detail
- Desert Treasure II
- Field
- Notable reward
- Detail
- Executioner's axe head, ultor vestige
- Field
- Signature mechanic
- Detail
- Axe swing mechanics
- Field
- Hitpoints
- Detail
- 700
- Field
- Max hits
- Detail
- 32-43 (Melee), 35 (axes)
- Field
- Released
- Detail
- 26 July 2023
Is Vardorvis the Right Fight for You Yet?
Vardorvis is a movement test wearing melee armour. The mechanical knowledge required is small — four special attacks, all of them documented, none of them ambiguous — but you have to execute the dodges without warning while holding a prayer and keeping your damage up. Players who are comfortable at bosses with fixed cycles often find him harder than his stat requirements suggest, because there is no cycle to lean on.
You are ready for this fight if:
- You have finished Desert Treasure II — The Fallen Empire. That is the only hard requirement on the page; everything else the wiki lists is a suggestion.
- You own a slash weapon you will not resent using for hundreds of kills. He is weakest to slash, with only +65 slash defence against +85 crush and +215 stab, and the gap between slash and crush is wide enough that crush is not recommended.
- Holding Protect from Melee while you move is already second nature. It cuts his auto-attacks by 75 per cent, taking a 32 down to 8 to 10, and it halves axe damage as well.
- You are willing to prioritise dodging over damage. Every hit he lands on you heals him for half of it, rounded down, so a sloppy kill genuinely takes longer rather than just costing food.
Come back later if any of these are true:
- Your melee gear has several downgrades in it at once. Because he heals off you and starts with 215 Defence, gear gaps compound here in a way they do not at bosses that simply have a health bar to chew through.
- You are hoping to bring ranged or magic. He has +580 defence against both and a Magic level of 215; the wiki calls him highly resistant to them, and there is no bow route to fall back on.
- You expect stat-draining specials to open him up. A Bandos godsword or dragon warhammer does nothing useful, because his Defence is already tied to his health bar.
Access Requirements
Vardorvis is gated behind Desert Treasure II.
That single unlock opens the whole Desert Treasure II group, so finishing it is worth more than any one drop from Vardorvis. The boss requirements checklist lists what each group needs.
Location and How to Get There
Vardorvis is found in the Stranglewood Ritual Site, where his corpse is animated by the Strangler.
Access opens through Desert Treasure II. The post-quest fight is a harder version of the one you met in the quest, so your quest experience undersells how dangerous the repeatable version is.
The fastest way in is the ring of shadows, once you have used a strangled tablet on it — that is a 1/25 drop from Vardorvis himself, so your first several trips will be slower than your later ones. It puts you at the Stranglewood Temple entrance.
Without the tablet, fairy ring code bls and a run west to the rowboat is the cleanest option. Xeric's talisman to Xeric's Honour and Rada's blessing to the Kourend Woodland both work as well, but they route you through the Mountain Guide and the Lovakengj minecart, which is a lot of clicking for the same destination.
The shortcut from the temple grounds to the ritual site is the part worth checking before your first post-quest trip. You should have unlocked it during the quest; if it is not there, you have to run the long way once and unlock it from the far end. It is not drawn on the map, and from the temple you teleport to with the ring of shadows it sits to the north-west.
Every route makes you cross the Stranglewood, and even with the shortcut you will pass Strangled and a Strangled Boar on the way. They deal 1 to 3 and 2 to 4 damage respectively, which is trivial per trip and worth pre-eating an anglerfish for anyway. Click the shortcut the moment it renders, so a disconnect does not leave you stranded in the middle of it.
Recommended Stats and Gear at Three Budgets
| Skill | Suggested | What it buys you here |
|---|---|---|
| Attack | 80+ | Landing hits on a 215 Defence boss whose defence only drops as you damage him. |
| Strength | 85+ | The highest of his suggested combat skills, because kill speed is the direct counter to the axe count rising. |
| Defence | 80+ | Chip damage from axes and spikes you did not dodge. He is accurate regardless — Attack 280 and +190 attack bonus — so this is about the hits that were always going to land. |
| Hitpoints | 85+ | A single unprayed axe deals up to 35 plus a bleed of 15 or more over 14 ticks. The buffer matters more than usual. |
| Magic | 76+ | Resurrection spells for thralls on the Arceuus spellbook. Optional damage that costs no attention during an axe cycle. |
- Skill
- Attack
- Suggested
- 80+
- What it buys you here
- Landing hits on a 215 Defence boss whose defence only drops as you damage him.
- Skill
- Strength
- Suggested
- 85+
- What it buys you here
- The highest of his suggested combat skills, because kill speed is the direct counter to the axe count rising.
- Skill
- Defence
- Suggested
- 80+
- What it buys you here
- Chip damage from axes and spikes you did not dodge. He is accurate regardless — Attack 280 and +190 attack bonus — so this is about the hits that were always going to land.
- Skill
- Hitpoints
- Suggested
- 85+
- What it buys you here
- A single unprayed axe deals up to 35 plus a bleed of 15 or more over 14 ticks. The buffer matters more than usual.
- Skill
- Magic
- Suggested
- 76+
- What it buys you here
- Resurrection spells for thralls on the Arceuus spellbook. Optional damage that costs no attention during an axe cycle.
None of these are gates. The only requirement is the quest, and the numbers above are the wiki's suggestion for a fight that goes badly when it goes slowly.
| Slot | Learning it | Comfortable | Best in slot |
|---|---|---|---|
| Weapon | Abyssal whip or zombie axe, set to slash | Abyssal tentacle, or a blade of saeldor or noxious halberd once you stop taking axe hits | Soulreaper axe with five soul stacks held wherever possible |
| Head | Helm of neitiznot or a serpentine helm | Torva full helm, or a Justiciar faceguard if you want the set effect | Oathplate helm, or a slayer helmet (i) while on a normal-mode task |
| Body and legs | Barrows body and legs | Bandos, fighter torso, blood moon or Justiciar | Oathplate chest and legs; Torva if you do not have them |
| Shield | Dragon defender | Dragon defender | Avernic defender |
| Boots | Dragon or guardian boots | Primordial boots | Echo boots for the reflect and defence, Avernic treads in a maximum setup |
| Ring | Ring of suffering (ri) | Berserker ring (i) | Bellator or Ultor ring, whichever your setup actually prefers |
| Amulet and cape | Amulet of fury, fire cape | Amulet of torture or blood fury, infernal cape | Amulet of rancour, infernal cape |
| Special attack | Saradomin godsword, or a dragon dagger saved for the end | Arkan blade, which rolls against his slash defence, or an ancient godsword for the guaranteed heal | Dragon or burning claws, with a Voidwaker as the defence-ignoring alternative |
- Slot
- Weapon
- Learning it
- Abyssal whip or zombie axe, set to slash
- Comfortable
- Abyssal tentacle, or a blade of saeldor or noxious halberd once you stop taking axe hits
- Best in slot
- Soulreaper axe with five soul stacks held wherever possible
- Slot
- Head
- Learning it
- Helm of neitiznot or a serpentine helm
- Comfortable
- Torva full helm, or a Justiciar faceguard if you want the set effect
- Best in slot
- Oathplate helm, or a slayer helmet (i) while on a normal-mode task
- Slot
- Body and legs
- Learning it
- Barrows body and legs
- Comfortable
- Bandos, fighter torso, blood moon or Justiciar
- Best in slot
- Oathplate chest and legs; Torva if you do not have them
- Slot
- Shield
- Learning it
- Dragon defender
- Comfortable
- Dragon defender
- Best in slot
- Avernic defender
- Slot
- Boots
- Learning it
- Dragon or guardian boots
- Comfortable
- Primordial boots
- Best in slot
- Echo boots for the reflect and defence, Avernic treads in a maximum setup
- Slot
- Ring
- Learning it
- Ring of suffering (ri)
- Comfortable
- Berserker ring (i)
- Best in slot
- Bellator or Ultor ring, whichever your setup actually prefers
- Slot
- Amulet and cape
- Learning it
- Amulet of fury, fire cape
- Comfortable
- Amulet of torture or blood fury, infernal cape
- Best in slot
- Amulet of rancour, infernal cape
- Slot
- Special attack
- Learning it
- Saradomin godsword, or a dragon dagger saved for the end
- Comfortable
- Arkan blade, which rolls against his slash defence, or an ancient godsword for the guaranteed heal
- Best in slot
- Dragon or burning claws, with a Voidwaker as the defence-ignoring alternative
The soulreaper axe tops that list for a reason specific to his hitbox: he is 2x2, which stops a scythe of vitur getting its extra hits, so the weapon that would normally be the melee answer is held back here. If you are still learning, deliberately trade damage for survivability — a one-handed abyssal tentacle with a defender beats a stronger two-hander, because maximising slash defence is what stops the chip damage that feeds him.
Set every weapon to its slashing style, including burning claws if that is your special attack weapon. It is the single most common gear mistake here, and it stays invisible unless you go and look.
Oathplate is unusually good here because it stacks high slash defence with additional slash accuracy, which is exactly the pairing this fight rewards. Full Justiciar wins by a completely different mechanism: it reduces the damage he deals you, which reduces the amount he heals, which shortens the fight even though your strength bonus went down.
He is an undead vampyre, and none of the things you would expect to exploit that work. Silver weaponry does nothing, Crumble Undead does nothing, and the Salve amulet does nothing. Wear the amulet that gives you the most damage instead.
On specials, the useful distinction is accuracy against a defence that is highest at the start. Claws have very high accuracy and are best spent early, while his Defence is still up. Voidwaker ignores defence entirely, which points the same way, with one caveat: its special always hits a zero if it is the move that opens the fight, so land an auto-attack first. A dragon dagger is the opposite case and belongs at the end, when his Defence has fallen with his health.
| Check | Value |
|---|---|
| Prayers for its own attacks | Protect from Melee |
| Its Defence level | 215 |
| Its Magic level | 215 |
| Its lowest defence bonus, per its infobox | slash |
| Elemental weakness | 35% to fire spells |
- Check
- Prayers for its own attacks
- Value
- Protect from Melee
- Check
- Its Defence level
- Value
- 215
- Check
- Its Magic level
- Value
- 215
- Check
- Its lowest defence bonus, per its infobox
- Value
- slash
- Check
- Elemental weakness
- Value
- 35% to fire spells
- 215 Magic level rewards magic-defence scaling weapons.
Inventory and Supplies
| What | Why it is in the bag |
|---|---|
| A special attack weapon | Dragon claws, burning claws or an Arkan blade. Whether you spend it early or hold it for enrage is the one real decision in your inventory. |
| One divine super combat potion | Divine, so the boost does not lapse in the middle of a fight where a slow finish means more axes. |
| Two to four super restores or prayer potions | Protect from Melee runs all fight, and a missed head gaze costs you 10 prayer points on top of that. |
| Anglerfish, and one eaten before you arrive | The overheal matters because axe damage arrives in a lump — up to 35, plus the bleed — rather than as chip. |
| Cooked karambwans | Two-tick food for eating inside the fight without giving up a movement tick you needed. |
| Cooked moonlight antelope or other three-tick food | Specifically for after a Strangle. You can eat before resuming your attack once the special resolves. |
| A haemostatic dressing, optionally | The wiki lists it for players who are still eating axes. If your dodging is clean you will never use it. |
| Book of the dead and a rune pouch | Death Charge and resurrection spells for thralls on Arceuus. The thrall's style does not matter here. |
| Ring of shadows, and a house tablet | The ring is your route in once you have the strangled tablet; the tablet, a Construct. cape or a Desert amulet 4 is your route out. |
- What
- A special attack weapon
- Why it is in the bag
- Dragon claws, burning claws or an Arkan blade. Whether you spend it early or hold it for enrage is the one real decision in your inventory.
- What
- One divine super combat potion
- Why it is in the bag
- Divine, so the boost does not lapse in the middle of a fight where a slow finish means more axes.
- What
- Two to four super restores or prayer potions
- Why it is in the bag
- Protect from Melee runs all fight, and a missed head gaze costs you 10 prayer points on top of that.
- What
- Anglerfish, and one eaten before you arrive
- Why it is in the bag
- The overheal matters because axe damage arrives in a lump — up to 35, plus the bleed — rather than as chip.
- What
- Cooked karambwans
- Why it is in the bag
- Two-tick food for eating inside the fight without giving up a movement tick you needed.
- What
- Cooked moonlight antelope or other three-tick food
- Why it is in the bag
- Specifically for after a Strangle. You can eat before resuming your attack once the special resolves.
- What
- A haemostatic dressing, optionally
- Why it is in the bag
- The wiki lists it for players who are still eating axes. If your dodging is clean you will never use it.
- What
- Book of the dead and a rune pouch
- Why it is in the bag
- Death Charge and resurrection spells for thralls on Arceuus. The thrall's style does not matter here.
- What
- Ring of shadows, and a house tablet
- Why it is in the bag
- The ring is your route in once you have the strangled tablet; the tablet, a Construct. cape or a Desert amulet 4 is your route out.
The awakened loadout is a different document rather than a heavier version of this one. It swaps most of the solid food for Saradomin brews and adds a second combat potion, because you spend that fight deliberately overhealed rather than topping up after mistakes.
Prayer and Spellbook
Protect from Melee is your default, and it carries more of this fight than its description implies. It cuts his auto-attack potency by 75 per cent, dropping a 32 to somewhere between 8 and 10, and it roughly halves the damage of a Swinging Axe you failed to dodge. Camping it is correct.
The exception is the head. Once he is below 570 health, the Strangler's tendrils start firing a green cone-shaped projectile at you, announced by the message that his head gazes upon you. That one needs Protect from Missiles. If you miss the flick you lose 10 prayer points and you cannot use any overhead protection prayer for the next three ticks, which is the real cost — it strips you naked for whatever comes next.
There is a small mercy built into the head attack: it always fires off-sync with the body, and he will not melee you while the projectile is in the air, taking two ticks to resume afterwards. The window is genuinely there. The only case where that mercy does not apply is if the Darting Spikes mechanic has him dashing three times in a row.
Be on the Arceuus spellbook if you can. Thralls are damage you do not have to click for during an axe cycle, and Death Charge feeds the special attack that ends the enrage phase early.
Mechanics That Decide the Fight
| Mechanic | How you see it coming | What it does | Your answer |
|---|---|---|---|
| Swinging Axes | Tendrils lift his axes into the arena before releasing them. He performs three auto-attacks at the start of the fight before the first set appears. | Up to 35 damage, roughly halved by Protect from Melee, plus a bleed over 14 ticks dealing 15 or more — three damage every three ticks, or every single tick if you run while bleeding. | Run two tiles diagonally away from the path the axe is taking. There are twelve tiles in the arena that let you do this cleanly: one in each cardinal direction, and the two tiles in front of each pillar facing the centre. |
| Darting Spikes | He darts around you rather than attacking, leaving cracks in the ground. | Tendrils burst from the cracks a few seconds later for up to 25 damage, and heal him for half of it. Under most conditions one crack appears directly beneath you. | Stand by the arena edge next to the tendrils. That makes him dart in place, which limits it to a single crack and stops one spawning under you at all. |
| Head Gaze | The message that Vardorvis' head gazes upon you, and a green cone-shaped projectile. Begins below 570 health. | Drains 10 prayer points and locks you out of overhead prayers for three ticks if it lands. | Protect from Missiles, then straight back to melee. It usually arrives alongside an axe cycle, which is what makes it awkward rather than what makes it hard. |
| Strangle | He strikes an arm into the ground and tendrils wrap you. Begins below 570 health. A sudden lull in the axes is the warning that it is coming. | Spores appear in the centre of your screen and must all be destroyed within five game ticks. Miss the window and the tendrils tighten for heavy damage. He keeps attacking through it. | Clear the spores, which start at four and rise to a maximum of six as he uses the attack more often. Right-clicking him and choosing attack after the overlay appears lets you resume attacking without losing ticks. |
| Life-steal on everything | None. It applies to every hit he lands, auto-attacks and special attacks alike. | Heals him for 50 per cent of the damage he dealt you, rounded down. | Treat damage taken as time added rather than food spent. This is why a player with worse gear and clean movement often kills him faster than a better-geared player who eats axes. |
| Sliding stats | Nothing visible. It happens continuously as his health falls. | His Strength and Defence scale linearly with remaining hitpoints — he becomes easier to hit and hits harder as the fight goes on, with his melee maximum reaching 43 at critically low health. | Front-load accuracy-hungry specials while his Defence is high, and expect the last stretch to be the one that kills you rather than the opening. |
- Mechanic
- Swinging Axes
- How you see it coming
- Tendrils lift his axes into the arena before releasing them. He performs three auto-attacks at the start of the fight before the first set appears.
- What it does
- Up to 35 damage, roughly halved by Protect from Melee, plus a bleed over 14 ticks dealing 15 or more — three damage every three ticks, or every single tick if you run while bleeding.
- Your answer
- Run two tiles diagonally away from the path the axe is taking. There are twelve tiles in the arena that let you do this cleanly: one in each cardinal direction, and the two tiles in front of each pillar facing the centre.
- Mechanic
- Darting Spikes
- How you see it coming
- He darts around you rather than attacking, leaving cracks in the ground.
- What it does
- Tendrils burst from the cracks a few seconds later for up to 25 damage, and heal him for half of it. Under most conditions one crack appears directly beneath you.
- Your answer
- Stand by the arena edge next to the tendrils. That makes him dart in place, which limits it to a single crack and stops one spawning under you at all.
- Mechanic
- Head Gaze
- How you see it coming
- The message that Vardorvis' head gazes upon you, and a green cone-shaped projectile. Begins below 570 health.
- What it does
- Drains 10 prayer points and locks you out of overhead prayers for three ticks if it lands.
- Your answer
- Protect from Missiles, then straight back to melee. It usually arrives alongside an axe cycle, which is what makes it awkward rather than what makes it hard.
- Mechanic
- Strangle
- How you see it coming
- He strikes an arm into the ground and tendrils wrap you. Begins below 570 health. A sudden lull in the axes is the warning that it is coming.
- What it does
- Spores appear in the centre of your screen and must all be destroyed within five game ticks. Miss the window and the tendrils tighten for heavy damage. He keeps attacking through it.
- Your answer
- Clear the spores, which start at four and rise to a maximum of six as he uses the attack more often. Right-clicking him and choosing attack after the overlay appears lets you resume attacking without losing ticks.
- Mechanic
- Life-steal on everything
- How you see it coming
- None. It applies to every hit he lands, auto-attacks and special attacks alike.
- What it does
- Heals him for 50 per cent of the damage he dealt you, rounded down.
- Your answer
- Treat damage taken as time added rather than food spent. This is why a player with worse gear and clean movement often kills him faster than a better-geared player who eats axes.
- Mechanic
- Sliding stats
- How you see it coming
- Nothing visible. It happens continuously as his health falls.
- What it does
- His Strength and Defence scale linearly with remaining hitpoints — he becomes easier to hit and hits harder as the fight goes on, with his melee maximum reaching 43 at critically low health.
- Your answer
- Front-load accuracy-hungry specials while his Defence is high, and expect the last stretch to be the one that kills you rather than the opening.
Because the specials fire at random rather than on a rotation, the useful thing to memorise is not an order but a set of counts tied to his health bar. Axes: one above 690, two from 231 to 690 with a chance of a third, three below 231. Darts: one above roughly 500, two from 231 to 500, three below roughly 130. Head and Strangle: both unlocked at 570.
The dart layouts are consistent even though the timing is not. The first dart leaves half an X in a 3x5 area, the second fills in the other half, and the third scatters across a 5x5 area centred on you — assuming you are not standing near the edges and not running diagonally away from him.
One useful piece of negative information: if the axes go quiet, that is not the fight easing off. It is the Strangle winding up, and it is the one moment in the fight you get advance notice of anything.
| Property | Value |
|---|---|
| Combat level | 784 |
| Attack styles | Slash |
| Attack speed | 5 ticks |
| Attacks on sight | No |
| Poisons you | No |
| Size | 2 tiles |
| Immune to cannon | Yes |
| Immune to thralls | No |
- Property
- Combat level
- Value
- 784
- Property
- Attack styles
- Value
- Slash
- Property
- Attack speed
- Value
- 5 ticks
- Property
- Attacks on sight
- Value
- No
- Property
- Poisons you
- Value
- No
- Property
- Size
- Value
- 2 tiles
- Property
- Immune to cannon
- Value
- Yes
- Property
- Immune to thralls
- Value
- No
Where Vardorvis Sits in Progression
Within the Desert Treasure II group, the fights below Vardorvis are Duke Sucellus. Nothing in the Desert Treasure II group is harder, which makes Vardorvis the ceiling for this cluster.
Phase by Phase
700 to 570: two mechanics, and time to get comfortable
He is not aggressive after the quest, so the fight starts when you attack and tendrils burst up to seal the arena. Those tendrils are also your emergency exit, since the rock you arrived on has its options disabled until he dies.
For the first three auto-attacks there are no axes at all. Above 690 hitpoints there is only ever one axe in the air and one dart, which makes this the window where you should be spending your highest-accuracy special attacks — his Defence will never be higher than it is now.
570: the head opens and the tendrils grab
Two mechanics unlock at the same number, and they demand opposite things. The Head Gaze wants a prayer flick and no movement; the Strangle wants your full attention on an overlay in the middle of your screen while he keeps hitting you.
This is where most players start losing prayer rather than health. Each missed gaze is 10 prayer points and three ticks of no overhead protection, and three ticks is long enough for an axe you were about to dodge to become an axe you are eating unprotected.
500 to 231: the arena gets busier
The second dart appears below roughly 500, so the crack pattern goes from half an X to a full one. Axes are running at two per set with a chance of a third. Nothing new has been introduced; there is simply more of it, and the overlaps start to matter.
If you are going to reposition to the arena edge to control the darts, this is the stretch to build that habit in, before the axe count makes edge tiles less attractive.
231 and below: enrage
At 33 per cent of his health, which is around 231, he enters enrage after his next non-enraged attack. There is no animation and no message. The axes now come three at a time, with a new set appearing as soon as the previous one has been thrown clear, and the head fires far more often.
Below roughly 130 the darts reach three as well, and his melee maximum has been climbing towards 43 the whole time. The combination of head and spikes in this window is what kills prepared players, not the axes on their own.
- If you saved a special attack for this phase, spend it now rather than perfectly. Shortening enrage is worth more than a clean spec.
- A lull in the axes still means Strangle, and in enrage that lull is the only quiet moment you will get.
- Overshooting into enrage while your prayer is low is the single worst position in the fight. Restore before you cross 231, not after.
Fight Strategy: Axe swing mechanics
- Pre-eat an anglerfish outside, then attack him to start the fight and turn on Protect from Melee immediately.
- Use the three auto-attack grace period to establish your position, then spend your accuracy-dependent special attacks while his Defence is at its highest.
- Dodge each axe by running two tiles diagonally out of its path, using the twelve marked tiles. If three quadrants horizontal to you are throwing, run four tiles diagonally from the central square instead.
- When he darts, drift to the arena edge so he darts on the spot and leaves one crack rather than a pattern.
- From 570, add the Protect from Missiles flick for the head and clear Strangle spores as they appear. Resume attacking with a right-click rather than waiting for the animation.
- Restore prayer and health above 231 rather than inside enrage. There is no indicator for the phase change, so the threshold is yours to watch.
- In enrage, prioritise movement over damage entirely, and spend any special attack energy still in the bar to shorten the phase.
The arena is divided into nine 3x3 quadrants, and once you see it that way the axe dodge stops being reactive. Axes travel either straight or diagonally depending on which quadrant they emerge from, so what you are reading is a direction, not a projectile.
The advanced version of the dodge is the axe skip, which trades distance for tick precision. If the axes are swung from a quadrant adjacent to you, click a second marked tile one tick after the axe appears and click back one tick later. If they are swung from the opposing quadrant, make that first click on the fourth tick after the swing and come back one tick after. In normal mode this is optional and buys you attack ticks; in Awakened mode it stops being optional.
Every hit you avoid is worth double, because anything that connects heals him for half of it. That is the honest reason this fight rewards patience over damage output, and it is specific to him rather than general advice — at most bosses a hit taken costs you food, and here it costs you food and gives some of your progress back.
Positioning and Movement
There are twelve tiles in the arena that let you dodge an axe with a single two-tile diagonal move: one in each of the four cardinal directions, and the pair of tiles in front of each pillar facing the centre. Learning three or four of them well is more useful than knowing all twelve badly.
Edge tiles and pillar tiles solve different problems, and in normal mode the edge usually wins. Standing next to the tendrils at the arena edge collapses his dart pattern to a single crack and keeps one from spawning underneath you, which removes a whole mechanic from your workload.
Awakened inverts that specific piece of advice. There, axes deal damage the instant they appear and the anti-edge behaviour makes the perimeter unsafe, so you live in the corner quadrants and by the pillars instead, running back and forth between a corner and the quadrant across from it.
Beginner Plan, Then the Advanced One
Your first trips
- Set your weapon to slash before your first kill, then check it again after your first bank trip. Whip on slash, tentacle on slash, burning claws on slash.
- Deliberately downgrade to a one-handed weapon and a defender while you are learning. Maximising slash defence reduces the chip damage that feeds his healing, and a slightly slower kill you survive beats a faster one you do not.
- Learn the dart-control trick early. Moving to the edge when he starts darting is one habit that removes an entire source of damage and healing.
- Do not chase the axe. Read which quadrant it came from, pick your diagonal, and commit — hesitating in the middle of a two-tile move is how a dodge becomes a hit plus a bleed.
- Never run while bleeding if you can help it. The bleed deals three damage every three ticks normally, and three damage every single tick if you are running.
- Watch your health cross 570 and 231 consciously. Both thresholds change the fight and neither one announces itself.
Once the kill is boring
- Learn the axe skip properly rather than as an emergency measure. The tick-precise version keeps you attacking through cycles where the four-tile diagonal run costs you the whole window.
- Decide a spec policy and stick to it. Spending claws early exploits his high starting Defence; holding them exploits the fact that enrage is the phase you most want to be short. Both are defensible and alternating between them by mood is not.
- In Awakened mode — entered by climbing the rocks with an awakener's orb in your inventory and accepting the prompt — the axe skip is close to mandatory. Axes hit for up to 96 rather than 35 and deal damage the moment they appear, which combined with his own attack will usually end the fight on the spot, and an extra axe joins every set — three guaranteed from 462 to 1,380 health with a chance of a fourth, four guaranteed below 462.
- Awakened also changes the head from a single ranged cone to a mixed threat: it can fire a magic attack that looks like a blue crescent wave, and below 50 per cent it fires magic and ranged one tick apart in a random order. The trick worth learning is to pray only against the first projectile you see, switch to the opposite prayer as it lands, then return to Protect from Melee, because the second is always the other style.
- If you miss a prayer in Awakened, dodge and eat first, and pray against the next head attack after the body has attacked. Reacting to the body instead usually costs you the following two projectiles as well.
Drops and What Vardorvis Is Worth
The executioner's axe head is why most accounts turn up here, and it is worth being honest about what that means: it is one quarter of a project that requires all four Desert Treasure II bosses, so Vardorvis is usually a stop on a list rather than a destination. The ultor vestige is the other reason, and it has no second source.
The strangled tablet at 1/25 changes the shape of the grind rather than its value, since it is what turns the run across the Stranglewood into a teleport. It is common enough that the awkward travel phase of this grind is measured in a handful of kills.
Drops worth the trip: Executioner's axe head, ultor vestige. Whether that is worth your time depends on how many kills an hour you personally get, which is a function of axe swing mechanics rather than of your gear list.
Combat Achievements
Vardorvis has Combat Achievement tasks. A 43 max hit is survivable enough that the kill-time limits usually bite before the restricted-gear ones do.
Task lists move with updates — read the current list in game.
Ironman Notes
Slayer masters who assign Vardorvis: Konar, Nieve, Duradel. Each kill is 1085 Slayer XP.
Without a Grand Exchange, executioner's axe head, ultor vestige has to be earned rather than bought, and this is the fastest table it sits on.
Common Mistakes and Death Causes
| What happened | Why it happened | The fix |
|---|---|---|
| Killed during enrage without noticing enrage had started | There is no visual indicator at 231 hitpoints, and the axes escalate to three per set with a new set following immediately. | Treat 231 as a checkpoint. Top up prayer and health above it, then push through rather than arriving in the phase at half resources. |
| An axe and a head projectile in the same tick | The head usually appears alongside an axe cycle, so the flick to Protect from Missiles and the diagonal dodge compete for the same moment. | Move first, then flick. The head will not connect while you are mid-dodge as often as an axe will, and the head's punishment is prayer rather than a bleed. |
| Bleeding to death after a single axe | The bleed runs for 14 ticks and deals three damage every tick rather than every three if you are running, which is exactly what you do after being hit. | Take the hit, then walk if the arena allows it. If you must run, eat through it rather than assuming the bleed is chip damage. |
| The fight never seems to end | He heals for half of every hit he lands, so taking damage extends the kill, which produces more axes, which produces more damage taken. | Trade damage for defence while you are learning. Slash defence and clean movement shorten this fight more reliably than a bigger weapon does. |
| Caught by the Strangle with no health buffer | The spores must be cleared within five game ticks and he keeps attacking through the animation, so a Strangle at low health is a hit you cannot answer. | Use the lull in the axes as your warning to eat. It is the only advance notice the fight gives you. |
| Bringing defence-draining specials | His Defence is tied to his remaining health, so a Bandos godsword or dragon warhammer contributes nothing beyond its raw damage. | Bring accuracy or guaranteed damage instead — claws early, Voidwaker for the defence-ignoring hit, dragon dagger saved for the low-health end. |
- What happened
- Killed during enrage without noticing enrage had started
- Why it happened
- There is no visual indicator at 231 hitpoints, and the axes escalate to three per set with a new set following immediately.
- The fix
- Treat 231 as a checkpoint. Top up prayer and health above it, then push through rather than arriving in the phase at half resources.
- What happened
- An axe and a head projectile in the same tick
- Why it happened
- The head usually appears alongside an axe cycle, so the flick to Protect from Missiles and the diagonal dodge compete for the same moment.
- The fix
- Move first, then flick. The head will not connect while you are mid-dodge as often as an axe will, and the head's punishment is prayer rather than a bleed.
- What happened
- Bleeding to death after a single axe
- Why it happened
- The bleed runs for 14 ticks and deals three damage every tick rather than every three if you are running, which is exactly what you do after being hit.
- The fix
- Take the hit, then walk if the arena allows it. If you must run, eat through it rather than assuming the bleed is chip damage.
- What happened
- The fight never seems to end
- Why it happened
- He heals for half of every hit he lands, so taking damage extends the kill, which produces more axes, which produces more damage taken.
- The fix
- Trade damage for defence while you are learning. Slash defence and clean movement shorten this fight more reliably than a bigger weapon does.
- What happened
- Caught by the Strangle with no health buffer
- Why it happened
- The spores must be cleared within five game ticks and he keeps attacking through the animation, so a Strangle at low health is a hit you cannot answer.
- The fix
- Use the lull in the axes as your warning to eat. It is the only advance notice the fight gives you.
- What happened
- Bringing defence-draining specials
- Why it happened
- His Defence is tied to his remaining health, so a Bandos godsword or dragon warhammer contributes nothing beyond its raw damage.
- The fix
- Bring accuracy or guaranteed damage instead — claws early, Voidwaker for the defence-ignoring hit, dragon dagger saved for the low-health end.
If a trip goes wrong there is a genuine exit that many players forget exists. The rock you climbed in on has its options disabled once the tendrils are up, but the tendrils themselves can be used to leave the arena quickly if you did not bring a teleport.
Dying here is cheaper than it looks while you are learning. Your grave appears by the rocks leading to the Stranglewood Ritual Site, and the reclamation fee runs at a quarter of the usual price for your first five kills. There is one exception to check before you lean on that: if you already have an active gravestone somewhere else when you die at Vardorvis, the full cost applies with no reduction at all.
FAQ
Why does my Bandos godsword do nothing to him?
His Defence level is tied to his remaining hitpoints and slides down as you damage him, so a stat-draining special has nothing meaningful to remove. Bring damage or accuracy instead. The corollary is that claws are unusually strong early in the fight, when his Defence is at its highest.
Do I actually need to learn the axe skip?
In normal mode, no. The four-tile diagonal run handles the awkward case where three quadrants horizontal to you are throwing, and plenty of people kill him for hundreds of kills without ever skipping. In Awakened mode it is close to mandatory, because there are more axes, they hit for up to 96, and they deal damage as they appear rather than only as they travel.
Oathplate or Justiciar?
They win by different mechanisms. Oathplate gives high slash defence plus additional slash accuracy, which is the more straightforward improvement. Full Justiciar reduces the damage he deals you, and because he heals for half of what he deals, reducing incoming damage also reduces his healing — which is why the wiki notes it can beat full Bandos across many loadouts despite the lower strength bonus.
He is an undead vampyre. Does a Salve amulet help?
No. Silver weaponry, Crumble Undead and the Salve amulet all fail to apply here despite what his description implies. Wear the amulet that gives you the most damage or the most sustain instead.
Can I stay on a Slayer task for the Awakened version?
You can be on the task, but the black mask and slayer helmet stop applying their damage and accuracy bonuses on Awakened Desert Treasure II bosses. Plan the Awakened loadout around a helmet that is good on its own merits rather than one that is good on task.
Why is he rated harder than the other three Desert Treasure II bosses?
Because he is the only one without a rotation. The Leviathan escalates down a fixed list, the Whisperer fires her specials at set health thresholds, and Duke Sucellus runs his gas on a countable attack cycle. Vardorvis picks at random, so the overlaps that end trips cannot be prepared for in advance — only reacted to.
Related Guides
Bottom Line
Vardorvis rewards a very particular kind of player: one who is willing to stop attacking. Every mechanic here has a clean answer, the twelve safe tiles are learnable in an hour, and Protect from Melee turns his auto-attacks into rounding errors. What he punishes is greed, because greed feeds him — each hit he lands hands back half of it as healing, and a fight that runs long is a fight that runs into three-axe enrage with your supplies already spent.
Learn the arena as nine quadrants, hold your prayer, and accept that the last 231 hitpoints are the fight. If Awakened attempts are the goal and you would rather not spend a week failing them at 96 damage a mistake, the Vardorvis kills themselves are something we do by hand.
If Vardorvis is blocking a Combat Achievement or an unlock you actually want, our PvM service is done by hand — no automation. Otherwise the bosses list has the full index.
Vardorvis — DT2 boss, difficulty 5/5. Combat values here — hitpoints, max hits, attack styles and speed, Defence and Magic levels, immunities and Slayer requirements — were read from the Old School RuneScape Wiki infobox for Vardorvis on 2026-08-03. Kill rates, GP per hour and item prices are deliberately absent because they move with balance patches and the Grand Exchange. Mechanics, gear tiers and phase behaviour on this page were checked against Vardorvis/Strategies on 4 August 2026.
Need a trusted team? Bils Services
Enjoyed the guide?
Drop a like — it helps other Adventurers find the good stuff.
Community
Comments
Silence in the hall…
Be the first Adventurer to leave a mark.
Join the thread
Add a comment
Tips, drops, or “this carried my account” — keep it useful.
bilsservices · bils services · bilsservices.com

