


OSRS The Leviathan Guide: Prayer, Stun Mechanics, Gear & Drops
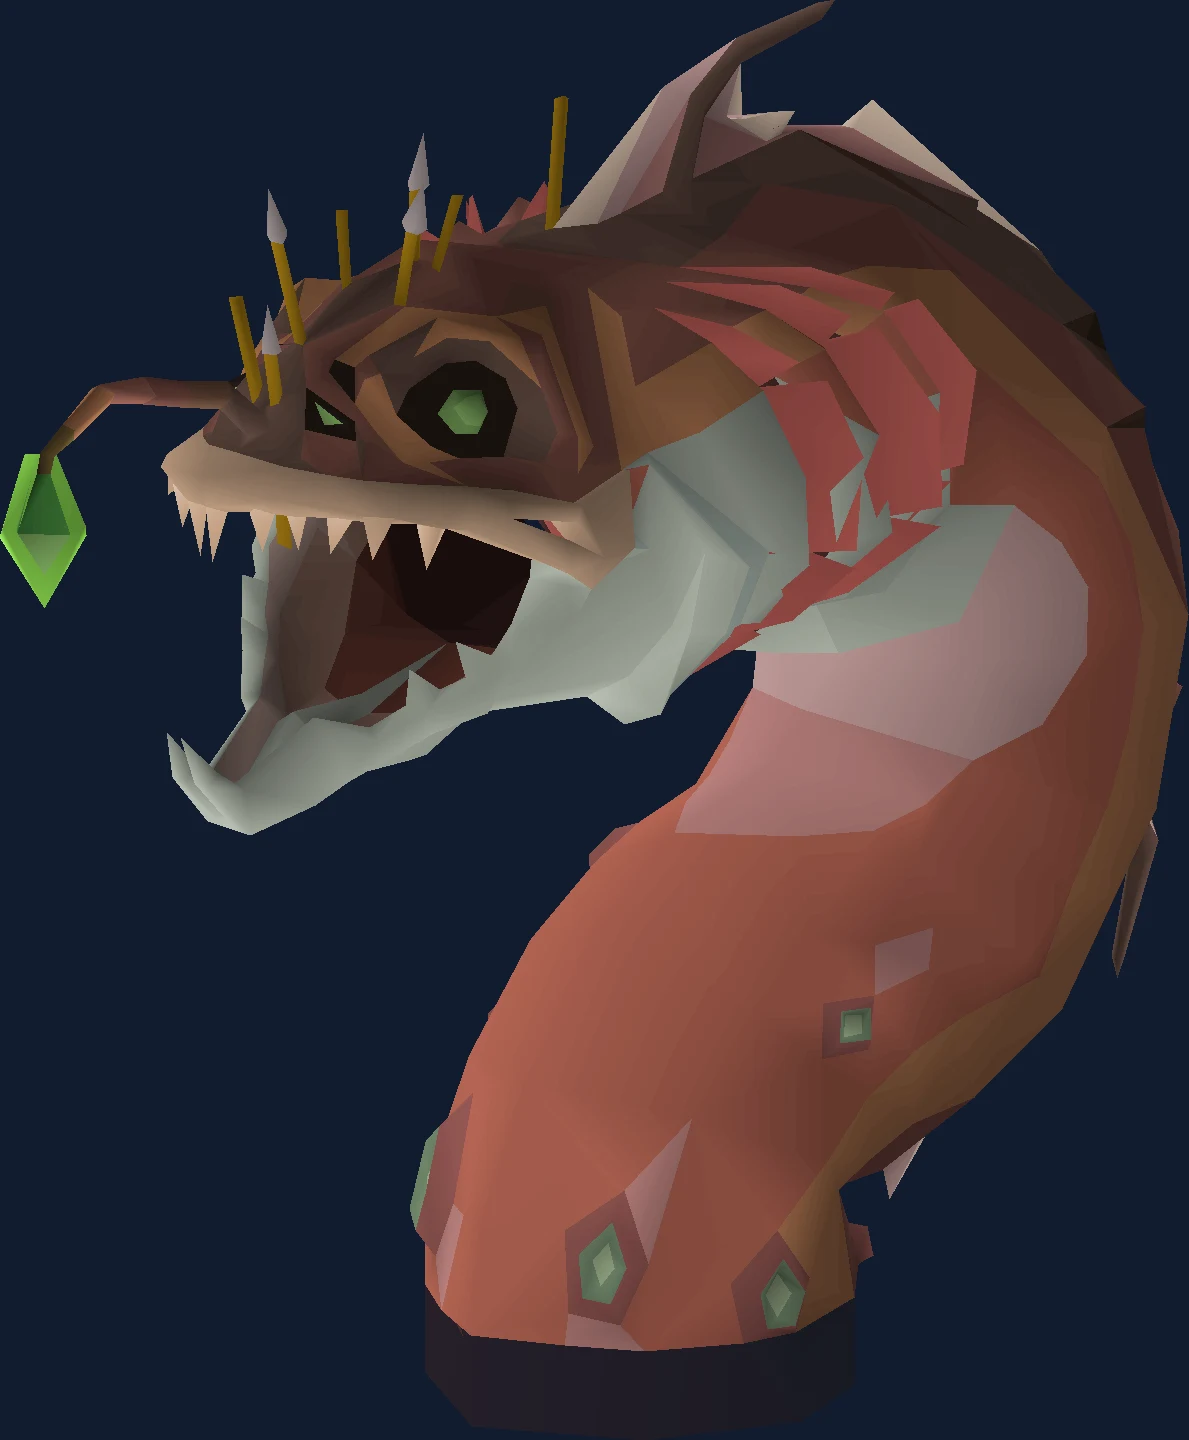
Leviathan guide for stun windows, prayer, and ranged-oriented DT2 kills.
Why People Fight The Leviathan
The Leviathan is the only boss in Old School RuneScape that speeds up on a published schedule. Its attacks start at three ticks apart using magic and ranged, then two ticks, then two ticks with melee added, then one tick, then one tick with all three styles, and then twice more with the projectiles themselves flying faster — first leaving two ticks to react, finally leaving one. Seven rungs, and it climbs them whether you do anything about it or not.
That is the fight. Not the special attacks, not the arena, not the drops: a metronome that gets faster than any human can flick prayers, and a single lever you can pull to wind it back. Cast any shadow spell and it freezes for fifteen ticks; strike the gaping wound on its back, or stun it once you have taken a quarter of its health off, and it drops back to the second rung and starts climbing again. Do it a second time and it drops back only to the third. Every rewind is shallower than the last, which is why the guidance attached to this boss is to stun sparingly — the most counterintuitive instruction in Desert Treasure II, given that the stun is the fun part.
People fight it for the leviathan's lure and the venator vestige. There is a neat detail in its own recommended setup: a Zaryte crossbow is best in slot here until the boss reaches 450 hitpoints, or 380 without a venator ring — a ring that exists because of this boss. Killing the Leviathan efficiently is easier once you have already killed the Leviathan.
The unlock is the one every Desert Treasure II boss shares, The Fallen Empire, and nothing beyond it. Its awakened form asks only that you climb the handholds carrying an awakener's orb. Where the awakened versions of the other three mostly add damage, this one mostly takes away time: stuns last half as long, and the enrage attack speed doubles to a single tick.
Its own attacks are melee, ranged and magic, so Protect from Melee, Missiles and Magic all have a job.
In our index it sits in the Desert Treasure II group at difficulty 5 of 5, where kill times come down to stun windows.
| Field | Detail |
|---|---|
| Classification | DT2 boss (Boss) |
| Group | Desert Treasure II |
| Difficulty | 5 / 5 |
| Solo or team | Solo |
| Access requirement | Desert Treasure II |
| Notable reward | Venator vestige, leviathan's lure |
| Signature mechanic | Stun windows |
| Hitpoints | 900 |
| Max hits | 50 (Melee orb & Bite), 24 (Ranged orb), 32 (Magic orb), 60 (Smoke Blast) |
| Released | 26 July 2023 |
- Field
- Classification
- Detail
- DT2 boss (Boss)
- Field
- Group
- Detail
- Desert Treasure II
- Field
- Difficulty
- Detail
- 5 / 5
- Field
- Solo or team
- Detail
- Solo
- Field
- Access requirement
- Detail
- Desert Treasure II
- Field
- Notable reward
- Detail
- Venator vestige, leviathan's lure
- Field
- Signature mechanic
- Detail
- Stun windows
- Field
- Hitpoints
- Detail
- 900
- Field
- Max hits
- Detail
- 50 (Melee orb & Bite), 24 (Ranged orb), 32 (Magic orb), 60 (Smoke Blast)
- Field
- Released
- Detail
- 26 July 2023
Access Requirements
The Leviathan is gated behind Desert Treasure II.
That single unlock opens the whole Desert Treasure II group, so finishing it is worth more than any one drop from The Leviathan. The boss requirements checklist lists what each group needs.
Location and How to Get There
The Leviathan is found in the Scar.
Unlocked by Desert Treasure II. It was dragged into the Scar from the Eastern Ocean during the Battle for the Eye, and it fights on a narrow ledge — position matters more here than at any other Forgotten Four boss.
The Leviathan lives in the Scar. Everyone ends up travelling by ring of shadows eventually: a scarred tablet, which drops at 1/25, adds the Scar to the ring's destinations and drops you beside the abyssal rift.
Before that, the route runs through the Temple of the Eye. An amulet of the eye teleports you there directly, and so does the Minigame Teleport for Guardians of the Rift; from the temple, the Catalytic Guardian takes you into the Scar.
The third option is the portal in the Wizards' Tower basement, reached with a necklace of passage or fairy ring code dis. It is the fallback when you have neither the tablet nor an amulet, and a lot of accounts end up running a few rounds of Guardians of the Rift before their first trip here for exactly that reason.
Recommended Stats and Gear at Three Budgets
| Skill | Suggested | Where it shows up |
|---|---|---|
| Ranged | 75+ | The primary style. Its recommended setups are built around crossbows, a blowpipe and a bow of faerdhinen rather than melee. |
| Defence | 70+ | The chip damage you cannot pray against — up to 7 from each roar, plus anything the debris and the specials catch you with. |
| Hitpoints | 80+ | Its melee orb hits up to 50 unprayed. That is the biggest number it can put on you in one tick, and the reason to carry a buffer. |
| Magic | Enough for a shadow spell | Shadow Rush is as effective as Shadow Barrage at stunning it, and costs a third as much per cast. This is the skill that unlocks the fight's only lever. |
| Prayer | High enough to hold three protection prayers | You will be switching between all three on a one-tick cycle by the later rungs of the ladder. |
- Skill
- Ranged
- Suggested
- 75+
- Where it shows up
- The primary style. Its recommended setups are built around crossbows, a blowpipe and a bow of faerdhinen rather than melee.
- Skill
- Defence
- Suggested
- 70+
- Where it shows up
- The chip damage you cannot pray against — up to 7 from each roar, plus anything the debris and the specials catch you with.
- Skill
- Hitpoints
- Suggested
- 80+
- Where it shows up
- Its melee orb hits up to 50 unprayed. That is the biggest number it can put on you in one tick, and the reason to carry a buffer.
- Skill
- Magic
- Suggested
- Enough for a shadow spell
- Where it shows up
- Shadow Rush is as effective as Shadow Barrage at stunning it, and costs a third as much per cast. This is the skill that unlocks the fight's only lever.
- Skill
- Prayer
- Suggested
- High enough to hold three protection prayers
- Where it shows up
- You will be switching between all three on a one-tick cycle by the later rungs of the ladder.
Nothing here is gated on a level. The thing the fight actually tests is how fast you can switch between three protection prayers, and no amount of training improves that — which is why the Magic and Prayer rows below the wiki's own three are phrased as tools rather than thresholds.
| Slot | Budget | Mid | Endgame |
|---|---|---|---|
| Main weapon | Rune crossbow, or a toxic blowpipe | Armadyl or dragon crossbow; a bow of faerdhinen with full crystal | Zaryte crossbow, swapping to a toxic blowpipe with dragon darts at low health |
| Ammunition | Ruby bolts (e) | Ruby bolts (e) | Ruby dragon bolts (e) |
| Head | Karil's coif, a hueycoatl hide coif or a blessed coif | Crystal helm with the bow, or a void ranger helm with the full set | Masori mask (f); a slayer helmet (i) instead while on a normal-mode task |
| Body and legs | Black d'hide, then Karil's, hueycoatl hide or blessed d'hide | Crystal body and legs, or elite void | Masori body (f) and chaps (f) |
| Cape and neck | Ava's accumulator, amulet of glory or fury | Ava's assembler, necklace of anguish | Dizana's quiver, necklace of rupture |
| Shield | Antler guard or an odium ward, with a one-handed weapon | Dragonfire ward if you want the defence over the max hit | Twisted buckler |
| Hands and feet | Blessed vambraces, blessed boots or aranea boots | Barrows or void gloves, ranger boots | Zaryte vambraces, Avernic treads or devout boots |
| Ring | Archers ring (i) | Ring of the gods (i), or a venator ring | Lightbearer |
| Special attack | Dragon knife or a rosewood blowpipe for the enrage phase | Armadyl crossbow, or tonalztics of ralos | Zaryte crossbow early, webweaver bow saved for enrage |
- Slot
- Main weapon
- Budget
- Rune crossbow, or a toxic blowpipe
- Mid
- Armadyl or dragon crossbow; a bow of faerdhinen with full crystal
- Endgame
- Zaryte crossbow, swapping to a toxic blowpipe with dragon darts at low health
- Slot
- Ammunition
- Budget
- Ruby bolts (e)
- Mid
- Ruby bolts (e)
- Endgame
- Ruby dragon bolts (e)
- Slot
- Head
- Budget
- Karil's coif, a hueycoatl hide coif or a blessed coif
- Mid
- Crystal helm with the bow, or a void ranger helm with the full set
- Endgame
- Masori mask (f); a slayer helmet (i) instead while on a normal-mode task
- Slot
- Body and legs
- Budget
- Black d'hide, then Karil's, hueycoatl hide or blessed d'hide
- Mid
- Crystal body and legs, or elite void
- Endgame
- Masori body (f) and chaps (f)
- Slot
- Cape and neck
- Budget
- Ava's accumulator, amulet of glory or fury
- Mid
- Ava's assembler, necklace of anguish
- Endgame
- Dizana's quiver, necklace of rupture
- Slot
- Shield
- Budget
- Antler guard or an odium ward, with a one-handed weapon
- Mid
- Dragonfire ward if you want the defence over the max hit
- Endgame
- Twisted buckler
- Slot
- Hands and feet
- Budget
- Blessed vambraces, blessed boots or aranea boots
- Mid
- Barrows or void gloves, ranger boots
- Endgame
- Zaryte vambraces, Avernic treads or devout boots
- Slot
- Ring
- Budget
- Archers ring (i)
- Mid
- Ring of the gods (i), or a venator ring
- Endgame
- Lightbearer
- Slot
- Special attack
- Budget
- Dragon knife or a rosewood blowpipe for the enrage phase
- Mid
- Armadyl crossbow, or tonalztics of ralos
- Endgame
- Zaryte crossbow early, webweaver bow saved for enrage
The weapon question here has a numerical answer rather than a preference. With Masori armour, a Zaryte crossbow is best in slot until the boss reaches 450 hitpoints — 380 without a venator ring — at which point a toxic blowpipe with dragon darts overtakes it. That is a swap on a threshold, not a matter of taste, and it is why the recommended loadout carries both.
The bow of faerdhinen with full crystal is the setup worth knowing about if ruby bolts bother you. It avoids both the damage falloff and the chip damage that come with ruby bolts (e), and it outperforms a blowpipe loaded with amethyst darts. As a package it competes with higher-tier crossbows without needing separate ranged strength gear.
The Zaryte crossbow is also the strongest special attack weapon here, and the recommended pattern is to spend it at the start of the fight and let the blowpipe do the work during enrage. The webweaver bow is the exception to that plan: two of its specials once the abyssal pathfinder has lit you up will end the fight outright, at the cost of a Lightbearer usually not recovering enough energy for the next kill. If you are using a Zaryte crossbow, that trade is not recommended.
A Tumeken's shadow is a legitimate alternative rather than a novelty, because its passive accuracy boost lets it compete with and beat lower-tier ranged weapons here, and a Volatile nightmare staff special into the exposed back is a genuine damage window. Without several pieces of ancestral and a saturated heart, though, the page is explicit that you should be ranging it instead.
One inventory-saving detail: a twisted bow is worth carrying purely for the backside attack, because the enormous minimum hit usually beats a crossbow shot there. With a Dizana's quiver it does not even cost you two slots.
| Check | Value |
|---|---|
| Prayers for its own attacks | 3 — Protect from Melee, Missiles and Magic |
| Its Defence level | 250 |
| Its Magic level | 160 |
| Its lowest defence bonus, per its infobox | heavy ammunition |
- Check
- Prayers for its own attacks
- Value
- 3 — Protect from Melee, Missiles and Magic
- Check
- Its Defence level
- Value
- 250
- Check
- Its Magic level
- Value
- 160
- Check
- Its lowest defence bonus, per its infobox
- Value
- heavy ammunition
Inventory and Supplies
| What | Why |
|---|---|
| Prayer potions or super restores, in quantity | Three protection prayers switched on a tightening cycle is the whole fight. Experienced players trade food out for more of these. |
| Anglerfish | Specifically for overhealing before you start a kill, so that the volley does not have to be interrupted to eat, and so the roar's chip damage has somewhere to land. |
| Cheap food, filling most of the bag | Bulk healing for the mistakes. It is a learner's supply and it thins out as your flicking improves. |
| Divine ranging potions | Divine, so a long kill does not quietly lose the boost partway through the ladder. |
| A rune pouch for shadow spells | Shadow Rush stuns exactly as well as Shadow Barrage and costs a third as much per cast, which matters because you will cast it every kill forever. |
| A webweaver bow and a toxic blowpipe | The enrage-phase pairing. One ends the phase quickly; the other is the strongest thing you can hold inside the pathfinder's area. |
| Ring of shadows, or an amulet of the eye | Travel. The amulet covers you until the scarred tablet drops. |
| A house teleport tablet | One-click exit. In a fight where debris permanently fills the arena, having an exit that does not require a menu is worth a slot. |
- What
- Prayer potions or super restores, in quantity
- Why
- Three protection prayers switched on a tightening cycle is the whole fight. Experienced players trade food out for more of these.
- What
- Anglerfish
- Why
- Specifically for overhealing before you start a kill, so that the volley does not have to be interrupted to eat, and so the roar's chip damage has somewhere to land.
- What
- Cheap food, filling most of the bag
- Why
- Bulk healing for the mistakes. It is a learner's supply and it thins out as your flicking improves.
- What
- Divine ranging potions
- Why
- Divine, so a long kill does not quietly lose the boost partway through the ladder.
- What
- A rune pouch for shadow spells
- Why
- Shadow Rush stuns exactly as well as Shadow Barrage and costs a third as much per cast, which matters because you will cast it every kill forever.
- What
- A webweaver bow and a toxic blowpipe
- Why
- The enrage-phase pairing. One ends the phase quickly; the other is the strongest thing you can hold inside the pathfinder's area.
- What
- Ring of shadows, or an amulet of the eye
- Why
- Travel. The amulet covers you until the scarred tablet drops.
- What
- A house teleport tablet
- Why
- One-click exit. In a fight where debris permanently fills the arena, having an exit that does not require a menu is worth a slot.
You do not need a staff for the shadow spells. Autocasting from something light like a Thammaron's sceptre works, but manual casting is the same number of clicks, saves an inventory slot, and gives you a bigger click box in the spellbook if you filter out spells you cannot afford to cast.
Prayer and Spellbook
Every orb in a volley is shut down completely by the right protection prayer, and the Leviathan tells you which one twice — the orb itself and the lure on its head both change colour. Blue is magic and hits up to 32. Green is ranged and hits up to 24. Orange is melee and hits up to 50. Rocks are the exception: there is no prayer for them, they hit up to 25, and the answer is to run out of the shadows.
Note the ordering of those numbers, because it decides where your attention goes when you are behind. The melee orb is the one that hits twice as hard as the ranged one, so if you have to guess, guess orange.
Its bite attack is separate and it is a positioning problem rather than a prayer one. It only happens if you are directly beside the pool, diagonals included, it has no warning animation at all, and it interrupts the volley when it happens. Marking those tiles so you never wander onto them is the standard fix.
The roar at the end of each volley is unprayable chip damage of up to 7, which is why the recommendation is to arrive at each kill overhealed rather than exactly full.
Mechanics That Decide the Fight
| Mechanic | How you see it coming | What it does | Your answer |
|---|---|---|---|
| The orb volley | The colour of the orb and of the lure on its head. Blue for magic, green for ranged, orange for melee. | Damage on impact — up to 32, 24 and 50 respectively if the prayer is wrong. Protection prayers block them completely. | Flick to the colour. The projectile speed and the gap between attacks both tighten as the fight goes on, so this gets harder without ever getting different. |
| Falling rocks | Shadows on the ground during a volley. The orb for it is the rocks icon rather than a colour. | Up to 25 damage. No prayer blocks it. | Move out of the shadows. This is the only part of a volley you solve with your feet rather than your prayer book. |
| The roar and permanent debris | It roars at the end of every volley. | Up to 7 chip damage, plus debris falling across the arena. One piece lands on your tile and stays there for the rest of the fight. | Step at least one tile away to avoid the debris itself. You cannot avoid the chip damage, and you cannot avoid the arena slowly filling up — only outrun it by killing the boss. |
| Lightning Barrage | A barrage of lightning aimed at you, with orbs launched around the arena. | The orbs land with a 1x1 area of effect and never on the tiles surrounding the pool. The lightning follows you. | Run a tight circle to stay ahead of the stroke. When it ends, step out of melee range so the bite attack does not follow it. |
| Smoke Blast | It starts spitting debris onto your tile, one piece every tick. | After ten pieces it discharges a blast of smoke for up to 59 damage. | Debris takes two ticks to land, so you can stand still for one tick per tile and keep attacking. When the blast comes, stand behind the debris you just left behind. |
| The shadow-spell stun | Yours to choose. Any shadow spell, at any point in a volley. | Freezes it for fifteen ticks and caps your damage at 10 — unless you run behind it and hit the gaping wound on its back. | Ranged shots to the wound deal at least around 65 per cent of your maximum hit; magic rolls for accuracy as normal but deals double. Either one breaks the stun and provokes a special attack in retaliation. |
| The abyssal pathfinder | Spawns when the enrage phase starts, in the north-west corner unless debris is in the way. | Creates a 5x5 area you must stand inside. Outside it, the Leviathan's attacks pierce your protection prayers and your own damage drops. | Stay in the glow. Inside it you are granted perfect accuracy and a raised minimum hit — at least 20 per cent of your maximum — or doubled damage instead if you are attacking with magic. |
- Mechanic
- The orb volley
- How you see it coming
- The colour of the orb and of the lure on its head. Blue for magic, green for ranged, orange for melee.
- What it does
- Damage on impact — up to 32, 24 and 50 respectively if the prayer is wrong. Protection prayers block them completely.
- Your answer
- Flick to the colour. The projectile speed and the gap between attacks both tighten as the fight goes on, so this gets harder without ever getting different.
- Mechanic
- Falling rocks
- How you see it coming
- Shadows on the ground during a volley. The orb for it is the rocks icon rather than a colour.
- What it does
- Up to 25 damage. No prayer blocks it.
- Your answer
- Move out of the shadows. This is the only part of a volley you solve with your feet rather than your prayer book.
- Mechanic
- The roar and permanent debris
- How you see it coming
- It roars at the end of every volley.
- What it does
- Up to 7 chip damage, plus debris falling across the arena. One piece lands on your tile and stays there for the rest of the fight.
- Your answer
- Step at least one tile away to avoid the debris itself. You cannot avoid the chip damage, and you cannot avoid the arena slowly filling up — only outrun it by killing the boss.
- Mechanic
- Lightning Barrage
- How you see it coming
- A barrage of lightning aimed at you, with orbs launched around the arena.
- What it does
- The orbs land with a 1x1 area of effect and never on the tiles surrounding the pool. The lightning follows you.
- Your answer
- Run a tight circle to stay ahead of the stroke. When it ends, step out of melee range so the bite attack does not follow it.
- Mechanic
- Smoke Blast
- How you see it coming
- It starts spitting debris onto your tile, one piece every tick.
- What it does
- After ten pieces it discharges a blast of smoke for up to 59 damage.
- Your answer
- Debris takes two ticks to land, so you can stand still for one tick per tile and keep attacking. When the blast comes, stand behind the debris you just left behind.
- Mechanic
- The shadow-spell stun
- How you see it coming
- Yours to choose. Any shadow spell, at any point in a volley.
- What it does
- Freezes it for fifteen ticks and caps your damage at 10 — unless you run behind it and hit the gaping wound on its back.
- Your answer
- Ranged shots to the wound deal at least around 65 per cent of your maximum hit; magic rolls for accuracy as normal but deals double. Either one breaks the stun and provokes a special attack in retaliation.
- Mechanic
- The abyssal pathfinder
- How you see it coming
- Spawns when the enrage phase starts, in the north-west corner unless debris is in the way.
- What it does
- Creates a 5x5 area you must stand inside. Outside it, the Leviathan's attacks pierce your protection prayers and your own damage drops.
- Your answer
- Stay in the glow. Inside it you are granted perfect accuracy and a raised minimum hit — at least 20 per cent of your maximum — or doubled damage instead if you are attacking with magic.
The two special attacks alternate, and you can find out which one comes first before it happens. After the first roar, look at where the debris settled: east and west means Lightning Barrage is first, north and south means Smoke Blast. That only holds if you did not stun it before the volley ended.
Damage you deal during either special is reduced by 33 per cent for its duration, which is a good reason to spend those windows moving cleanly rather than forcing attacks.
The stun economy is the part worth thinking about before your first kill. It climbs the ladder regardless of what you do. Stunning and hitting the wound — or stunning after you have already taken 25 per cent of its health off — rewinds it to the second rung. The next time you do it, the floor is the third rung, then the fourth, and so on until it is at its fastest attack and there is nothing left to rewind. Spend those rewinds on the rungs you genuinely cannot flick.
| Property | Value |
|---|---|
| Combat level | 798 |
| Attack styles | Melee, Ranged, Magic |
| Attack speed | null ticks |
| Attacks on sight | Yes |
| Poisons you | No |
| Size | 7 tiles |
| Immune to cannon | Yes |
- Property
- Combat level
- Value
- 798
- Property
- Attack styles
- Value
- Melee, Ranged, Magic
- Property
- Attack speed
- Value
- null ticks
- Property
- Attacks on sight
- Value
- Yes
- Property
- Poisons you
- Value
- No
- Property
- Size
- Value
- 7 tiles
- Property
- Immune to cannon
- Value
- Yes
Where The Leviathan Sits in Progression
Within the Desert Treasure II group, the fights below The Leviathan are Duke Sucellus. Nothing in the Desert Treasure II group is harder, which makes The Leviathan the ceiling for this cluster.
Phase by Phase
The ladder: seven rungs, climbed regardless
The escalation is published in full, which makes it the rare boss mechanic you can rehearse before you ever fight it. Each volley is followed by a roar, and each new volley is tighter than the last.
- Three-tick attacks using magic and ranged.
- Two-tick attacks using magic and ranged.
- Two-tick attacks using all three styles.
- One-tick attacks using magic and ranged.
- One-tick attacks using all three styles.
- All three styles, with faster projectiles leaving two ticks to react.
- All three styles, with even faster projectiles leaving one tick to react.
- It moves down this list whether you stun it or not, so time spent not damaging it is time spent making the fight harder.
- The first two rungs are where a comfortable kill does most of its damage. Treat them as the DPS phase rather than the warm-up.
Stunning: a rewind that gets shallower each time
A shadow spell freezes it for fifteen ticks. While stunned, your damage against the front is capped at 10, which is the game telling you plainly that the point of a stun is to run around behind it and hit the exposed wound instead.
Attacking that wound, or stunning it once you have already dealt 25 per cent of its health in damage, sends it back to the second rung of the ladder. Your second stun sends it back only to the third rung, your third only to the fourth, and so on. There is a finite amount of rewinding available in a kill, and spending it early on rungs you could have flicked means having none left for the ones you cannot.
180 hitpoints: enrage, and the pathfinder
At 20 per cent of its health it roars, drops one more set of debris, and an abyssal pathfinder spawns — north-west corner by default, or the next corner clockwise if debris blocks the tile, falling back to the north-west if all four are blocked. Its attack speed becomes two ticks regardless of where it was on the ladder, and it uses only magic and ranged orbs from here, though it will still bite anything standing next to it.
The pathfinder inverts the usual relationship between safety and position. Its 5x5 area is where your prayers work at all: step outside and the Leviathan's attacks pierce protection prayers and your own damage falls off. Inside it you glow, and you are given perfect accuracy with a minimum hit of at least 20 per cent of your maximum — which is exactly why a blowpipe becomes the best thing in your inventory for this phase. If you are attacking with magic instead, you get doubled damage rather than the accuracy.
Debris keeps falling for the whole phase, including the permanent kind, so the arena is shrinking while you are pinned to a 5x5 square. There is no mechanic that removes it; the only answer is to finish the kill. Everything on the floor vanishes the moment it dies.
- Enter enrage as close to 180 as you can manage, with health and prayer topped up, rather than sliding into it mid-volley.
- Beginning the phase during a Smoke Blast does not interrupt the Smoke Blast, so expect to solve both at once if your timing lands there.
- Two webweaver bow specials once you are lit up will finish it outright. The cost is that a Lightbearer will usually not recharge in time for the next kill.
Fight Strategy: Stun windows
- Start each kill above your maximum health — that is what the anglerfish in the loadout are for — so the roar's chip damage never forces an eat mid-volley.
- Open on the first two rungs of the ladder with everything you have, including your Zaryte crossbow special. This is the widest damage window in the fight.
- Flick to the orb colour, and step out of the rock shadows rather than trying to pray them.
- After the first roar, check whether the debris settled east and west or north and south. That tells you which special is coming first, and they alternate from there.
- Save your stuns for the rungs you genuinely cannot hold. When you do stun, run behind it and hit the wound rather than chipping at the front for capped damage.
- Walk it down to just above 180 hitpoints, refill everything, then cross the line when you are ready rather than mid-volley.
- In enrage, live inside the pathfinder's glow, swap to the blowpipe, and finish it before the debris takes your last few tiles.
There is a rhythm to the mid-fight that becomes obvious once you stop treating the specials as interruptions. During a Smoke Blast the debris takes two ticks to land, which means you can hold a tile for exactly one tick, fire, and move — the special is a damage window with movement attached rather than a pause. Lightning Barrage is the stricter of the two, and running a tight circle to stay ahead of the stroke is the reliable version; the precise-movement version that lets you attack through it exists, and it is worth learning after the fight is otherwise routine.
The single most common misunderstanding about this boss is that the stun is a defensive tool. It is not — it is an offensive one with a defensive side effect. Damage against the front is capped at 10 while it is frozen, so a stun you do not follow up by running behind it has cost you a rewind and bought almost nothing. The wound on its back takes at least around 65 per cent of your maximum hit from a ranged shot, which is why a twisted bow earns a slot for that attack alone.
Expect the special attack when the stun breaks. Hitting the wound provokes one as retaliation, so the sequence you should have in mind is stun, reposition, hit the wound, and then immediately be ready to solve either the lightning or the smoke.
Positioning and Movement
Mark the tiles adjacent to the pool, diagonals included, and never stand on them. The bite attack only happens there, it has no warning animation, and it interrupts the volley you were reading.
The arena is a resource that depletes. One piece of debris lands on your tile after every single roar and stays there for the rest of the fight, so the space you have to run Lightning Barrage circles in at the end of a long kill is much smaller than the space you started with. That is an argument for damage rather than caution: a slow kill is a kill fought in a smaller room.
In enrage the geometry becomes fixed. You are tied to a 5x5 area around the pathfinder, and standing outside it is not a small penalty — your protection prayers stop working and your damage drops. If you have any control over where debris lands late in the fight, keeping the north-west corner clear means the pathfinder spawns where you expect it.
Beginner Plan, Then the Advanced One
Your first trips
- Read the ladder before your first kill and accept that you will fall off it somewhere around the one-tick rungs. Knowing where you will fail tells you where to spend your first stun.
- Learn the colours as numbers. Orange melee hits up to 50, blue magic up to 32, green ranged up to 24 — so when two things need doing at once, orange wins.
- Do not pray at the rocks. They are a movement mechanic dressed as an attack, and the shadows on the floor tell you where not to be.
- Use Shadow Rush rather than Shadow Barrage. It stuns identically for a third of the rune cost, and you are going to cast it thousands of times.
- Follow every stun with a run to the back. A stun where you keep hitting the front is 10 damage a shot and a wasted rewind.
- Overheal before each kill rather than topping up during one. Anglerfish exist in this loadout specifically so that the roar and the opening volley do not cost you a movement tick.
- Stop pushing damage at around 200 hitpoints, top everything up, and then start enrage. It is the only phase transition in the fight and it is entirely on your schedule.
Once the kill is boring
- Plan your stuns as a budget rather than as a reaction. You get a rewind to the second rung, then to the third, then to the fourth, and each is worth less than the last — so the correct pattern for most kills is to hold them until the ladder outpaces your flicking rather than to stun on cooldown.
- Learn the Lightning Barrage skip with your weapon's attack speed in mind. It is demonstrated with both four-tick and five-tick weapons and the movement is different for each, so practise the one that matches what you actually hold.
- Add the twisted bow purely for the exposed wound. The minimum hit on that attack is high enough that it usually beats a crossbow shot, and with a Dizana's quiver it takes up only the one inventory slot.
- In Awakened mode the correct habit reverses: rather than letting a volley finish, stun before it ends. The permanent blocker debris there arrives as five pieces in a + formation centred on you rather than one, and letting that accumulate before the enrage phase is close to a death sentence. Stunning also resets your own attack delay, so you get a free shot in before the damage reduction applies.
- Awakened stuns last half as long and the enrage attack speed doubles to a single tick, which is what makes the blowpipe unworkable there despite it being the enrage weapon of choice in normal mode. Its Magic level also rises from 160 to 280, which is precisely the condition a twisted bow scales against.
- The awakened tornado arrives at 50 per cent — 1,350 hitpoints — and deals 40 or more on contact. Lure it as far south as you can before starting enrage, keep the north-west clear so the pathfinder spawns where you planned, and expect to use two extra tiles when running the lightning current with it on the field.
Drops and What The Leviathan Is Worth
Two drops justify the trip: the leviathan's lure and the venator vestige. The lure is one of four pieces gathered from four different bosses, which is why the Leviathan tends to be an entry on a checklist rather than somewhere anyone camps in isolation.
The venator ring is the interesting one, because it feeds straight back into this fight. The recommended setup here notes that a Zaryte crossbow holds best in slot down to 450 hitpoints with the ring and only 380 without it — a rare case of a drop moving the moment at which you should swap weapons inside the fight that drops it.
Drops worth the trip: Venator vestige, leviathan's lure. Whether that is worth your time depends on how many kills an hour you personally get, which is a function of stun windows rather than of your gear list.
Combat Achievements
The Leviathan has Combat Achievement tasks, and a 60 max hit is the number to plan them around: any task that restricts your supplies or your gear is a materially different fight at that damage.
Task lists move with updates — read the current list in game.
Ironman Notes
Slayer masters who assign The Leviathan: Konar, Nieve, Duradel. Each kill is 1777.4 Slayer XP.
Without a Grand Exchange, venator vestige, leviathan's lure has to be earned rather than bought, and this is the fastest table it sits on.
Common Mistakes and Death Causes
| What happened | Why it happened | The fix |
|---|---|---|
| Killed by an orange orb while praying magic | Melee is the third style, and it joins the volley on the third rung of the ladder. Players who learned the first two rungs are used to a two-colour fight. | Watch the lure on its head as well as the orb. When melee joins, the flick pattern is genuinely different, not just faster. |
| Bitten out of nowhere | The bite has no warning animation and only triggers when you are directly next to the pool, diagonals included — usually reached by drifting during a special. | Mark those tiles. After Lightning Barrage ends specifically, step back out of melee range before you resume attacking. |
| Boxed in by your own debris | Every roar leaves one permanent piece on your tile. A long kill fills the arena, and Lightning Barrage needs room to circle in. | Treat kill speed as a survival mechanic here. The first two rungs of the ladder are where that speed comes from. |
| Ran out of stuns | Each rewind is shallower than the last, so stunning early and often means arriving at the fastest rungs with nothing left to spend. | Hold the first stun until the ladder is genuinely past your flicking. A rung you can hold is a rung you should not be spending a rewind on. |
| Died in the first seconds of enrage | The phase starts at 180 hitpoints with a roar, more debris and a jump to two-tick attacks, and it does not wait for your prayer bar. | Stop damaging it at around 200, restore fully, and cross the threshold deliberately. |
| Killed while standing outside the glow | Outside the pathfinder's 5x5 area, its attacks pierce protection prayers entirely. Praying correctly is not enough there. | Treat the glow as the only safe ground in the phase. If the pathfinder is somewhere awkward, move to it before you take another shot. |
| Caught by the Smoke Blast | The blast deals up to 59 damage, and it arrives after the tenth piece of debris — often while a player is still counting. | Stand behind the debris you have already left behind. The trail you created is the cover. |
- What happened
- Killed by an orange orb while praying magic
- Why it happened
- Melee is the third style, and it joins the volley on the third rung of the ladder. Players who learned the first two rungs are used to a two-colour fight.
- The fix
- Watch the lure on its head as well as the orb. When melee joins, the flick pattern is genuinely different, not just faster.
- What happened
- Bitten out of nowhere
- Why it happened
- The bite has no warning animation and only triggers when you are directly next to the pool, diagonals included — usually reached by drifting during a special.
- The fix
- Mark those tiles. After Lightning Barrage ends specifically, step back out of melee range before you resume attacking.
- What happened
- Boxed in by your own debris
- Why it happened
- Every roar leaves one permanent piece on your tile. A long kill fills the arena, and Lightning Barrage needs room to circle in.
- The fix
- Treat kill speed as a survival mechanic here. The first two rungs of the ladder are where that speed comes from.
- What happened
- Ran out of stuns
- Why it happened
- Each rewind is shallower than the last, so stunning early and often means arriving at the fastest rungs with nothing left to spend.
- The fix
- Hold the first stun until the ladder is genuinely past your flicking. A rung you can hold is a rung you should not be spending a rewind on.
- What happened
- Died in the first seconds of enrage
- Why it happened
- The phase starts at 180 hitpoints with a roar, more debris and a jump to two-tick attacks, and it does not wait for your prayer bar.
- The fix
- Stop damaging it at around 200, restore fully, and cross the threshold deliberately.
- What happened
- Killed while standing outside the glow
- Why it happened
- Outside the pathfinder's 5x5 area, its attacks pierce protection prayers entirely. Praying correctly is not enough there.
- The fix
- Treat the glow as the only safe ground in the phase. If the pathfinder is somewhere awkward, move to it before you take another shot.
- What happened
- Caught by the Smoke Blast
- Why it happened
- The blast deals up to 59 damage, and it arrives after the tenth piece of debris — often while a player is still counting.
- The fix
- Stand behind the debris you have already left behind. The trail you created is the cover.
A failed trip costs time rather than much else. The reclamation fee is cut by 75 per cent for your first five kills — roughly the period in which you are still learning where the melee orb fits into the volley — and the grave itself sits by the rowboat in the Scar.
Mid-fight, the honest recovery move is a stun. If you have lost the flick pattern, freezing it and repositioning buys fifteen ticks to fix your prayer and your health — just be aware you have spent a rewind to do it, and that hitting the wound will provoke a special attack on the way out.
FAQ
Why does the wiki tell me to stun it less?
Because the rewind degrades. The first qualifying stun sends it back to the second rung of its attack ladder, the second only to the third rung, the third only to the fourth, and so on until there is nothing left to rewind. If you stun on the early rungs — which you could have flicked — you will have no rewind available when the projectiles are arriving one tick apart.
Does the stun qualify if I do not hit the wound?
There are two qualifying conditions. Stunning and attacking the gaping wound on its back is one; stunning after you have already dealt 25 per cent of its health in damage is the other. A stun where you keep chipping the front outside that damage threshold is a stun you have mostly wasted, and your damage is capped at 10 while it is frozen anyway.
Which special attack comes first?
Look at where the debris settled after the first roar, assuming you did not stun before the volley ended. East and west means Lightning Barrage; north and south means Smoke Blast. After that it alternates.
Shadow Rush or Shadow Barrage?
Rush. It stuns exactly as effectively and costs a third as much per cast. You can autocast it from something light like a Thammaron's sceptre, but manual casting is the same number of clicks and saves the inventory slot.
Why did my prayers stop working during the last phase?
You were outside the abyssal pathfinder's area. In the enrage phase its 5x5 zone is the only ground where protection prayers hold — step out of it and the attacks pierce them and your own damage drops. You can see whether you are inside it because your character glows.
Should I bring a blowpipe or a crossbow?
Both, if you can. With Masori a Zaryte crossbow leads until the boss is down to 450 hitpoints, or 380 without a venator ring, and a toxic blowpipe with dragon darts takes over below that. The blowpipe is also the best thing to hold inside the pathfinder, because its minimum hit cannot fall below 20 per cent of its maximum there.
Can I kill it with magic?
Yes, with caveats. A Tumeken's shadow competes with and can beat lower-tier ranged weapons here thanks to its accuracy passive, and a Volatile nightmare staff special into the exposed wound is a real damage spike. Without several ancestral pieces and a saturated heart, though, ranging it is the better plan.
Related Guides
Bottom Line
The Leviathan is an honest fight with a dishonest reputation. Nothing it does is hidden — the orbs announce themselves twice, the escalation is published as a seven-item list, and the specials alternate in an order you can read off the floor after the first roar. What makes it hard is that it gets faster on a timer you do not control, and that the one lever which slows it down is worth less each time you pull it.
So the fight is a spending problem: bank damage on the slow rungs, hold your stuns for the rungs you cannot hold, and cross into enrage on your own terms with the pathfinder where you expect it. If the missing piece is the amulet of the eye that makes the trip bearable before the scarred tablet drops, that comes out of Guardians of the Rift.
If The Leviathan is blocking a Combat Achievement or an unlock you actually want, our PvM service is done by hand — no automation. Otherwise the bosses list has the full index.
The Leviathan — DT2 boss, difficulty 5/5. Combat values here — hitpoints, max hits, attack styles and speed, Defence and Magic levels, immunities and Slayer requirements — were read from the Old School RuneScape Wiki infobox for The Leviathan on 2026-08-03. Kill rates, GP per hour and item prices are deliberately absent because they move with balance patches and the Grand Exchange. Mechanics, gear tiers and phase behaviour on this page were checked against The Leviathan/Strategies on 4 August 2026.
Need a trusted team? Bils Services
Enjoyed the guide?
Drop a like — it helps other Adventurers find the good stuff.
Community
Comments
Silence in the hall…
Be the first Adventurer to leave a mark.
Join the thread
Add a comment
Tips, drops, or “this carried my account” — keep it useful.
bilsservices · bils services · bilsservices.com

