


OSRS Cerberus Guide: Ghosts, Gear, Prayer & Drops
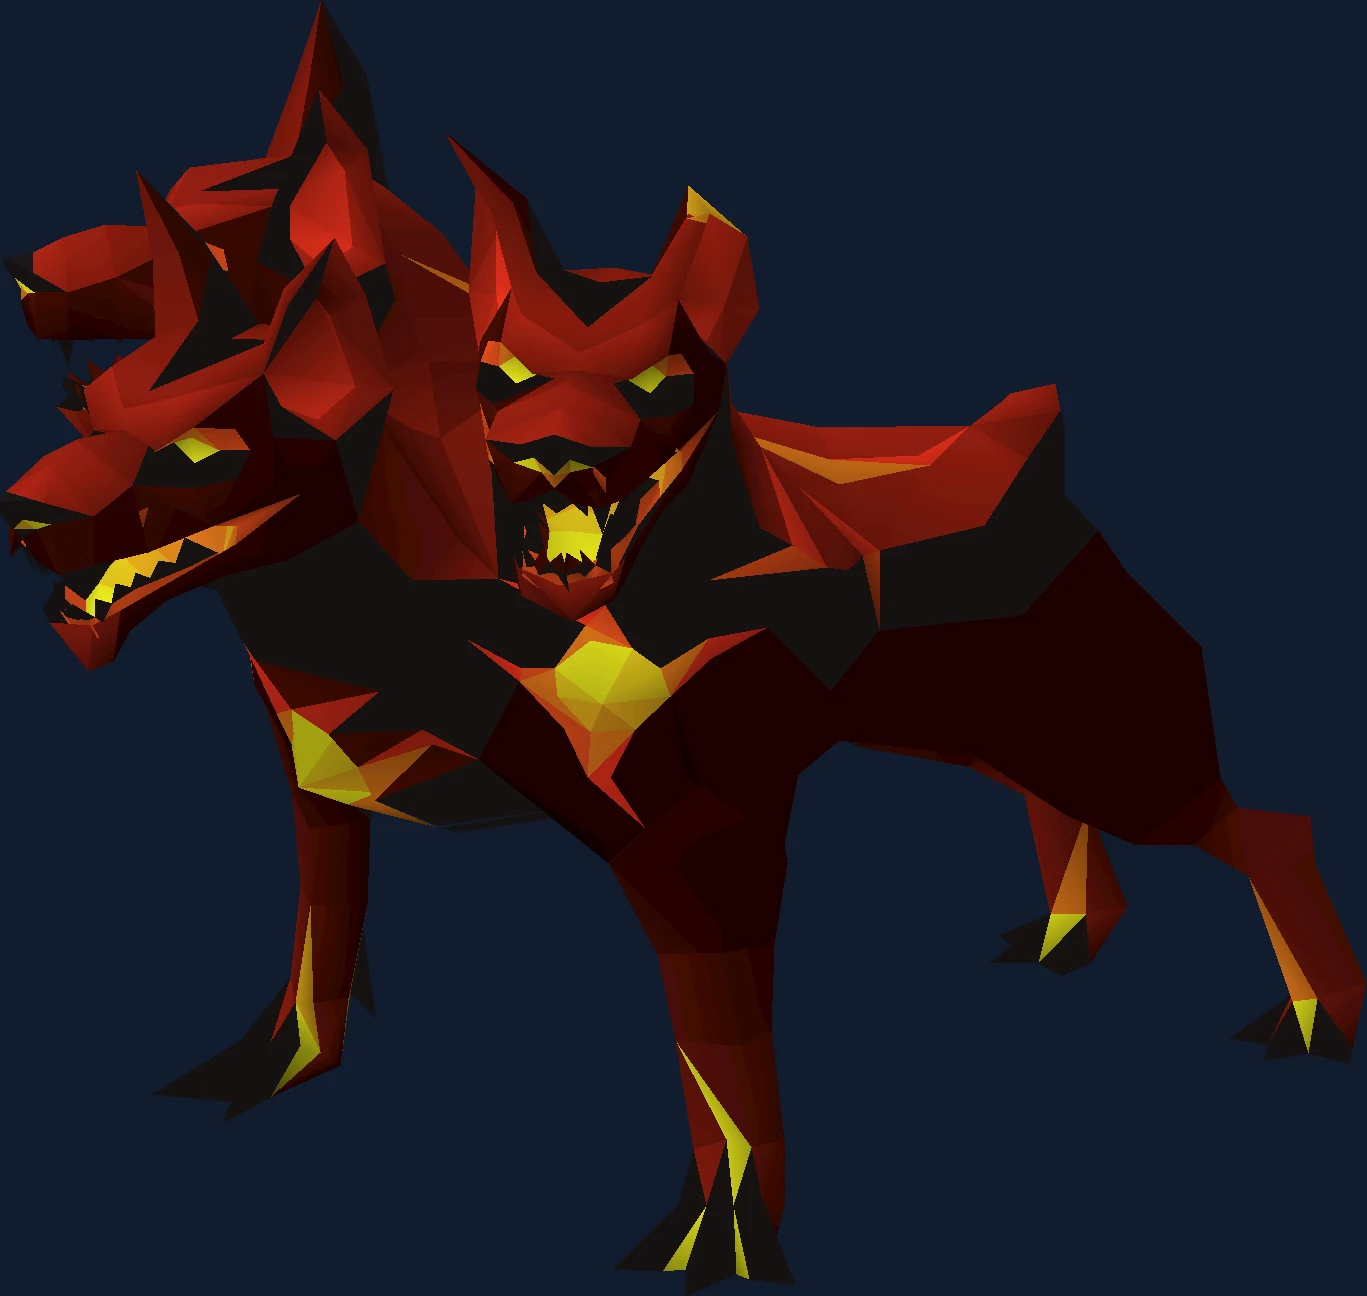
Cerberus guide focused on Summoned Souls, prayer timing, and smouldering stone goals.
Why People Fight Cerberus
Almost nobody kills Cerberus because they enjoy the fight. They kill her because she is the only monster in the game that drops the primordial, pegasian and eternal crystals, and those three crystals are what turn dragon boots, ranger boots and infinity boots into primordials, pegasians and eternals — the boots almost every serious melee, ranged and magic setup is built on. If you have ever looked at a max-gear setup and wondered where the boots come from, the answer is a hellhound in Taverley Dungeon.
That makes her an unusual boss to learn. She is not a step on a raid ladder and she is not a money-making method you grind indefinitely — she is a specific errand with a specific reward, and most players do her in bursts on Slayer tasks until the boots are done. The good news is that she is a mechanically honest fight. Everything she does is on a counter, the counter never changes, and once you can count her attacks she becomes almost boring. The bad news is that the counter is the entire fight, and players who try to react to her instead of counting her lose.
She is also a Slayer boss in the strict sense: you cannot damage her without the level and the task, which means she cannot be a spontaneous decision.
Its own attacks are melee (stab), ranged and magic, so Protect from Melee, Missiles and Magic all have a job.
In our index it sits in the Slayer boss group at difficulty 3 of 5, where kill times come down to ghost prayer order.
| Field | Detail |
|---|---|
| Classification | Slayer boss (Slayer Monster) |
| Group | Slayer boss |
| Difficulty | 3 / 5 |
| Solo or team | Solo |
| Access requirement | 91 Slayer + hellhounds task |
| Notable reward | Primordial / pegasian / eternal crystals, smouldering stone |
| Signature mechanic | Ghost prayer order |
| Hitpoints | 600 |
| Max hits | 23 |
| Released | 27 August 2015 |
- Field
- Classification
- Detail
- Slayer boss (Slayer Monster)
- Field
- Group
- Detail
- Slayer boss
- Field
- Difficulty
- Detail
- 3 / 5
- Field
- Solo or team
- Detail
- Solo
- Field
- Access requirement
- Detail
- 91 Slayer + hellhounds task
- Field
- Notable reward
- Detail
- Primordial / pegasian / eternal crystals, smouldering stone
- Field
- Signature mechanic
- Detail
- Ghost prayer order
- Field
- Hitpoints
- Detail
- 600
- Field
- Max hits
- Detail
- 23
- Field
- Released
- Detail
- 27 August 2015
Is Cerberus the Right Fight for You Yet?
Cerberus sits in an awkward spot on the difficulty curve. Mechanically she is easier than most bosses that drop items this valuable, but she is gated behind a high Slayer level and she punishes low DPS harder than she punishes mistakes — a slow kill means more attack cycles, which means more soul attacks draining your prayer, which is what ends trips.
You are ready for this fight if:
- You have the Slayer level and a task. Wild pies can boost into the requirement from 86, but the boost has to hold for the whole kill, which makes it a stopgap rather than a plan.
- You have a crush weapon you are happy to use for a few hundred kills. She is weak to melee and specifically to crush.
- You have the Agility for the Taverley shortcuts. Without them the run-in from the dungeon entrance is long enough to matter on every single trip.
- You can hold a protection prayer through a three-part attack without panicking, because her opening move is exactly that.
Come back later if any of these are true:
- Your prayer restoration is thin. The souls attack drains prayer on purpose, and it is the resource that decides trip length here rather than food.
- You are relying on ranged or magic because your melee gear is weak. Both work, and the twisted bow genuinely works well, but you are fighting a monster with a low Defence level and a melee weakness with the styles she resists.
- You are a Hardcore Ironman who has not watched the fight yet. The souls-and-lava overlap is a real death, and it arrives on a schedule you can learn beforehand.
Access Requirements
Cerberus is gated behind 91 Slayer + hellhounds task.
91 Slayer + hellhounds task also tends to sit alongside the other Slayer boss gates, so it is usually cheaper to clear them together than to come back for each one. The boss requirements checklist lists them by group.
Location and How to Get There
Cerberus is found in Cerberus' Lair, deep beneath the Taverley Dungeon past the poisonous spiders.
Enter the Taverley Dungeon, work down to the hellhound area, and take the cave entrance in its north-east corner. There are three separate rooms she can occupy, so expect to check more than one when you arrive.
Her lair is inside Taverley Dungeon, in the hellhound area — there is a small opening you crawl into. Getting there is the part players underestimate. The two clean approaches are teleporting to Falador and taking the wall shortcut near the west bank, or moving your player-owned house to Taverley and running south out of the portal.
The Agility shortcuts inside the dungeon are close to mandatory. The wiki recommends 65 Agility as a floor before attempting her at all, because the normal route from the entrance is impractical to run repeatedly. The pipe shortcut needs 70 and the wall trap needs 80, and both are boostable, so 65 and 75 are the practical minimums with a summer pie. Taking the shortcuts also avoids needing a dusty key.
Two small habits save damage on the way in. If you enter via the pipe, have Protect from Magic on before you go through, because a blue dragon can catch you on the far side. If you use the wall spikes, attack a skeleton and let it hit you once before jumping, so a wandering poison spider does not take the free hit instead.
Key master teleports remove the run entirely: they drop you directly outside the lair. Nothing needs unlocking — they are an item, and Cerberus drops them in batches, so the first few trips pay for every trip after them.
Recommended Stats and Gear at Three Budgets
| Skill | Recommended | What it changes |
|---|---|---|
| Slayer | 91 | Hard requirement. You cannot damage her below it, and you need a Cerberus or hellhound task on top. |
| Attack, Strength, Defence | 85+ | Kill speed, which is the real difficulty dial here — a faster kill sees fewer soul attacks. |
| Ranged | 75+ | Only if you are going the bow route, which is legitimate despite her ranged resistance. |
| Prayer | 70+ | Piety. Rigour at 74 if you are ranging her. |
| Agility | 65 minimum, 70 and 80 for the shortcuts | The run-in. Below 65 the trip to her lair is impractical to repeat. |
| Magic | 76, or 80 for Death Charge | Thralls, via the Arceuus spellbook and A Kingdom Divided. Optional but free damage. |
- Skill
- Slayer
- Recommended
- 91
- What it changes
- Hard requirement. You cannot damage her below it, and you need a Cerberus or hellhound task on top.
- Skill
- Attack, Strength, Defence
- Recommended
- 85+
- What it changes
- Kill speed, which is the real difficulty dial here — a faster kill sees fewer soul attacks.
- Skill
- Ranged
- Recommended
- 75+
- What it changes
- Only if you are going the bow route, which is legitimate despite her ranged resistance.
- Skill
- Prayer
- Recommended
- 70+
- What it changes
- Piety. Rigour at 74 if you are ranging her.
- Skill
- Agility
- Recommended
- 65 minimum, 70 and 80 for the shortcuts
- What it changes
- The run-in. Below 65 the trip to her lair is impractical to repeat.
- Skill
- Magic
- Recommended
- 76, or 80 for Death Charge
- What it changes
- Thralls, via the Arceuus spellbook and A Kingdom Divided. Optional but free damage.
These are recommended stats rather than gates, with the single exception of Slayer. You can kill her below them; you will just do it slowly, and slow is the thing that costs you prayer potions here.
| Slot | Starting out | Mid game | Best in slot |
|---|---|---|---|
| Weapon | Arclight on stab, or a Tzhaar-ket-om if you are flinching | Inquisitor's mace, Osmumten's fang or an abyssal bludgeon | Scythe of vitur on crush, or Emberlight |
| Head | Slayer helmet — you are on task anyway, so the bonus is free | Slayer helmet (i) | Slayer helmet (i) |
| Body and legs | Barrows body and legs, or a fighter torso | Bandos, blood moon or oathplate | Inquisitor's hauberk and plateskirt with a crush weapon, otherwise Torva |
| Shield | Dragonfire shield | Dragon defender | Avernic defender, with a spectral spirit shield swapped in for the souls |
| Boots | Dragon boots | Guardian or echo boots | Primordial boots — the ones you came here to build |
| Ring | Ring of suffering (i) or ring of the gods (i) | Berserker ring (i), or a Lightbearer if you lean on specials | Ultor ring |
| Amulet and cape | Amulet of glory, fire cape when you have it | Amulet of fury or blood fury | Amulet of rancour or torture, infernal cape |
- Slot
- Weapon
- Starting out
- Arclight on stab, or a Tzhaar-ket-om if you are flinching
- Mid game
- Inquisitor's mace, Osmumten's fang or an abyssal bludgeon
- Best in slot
- Scythe of vitur on crush, or Emberlight
- Slot
- Head
- Starting out
- Slayer helmet — you are on task anyway, so the bonus is free
- Mid game
- Slayer helmet (i)
- Best in slot
- Slayer helmet (i)
- Slot
- Body and legs
- Starting out
- Barrows body and legs, or a fighter torso
- Mid game
- Bandos, blood moon or oathplate
- Best in slot
- Inquisitor's hauberk and plateskirt with a crush weapon, otherwise Torva
- Slot
- Shield
- Starting out
- Dragonfire shield
- Mid game
- Dragon defender
- Best in slot
- Avernic defender, with a spectral spirit shield swapped in for the souls
- Slot
- Boots
- Starting out
- Dragon boots
- Mid game
- Guardian or echo boots
- Best in slot
- Primordial boots — the ones you came here to build
- Slot
- Ring
- Starting out
- Ring of suffering (i) or ring of the gods (i)
- Mid game
- Berserker ring (i), or a Lightbearer if you lean on specials
- Best in slot
- Ultor ring
- Slot
- Amulet and cape
- Starting out
- Amulet of glory, fire cape when you have it
- Mid game
- Amulet of fury or blood fury
- Best in slot
- Amulet of rancour or torture, infernal cape
Two details in that table are worth spelling out because they are the difference between a setup that works and one that reads correctly but fights badly. First, she is weak to crush specifically, which is why the mace and the scythe-on-crush appear rather than the slash options you might reach for by default. Inquisitor's is only the best body and legs choice if your weapon is a crush weapon; with anything else, Torva is the pick. Second, she is a demonic creature, so Arclight and Emberlight get their demonbane bonus here — set them to stab, unless you are wearing oathplate armour, which gives enough slash accuracy to change the answer.
Ranged is viable despite her resisting it. A twisted bow performs well because her offensive stats are extremely high, which is exactly what the bow scales against, and a scorching bow lands in the same territory as a non-maximum melee setup. If your ranged gear is genuinely better than your melee gear, use it — the style chart matters less than the gear gap.
If you are extending a Slayer task, switching to a bracelet of slaughter while she is nearly dead is the trick worth knowing, since it costs you nothing on a kill that is already finished.
| Check | Value |
|---|---|
| Prayers for its own attacks | 3 — Protect from Melee, Missiles and Magic |
| Its Defence level | 100 |
| Its Magic level | 220 |
| Its lowest defence bonus, per its infobox | crush |
| Elemental weakness | 40% to water spells |
| Monster attributes | demon |
- Check
- Prayers for its own attacks
- Value
- 3 — Protect from Melee, Missiles and Magic
- Check
- Its Defence level
- Value
- 100
- Check
- Its Magic level
- Value
- 220
- Check
- Its lowest defence bonus, per its infobox
- Value
- crush
- Check
- Elemental weakness
- Value
- 40% to water spells
- Check
- Monster attributes
- Value
- demon
- Tagged as a demon: demonbane weapons apply.
- 220 Magic level rewards magic-defence scaling weapons.
Inventory and Supplies
| What | Why it is there |
|---|---|
| Prayer restoration, more than you think | This is the resource that ends trips. Each blocked soul attack drains prayer, and there are three souls per attack, so plan around prayer rather than food. |
| Food, mostly for the lava | Her regular attacks are prayable. The damage you actually take is lava pools and any soul you mistime, so food is a mistake budget rather than a sustain plan. |
| A divine combat potion | The stat drain from a long trip costs you kill speed, and kill speed is what controls how many soul attacks you see. |
| A spectral spirit shield, if you own one | Swapped in only while the souls are attacking. It halves the prayer drain, which directly lengthens the trip. |
| A one-handed weapon alongside a two-hander | If you are using a scythe and swapping to a spectral, you need something one-handed to keep attacking during the swap. |
| House teleport, and a rune pouch if you are on Arceuus | The house teleport is the fast reset. The pouch is for thralls and, if you have no spectral, Ward of Arceuus. |
- What
- Prayer restoration, more than you think
- Why it is there
- This is the resource that ends trips. Each blocked soul attack drains prayer, and there are three souls per attack, so plan around prayer rather than food.
- What
- Food, mostly for the lava
- Why it is there
- Her regular attacks are prayable. The damage you actually take is lava pools and any soul you mistime, so food is a mistake budget rather than a sustain plan.
- What
- A divine combat potion
- Why it is there
- The stat drain from a long trip costs you kill speed, and kill speed is what controls how many soul attacks you see.
- What
- A spectral spirit shield, if you own one
- Why it is there
- Swapped in only while the souls are attacking. It halves the prayer drain, which directly lengthens the trip.
- What
- A one-handed weapon alongside a two-hander
- Why it is there
- If you are using a scythe and swapping to a spectral, you need something one-handed to keep attacking during the swap.
- What
- House teleport, and a rune pouch if you are on Arceuus
- Why it is there
- The house teleport is the fast reset. The pouch is for thralls and, if you have no spectral, Ward of Arceuus.
The quantities are deliberately absent. How many prayer potions you need depends on whether you have a spectral spirit shield, whether you are running Ward of Arceuus, how fast your setup kills, and whether you flick — the same trip can want two doses or ten. Bring what your first few kills tell you to bring.
Prayer and Spellbook
Protect from Magic is the prayer to hold for the fight. All three of her attack styles hit for the same maximum, all three are fully blocked by the matching protection prayer, and magic is the one to keep up as the default because it covers the style you cannot avoid by positioning.
The important rule about her prayers is a timing rule: a protection prayer stops the damage entirely, but only if it is already active at the moment the attack is launched. Switching after you see the projectile is too late. This is why the fight rewards counting instead of reacting.
The Arceuus spellbook is worth the switch if you have it. Thralls add damage for no attention cost, which shortens the fight and therefore reduces the number of soul attacks you have to survive. Death Charge gives you specials more often if you are built around them. And if you do not own a spectral spirit shield, Ward of Arceuus cuts the soul prayer drain by a third — but be aware it does nothing about lava pool damage.
Demonic Offering is the advanced option. Because you only need the correct prayer active as each soul attack lands, and not any particular amount of prayer, you can survive a souls sequence with almost nothing left: block the first two, cast Demonic Offering on the ash from a previous kill at zero prayer, and pray against the third.
Mechanics That Decide the Fight
| Mechanic | How you see it coming | What it does | Your answer |
|---|---|---|---|
| Triple attack | It is her opening move, then every tenth attack after that. You do not need a tell — you need a count. | A magic, a ranged and a melee attack two ticks apart. The melee part lands regardless of your distance from her. | Hold one protection prayer through it. All three parts share the same maximum hit and all three are blockable, so the goal is not to dodge but to already be praying. |
| Summoned souls | She howls, and three souls rise behind the archaic skull. This only begins once she is below 400 hitpoints, and then it is every seventh attack. | Three attacks, one per style, in a random order but always resolving west to east. Unblocked, each hits hard; blocked, each drains a chunk of prayer instead. | Read the colours — red is melee, blue is magic, green is ranged — and switch west to east in that order. Cycling to the next prayer the instant the current soul drains you is the reliable rhythm. |
| Lava pools | A growl, and three pools form. Only below 200 hitpoints, then every fifth attack. | One pool spawns on your tile and two land randomly. Standing on a pool as it forms hurts; standing in one afterwards keeps hurting every couple of ticks. | Move. If you are outside melee range the pool animation gives you time to react; inside melee range you only escape it if you were already moving when the attack began. |
| Fire wall | The flames at the entrance, present from the start. | Stops you killing her from safety, and chips you each time you pass through it. | Nothing, except knowing it is there. It is also your reset button: walking back over it is how you restart a fight you have mismanaged. |
| Auto-healing | She sits down and loses her attack option. | If nobody is in the chamber she returns to idle and restores all the health you took off her. | Do not leave a wounded Cerberus. This is also why she is unattackable for the moment after she spawns — she has to stand up first. |
- Mechanic
- Triple attack
- How you see it coming
- It is her opening move, then every tenth attack after that. You do not need a tell — you need a count.
- What it does
- A magic, a ranged and a melee attack two ticks apart. The melee part lands regardless of your distance from her.
- Your answer
- Hold one protection prayer through it. All three parts share the same maximum hit and all three are blockable, so the goal is not to dodge but to already be praying.
- Mechanic
- Summoned souls
- How you see it coming
- She howls, and three souls rise behind the archaic skull. This only begins once she is below 400 hitpoints, and then it is every seventh attack.
- What it does
- Three attacks, one per style, in a random order but always resolving west to east. Unblocked, each hits hard; blocked, each drains a chunk of prayer instead.
- Your answer
- Read the colours — red is melee, blue is magic, green is ranged — and switch west to east in that order. Cycling to the next prayer the instant the current soul drains you is the reliable rhythm.
- Mechanic
- Lava pools
- How you see it coming
- A growl, and three pools form. Only below 200 hitpoints, then every fifth attack.
- What it does
- One pool spawns on your tile and two land randomly. Standing on a pool as it forms hurts; standing in one afterwards keeps hurting every couple of ticks.
- Your answer
- Move. If you are outside melee range the pool animation gives you time to react; inside melee range you only escape it if you were already moving when the attack began.
- Mechanic
- Fire wall
- How you see it coming
- The flames at the entrance, present from the start.
- What it does
- Stops you killing her from safety, and chips you each time you pass through it.
- Your answer
- Nothing, except knowing it is there. It is also your reset button: walking back over it is how you restart a fight you have mismanaged.
- Mechanic
- Auto-healing
- How you see it coming
- She sits down and loses her attack option.
- What it does
- If nobody is in the chamber she returns to idle and restores all the health you took off her.
- Your answer
- Do not leave a wounded Cerberus. This is also why she is unattackable for the moment after she spawns — she has to stand up first.
The three specials run on independent counters, which means they collide. When two are due on the same attack she resolves them in a fixed priority: triple attack first, then souls, then lava. There is also roughly a one-in-ten chance she skips a scheduled souls or lava attack and throws a normal one instead, so a counter that seems to have slipped has probably not — she just declined.
The counter is worth memorising as a shape rather than a list. Her first attack is the triple, and another follows every tenth normal attack after it — so 11, 21, 31. Souls are due every seventh attack once she is under 400, and lava every fifth once she is under 200, but the priority order decides collisions: triple beats souls, souls beat lava. That means souls actually land on 7, 14 and 28 rather than on 21, because attack 21 is a triple. There is also a 10% chance she skips a souls or lava special and throws a normal attack instead, so treat the count as a plan rather than a guarantee. The collision that kills people is 14 and 15: souls immediately followed by lava.
| Property | Value |
|---|---|
| Combat level | 318 |
| Attack styles | Stab, Ranged, Magic |
| Attack speed | 6 ticks |
| Attacks on sight | Yes |
| Poisons you | No |
| Size | 5 tiles |
| Immune to cannon | No |
| Immune to thralls | No |
| Slayer requirement | 91 |
- Property
- Combat level
- Value
- 318
- Property
- Attack styles
- Value
- Stab, Ranged, Magic
- Property
- Attack speed
- Value
- 6 ticks
- Property
- Attacks on sight
- Value
- Yes
- Property
- Poisons you
- Value
- No
- Property
- Size
- Value
- 5 tiles
- Property
- Immune to cannon
- Value
- No
- Property
- Immune to thralls
- Value
- No
- Property
- Slayer requirement
- Value
- 91
Where Cerberus Sits in Progression
Within the Slayer boss group, the fights below Cerberus are Kraken and Thermonuclear Smoke Devil. Above it sit Araxxor and Abyssal Sire.
Fight Strategy: Ghost prayer order
- Turn on Protect from Magic before she stands up, and start the kill standing underneath her.
- Eat the opening triple attack behind your prayer and start counting from there. One is the triple; the count never resets.
- Push damage hard while she is above 400. Nothing she does in this window is more complicated than the triple attack, and every hitpoint you take off now is a hitpoint you are not taking off while dodging pools.
- At attack 7, if she is under 400, switch to the souls. Read the colours west to east and change prayer as each one drains you.
- From under 200, add the pools to your count. Attacks 14 and 15 are the dangerous pair — deal with the souls first and accept a pool hit if you have to choose.
- Finish her rather than nursing her. A slow last quarter is where the prayer bill is run up.
Standing under her is not a flourish. She attacks on a six-tick cycle and a scythe swings on a five-tick cycle, so by stepping under her for a few ticks and coming back out you can fit two of your attacks into one of hers. Done properly this removes a large slice of her health and can end the fight before she ever gets to summon souls, which is the cleanest possible outcome.
If you use ranged, you get a genuine mechanical advantage on the pools: the pool targeted at you does not land on the same tick she starts the animation, so you have more time to step away and can keep your attention on the souls. Melee players do not get that grace and have to solve it by counting instead.
Positioning and Movement
There are only two positions that matter here: under her, and out of melee range. Under her is where you go to abuse the tick difference and to set up a flinch. Out of melee range is where you go if you want time to see lava pools forming.
What gets people killed is drifting between the two without deciding. Standing at the edge of melee range gives you the pool timing of a melee player and the damage of neither. Pick one.
The pools also change the geometry of the room as the fight goes on, and there is a version of this fight where you back yourself into a corner surrounded by lava while a souls attack lands. Keep an eye on where the clear tiles are before you need them, not after.
Beginner Plan, Then the Advanced One
Your first trips
- Watch one kill before you take one. Everything she does is on a fixed counter, so a single viewing tells you the entire fight — this is unusually true of Cerberus and not true of most bosses.
- Bring more prayer restoration than a guide suggests, and fewer supplies you will not use. Your first trips will be slow, and slow trips cost prayer.
- Count out loud, or at least deliberately. The whole skill of this fight is knowing whether the next attack is number 7 or number 8.
- Use the no-ghosts method for your first attempts. Take her to just above 400 hitpoints, then stop attacking and wait for her fourteenth attack — doing that guarantees no souls until attack 28, which effectively gives you a fight with only one mechanic in it. Put on defensive gear while you wait, and step out of melee range.
- If you overshoot and drop her below 400 too early, walk back over the entrance flames. That resets the fight cleanly, and it costs you a minute rather than a trip.
- Accept a pool hit rather than a soul hit, every time. One is a manageable chunk of damage; the other is a large one plus a broken prayer rhythm.
Once the kill is boring
- Learn the tick manipulation under her properly. Getting two scythe hits per attack cycle is the single largest improvement available to a melee setup here, and it shortens the fight enough to skip mechanics entirely.
- Run the spectral swap on souls only. Holding it all fight costs damage; holding it for three attacks costs almost nothing and halves the drain that ends your trip.
- Practise the Demonic Offering recovery so a souls attack at low prayer stops being fatal. Blocking two, offering at zero, and blocking the third is a real technique rather than a trick.
- The Dharok's red-click method is the resource-free extreme: drop to one hitpoint for maximum Dharok's damage, attack, walk under her, and click the exit portcullis so your character does not walk out. Done right she never retaliates, which means no souls and no pools at all, so the only things you use up are boost potions and whatever prayer your offensive prayers drain. Kill times are long enough that it is a deliberate trade rather than an upgrade, and it is a bad idea on a Hardcore account, since one slip is a death.
- A Tzhaar-ket-om with a slayer helmet and a berserker necklace flinches nearly as well as Dharok's if you do not own the set, and it is safer because you keep full health.
Drops and What Cerberus Is Worth
Cerberus has a narrow, specific reward identity, and it is the reason anyone comes here. She is the only monster in the game that drops the primordial, pegasian and eternal crystals, which upgrade dragon boots, ranger boots and infinity boots into primordials, pegasians and eternals. There is no alternative source and no substitute. They are no longer strictly best in slot for melee — Avernic treads sit above primordials now — but they remain the boots the great majority of accounts are aiming at, and the ranged and magic pairs are still the top of their slots.
She also drops the smouldering stone, which combines with a dragon axe, pickaxe or harpoon to make the infernal versions — the tools that smelt or cook as you gather. For a lot of accounts that is the quieter but more immediately useful drop, since it changes how skilling feels rather than adding a stat line.
We do not print prices for any of these. Crystal values move with the Grand Exchange and with whatever the current best-in-slot conversation is, so any figure written here would be wrong within weeks.
Drops worth the trip: Primordial / pegasian / eternal crystals, smouldering stone. Whether that is worth your time depends on how many kills an hour you personally get, which is a function of ghost prayer order rather than of your gear list.
Combat Achievements
The Cerberus tasks reward doing the fight properly rather than doing it fast, which is unusual and welcome. There is no restricted-gear task here; the ones worth planning for are the two that ask you to take no damage from a specific source, and both are really tests of whether you know when the specials arrive rather than tests of your setup. Read the current list in game before you start a trip for them.
Cerberus has Combat Achievement tasks. With a 23 max hit the restrictions are mostly about execution rather than survival.
Task lists move with updates — read the current list in game.
Ironman Notes
Slayer masters who assign Cerberus: Vannaka, Chaeldar, Konar, Nieve, Duradel. Each kill is 690 Slayer XP.
Without a Grand Exchange, primordial / pegasian / eternal crystals, smouldering stone has to be earned rather than bought, and this is the fastest table it sits on.
Cerberus is a good Ironman target and an awkward one. Good, because the boots she enables are permanent upgrades you cannot buy your way to. Awkward, because the fight is balanced around owning a spectral spirit shield and you almost certainly do not.
Without a spectral, Ward of Arceuus is the substitute — a third off the soul drain for the cost of carrying runes. If you have neither, the no-ghosts method is genuinely the right answer rather than a training-wheels version: waiting for attack 14 above 400 hitpoints cuts prayer consumption to a couple of doses a kill if you flick while waiting, and Guthan's is a defensible choice for the wait because its low damage output helps you avoid overshooting 400 while healing you at the same time.
On a Hardcore account, do the no-ghosts version until the counter is automatic, and stay away from the red-click method entirely. It removes the mechanics but it converts every small mistake into a death.
Common Mistakes and Death Causes
| What happened | Why it happened | The fix |
|---|---|---|
| Souls and lava on attacks 14 and 15 | Two specials land back to back. The pools pull your attention and your clicks, and the souls resolve while you are busy moving and eating. | Treat the souls as the only thing that matters in that window. Take the pool damage, keep the prayer cycle, and clean up afterwards. |
| Praying the wrong soul | The souls appear in a random order, so pattern-matching from the last kill gives you the wrong answer. | Read the colours every time, and remember they resolve west to east regardless of the order they appeared in. |
| Switching prayer after seeing the attack | Protection prayers only work if they are already up when the attack launches. Reacting is always too slow. | Switch on the count, not on the animation. |
| Standing in a pool while eating | The pool keeps dealing damage every couple of ticks, so a heal taken without moving is often a net loss. | Move first, eat second. It is nearly always the right order here. |
| Running out of prayer at low health | The souls drain prayer whether you block them or not, and a slow kill sees more of them than a fast one. | Track prayer as the trip resource. If you cannot cover the next souls attack, leave — she resets and you lose nothing but time. |
- What happened
- Souls and lava on attacks 14 and 15
- Why it happened
- Two specials land back to back. The pools pull your attention and your clicks, and the souls resolve while you are busy moving and eating.
- The fix
- Treat the souls as the only thing that matters in that window. Take the pool damage, keep the prayer cycle, and clean up afterwards.
- What happened
- Praying the wrong soul
- Why it happened
- The souls appear in a random order, so pattern-matching from the last kill gives you the wrong answer.
- The fix
- Read the colours every time, and remember they resolve west to east regardless of the order they appeared in.
- What happened
- Switching prayer after seeing the attack
- Why it happened
- Protection prayers only work if they are already up when the attack launches. Reacting is always too slow.
- The fix
- Switch on the count, not on the animation.
- What happened
- Standing in a pool while eating
- Why it happened
- The pool keeps dealing damage every couple of ticks, so a heal taken without moving is often a net loss.
- The fix
- Move first, eat second. It is nearly always the right order here.
- What happened
- Running out of prayer at low health
- Why it happened
- The souls drain prayer whether you block them or not, and a slow kill sees more of them than a fast one.
- The fix
- Track prayer as the trip resource. If you cannot cover the next souls attack, leave — she resets and you lose nothing but time.
The recovery move at Cerberus is unusually forgiving and almost nobody uses it: walk back over the entrance flames. She resets to full and idles, you lose the progress, and you keep your supplies and your account. Because she fully heals when nobody is in the chamber, there is no such thing as a wasted retreat — there is only a fight you have to start again.
If a souls attack catches you at low health and low prayer, the order of operations is prayer first. Restore enough for the next block, then heal. Healing into an unblocked soul just moves the damage.
FAQ
Can I boost into the Slayer requirement?
Wild pies work from 86 Slayer, but the boost has to stay active for the entire kill — if it lapses mid-fight you stop being able to damage her. It is fine for finishing a task you are one level short of and a bad basis for a grind.
Do I need a spectral spirit shield?
No, but the fight is noticeably cheaper with one. It halves the prayer drain from the souls, and prayer is what ends trips here. Ward of Arceuus covers a third of the same gap if you would rather not own one, and the two stack.
Melee or ranged?
Melee on crush is what she is weakest to, and it is the answer if your gear is comparable. That said a twisted bow performs very well here despite her ranged resistance, because her offensive stats are high and that is what the bow scales off. Use whichever of your setups is actually better rather than the one the weakness chart implies.
How do I stop dying to attacks 14 and 15?
Decide in advance that the souls win. When the pool and the souls overlap, take the pool damage, hold the prayer cycle, and sort the health out afterwards. Almost every death in that window comes from trying to solve both.
What is the no-ghosts strategy actually doing?
It exploits the fact that souls only start below 400 hitpoints and arrive every seventh attack. If you hold her above 400 until her fourteenth attack, the next souls window is attack 28 — far enough away that a reasonable setup kills her first. You trade kill speed for almost no prayer consumption.
Is she worth doing outside a Slayer task?
You cannot — she requires the task to damage at all. In practice that makes her a boss you do in blocks whenever hellhounds or Cerberus come up, which is also why unlocking and extending the task matters more here than at most bosses.
Related Guides
Bottom Line
Cerberus is a counting exercise wearing a boss costume. Her attacks arrive on fixed schedules, every one of them is fully blockable or fully dodgeable, and the only genuinely hard moment in the fight is the one you can predict from the moment she stands up. Learn the count, hold Protect from Magic, and treat prayer as the resource that decides your trip length.
If the boots are the goal and the Slayer level is the obstacle, that is a training problem rather than a PvM one — our Slayer training is the relevant service, and the Cerberus fight itself if you would rather skip the learning curve entirely.
If Cerberus is blocking a Combat Achievement or an unlock you actually want, our PvM service is done by hand — no automation. Otherwise the bosses list has the full index.
Cerberus — Slayer boss, difficulty 3/5. Combat values here — hitpoints, max hits, attack styles and speed, Defence and Magic levels, immunities and Slayer requirements — were read from the Old School RuneScape Wiki infobox for Cerberus on 2026-08-03. Kill rates, GP per hour and item prices are deliberately absent because they move with balance patches and the Grand Exchange. Mechanics, gear tiers and phase behaviour on this page were checked against Cerberus/Strategies on 4 August 2026.
Need a trusted team? Bils Services
Enjoyed the guide?
Drop a like — it helps other Adventurers find the good stuff.
Community
Comments
Silence in the hall…
Be the first Adventurer to leave a mark.
Join the thread
Add a comment
Tips, drops, or “this carried my account” — keep it useful.
bilsservices · bils services · bilsservices.com

