


OSRS Abyssal Sire Guide: Requirements, Gear, Mechanics & Drops
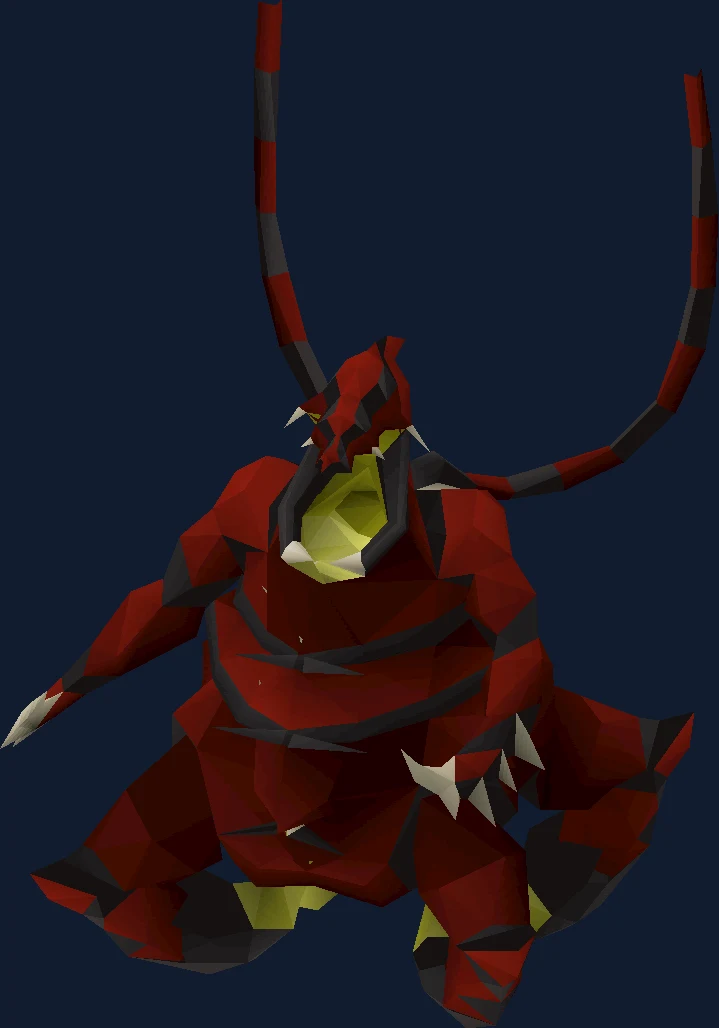
Abyssal Sire Slayer boss guide for unlocks, phase plan, and unique chase.
Why People Fight Abyssal Sire
The first thing to understand about the Abyssal Sire is that hitting it during phase one accomplishes nothing. Any damage you deal in that opening stretch is restored in full when the phase ends; the numbers exist purely to decide whether the boss is disoriented. Players who arrive expecting a health bar to whittle down spend a confusing few minutes watching their work evaporate before realising that phase one is a demolition job with a stopwatch attached, not a fight.
People come anyway, and they come for one item that is not really an item. The unsired is a token you hand to the Font of Consumption, and what comes back might be an abyssal dagger, a piece of the abyssal bludgeon, an abyssal whip, or the abyssal orphan pet. That gambling layer is the Sire's whole personality as a reward: you are not farming a drop, you are farming entries into a second roll. No rates or values appear on this page, because both move and the wiki keeps the current copy.
The fight itself is four distinct problems stacked on top of each other. Break four respiratory systems while the boss is stunned. Stand in melee distance and eat tendril flicks that can reach 66. Get dragged into an explosion that hits for up to 96 and survive it by running in a straight line. Then finish the kill while fifteen minions chew on you, deliberately not killing any of them, because leaving them alive is what stops the miasma pools.
It is gated behind 85 Slayer and an abyssal demon task, and though the Nexus is a multicombat area the Sire itself can only be fought by one player at a time. Stop attacking for about twenty seconds and somebody else can take it from you — which makes the Sire one of the few bosses where hesitating has a social cost as well as a mechanical one.
Its own attack is melee, so Protect from Melee is the prayer it asks for.
In our index it sits in the Slayer boss group at difficulty 4 of 5, where kill times come down to respiratory system phases.
| Field | Detail |
|---|---|
| Classification | Slayer boss (Slayer Monster) |
| Group | Slayer boss |
| Difficulty | 4 / 5 |
| Solo or team | Solo |
| Access requirement | 85 Slayer + abyssal demons task |
| Notable reward | Abyssal dagger, bludgeon pieces, abyssal whip |
| Signature mechanic | Respiratory system phases |
| Hitpoints | 425 |
| Max hits | 66 (Melee), 96 (with explosion) |
| Released | 1 October 2015 |
- Field
- Classification
- Detail
- Slayer boss (Slayer Monster)
- Field
- Group
- Detail
- Slayer boss
- Field
- Difficulty
- Detail
- 4 / 5
- Field
- Solo or team
- Detail
- Solo
- Field
- Access requirement
- Detail
- 85 Slayer + abyssal demons task
- Field
- Notable reward
- Detail
- Abyssal dagger, bludgeon pieces, abyssal whip
- Field
- Signature mechanic
- Detail
- Respiratory system phases
- Field
- Hitpoints
- Detail
- 425
- Field
- Max hits
- Detail
- 66 (Melee), 96 (with explosion)
- Field
- Released
- Detail
- 1 October 2015
Is Abyssal Sire the Right Fight for You Yet?
The Sire is a knowledge check dressed as a stat check. Its recommended levels are high, but the deaths that happen here are almost never caused by being a few levels short — they are caused by killing minions that should have been left alive, or by not knowing that the boss teleports you into an explosion at 140 hitpoints. A well-informed account at the low end of the recommendations will outperform a maxed one seeing the fight for the first time.
You are ready for this fight if:
- You have 85 Slayer and an abyssal demon task, plus a way into the Abyssal Nexus that is not the Wilderness route.
- You can cast Shadow Barrage, or you are content to disorient the Sire by dealing 75 damage with ranged or magic instead.
- You own or can borrow a scorching bow. It one-shots the respiratory systems even with bronze arrows, and it removes the need for ranged switches entirely.
- You are willing to turn Auto Retaliate off and leave it off. The strategy page opens with that instruction for good reason — there are minions everywhere and none of them are worth your attack cycle.
Come back later if any of these are true:
- Your only route into the Nexus is through the Abyss via the Mage of Zamorak. That means a Wilderness run, a skull, and all of your prayer points drained before the fight begins.
- You have never seen the phase three explosion. Ninety-six damage arriving two ticks after a forced teleport is a genuine one-shot on a lot of accounts.
- You intend to fight it with ranged. It works, but the wiki rates it below melee and notes the weaker defence shortens trips against the spawns.
- You are relying on protection prayers to solve the miasma. They do not touch it, and no form of poison protection does either.
Access Requirements
Abyssal Sire is gated behind 85 Slayer + abyssal demons task.
85 Slayer + abyssal demons task also tends to sit alongside the other Slayer boss gates, so it is usually cheaper to clear them together than to come back for each one. The boss requirements checklist lists them by group.
Location and How to Get There
Abyssal Sire is found in the Abyssal Nexus, reached through the Abyss.
You must have visited the Abyss at least once, either through the Mage of Zamorak or the fairy ring network, before the Nexus opens to you. Like every Slayer boss, the Sire is only attackable on an appropriate task.
Fairy ring code DIP puts you in the Abyssal Nexus directly, and that is the route worth arranging your account around. It needs partial completion of Fairytale II - Cure a Queen for fairy ring access.
The alternative is genuinely bad and the wiki says so: entering the Abyss via the Mage of Zamorak and taking the one-way passage on the south side. It requires a run through the Wilderness, it skulls you, and it drains every prayer point you have before you reach the boss. Treat it as a last resort rather than a budget option.
There are four Sires per world, in the north-east, north-west, south-east and south-west corners of the Nexus. Near the Font of Consumption sit four eyes; interacting with one tells you whether another player is already in that chamber, which saves the walk.
For the trip home, the wiki's loadout carries a house tablet or construction cape for the pool and the fairy ring back, with a desert amulet 4 or quest point cape as alternatives. A quick teleport for banking is a separate item from the one that returns you.
Recommended Stats and Gear at Three Budgets
| Skill | Recommended | What it changes |
|---|---|---|
| Slayer | 85, with an abyssal demon task | The only hard gate. Boss tasks for the Sire itself also qualify. |
| Attack and Strength | 90 or higher | Phase two and three are melee phases with a real health bar behind them, and slow kills mean more spawns maturing into scions. |
| Defence | 90 or higher | Most incoming damage in this fight is unprayable chip from minions rather than boss hits, which is exactly what Defence answers. |
| Ranged | 90 or higher | Phase one is a ranged phase for nearly everyone, even players who melee the rest of the fight. |
| Magic | 92 or higher | Shadow Barrage is the clean way to stun the Sire, and the guaranteed stun is what makes a one-cycle phase one possible. |
| Hitpoints | 90 or higher | The explosion in phase three can deal up to 96, and the double tendril flick reaches 66 unprayed. |
| Prayer | 70 or higher | Piety for the melee phases, and enough restoration to hold Protect from Missiles continuously once the minions arrive. |
- Skill
- Slayer
- Recommended
- 85, with an abyssal demon task
- What it changes
- The only hard gate. Boss tasks for the Sire itself also qualify.
- Skill
- Attack and Strength
- Recommended
- 90 or higher
- What it changes
- Phase two and three are melee phases with a real health bar behind them, and slow kills mean more spawns maturing into scions.
- Skill
- Defence
- Recommended
- 90 or higher
- What it changes
- Most incoming damage in this fight is unprayable chip from minions rather than boss hits, which is exactly what Defence answers.
- Skill
- Ranged
- Recommended
- 90 or higher
- What it changes
- Phase one is a ranged phase for nearly everyone, even players who melee the rest of the fight.
- Skill
- Magic
- Recommended
- 92 or higher
- What it changes
- Shadow Barrage is the clean way to stun the Sire, and the guaranteed stun is what makes a one-cycle phase one possible.
- Skill
- Hitpoints
- Recommended
- 90 or higher
- What it changes
- The explosion in phase three can deal up to 96, and the double tendril flick reaches 66 unprayed.
- Skill
- Prayer
- Recommended
- 70 or higher
- What it changes
- Piety for the melee phases, and enough restoration to hold Protect from Missiles continuously once the minions arrive.
These are the wiki's own recommendations rather than requirements, and it flags them as an indication of advised stats rather than a wall. The Sire is beatable below them; what suffers is trip length, because a longer kill is a kill with more scions in it.
| Slot | Starting out | Mid game | Best in slot |
|---|---|---|---|
| Phase one weapon | Scorching bow with bronze arrows | Scorching bow with amethyst arrows | Scorching bow, with seeking dragon arrows if you plan to shoot the transition |
| Phase two and three weapon | Arclight, or a Zamorakian hasta | Ghrazi rapier, blade of saeldor or inquisitor's mace | Emberlight or Osmumten's fang, paired with a Lightbearer |
| Head | Black mask (i) | Slayer helmet (i) | Slayer helmet (i) |
| Neck | Amulet of glory | Amulet of fury or torture | Amulet of rancour |
| Cape | Max or hitpoints cape | Fire cape, or an Ardougne cloak 4 | Infernal cape |
| Body and legs | Fighter torso and obsidian platelegs, or Barrows pieces | Bandos, blood moon, or Justiciar if the spawns are hurting | Torva, or oathplate with a slash weapon |
| Shield | Rune defender | Dragon defender or a dragonfire shield | Avernic defender |
| Hands | Dragon gloves | Barrows gloves | Ferocious gloves |
| Feet | Rune boots | Dragon, echo or guardian boots | Primordial boots, or Avernic treads |
| Ring | Berserker ring (i) or ring of suffering (i) | Ultor ring, or Bellator with a slash weapon | Lightbearer, if your weapon is accurate enough to skip defence reduction |
- Slot
- Phase one weapon
- Starting out
- Scorching bow with bronze arrows
- Mid game
- Scorching bow with amethyst arrows
- Best in slot
- Scorching bow, with seeking dragon arrows if you plan to shoot the transition
- Slot
- Phase two and three weapon
- Starting out
- Arclight, or a Zamorakian hasta
- Mid game
- Ghrazi rapier, blade of saeldor or inquisitor's mace
- Best in slot
- Emberlight or Osmumten's fang, paired with a Lightbearer
- Slot
- Head
- Starting out
- Black mask (i)
- Mid game
- Slayer helmet (i)
- Best in slot
- Slayer helmet (i)
- Slot
- Neck
- Starting out
- Amulet of glory
- Mid game
- Amulet of fury or torture
- Best in slot
- Amulet of rancour
- Slot
- Cape
- Starting out
- Max or hitpoints cape
- Mid game
- Fire cape, or an Ardougne cloak 4
- Best in slot
- Infernal cape
- Slot
- Body and legs
- Starting out
- Fighter torso and obsidian platelegs, or Barrows pieces
- Mid game
- Bandos, blood moon, or Justiciar if the spawns are hurting
- Best in slot
- Torva, or oathplate with a slash weapon
- Slot
- Shield
- Starting out
- Rune defender
- Mid game
- Dragon defender or a dragonfire shield
- Best in slot
- Avernic defender
- Slot
- Hands
- Starting out
- Dragon gloves
- Mid game
- Barrows gloves
- Best in slot
- Ferocious gloves
- Slot
- Feet
- Starting out
- Rune boots
- Mid game
- Dragon, echo or guardian boots
- Best in slot
- Primordial boots, or Avernic treads
- Slot
- Ring
- Starting out
- Berserker ring (i) or ring of suffering (i)
- Mid game
- Ultor ring, or Bellator with a slash weapon
- Best in slot
- Lightbearer, if your weapon is accurate enough to skip defence reduction
The gear decision that shapes everything else is whether you reduce the Sire's defence or skip that step. Emberlight and Osmumten's fang are accurate enough that defence reduction becomes unnecessary, which frees every point of special attack energy for damage in phase three. The alternative — an elder maul or dragon warhammer special followed by a scythe of vitur — works and the wiki describes it as typically slower.
You do not need a full ranged switch to handle phase one. The scorching bow is recommended precisely because it stays accurate while you are wearing melee armour, and demonbane weapons destroy a respiratory system in one successful hit regardless of your bonuses. Bronze arrows are as likely to one-shot a system as anything expensive, which is why the wiki names them explicitly.
Without demonbane the arithmetic changes but does not break. You always hit for at least 50 per cent of your weapon's maximum on the respiratory systems, so a weapon with a maximum hit of 50 or more clears each system in two attacks — meaning all four inside one stun, assuming you do not miss.
If your Defence is at the lower end, the wiki advises prioritising ranged defence over melee strength. The reasoning is specific to this boss: the thing most likely to overwhelm you is a crowd of scions using ranged attacks, not the Sire itself.
Magic is a legitimate primary style rather than a curiosity, but only with a Tumeken's shadow. With top-tier gear it produces output comparable to the best melee setup and it removes most of the swapping, at the cost of a much softer defensive profile against the minions. An Eldritch nightmare staff or accursed sceptre covers the special attack slot, with the accursed sceptre preferred because it lowers the boss's magic and defence levels whether or not the hit lands.
| Check | Value |
|---|---|
| Prayers for its own attacks | Protect from Melee |
| Its Defence level | 250 |
| Its Magic level | 200 |
| Its lowest defence bonus, per its infobox | magic |
| Monster attributes | demon |
- Check
- Prayers for its own attacks
- Value
- Protect from Melee
- Check
- Its Defence level
- Value
- 250
- Check
- Its Magic level
- Value
- 200
- Check
- Its lowest defence bonus, per its infobox
- Value
- magic
- Check
- Monster attributes
- Value
- demon
- Tagged as a demon: demonbane weapons apply.
- 200 Magic level rewards magic-defence scaling weapons.
Inventory and Supplies
| What | Why it is there |
|---|---|
| A scorching bow and cheap arrows | Phase one, every kill. Cheap and available, and accurate enough that it does not care what armour you are wearing. |
| A super combat potion, divine on long trips | The melee phases are where the health bar actually moves, so the boost is spent on phases two and three rather than phase one. |
| Super restores rather than prayer potions | Protect from Missiles stays up whenever minions are on the floor, which is most of the fight, and restores also cover the stat drain from a long trip. |
| Anglerfish or similar high-healing food | The chip damage in this fight arrives in a rush during the final stage rather than steadily, so overhealing capacity matters more than dose count. |
| A special attack weapon of your choice | Burning claws, dragon claws, a voidwaker or a crystal halberd. If you are not reducing defence, all of this energy belongs to phase three. |
| A staff for autocasting Ancient Magicks, on long trips | A blood ancient sceptre is the standout, allowing an overheal up to 108 hitpoints at level 99, which turns the minion crowd from a threat into a healing source. |
| A bracelet of slaughter | Task extension, swapped in at the point the kill is already decided. |
| A divine rune pouch | Shadow Barrage runes for the stun, and whatever else your method needs. Thralls and Death Charge live here too if you have room. |
| A lunar or dramen staff | Fairy ring access, unless the elite Lumbridge and Draynor diary has already removed the need. |
| A house tablet or construction cape, plus a banking teleport | One returns you through the pool and the fairy ring, the other gets you to a bank. They are not the same item and it is worth carrying both. |
- What
- A scorching bow and cheap arrows
- Why it is there
- Phase one, every kill. Cheap and available, and accurate enough that it does not care what armour you are wearing.
- What
- A super combat potion, divine on long trips
- Why it is there
- The melee phases are where the health bar actually moves, so the boost is spent on phases two and three rather than phase one.
- What
- Super restores rather than prayer potions
- Why it is there
- Protect from Missiles stays up whenever minions are on the floor, which is most of the fight, and restores also cover the stat drain from a long trip.
- What
- Anglerfish or similar high-healing food
- Why it is there
- The chip damage in this fight arrives in a rush during the final stage rather than steadily, so overhealing capacity matters more than dose count.
- What
- A special attack weapon of your choice
- Why it is there
- Burning claws, dragon claws, a voidwaker or a crystal halberd. If you are not reducing defence, all of this energy belongs to phase three.
- What
- A staff for autocasting Ancient Magicks, on long trips
- Why it is there
- A blood ancient sceptre is the standout, allowing an overheal up to 108 hitpoints at level 99, which turns the minion crowd from a threat into a healing source.
- What
- A bracelet of slaughter
- Why it is there
- Task extension, swapped in at the point the kill is already decided.
- What
- A divine rune pouch
- Why it is there
- Shadow Barrage runes for the stun, and whatever else your method needs. Thralls and Death Charge live here too if you have room.
- What
- A lunar or dramen staff
- Why it is there
- Fairy ring access, unless the elite Lumbridge and Draynor diary has already removed the need.
- What
- A house tablet or construction cape, plus a banking teleport
- Why it is there
- One returns you through the pool and the fairy ring, the other gets you to a bank. They are not the same item and it is worth carrying both.
No dose counts appear here on purpose. Whether you bring eight restores or fourteen depends on whether you are using blood spells to heal off the minions, whether your weapon is accurate enough to skip defence reduction, and whether you intend to leave after one kill or twenty. The first trip should be treated as a measuring exercise.
One structural note that catches people out: tagging the minions activates Death Charge when the Sire dies, keeping your special attack energy topped up. It also means committing to the Ancient spellbook for the kill, which costs you the Shadow Barrage stun on the next phase one — the wiki flags this as a reason Death Charge can make trips slower rather than faster.
Prayer and Spellbook
Protect from Missiles is the prayer that keeps you alive at the Sire, and it is not about the boss. Spawns and scions attack randomly with ranged for up to 16 and melee for up to 10, and the ranged attacks are both more damaging and more accurate. A crowd of them can kill a well-armoured player in seconds, which is why the strategy page recommends holding Protect from Missiles at all times rather than reacting to it.
Protect from Melee has one narrow, valuable job in phase two. The Sire's three melee attacks — an arm swipe, a single tendril flick and a double flick — hit for up to 66 on the double flick unprayed, and the prayer reduces the three to 6, 6 and 26 respectively. It also takes a little off the 30 damage typeless crush the tentacles deal in phase one.
Nothing helps with the miasma pools. They are unaffected by protection prayers and unaffected by every form of poison protection, dealing 10 to 30 per tick on the central tile and 2 to 8 on the surrounding ones. The only answer is two tiles of distance, and the game gives you enough time to cover it.
The Ancient spellbook is the enabling piece for the fastest phase one, because Shadow Barrage guarantees the stun. If you would rather not switch, the lower shadow spells still work at reduced odds — Blitz at three in four, Burst at one in two, Rush at one in four — and the effect applies even when the spell splashes.
Mechanics That Decide the Fight
| Mechanic | How you see it coming | What it does | Your answer |
|---|---|---|---|
| Respiratory systems | Four of them, around the edge of the room, present from the moment you walk in. | All four must be destroyed to end phase one. While the Sire is awake and unstunned, the tentacles reduce anything you do to them to between 0 and 3 damage. | Stun first, then demolish. Demonbane weapons destroy a system in one successful hit; anything else deals at least half your maximum, so a 50 maximum clears each system in two. |
| Tentacles | Six immobile tentacles that wake with the Sire in phase one, sleep through phase two, and wake again in phase three. | Protect the respiratory systems and attack anyone nearby with typeless crush for up to 30, reduced slightly by Protect from Melee. | Do not fight them. The stun is what turns them off, and in phase three they simply limit how much room you have to work in. |
| The stun | You apply it deliberately; there is no tell to read. | Disorients the Sire for a nominal 30 seconds, opening the respiratory systems. | Wake the Sire with any non-shadow ranged or magic attack first, then cast Shadow Barrage — cast on a sleeping Sire the stun does not land for ten game ticks while it performs its waking animation. Dealing 75 damage with ranged or magic achieves the same thing without Ancients. |
| Miasma pools | In phases one and two the Sire clenches both claws towards its stomach and a dark-green spiral appears above it. In phase three there is no animation at all. | A 3x3 pool under you dealing 10 to 30 poison damage per tick on the centre tile and 2 to 8 on the edges, and poisoning you starting at 8. | Run two tiles. That is enough to avoid the attack completely, and there is enough warning to do it. No prayer or poison protection reduces this damage. |
| Melee attacks | Phase two only, at melee distance. | An arm swipe, a single tendril flick, and a double tendril flick that reaches 66. | Protect from Melee, which brings those three down to 6, 6 and 26. There is no dodging component — this is purely a prayer uptime problem. |
| Spawns and scions | Thrown from the Sire's mouth in phases one and two, landing near it. In phase three they arrive in bulk. | A spawn has 15 hitpoints and low accuracy. Left alone for 15 seconds it matures into a scion with 60 hitpoints and better accuracy, attacking for up to 16 ranged or 10 melee. | Hold Protect from Missiles and generally ignore them. If they cannot reach you for around 35 seconds they die on their own, and every one of them dies the instant the Sire does. |
| Forced teleport | Phase two, triggered by you attacking from outside melee distance. | Drags you next to the Sire and discharges energy from the portal in its stomach for up to 60. | Do not try to safespot phase two. Stand in melee range on the front row and accept the tendril flicks. |
| The explosion | Phase three, the moment the Sire drops below 140 hitpoints. You are teleported without warning. | Two ticks after the teleport it detonates for up to 96 to anything in the blast radius. | Spam-click away from the Sire the instant you land. Vengeance recoils it if you have a spellbook swap arranged, but running is the answer that always works. |
- Mechanic
- Respiratory systems
- How you see it coming
- Four of them, around the edge of the room, present from the moment you walk in.
- What it does
- All four must be destroyed to end phase one. While the Sire is awake and unstunned, the tentacles reduce anything you do to them to between 0 and 3 damage.
- Your answer
- Stun first, then demolish. Demonbane weapons destroy a system in one successful hit; anything else deals at least half your maximum, so a 50 maximum clears each system in two.
- Mechanic
- Tentacles
- How you see it coming
- Six immobile tentacles that wake with the Sire in phase one, sleep through phase two, and wake again in phase three.
- What it does
- Protect the respiratory systems and attack anyone nearby with typeless crush for up to 30, reduced slightly by Protect from Melee.
- Your answer
- Do not fight them. The stun is what turns them off, and in phase three they simply limit how much room you have to work in.
- Mechanic
- The stun
- How you see it coming
- You apply it deliberately; there is no tell to read.
- What it does
- Disorients the Sire for a nominal 30 seconds, opening the respiratory systems.
- Your answer
- Wake the Sire with any non-shadow ranged or magic attack first, then cast Shadow Barrage — cast on a sleeping Sire the stun does not land for ten game ticks while it performs its waking animation. Dealing 75 damage with ranged or magic achieves the same thing without Ancients.
- Mechanic
- Miasma pools
- How you see it coming
- In phases one and two the Sire clenches both claws towards its stomach and a dark-green spiral appears above it. In phase three there is no animation at all.
- What it does
- A 3x3 pool under you dealing 10 to 30 poison damage per tick on the centre tile and 2 to 8 on the edges, and poisoning you starting at 8.
- Your answer
- Run two tiles. That is enough to avoid the attack completely, and there is enough warning to do it. No prayer or poison protection reduces this damage.
- Mechanic
- Melee attacks
- How you see it coming
- Phase two only, at melee distance.
- What it does
- An arm swipe, a single tendril flick, and a double tendril flick that reaches 66.
- Your answer
- Protect from Melee, which brings those three down to 6, 6 and 26. There is no dodging component — this is purely a prayer uptime problem.
- Mechanic
- Spawns and scions
- How you see it coming
- Thrown from the Sire's mouth in phases one and two, landing near it. In phase three they arrive in bulk.
- What it does
- A spawn has 15 hitpoints and low accuracy. Left alone for 15 seconds it matures into a scion with 60 hitpoints and better accuracy, attacking for up to 16 ranged or 10 melee.
- Your answer
- Hold Protect from Missiles and generally ignore them. If they cannot reach you for around 35 seconds they die on their own, and every one of them dies the instant the Sire does.
- Mechanic
- Forced teleport
- How you see it coming
- Phase two, triggered by you attacking from outside melee distance.
- What it does
- Drags you next to the Sire and discharges energy from the portal in its stomach for up to 60.
- Your answer
- Do not try to safespot phase two. Stand in melee range on the front row and accept the tendril flicks.
- Mechanic
- The explosion
- How you see it coming
- Phase three, the moment the Sire drops below 140 hitpoints. You are teleported without warning.
- What it does
- Two ticks after the teleport it detonates for up to 96 to anything in the blast radius.
- Your answer
- Spam-click away from the Sire the instant you land. Vengeance recoils it if you have a spellbook swap arranged, but running is the answer that always works.
Phase one has no persistent health bar, and that is the single most misunderstood thing about this boss. Damage dealt to the Sire during that phase counts only towards disorienting it; when the phase ends, the Sire is restored to full. Once you internalise this, phase one stops feeling slow and starts feeling like a lock you are picking.
There are two overflow rules worth knowing because they reward pushing damage into the transitions. If the Sire somehow reaches zero health before phase two begins, it starts phase two at 40 per cent. If it reaches zero before phase three begins, it starts phase three at 20 per cent. That is why the wiki tells you to attack the moment it steps out into the arena after the last respiratory system falls, and why ranged players can squeeze three scorching bow shots into that window.
Turn Auto Retaliate off before your first attempt. With minions constantly landing next to you, retaliation means your character quietly stops attacking the boss at the worst possible moments.
Attacks the minions have already launched still resolve after the Sire dies, including ones that spawn on the tick it dies. It is uncommon but entirely possible to die to a corpse's entourage, and lower-level accounts should not walk away from the screen the moment the health bar empties.
| Property | Value |
|---|---|
| Combat level | 350 |
| Attack styles | Melee |
| Attack speed | 7 ticks |
| Attacks on sight | No |
| Poisons you | Yes (8) |
| Size | 6 tiles |
| Immune to cannon | No |
| Immune to thralls | Yes |
| Slayer requirement | 85 |
- Property
- Combat level
- Value
- 350
- Property
- Attack styles
- Value
- Melee
- Property
- Attack speed
- Value
- 7 ticks
- Property
- Attacks on sight
- Value
- No
- Property
- Poisons you
- Value
- Yes (8)
- Property
- Size
- Value
- 6 tiles
- Property
- Immune to cannon
- Value
- No
- Property
- Immune to thralls
- Value
- Yes
- Property
- Slayer requirement
- Value
- 85
Where Abyssal Sire Sits in Progression
Within the Slayer boss group, the fights below Abyssal Sire are Basilisk Knights and Maggot King. Nothing in the Slayer boss group is rated harder — Abyssal Sire shares the top band with Araxxor and Alchemical Hydra and others at the same rating.
Phase by Phase
Phase one — four systems, one stun
The Sire sleeps until attacked. Wake it with any ranged or magic attack that is not a shadow spell, then cast Shadow Barrage on it — this order matters, because a shadow spell cast on a sleeping Sire does not apply its stun for ten game ticks while the boss performs its waking animation, and moving in early during that window gets you hit by tentacles for up to 30 apiece.
The stun is advertised as 30 seconds and behaves as 27, because the tentacles reawaken at that mark and immediately resume protecting the systems. Within that window a demonbane weapon clears all four comfortably. Without one, you need a weapon that two-shots them; three hits per system will usually cost you a second Shadow Barrage.
When the last system falls, head back to the centre and attack the Sire as soon as it steps into the arena. Damage in that window is halved, but the transition is slow enough to be worth using — and if you somehow empty its health bar before phase two starts, it opens phase two at 40 per cent.
- Attack the Sire with a non-shadow ranged or magic attack to wake it.
- Cast Shadow Barrage to stun it, or deal 75 damage with ranged or magic if you are not on Ancients.
- Work one side of the room at a time — east or west — rather than circling.
- Re-stun if the tentacles wake before you are finished, then clear the remaining systems.
- Return to the centre and start hitting the Sire the moment it becomes attackable.
Phase two — stand still and take it
This is the simplest phase and the one people overcomplicate. Stay in melee distance on the front row. Attacking from further out triggers a forced teleport and a blast for up to 60, so there is no safespot to find and looking for one is actively punished.
Hold Protect from Melee, which turns the three attack types into 6, 6 and 26. When a miasma pool appears under you, step across to the other marked tile on the same row and carry on. Ignore the spawns unless your damage output is low enough that kills genuinely drag.
There is a despawn timer here: leave the Sire out of combat for around a minute and it resets the fight entirely.
- If you are reducing the Sire's defence, spend that special attack now. If you are not, hold every point of energy for phase three.
- Below 50 per cent — 212 hitpoints or fewer — the Sire starts walking south. Follow it to the second row and switch to Protect from Missiles before the minions arrive.
- Emptying its health bar before the transition completes starts phase three at 20 per cent.
Phase three, stage one — pools instead of punches
The Sire latches onto the floor and summons four spawns before the pools begin. It stops using melee entirely; miasma pools become its attack. The tentacles wake up again, which shrinks the space you have to work in.
The catch is that phase three pools have no animation warning them. In earlier phases you get the claw-clench and the green spiral; here you simply see the pool appear, which is still enough time to walk two tiles clear if you are paying attention.
Below 35 per cent — around 143 hitpoints — the Sire teleports you and the final stage begins. If a multi-hit weapon triggers that transition, the first hit fires the change and the remainder land once the new stage has started.
Phase three, stage two — the explosion and the crowd
You are teleported to the western tile of the second row, and two ticks later the Sire explodes for up to 96 to anything inside the blast. Spam-click the third row the instant you land. Vengeance will recoil the damage, but arranging it requires a spellbook swap through a magic cape or Spellbook Swap, or a second player casting Vengeance Other, so for most people the answer is simply moving.
Then comes the part that reads as wrong and is not. The Sire creates a huge number of spawns, and it will use its miasma pool attack a minimum of three more times before stopping — but only for as long as fifteen minions are alive. So you must not kill any of them. Run back and forth along the second row while attacking until three pools have been made, and after that you can stand still and finish the fight.
Watch your health through this. Scions do real damage in numbers, and if you drop below 40 the correct response is to walk away for a moment rather than to fight through it.
- Spend whatever special attack energy you have left here. This is the phase you saved it for.
- If you are struggling, the south-eastern safespot lets you heal off the minions with Blood Burst or Blood Barrage — their magic defence is low enough that the spells land reliably.
- Every minion dies when the Sire does, so there is never a reason to clean up afterwards.
Fight Strategy: Respiratory system phases
- Turn Auto Retaliate off before you attack anything.
- Wake the Sire with the scorching bow, then Shadow Barrage it to stun.
- Clear the four respiratory systems one side at a time, re-stunning if the tentacles wake.
- Return to the centre and start hitting the Sire in the transition window.
- Stand on the front row in melee distance for phase two with Protect from Melee up, stepping sideways when a pool lands.
- At 212 hitpoints follow it south to the second row and switch to Protect from Missiles.
- In stage one, treat pools as the only attack and keep two tiles of walking room available.
- At 143 hitpoints expect the teleport, then immediately click the third row to escape the explosion.
- Return to melee range, run the second row while it makes three more pools, then stand and finish it without touching a single minion.
The most useful mental model for this fight is that its danger is front-loaded onto two specific instants — the teleport-and-explosion at 140 hitpoints, and the crowd immediately after it — with everything else being a matter of standing in the right place with the right prayer on. A player who has rehearsed those two moments has effectively already learned the boss.
The second thing worth internalising is that damage carries across transitions in your favour. Hitting the Sire during the phase one to two handover, and again on the way into phase three, is free progress that the overflow rules turn into a 40 per cent or 20 per cent head start. Ranged players get the most from this, with three scorching bow shots available before the Sire closes to melee range.
Positioning and Movement
The whole fight resolves onto three rows of tiles. You stand on the first row for phase two, move to the second when the Sire walks south, and the third row is where you run when the explosion teleport lands. Marking those three rows before your first kill converts the most dangerous moment of the fight into a single click.
Phase one is the exception, and it is a movement puzzle rather than a stationary one. Working one side of the room at a time — the east pair, then the west pair — beats circling, because the stun clock is running and a longer path is a wasted second.
The one position never to take is out of melee range in phase two. It looks like caution and the boss reads it as an invitation.
Beginner Plan, Then the Advanced One
Your first trips
- Watch the explosion happen once before you try to survive it. Knowing that the teleport arrives at 140 hitpoints and that the detonation follows two ticks later is worth more than any amount of gear.
- Bring a scorching bow and cheap arrows even if you plan to melee everything else. It removes the entire question of ranged switches from your first attempts.
- Do not kill the spawns. It feels wrong and it is the single most important instruction in the final stage — fifteen live minions is what makes the pools stop.
- Keep Protect from Missiles up whenever minions are on the ground, and do not switch off it to squeeze in a Protect from Melee out of habit.
- If your health drops below 40 during the last stage, walk away for a few seconds. The Sire cannot follow, the minions lose interest, and the kill is still there when you come back.
Once the kill is boring
- Build the kill around an accurate weapon rather than a defence-reducing one. Emberlight or Osmumten's fang with a Lightbearer means no special attack energy is spent on the Sire's Defence, and all of it lands as damage in the final stage.
- Use the transition windows properly. Three scorching bow shots between the last respiratory system and melee range is real progress, and the overflow rules mean any damage that would have killed it early becomes a head start on the next phase.
- Pull the Sire south while attacking it in phase two rather than waiting for it to walk. It is a small saving that repeats on every kill.
- Decide consciously about Death Charge. Tagging minions keeps your special energy full, but committing to Ancients for the kill costs you the Shadow Barrage stun on the following phase one — this is a genuine trade-off, not a free upgrade.
- If you are running very long trips, a blood ancient sceptre turns the minion crowd into a resource. Overhealing up to 108 hitpoints at level 99 means the final stage refills you rather than draining you.
Drops and What Abyssal Sire Is Worth
The Sire's reward structure is unusual because the thing it drops is not the thing you want. The unsired is a token, and it is handed to the Font of Consumption in exchange for a roll — an abyssal dagger, a piece of the abyssal bludgeon, an abyssal whip, or the abyssal orphan pet. Everything else in the table is incidental to that loop.
That two-stage structure changes how the grind feels. Progress is not measured in valuable drops but in unsired handed over, and a run of poor Font results can look like a run of poor kills even when the kills were fine.
As always, no rates or values here. The wiki holds the current numbers for both.
Drops worth the trip: Abyssal dagger, bludgeon pieces, abyssal whip. Whether that is worth your time depends on how many kills an hour you personally get, which is a function of respiratory system phases rather than of your gear list.
Combat Achievements
Abyssal Sire has Combat Achievement tasks, and a 96 max hit is the number to plan them around: any task that restricts your supplies or your gear is a materially different fight at that damage.
Task lists move with updates — read the current list in game.
Ironman Notes
Slayer masters who assign Abyssal Sire: Vannaka, Chaeldar, Konar, Nieve, Duradel, Mortimer. Each kill is 478 Slayer XP.
Without a Grand Exchange, abyssal dagger, bludgeon pieces, abyssal whip has to be earned rather than bought, and this is the fastest table it sits on.
The Sire is one of the more Ironman-friendly high-level Slayer bosses, largely because its recommended phase one weapon is deliberately cheap. A scorching bow with bronze arrows destroys respiratory systems as reliably as anything expensive, and demonbane weapons one-shot them regardless of your bonuses.
The gap an Ironman feels is the Ancient spellbook. Without Shadow Barrage you disorient the boss by dealing 75 damage with ranged or magic instead, which works but costs you tempo — and the lower shadow spells are a partial substitute, since the stun applies even on a splash.
For sustain, a blood ancient sceptre is the item worth building towards. It turns the final stage's crowd of minions from the thing that ends your trip into the thing that extends it.
Common Mistakes and Death Causes
| What happened | Why it happened | The fix |
|---|---|---|
| The explosion at 140 hitpoints | You are teleported without an animation and the detonation lands two ticks later for up to 96. | Know the threshold and have a target tile picked out. Spam-click the third row the instant the screen moves; do not wait to see the animation. |
| Being killed by scions during the final stage | Minions arrive in bulk and their ranged attacks are far more accurate and damaging than their melee. | Protect from Missiles at all times, and step away entirely if your health goes below 40. Do not try to trade through it. |
| Killing the minions in the final stage | The Sire only stops making miasma pools while fifteen minions are alive, so clearing them keeps the pools coming indefinitely. | Leave every one of them alone. They all die when the boss does. |
| Standing in a miasma pool | The centre tile deals 10 to 30 per tick and no prayer or poison protection reduces it. In phase three there is no animation to warn you. | Move two tiles the moment a pool appears. Build the habit in phases one and two, where you do get a warning, so it is automatic by phase three. |
| Trying to safespot phase two | Attacking from outside melee distance triggers a forced teleport and a blast for up to 60. | Stay on the front row in melee range. The double tendril flick is survivable with Protect from Melee; the blast is not something you can plan around. |
| Dying after the Sire is already dead | Minion attacks launched before the kill, including those spawning on the same tick, still roll normally. | Stay alert for a moment after the health bar empties, especially on a lower-level account. |
- What happened
- The explosion at 140 hitpoints
- Why it happened
- You are teleported without an animation and the detonation lands two ticks later for up to 96.
- The fix
- Know the threshold and have a target tile picked out. Spam-click the third row the instant the screen moves; do not wait to see the animation.
- What happened
- Being killed by scions during the final stage
- Why it happened
- Minions arrive in bulk and their ranged attacks are far more accurate and damaging than their melee.
- The fix
- Protect from Missiles at all times, and step away entirely if your health goes below 40. Do not try to trade through it.
- What happened
- Killing the minions in the final stage
- Why it happened
- The Sire only stops making miasma pools while fifteen minions are alive, so clearing them keeps the pools coming indefinitely.
- The fix
- Leave every one of them alone. They all die when the boss does.
- What happened
- Standing in a miasma pool
- Why it happened
- The centre tile deals 10 to 30 per tick and no prayer or poison protection reduces it. In phase three there is no animation to warn you.
- The fix
- Move two tiles the moment a pool appears. Build the habit in phases one and two, where you do get a warning, so it is automatic by phase three.
- What happened
- Trying to safespot phase two
- Why it happened
- Attacking from outside melee distance triggers a forced teleport and a blast for up to 60.
- The fix
- Stay on the front row in melee range. The double tendril flick is survivable with Protect from Melee; the blast is not something you can plan around.
- What happened
- Dying after the Sire is already dead
- Why it happened
- Minion attacks launched before the kill, including those spawning on the same tick, still roll normally.
- The fix
- Stay alert for a moment after the health bar empties, especially on a lower-level account.
The reset here is unusually gentle for a boss this dangerous. If the Sire goes out of combat for around a minute during phase two it despawns and the fight starts over — no penalty beyond the time you spent. Walking out of a kill that has gone wrong genuinely costs you nothing but the trip.
During the final stage, the correct response to low health is retreat rather than food. The minions lose track of you if they cannot reach you, and one that cannot attack for around 35 seconds dies on its own. Eating while surrounded is often just feeding the same crowd.
If you need a longer breather, the south-eastern safespot combined with Blood Burst or Blood Barrage lets you heal off the minions directly. Their magic defence is low enough that the spells reliably connect.
FAQ
Why does my phase one damage disappear?
Because it is designed to. Damage dealt to the Sire during phase one only counts towards disorienting it — the boss is restored to full health when the phase ends. Phase one is about breaking the four respiratory systems, not about the health bar.
Do I need Ancient Magicks to fight the Sire?
No, but Shadow Barrage is the cleanest stun because it works every time. Shadow Blitz stuns three times in four, Burst one in two and Rush one in four, and the effect applies even if the spell splashes. Failing all of that, dealing 75 damage with ranged or magic disorients it just as well.
How many respiratory systems can I break in one stun?
All four, if your weapon is up to it. Demonbane weapons destroy a system in a single successful hit. Anything else deals at least half your maximum, so a weapon with a maximum hit of 50 or more takes two attacks per system — which fits, assuming you do not miss. Three hits per system will usually need a second stun.
Should I kill the spawns?
Almost never, and in the final stage definitely not. The Sire stops using its miasma pool attack after three more casts provided fifteen minions are alive, so clearing them keeps the pools coming. They all die automatically when the boss does.
Can I safespot it?
Phase two specifically punishes the attempt: attacking from outside melee distance teleports you next to the Sire and blasts you for up to 60. There is a safespot in the south-east for hiding from the minions and healing off them with blood spells, which is a different thing entirely.
Is Tumeken's shadow really competitive here?
Yes, according to the strategy page — with the best gear it delivers output comparable to the best melee setup, and it cuts down the number of switches so you can carry more supplies. The cost is a much weaker defensive profile against the minion crowd, so your health needs watching more closely.
Can I die after killing it?
You can. Attacks the minions have already launched, including any that spawn on the tick the Sire dies, still roll as normal. It is not common, but it is worth not walking away from the keyboard the instant the boss falls.
Related Guides
Bottom Line
The Abyssal Sire is a fight where reading beats reacting. Nothing it does is fast enough to be unfair — you get time to walk out of a miasma pool, time to escape the explosion, and a stun long enough to clear four respiratory systems — but almost every mechanic behaves in a way that contradicts what a well-trained PvM instinct would tell you to do. Stand in melee range when you would rather back off. Leave the minions alive when you would rather clear them. Ignore the health bar in phase one entirely.
The gate that stops most accounts is not the fight but the 85 Slayer and the abyssal demon tasks that lead to it. If that is your bottleneck, our Slayer levelling service is the one that gets you to the door.
If Abyssal Sire is blocking a Combat Achievement or an unlock you actually want, our PvM service is done by hand — no automation. Otherwise the bosses list has the full index.
Abyssal Sire — Slayer boss, difficulty 4/5. Combat values here — hitpoints, max hits, attack styles and speed, Defence and Magic levels, immunities and Slayer requirements — were read from the Old School RuneScape Wiki infobox for Abyssal Sire on 2026-08-03. Kill rates, GP per hour and item prices are deliberately absent because they move with balance patches and the Grand Exchange. Mechanics, gear tiers and phase behaviour on this page were checked against Abyssal Sire/Strategies on 4 August 2026.
Need a trusted team? Bils Services
Enjoyed the guide?
Drop a like — it helps other Adventurers find the good stuff.
Community
Comments
Silence in the hall…
Be the first Adventurer to leave a mark.
Join the thread
Add a comment
Tips, drops, or “this carried my account” — keep it useful.
bilsservices · bils services · bilsservices.com

