


OSRS PvM Progression Guide: Which Boss Should You Learn First?
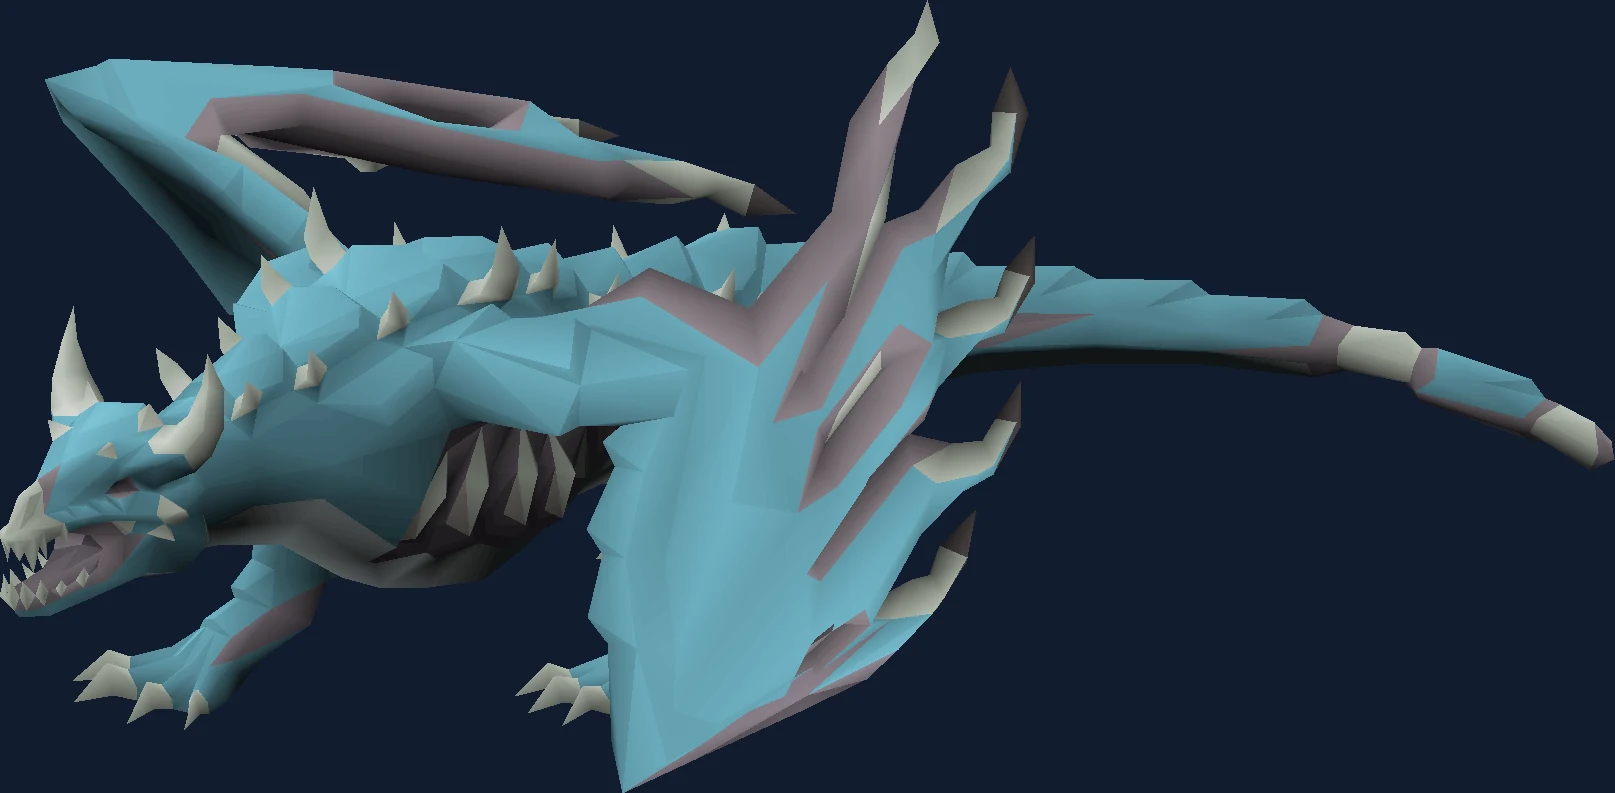
A difficulty-ordered path through OSRS bosses, generated from our full boss index, with the requirement and the reward that makes each step worth taking.
Overview
The order you learn bosses in matters more than which gear you own. Every boss teaches one or two specific skills, and the ones worth learning early are the ones whose skills transfer to everything above them.
We index 97 bosses across the site and rate each on a five-point difficulty scale. This page walks up that scale, so the answer to "which boss next" is whichever entry in the next tier your account already qualifies for.
The one rule that matters throughout: learn a boss on cheap gear until you stop dying, then upgrade. Turning up in best-in-slot to learn mechanics just makes each death expensive without making it less likely.
| Detail | Value |
|---|---|
| Bosses indexed | 97 |
| Difficulty scale | 1 introductory to 5 endgame |
| First skill to learn | Prayer switching under pressure |
| Second skill to learn | Reading an attack animation instead of a timer |
| Third skill to learn | Managing supplies across a whole trip, not one kill |
| What actually gates progression | Consistency, not gear — most players over-gear and under-practise |
- Detail
- Bosses indexed
- Value
- 97
- Detail
- Difficulty scale
- Value
- 1 introductory to 5 endgame
- Detail
- First skill to learn
- Value
- Prayer switching under pressure
- Detail
- Second skill to learn
- Value
- Reading an attack animation instead of a timer
- Detail
- Third skill to learn
- Value
- Managing supplies across a whole trip, not one kill
- Detail
- What actually gates progression
- Value
- Consistency, not gear — most players over-gear and under-practise
The Progression Scale
Every boss on the site is rated 1 to 5. This is what each tier means in terms of what it asks of you, and how many bosses sit at each level.
| Tier | Count | Examples |
|---|---|---|
| 1 — Introductory | 8 | Brutus (the Cow Boss), Bryophyta, Gemstone Crab, Giant Mole |
| 2 — Easy | 11 | Amoxliatl, Barrows brothers, Chaos Fanatic, Crazy Archaeologist |
| 3 — Moderate | 32 | Ancient Wyverns, Artio, Basilisk Knights, Blood Moon |
| 4 — Hard | 30 | Abyssal Sire, Akkha, Alchemical Hydra, Araxxor |
| 5 — Endgame | 16 | Awakened DT2 bosses, Corrupted Hunllef, Doom of Mokhaiotl, Fortis Colosseum waves |
- Tier
- 1 — Introductory
- Count
- 8
- Examples
- Brutus (the Cow Boss), Bryophyta, Gemstone Crab, Giant Mole
- Tier
- 2 — Easy
- Count
- 11
- Examples
- Amoxliatl, Barrows brothers, Chaos Fanatic, Crazy Archaeologist
- Tier
- 3 — Moderate
- Count
- 32
- Examples
- Ancient Wyverns, Artio, Basilisk Knights, Blood Moon
- Tier
- 4 — Hard
- Count
- 30
- Examples
- Abyssal Sire, Akkha, Alchemical Hydra, Araxxor
- Tier
- 5 — Endgame
- Count
- 16
- Examples
- Awakened DT2 bosses, Corrupted Hunllef, Doom of Mokhaiotl, Fortis Colosseum waves
You do not need to clear a whole tier before moving up. You need to be consistent at two or three bosses in a tier, because consistency is the thing that transfers.
Tier 1: Learn Prayer Switching Here
These are cheap to attempt, cheap to die at, and each one has exactly one mechanic to learn. Do not skip them because they look trivial — the muscle memory is the point.
| Boss | Type | Requirement | Main reward |
|---|---|---|---|
| Brutus (the Cow Boss) | Standalone | The Ides of Milk | Mooleta, bottomless milk bucket, cow slippers |
| Bryophyta | Mini-boss | Mossy key from moss giants | Bryophyta's essence (unlimited-charge staff) |
| Gemstone Crab | Shared-damage XP boss | None | Passive melee XP, gemstone drops |
| Giant Mole | Standalone | None (Falador Mole Lair) | Mole claw and skin for Falador Hard Diary |
| Obor | Mini-boss | Giant key from hill giants | Hill giant club |
| Scurrius | Standalone | None (Varrock sewers) | Scurrius' spine, bones for Prayer XP |
| Tempoross | Fishing boss | 35 Fishing | Fish barrel, tackle box, soaked pages |
| Wintertodt | Firemaking boss | 50 Firemaking | Pyromancer outfit, warm gloves, tome of fire |
- Boss
- Brutus (the Cow Boss)
- Type
- Standalone
- Requirement
- The Ides of Milk
- Main reward
- Mooleta, bottomless milk bucket, cow slippers
- Boss
- Bryophyta
- Type
- Mini-boss
- Requirement
- Mossy key from moss giants
- Main reward
- Bryophyta's essence (unlimited-charge staff)
- Boss
- Gemstone Crab
- Type
- Shared-damage XP boss
- Requirement
- None
- Main reward
- Passive melee XP, gemstone drops
- Boss
- Giant Mole
- Type
- Standalone
- Requirement
- None (Falador Mole Lair)
- Main reward
- Mole claw and skin for Falador Hard Diary
- Boss
- Obor
- Type
- Mini-boss
- Requirement
- Giant key from hill giants
- Main reward
- Hill giant club
- Boss
- Scurrius
- Type
- Standalone
- Requirement
- None (Varrock sewers)
- Main reward
- Scurrius' spine, bones for Prayer XP
- Boss
- Tempoross
- Type
- Fishing boss
- Requirement
- 35 Fishing
- Main reward
- Fish barrel, tackle box, soaked pages
- Boss
- Wintertodt
- Type
- Firemaking boss
- Requirement
- 50 Firemaking
- Main reward
- Pyromancer outfit, warm gloves, tome of fire
If you can complete a full trip at two of these without checking a guide mid-fight, you are ready for tier 2.
Tier 2: Learn to Read Animations
Tier 2 bosses punish reacting late. The step up is that you stop switching prayers on a timer and start switching them because you saw the attack start.
| Boss | Type | Requirement | Main reward |
|---|---|---|---|
| Amoxliatl | Standalone | Access to Cam Torum / Varlamore | Glacial temotli, tonalztics of ralos parts |
| Barrows brothers | Minigame-style chest | Priest in Peril | Barrows equipment (Dharok's, Ahrim's, Karil's…) |
| Chaos Fanatic | Wilderness mini-boss | Deep Wilderness | Odium / malediction shard 1 |
| Crazy Archaeologist | Wilderness mini-boss | Wilderness (Fossil Island coastline) | Odium / malediction shard 2, fedora |
| Deranged Archaeologist | Mini-boss | Fossil Island access | Unidentified fossils, Fossil Island notes |
| Hespori | Farming boss | Farming Guild access + Hespori seed | Bottomless compost bucket, anima seeds |
| King Black Dragon | Standalone dragon | Antifire protection | Dragon pickaxe, draconic visage |
| Kraken | Slayer boss | 87 Slayer + cave kraken task | Trident of the seas, kraken tentacle |
| Sarachnis | Standalone | None (Forthos Dungeon) | Sarachnis cudgel, strong herb and seed loot |
| Thermonuclear Smoke Devil | Slayer boss | 93 Slayer | Occult necklace, smoke battlestaff |
| Zalcano | Mining/Smithing boss | Song of the Elves + 70 Mining/Smithing | Crystal tool seed, zalcano shard |
- Boss
- Amoxliatl
- Type
- Standalone
- Requirement
- Access to Cam Torum / Varlamore
- Main reward
- Glacial temotli, tonalztics of ralos parts
- Boss
- Barrows brothers
- Type
- Minigame-style chest
- Requirement
- Priest in Peril
- Main reward
- Barrows equipment (Dharok's, Ahrim's, Karil's…)
- Boss
- Chaos Fanatic
- Type
- Wilderness mini-boss
- Requirement
- Deep Wilderness
- Main reward
- Odium / malediction shard 1
- Boss
- Crazy Archaeologist
- Type
- Wilderness mini-boss
- Requirement
- Wilderness (Fossil Island coastline)
- Main reward
- Odium / malediction shard 2, fedora
- Boss
- Deranged Archaeologist
- Type
- Mini-boss
- Requirement
- Fossil Island access
- Main reward
- Unidentified fossils, Fossil Island notes
- Boss
- Hespori
- Type
- Farming boss
- Requirement
- Farming Guild access + Hespori seed
- Main reward
- Bottomless compost bucket, anima seeds
- Boss
- King Black Dragon
- Type
- Standalone dragon
- Requirement
- Antifire protection
- Main reward
- Dragon pickaxe, draconic visage
- Boss
- Kraken
- Type
- Slayer boss
- Requirement
- 87 Slayer + cave kraken task
- Main reward
- Trident of the seas, kraken tentacle
- Boss
- Sarachnis
- Type
- Standalone
- Requirement
- None (Forthos Dungeon)
- Main reward
- Sarachnis cudgel, strong herb and seed loot
- Boss
- Thermonuclear Smoke Devil
- Type
- Slayer boss
- Requirement
- 93 Slayer
- Main reward
- Occult necklace, smoke battlestaff
- Boss
- Zalcano
- Type
- Mining/Smithing boss
- Requirement
- Song of the Elves + 70 Mining/Smithing
- Main reward
- Crystal tool seed, zalcano shard
Tier 3: Learn Trip Management
This is where most accounts stall, and the reason is almost never mechanics. It is that a tier 3 boss expects you to survive twenty kills on one inventory rather than one kill on a full one.
| Boss | Type | Requirement | Main reward |
|---|---|---|---|
| Ancient Wyverns | Elite monster | 82 Slayer + elemental/mind shield | Granite legs, wyvern visage |
| Artio | Solo Callisto variant | Wilderness singles-plus area | Same unique table at lower rates |
| Basilisk Knights | Elite slayer monster | Basilisk task + mirror shield | Basilisk jaw (neitiznot faceguard) |
| Blood Moon | Moons of Peril boss | Perilous Moons quest | Blood moon armour set, dual macuahuitl |
| Blue Moon | Moons of Peril boss | Perilous Moons quest | Blue moon armour set, blue moon spear |
| Calvar'ion | Solo Vet'ion variant | Wilderness singles-plus area | Same unique table at lower rates |
| Cerberus | Slayer boss | 91 Slayer + hellhounds task | Primordial / pegasian / eternal crystals, smouldering stone |
| Chaos Elemental | Wilderness (multi) | Deep Wilderness | Dragon pickaxe, pet chaos elemental |
| Dagannoth Kings | Three-boss lair | Horror from the Deep | Berserker / archer / warrior / seers rings, dragon axe |
| Dagannoth Prime | Magic king | Horror from the Deep | Seers ring, Dagannoth Prime pet |
| Dagannoth Rex | Melee king | Horror from the Deep | Berserker ring |
| Dagannoth Supreme | Ranged king | Horror from the Deep | Archers ring, dragon axe |
| Eclipse Moon | Moons of Peril boss | Perilous Moons quest | Eclipse moon armour set, eclipse atlatl |
| Gauntlet demi-bosses | Prep-phase demi-bosses | Song of the Elves | Crystal shards and paddlefish for the Hunllef fight |
| General Graardor | GWD general (Bandos) | 40 kill count + Troll Stronghold / Death Plateau route | Bandos chestplate and tassets, bandos hilt |
| K'ril Tsutsaroth | GWD general (Zamorak) | 70 Hitpoints + 40 kill count | Zamorakian spear, staff of the dead, zamorak hilt |
| Kalphite Queen | Standalone (two phases) | Rope + light source for the lair shortcut | Dragon chainbody, Kq head |
| Maggot King | Slayer boss | Slayer unlock | Unique drops and Combat Achievement tasks |
| Muttadiles | CoX boss room | Chambers of Xeric | Raid points toward CoX uniques |
| Penance Queen | Barbarian Assault boss | Barbarian Assault wave 10 | Fighter torso, penance gloves |
| Revenant Maledictus | Revenant Caves boss | Revenant Caves access | Amulet of avarice, ancient relics/emblems |
| Scorpia | Wilderness (multi) | Deep Wilderness | Odium / malediction shard 3 |
| Shellbane Gryphon | Slayer boss | Slayer unlock + weight mechanic prep | Slayer-only unique drops |
| Skotizo | Slayer mini-boss | Dark totem (four totem pieces) | Dark claw, jar of darkness, skotos pet |
| Spindel | Solo Venenatis variant | Wilderness singles-plus area | Same unique table at lower rates |
| The Mimic | Clue-scroll mini-boss | Mimic cave key (master clue reward) | Ring of 3rd age, 3rd age items |
| The Royal Titans (Branda & Eldric) | Dual boss | None (Varrock entrance) | Deadeye and Mystic prayer scrolls, mith gloves i |
| Vanguards | CoX boss room | Chambers of Xeric | Raid points toward CoX uniques |
| Vasa Nistirio | CoX boss room | Chambers of Xeric | Raid points toward CoX uniques |
| Vespula | CoX boss room | Chambers of Xeric | Raid points toward CoX uniques |
| Vorkath | Standalone dragon | Dragon Slayer II | Dragonbone necklace, vorki, superior dragon bones |
| Zulrah | Standalone (rotational) | Regicide | Tanzanite fang / magic fang / serpentine visage |
- Boss
- Ancient Wyverns
- Type
- Elite monster
- Requirement
- 82 Slayer + elemental/mind shield
- Main reward
- Granite legs, wyvern visage
- Boss
- Artio
- Type
- Solo Callisto variant
- Requirement
- Wilderness singles-plus area
- Main reward
- Same unique table at lower rates
- Boss
- Basilisk Knights
- Type
- Elite slayer monster
- Requirement
- Basilisk task + mirror shield
- Main reward
- Basilisk jaw (neitiznot faceguard)
- Boss
- Blood Moon
- Type
- Moons of Peril boss
- Requirement
- Perilous Moons quest
- Main reward
- Blood moon armour set, dual macuahuitl
- Boss
- Blue Moon
- Type
- Moons of Peril boss
- Requirement
- Perilous Moons quest
- Main reward
- Blue moon armour set, blue moon spear
- Boss
- Calvar'ion
- Type
- Solo Vet'ion variant
- Requirement
- Wilderness singles-plus area
- Main reward
- Same unique table at lower rates
- Boss
- Cerberus
- Type
- Slayer boss
- Requirement
- 91 Slayer + hellhounds task
- Main reward
- Primordial / pegasian / eternal crystals, smouldering stone
- Boss
- Chaos Elemental
- Type
- Wilderness (multi)
- Requirement
- Deep Wilderness
- Main reward
- Dragon pickaxe, pet chaos elemental
- Boss
- Dagannoth Kings
- Type
- Three-boss lair
- Requirement
- Horror from the Deep
- Main reward
- Berserker / archer / warrior / seers rings, dragon axe
- Boss
- Dagannoth Prime
- Type
- Magic king
- Requirement
- Horror from the Deep
- Main reward
- Seers ring, Dagannoth Prime pet
- Boss
- Dagannoth Rex
- Type
- Melee king
- Requirement
- Horror from the Deep
- Main reward
- Berserker ring
- Boss
- Dagannoth Supreme
- Type
- Ranged king
- Requirement
- Horror from the Deep
- Main reward
- Archers ring, dragon axe
- Boss
- Eclipse Moon
- Type
- Moons of Peril boss
- Requirement
- Perilous Moons quest
- Main reward
- Eclipse moon armour set, eclipse atlatl
- Boss
- Gauntlet demi-bosses
- Type
- Prep-phase demi-bosses
- Requirement
- Song of the Elves
- Main reward
- Crystal shards and paddlefish for the Hunllef fight
- Boss
- General Graardor
- Type
- GWD general (Bandos)
- Requirement
- 40 kill count + Troll Stronghold / Death Plateau route
- Main reward
- Bandos chestplate and tassets, bandos hilt
- Boss
- K'ril Tsutsaroth
- Type
- GWD general (Zamorak)
- Requirement
- 70 Hitpoints + 40 kill count
- Main reward
- Zamorakian spear, staff of the dead, zamorak hilt
- Boss
- Kalphite Queen
- Type
- Standalone (two phases)
- Requirement
- Rope + light source for the lair shortcut
- Main reward
- Dragon chainbody, Kq head
- Boss
- Maggot King
- Type
- Slayer boss
- Requirement
- Slayer unlock
- Main reward
- Unique drops and Combat Achievement tasks
- Boss
- Muttadiles
- Type
- CoX boss room
- Requirement
- Chambers of Xeric
- Main reward
- Raid points toward CoX uniques
- Boss
- Penance Queen
- Type
- Barbarian Assault boss
- Requirement
- Barbarian Assault wave 10
- Main reward
- Fighter torso, penance gloves
- Boss
- Revenant Maledictus
- Type
- Revenant Caves boss
- Requirement
- Revenant Caves access
- Main reward
- Amulet of avarice, ancient relics/emblems
- Boss
- Scorpia
- Type
- Wilderness (multi)
- Requirement
- Deep Wilderness
- Main reward
- Odium / malediction shard 3
- Boss
- Shellbane Gryphon
- Type
- Slayer boss
- Requirement
- Slayer unlock + weight mechanic prep
- Main reward
- Slayer-only unique drops
- Boss
- Skotizo
- Type
- Slayer mini-boss
- Requirement
- Dark totem (four totem pieces)
- Main reward
- Dark claw, jar of darkness, skotos pet
- Boss
- Spindel
- Type
- Solo Venenatis variant
- Requirement
- Wilderness singles-plus area
- Main reward
- Same unique table at lower rates
- Boss
- The Mimic
- Type
- Clue-scroll mini-boss
- Requirement
- Mimic cave key (master clue reward)
- Main reward
- Ring of 3rd age, 3rd age items
- Boss
- The Royal Titans (Branda & Eldric)
- Type
- Dual boss
- Requirement
- None (Varrock entrance)
- Main reward
- Deadeye and Mystic prayer scrolls, mith gloves i
- Boss
- Vanguards
- Type
- CoX boss room
- Requirement
- Chambers of Xeric
- Main reward
- Raid points toward CoX uniques
- Boss
- Vasa Nistirio
- Type
- CoX boss room
- Requirement
- Chambers of Xeric
- Main reward
- Raid points toward CoX uniques
- Boss
- Vespula
- Type
- CoX boss room
- Requirement
- Chambers of Xeric
- Main reward
- Raid points toward CoX uniques
- Boss
- Vorkath
- Type
- Standalone dragon
- Requirement
- Dragon Slayer II
- Main reward
- Dragonbone necklace, vorki, superior dragon bones
- Boss
- Zulrah
- Type
- Standalone (rotational)
- Requirement
- Regicide
- Main reward
- Tanzanite fang / magic fang / serpentine visage
Tier 4: Learn Phases and Team Roles
Tier 4 fights have distinct phases with different rules, and several of them expect you to hold a role in a team rather than solve everything yourself.
| Boss | Type | Requirement | Main reward |
|---|---|---|---|
| Abyssal Sire | Slayer boss | 85 Slayer + abyssal demons task | Abyssal dagger, bludgeon pieces, abyssal whip |
| Akkha | ToA path boss | Tombs of Amascut | Raid points toward ToA uniques |
| Alchemical Hydra | Slayer boss | 95 Slayer + hydra task | Hydra's claw, hydra leather, brimstone ring pieces |
| Araxxor | Slayer boss | 92 Slayer | Amulet of rancour pieces, araxyte fang |
| Ba-Ba | ToA path boss | Tombs of Amascut | Raid points toward ToA uniques |
| Callisto | Wilderness (multi) | Deep Wilderness + anti-PK setup | Voidwaker hilt, dragon pickaxe, tyrannical ring |
| Commander Zilyana | GWD general (Saradomin) | 70 Agility + 40 kill count | Armadyl crossbow, saradomin sword and hilt |
| Corporeal Beast | Standalone | Summer's End | Spirit shield and sigils |
| Crystalline Hunllef | Gauntlet boss | Song of the Elves | Crystal armour seeds, enhanced crystal weapon seed |
| Demonic Gorillas | Elite monster | Monkey Madness II | Zenyte shard, heavy ballista parts |
| Duke Sucellus | DT2 boss | Desert Treasure II (Awakener's orb for Awakened) | Magus vestige, eye of the duke, chromium ingot |
| Grotesque Guardians | Slayer boss (duo) | 75 Slayer + brittle key | Black tourmaline core, granite gloves, granite ring |
| Kephri | ToA path boss | Tombs of Amascut | Raid points toward ToA uniques |
| Kree'arra | GWD general (Armadyl) | 70 Ranged + 40 kill count | Armadyl armour, armadyl hilt |
| Nylocas Vasilias | ToB boss | Theatre of Blood | Progress toward ToB purple |
| Pestilent Bloat | ToB boss | Theatre of Blood | Progress toward ToB purple |
| Phantom Muspah | Standalone (form swapping) | Secrets of the North | Venator bow shard, ancient icon |
| Sotetseg | ToB boss | Theatre of Blood | Progress toward ToB purple |
| Tekton | CoX boss room | Chambers of Xeric | Raid points toward CoX uniques |
| The Hueycoatl | Standalone (segmented) | Access to Varlamore: The Rising Darkness content | Dragon hunter wand, hueycoatl hide |
| The Maiden of Sugadinti | ToB boss | Theatre of Blood | Progress toward ToB purple |
| The Nightmare | Standalone (multi-phase) | Sins of the Father | Inquisitor's armour, nightmare staff, harmonised orb |
| Tormented Demons | Elite monster | While Guthix Sleeps | Burning claws, synapse, tormented synapse |
| TzTok-Jad (Fight Caves) | Wave challenge | Access to the TzHaar Fight Cave | Fire cape, tzrek-jad |
| Vanstrom Klause | Quest boss | Sins of the Father | Unlocks Nightmare and blisterwood weapons |
| Venenatis | Wilderness (multi) | Deep Wilderness + anti-PK setup | Voidwaker gem, treasonous ring, dragon pickaxe |
| Vet'ion | Wilderness (multi) | Deep Wilderness + anti-PK setup | Voidwaker blade, ring of the gods, skeletal visage |
| Wyrmscraig boss | Quest / post-quest boss | Wyrmscraig quest line | Wyrmscraig unique drops |
| Xarpus | ToB boss | Theatre of Blood | Progress toward ToB purple |
| Zebak | ToA path boss | Tombs of Amascut | Raid points toward ToA uniques |
- Boss
- Abyssal Sire
- Type
- Slayer boss
- Requirement
- 85 Slayer + abyssal demons task
- Main reward
- Abyssal dagger, bludgeon pieces, abyssal whip
- Boss
- Akkha
- Type
- ToA path boss
- Requirement
- Tombs of Amascut
- Main reward
- Raid points toward ToA uniques
- Boss
- Alchemical Hydra
- Type
- Slayer boss
- Requirement
- 95 Slayer + hydra task
- Main reward
- Hydra's claw, hydra leather, brimstone ring pieces
- Boss
- Araxxor
- Type
- Slayer boss
- Requirement
- 92 Slayer
- Main reward
- Amulet of rancour pieces, araxyte fang
- Boss
- Ba-Ba
- Type
- ToA path boss
- Requirement
- Tombs of Amascut
- Main reward
- Raid points toward ToA uniques
- Boss
- Callisto
- Type
- Wilderness (multi)
- Requirement
- Deep Wilderness + anti-PK setup
- Main reward
- Voidwaker hilt, dragon pickaxe, tyrannical ring
- Boss
- Commander Zilyana
- Type
- GWD general (Saradomin)
- Requirement
- 70 Agility + 40 kill count
- Main reward
- Armadyl crossbow, saradomin sword and hilt
- Boss
- Corporeal Beast
- Type
- Standalone
- Requirement
- Summer's End
- Main reward
- Spirit shield and sigils
- Boss
- Crystalline Hunllef
- Type
- Gauntlet boss
- Requirement
- Song of the Elves
- Main reward
- Crystal armour seeds, enhanced crystal weapon seed
- Boss
- Demonic Gorillas
- Type
- Elite monster
- Requirement
- Monkey Madness II
- Main reward
- Zenyte shard, heavy ballista parts
- Boss
- Duke Sucellus
- Type
- DT2 boss
- Requirement
- Desert Treasure II (Awakener's orb for Awakened)
- Main reward
- Magus vestige, eye of the duke, chromium ingot
- Boss
- Grotesque Guardians
- Type
- Slayer boss (duo)
- Requirement
- 75 Slayer + brittle key
- Main reward
- Black tourmaline core, granite gloves, granite ring
- Boss
- Kephri
- Type
- ToA path boss
- Requirement
- Tombs of Amascut
- Main reward
- Raid points toward ToA uniques
- Boss
- Kree'arra
- Type
- GWD general (Armadyl)
- Requirement
- 70 Ranged + 40 kill count
- Main reward
- Armadyl armour, armadyl hilt
- Boss
- Nylocas Vasilias
- Type
- ToB boss
- Requirement
- Theatre of Blood
- Main reward
- Progress toward ToB purple
- Boss
- Pestilent Bloat
- Type
- ToB boss
- Requirement
- Theatre of Blood
- Main reward
- Progress toward ToB purple
- Boss
- Phantom Muspah
- Type
- Standalone (form swapping)
- Requirement
- Secrets of the North
- Main reward
- Venator bow shard, ancient icon
- Boss
- Sotetseg
- Type
- ToB boss
- Requirement
- Theatre of Blood
- Main reward
- Progress toward ToB purple
- Boss
- Tekton
- Type
- CoX boss room
- Requirement
- Chambers of Xeric
- Main reward
- Raid points toward CoX uniques
- Boss
- The Hueycoatl
- Type
- Standalone (segmented)
- Requirement
- Access to Varlamore: The Rising Darkness content
- Main reward
- Dragon hunter wand, hueycoatl hide
- Boss
- The Maiden of Sugadinti
- Type
- ToB boss
- Requirement
- Theatre of Blood
- Main reward
- Progress toward ToB purple
- Boss
- The Nightmare
- Type
- Standalone (multi-phase)
- Requirement
- Sins of the Father
- Main reward
- Inquisitor's armour, nightmare staff, harmonised orb
- Boss
- Tormented Demons
- Type
- Elite monster
- Requirement
- While Guthix Sleeps
- Main reward
- Burning claws, synapse, tormented synapse
- Boss
- TzTok-Jad (Fight Caves)
- Type
- Wave challenge
- Requirement
- Access to the TzHaar Fight Cave
- Main reward
- Fire cape, tzrek-jad
- Boss
- Vanstrom Klause
- Type
- Quest boss
- Requirement
- Sins of the Father
- Main reward
- Unlocks Nightmare and blisterwood weapons
- Boss
- Venenatis
- Type
- Wilderness (multi)
- Requirement
- Deep Wilderness + anti-PK setup
- Main reward
- Voidwaker gem, treasonous ring, dragon pickaxe
- Boss
- Vet'ion
- Type
- Wilderness (multi)
- Requirement
- Deep Wilderness + anti-PK setup
- Main reward
- Voidwaker blade, ring of the gods, skeletal visage
- Boss
- Wyrmscraig boss
- Type
- Quest / post-quest boss
- Requirement
- Wyrmscraig quest line
- Main reward
- Wyrmscraig unique drops
- Boss
- Xarpus
- Type
- ToB boss
- Requirement
- Theatre of Blood
- Main reward
- Progress toward ToB purple
- Boss
- Zebak
- Type
- ToA path boss
- Requirement
- Tombs of Amascut
- Main reward
- Raid points toward ToA uniques
Tier 5: Endgame
These are the fights people practise for weeks. They combine everything below them and add a failure condition that ends the attempt rather than costing you a few hitpoints.
| Boss | Type | Requirement | Main reward |
|---|---|---|---|
| Awakened DT2 bosses | Awakened variants | Awakener's orb + base boss cleared | Guaranteed vestige, Awakened CA tasks |
| Corrupted Hunllef | Corrupted Gauntlet boss | Song of the Elves | Higher enhanced seed rate, blade of saeldor |
| Doom of Mokhaiotl | Endless delve boss | Access to the Doom of Mokhaiotl delve | Eye of ayak, avernic treads, dom scrolls |
| Fortis Colosseum waves | Wave challenge | Varlamore access | Dizana's quiver, sunfire splinters |
| Great Olm | CoX final boss | Chambers of Xeric | Twisted bow, elder maul, kodai insignia, dragon claws |
| Nex | Ancient Prison boss | Frozen key (four GWD shards) | Torva armour, zaryte crossbow, ancient hilt |
| Phosani's Nightmare | Solo-only variant | Sins of the Father + Nightmare unlock | Higher unique rates, Phosani's pet |
| Sol Heredit (Fortis Colosseum) | Wave challenge | Fortis Colosseum access | Dizana's quiver, sunfire fanatic armour |
| The Leviathan | DT2 boss | Desert Treasure II | Venator vestige, leviathan's lure |
| The Whisperer | DT2 boss | Desert Treasure II | Bellator vestige, siren's staff |
| Triple Jads (Inferno wave 69) | Wave challenge | Inferno access | Clears the hardest pre-Zuk wave |
| Tumeken's and Elidinis' Warden | ToA final boss | Tombs of Amascut | Tumeken's shadow, masori armour, osmumten's fang |
| TzKal-Zuk (Inferno) | Wave challenge | Inferno access + fire cape-level consistency | Infernal cape, jal-nib-rek |
| Vardorvis | DT2 boss | Desert Treasure II | Executioner's axe head, ultor vestige |
| Verzik Vitur | ToB final boss | Theatre of Blood | Scythe of vitur, ghrazi rapier, avernic defender hilt |
| Yama | Contract boss | Contracts from the Chasm of Fire | Oathplate armour, Soulflame horn |
- Boss
- Awakened DT2 bosses
- Type
- Awakened variants
- Requirement
- Awakener's orb + base boss cleared
- Main reward
- Guaranteed vestige, Awakened CA tasks
- Boss
- Corrupted Hunllef
- Type
- Corrupted Gauntlet boss
- Requirement
- Song of the Elves
- Main reward
- Higher enhanced seed rate, blade of saeldor
- Boss
- Doom of Mokhaiotl
- Type
- Endless delve boss
- Requirement
- Access to the Doom of Mokhaiotl delve
- Main reward
- Eye of ayak, avernic treads, dom scrolls
- Boss
- Fortis Colosseum waves
- Type
- Wave challenge
- Requirement
- Varlamore access
- Main reward
- Dizana's quiver, sunfire splinters
- Boss
- Great Olm
- Type
- CoX final boss
- Requirement
- Chambers of Xeric
- Main reward
- Twisted bow, elder maul, kodai insignia, dragon claws
- Boss
- Nex
- Type
- Ancient Prison boss
- Requirement
- Frozen key (four GWD shards)
- Main reward
- Torva armour, zaryte crossbow, ancient hilt
- Boss
- Phosani's Nightmare
- Type
- Solo-only variant
- Requirement
- Sins of the Father + Nightmare unlock
- Main reward
- Higher unique rates, Phosani's pet
- Boss
- Sol Heredit (Fortis Colosseum)
- Type
- Wave challenge
- Requirement
- Fortis Colosseum access
- Main reward
- Dizana's quiver, sunfire fanatic armour
- Boss
- The Leviathan
- Type
- DT2 boss
- Requirement
- Desert Treasure II
- Main reward
- Venator vestige, leviathan's lure
- Boss
- The Whisperer
- Type
- DT2 boss
- Requirement
- Desert Treasure II
- Main reward
- Bellator vestige, siren's staff
- Boss
- Triple Jads (Inferno wave 69)
- Type
- Wave challenge
- Requirement
- Inferno access
- Main reward
- Clears the hardest pre-Zuk wave
- Boss
- Tumeken's and Elidinis' Warden
- Type
- ToA final boss
- Requirement
- Tombs of Amascut
- Main reward
- Tumeken's shadow, masori armour, osmumten's fang
- Boss
- TzKal-Zuk (Inferno)
- Type
- Wave challenge
- Requirement
- Inferno access + fire cape-level consistency
- Main reward
- Infernal cape, jal-nib-rek
- Boss
- Vardorvis
- Type
- DT2 boss
- Requirement
- Desert Treasure II
- Main reward
- Executioner's axe head, ultor vestige
- Boss
- Verzik Vitur
- Type
- ToB final boss
- Requirement
- Theatre of Blood
- Main reward
- Scythe of vitur, ghrazi rapier, avernic defender hilt
- Boss
- Yama
- Type
- Contract boss
- Requirement
- Contracts from the Chasm of Fire
- Main reward
- Oathplate armour, Soulflame horn
There is no shortcut into this tier. Every player who is consistent here spent time being inconsistent at tier 3 and 4 first.
How to Actually Learn a New Boss
A routine that works
- Read the whole mechanics section before your first attempt, not during it
- Go in on gear you would not mind losing, and expect to lose it
- Pick one mechanic per trip to get right, and ignore your kill time entirely
- Watch your own deaths rather than someone else's kills — your mistakes are not their mistakes
- Only upgrade gear once you are surviving consistently, so the upgrade buys speed rather than survival
- Use the Combat Achievement tasks for that boss as a structured practice list
FAQ
What should my actual first boss be?
Any tier 1 boss with a requirement you already meet. The specific choice matters far less than doing full trips at it until prayer switching stops being something you think about.
When am I ready for raids?
When you can complete trips at tier 3 bosses without taking avoidable damage. Raids assume that baseline and add team coordination on top of it.
Do I need best-in-slot gear to progress?
No, and buying it early actively slows you down, because you learn less from a death you can absorb. Learn on cheap gear, then upgrade to go faster.
Should I follow profit or difficulty when choosing the next boss?
Difficulty. A boss you die at is not profitable at any drop table, and the skills from a lower tier transfer upward while the GP does not.
How long does it take to get good at a boss?
Long enough that your kill count is a better measure than your hours. Most players are consistent somewhere between 20 and 100 kills depending on the fight's length and complexity.
Can BILS teach me instead of doing it for me?
Yes. Coaching keeps you in the fight while a team member walks you through it, which is a different product from having the content completed for you.
Related Guides
- OSRS PVM Boss Service: Professional Kills for Every Difficulty Level
- OSRS Bosses List: Every Boss, Mini-Boss and Slayer Boss
- OSRS Combat Achievements Guide: Easy, Medium and Hard Progression
- OSRS Best Bosses for Money: Mid-Game to End-Game
- OSRS Raids Overview: Which Raid to Learn First
- OSRS Account Progression Plan: From Fresh Account to Raids Ready
Bottom Line
Pick the next boss by difficulty tier, not by drop table. The skills from tier 1 and 2 are what make tier 4 possible, and no amount of gear substitutes for them.
The single best change most players can make is to stop learning bosses in expensive gear. Cheap setups mean more attempts, and attempts are what teach you.
If you want the content completed rather than learned, our PvM team plays it by hand. If you want to learn it, ask about coaching instead.
Game content changes with updates. Verify current details on the Old School RuneScape Wiki.
Need a trusted team? Bils Services
Enjoyed the guide?
Drop a like — it helps other Adventurers find the good stuff.
Community
Comments
Silence in the hall…
Be the first Adventurer to leave a mark.
Join the thread
Add a comment
Tips, drops, or “this carried my account” — keep it useful.
bilsservices · bils services · bilsservices.com

