


OSRS Grotesque Guardians Guide: Mechanics, Gear & Drops
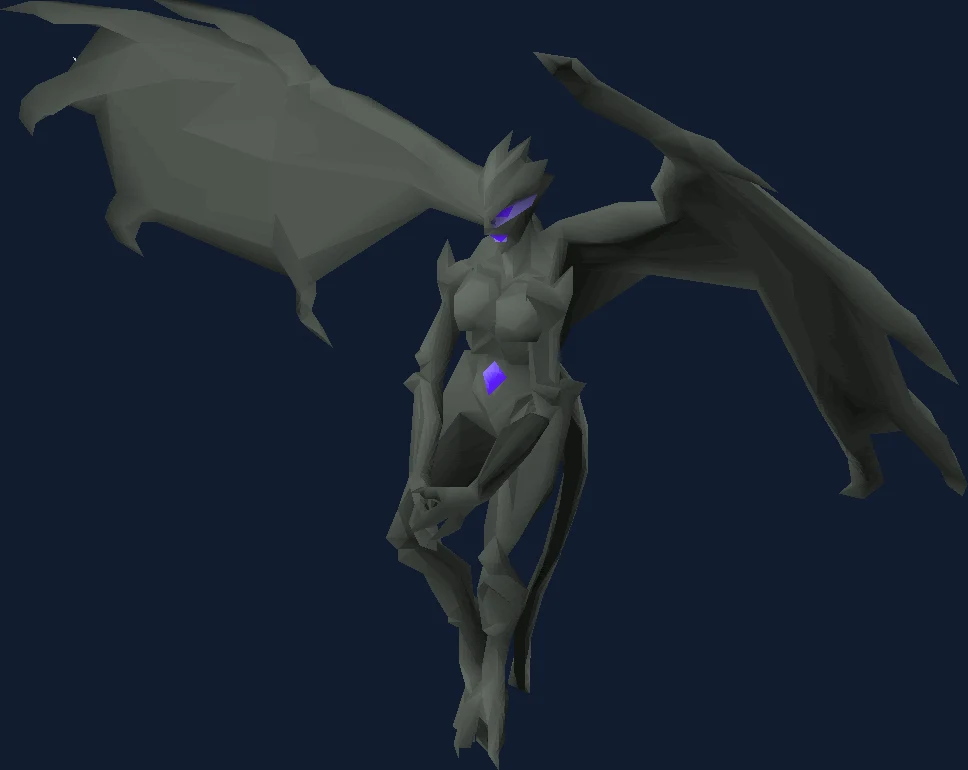
Grotesque Guardians guide for Dawn and Dusk phases, gear, and unique drops.
Why People Fight Grotesque Guardians
The Grotesque Guardians are built around a single restriction that shapes everything else: Dawn is airborne and immune to anything except ranged, magic or a halberd, while Dusk's armour turns away ranged and magic entirely. The two of them take turns being attackable. That means you are never fighting one boss with one setup — you are switching weapons on a schedule the fight dictates, and every second spent in the wrong equipment is a second of nothing happening.
They are also the only Slayer boss you have to earn access to twice. A brittle key drops from ordinary gargoyles while you are on a gargoyle task, and it unlocks the Slayer Tower rooftop permanently. Having unlocked it, you still need a gargoyle task, or the Guardians themselves as a boss task, every time you want to go up. The key is a one-off; the task is not.
What keeps players coming back is a drop table built around the black tourmaline core, the granite gloves, the granite ring and the granite hammer, alongside a steady stream of ordinary supplies — mushroom potatoes, two-dose super combat and ranging potions, rune equipment — that changes how you pack an inventory. The strategy page leans on this openly, suggesting you bring sustain rather than food because the bosses have such low Defence that healing off them is easy. No values or rates appear here; the wiki keeps the current figures.
There is one piece of equipment you cannot substitute. Like every gargoyle in the game, both Guardians have to be finished with a rock hammer, granite hammer or rock thrownhammer. Forgetting it does not make the fight harder — it makes the fight impossible to complete, twice per kill.
Its own attack is melee (slash), so Protect from Melee is the prayer it asks for.
In our index it sits in the Slayer boss group at difficulty 4 of 5, where kill times come down to Dawn and Dusk phase swaps.
| Field | Detail |
|---|---|
| Classification | Slayer boss (duo) (Slayer Monster) |
| Group | Slayer boss |
| Difficulty | 4 / 5 |
| Solo or team | Solo |
| Access requirement | 75 Slayer + brittle key |
| Notable reward | Black tourmaline core, granite gloves, granite ring |
| Signature mechanic | Dawn and Dusk phase swaps |
| Hitpoints | 450 |
| Max hits | 15 (melee) 33 (special attack) |
| Released | 26 October 2017 |
- Field
- Classification
- Detail
- Slayer boss (duo) (Slayer Monster)
- Field
- Group
- Detail
- Slayer boss
- Field
- Difficulty
- Detail
- 4 / 5
- Field
- Solo or team
- Detail
- Solo
- Field
- Access requirement
- Detail
- 75 Slayer + brittle key
- Field
- Notable reward
- Detail
- Black tourmaline core, granite gloves, granite ring
- Field
- Signature mechanic
- Detail
- Dawn and Dusk phase swaps
- Field
- Hitpoints
- Detail
- 450
- Field
- Max hits
- Detail
- 15 (melee) 33 (special attack)
- Field
- Released
- Detail
- 26 October 2017
Is Grotesque Guardians the Right Fight for You Yet?
This is a lower-level boss with a high-level habit requirement. The recommended stats sit around 75 in the combat skills, which most accounts reach long before they meet anything this fiddly, and the difficulty lives entirely in whether you can change equipment cleanly while dodging something. If your PvM experience so far has been single-setup fights, expect the first few kills to feel clumsy in a way the stat requirements do not predict.
You are ready for this fight if:
- You have 75 Slayer, a gargoyle task, and a brittle key already used on the rooftop door.
- Priest in Peril is complete, since Morytania access is a hard requirement.
- You carry a rock hammer, granite hammer or rock thrownhammer, and you have checked that it is in the inventory rather than in the bank.
- You have both a melee setup and either a ranged setup or a noxious halberd. Nothing else in the halberd family attacks fast enough to be worth using on Dawn.
Come back later if any of these are true:
- You were planning to bring magic. Dawn resists magic more than she resists ranged or halberd melee, and the strategy page recommends against it.
- You have no nosepeg and less than 81 Agility. That combination is how a single death at the Guardians turns into permanently lost items on the walk back.
- You cannot reliably move one tile on a visual cue. Dusk's blinding attack, Dawn's rockfall and the phase four prison are all solved by stepping, and all three punish standing still.
- You are relying on a slow halberd for Dawn. The wiki is specific that everything except the noxious halberd hits too slowly to be viable.
Access Requirements
Grotesque Guardians is gated behind 75 Slayer + brittle key.
75 Slayer + brittle key also tends to sit alongside the other Slayer boss gates, so it is usually cheaper to clear them together than to come back for each one. The boss requirements checklist lists them by group.
Location and How to Get There
Grotesque Guardians is found in the rooftop of the Slayer Tower.
Climb to the Slayer Tower roof using a brittle key. The key drops from gargoyles while you are on a gargoyle task, so the route genuinely starts several kills before you reach the door.
Four teleports put you near the Slayer Tower: a slayer ring drops you at the main entrance, fairy ring CKS lands south of it, Salve Graveyard Teleport also arrives south, and Kharyrll Teleport puts you in Canifis a short walk from the bank. An eternal slayer ring is the one the wiki singles out, because it covers both the trip in and the banking.
Inside, 61 Agility lets you climb the spikey chain on the ground floor and then take the south-western staircase up to the rooftop entrance. The game will warn you about the aberrant spectres if you are not wearing a nosepeg, and the warning is worth heeding.
At 81 Agility the Ivy outside the tower entrance takes you straight to the roof. That shortcut is recommended specifically for players who are still dying to the Guardians, because it removes the spectre-infested walk between the rooftop and the magical chest — which is where a second death turns lost items into permanently lost items.
One scheduling quirk to know before it happens: unlike most instances, this one ejects you after five minutes of inactivity, with warnings at one minute and thirty seconds remaining. Ringing the Cloister Bell resets the timer.
Recommended Stats and Gear at Three Budgets
| Skill | Recommended | What it changes |
|---|---|---|
| Slayer | 75, with a gargoyle or boss task | A hard gate, and it applies every trip. The brittle key unlock is permanent but the task requirement is not. |
| Attack and Strength | 75 or higher | Dusk is melee-only for you, and the fight has two separate phases where he is the only thing you can hit. |
| Defence | 70 or higher | Most of the incoming damage is chip you cannot pray away in full, so defence is doing steady work rather than saving you from one big hit. |
| Ranged | 75 or higher | Dawn cannot be reached with ordinary melee, so unless you are running a noxious halberd this is your only way to damage her. |
| Hitpoints | 75 or higher | The phase four prison deals up to 65 and heals Dusk with it, and a trample under him reaches 40. |
| Prayer | 70 for Piety, 74 for Rigour | You want both, because you are alternating between a melee setup and a ranged one within a single kill. |
| Agility | 61 for the spikey chain, 81 for the Ivy | The Ivy is the one that matters. It puts you on the roof directly and removes the walk past the aberrant spectres. |
- Skill
- Slayer
- Recommended
- 75, with a gargoyle or boss task
- What it changes
- A hard gate, and it applies every trip. The brittle key unlock is permanent but the task requirement is not.
- Skill
- Attack and Strength
- Recommended
- 75 or higher
- What it changes
- Dusk is melee-only for you, and the fight has two separate phases where he is the only thing you can hit.
- Skill
- Defence
- Recommended
- 70 or higher
- What it changes
- Most of the incoming damage is chip you cannot pray away in full, so defence is doing steady work rather than saving you from one big hit.
- Skill
- Ranged
- Recommended
- 75 or higher
- What it changes
- Dawn cannot be reached with ordinary melee, so unless you are running a noxious halberd this is your only way to damage her.
- Skill
- Hitpoints
- Recommended
- 75 or higher
- What it changes
- The phase four prison deals up to 65 and heals Dusk with it, and a trample under him reaches 40.
- Skill
- Prayer
- Recommended
- 70 for Piety, 74 for Rigour
- What it changes
- You want both, because you are alternating between a melee setup and a ranged one within a single kill.
- Skill
- Agility
- Recommended
- 61 for the spikey chain, 81 for the Ivy
- What it changes
- The Ivy is the one that matters. It puts you on the roof directly and removes the walk past the aberrant spectres.
Priest in Peril also sits in front of all of this, since it is what opens Morytania. It is the only quest requirement, and it is worth clearing well before you start chasing a brittle key.
| Slot | Starting out | Mid game | Best in slot |
|---|---|---|---|
| Melee weapon | Zamorakian hasta, or a dragon scimitar | Osmumten's fang, abyssal whip or abyssal bludgeon, moving up to a Ghrazi rapier, blade of saeldor or inquisitor's mace | Scythe of vitur, with a granite hammer or soulreaper axe as the alternative |
| Ranged switch | Magic shortbow (i), or a hunters' sunlight crossbow | Eclipse atlatl, or a bow of faerdhinen | Venator bow paired with a toxic blowpipe |
| Head | Slayer helmet (i) | Slayer helmet (i) | Slayer helmet (i) |
| Neck | Amulet of strength, or glory | Amulet of fury or blood fury; necklace of anguish on the ranged switch | Amulet of rancour, with a necklace of rupture for ranged |
| Cape | Ranging cape (t), or Ava's accumulator | Fire cape, with Ava's assembler for ranged | Infernal cape, with Dizana's quiver for ranged |
| Body and legs | Black d'hide, or dragon platelegs with an obsidian body | Fighter torso or blood moon with Verac's plateskirt; eclipse moon or Karil's for the ranged switch | Oathplate with a slash weapon or Torva; Masori (f) for the ranged switch |
| Shield | Dragonfire shield | Dragon defender | Avernic defender, with a twisted buckler only if you are running a crossbow |
| Hands | Rune or dragon gloves | Barrows gloves | Ferocious gloves, with Zaryte vambraces for ranged |
| Feet | Rune or mixed hide boots | Dragon, echo or guardian boots; Aranea boots double for both styles | Primordial boots, or Avernic treads, with pegasians for the ranged switch |
| Ring | Warrior, treasonous or tyrannical ring (i), matched to your style | Berserker ring (i), brimstone ring or a ring of shadows | Ultor ring, or Bellator with a scythe, or a Lightbearer if you lean on specials |
| Finisher | Rock hammer | Rock hammer, or a granite hammer used as your weapon | Rock thrownhammer, or the Gargoyle smasher unlock if you have it |
- Slot
- Melee weapon
- Starting out
- Zamorakian hasta, or a dragon scimitar
- Mid game
- Osmumten's fang, abyssal whip or abyssal bludgeon, moving up to a Ghrazi rapier, blade of saeldor or inquisitor's mace
- Best in slot
- Scythe of vitur, with a granite hammer or soulreaper axe as the alternative
- Slot
- Ranged switch
- Starting out
- Magic shortbow (i), or a hunters' sunlight crossbow
- Mid game
- Eclipse atlatl, or a bow of faerdhinen
- Best in slot
- Venator bow paired with a toxic blowpipe
- Slot
- Head
- Starting out
- Slayer helmet (i)
- Mid game
- Slayer helmet (i)
- Best in slot
- Slayer helmet (i)
- Slot
- Neck
- Starting out
- Amulet of strength, or glory
- Mid game
- Amulet of fury or blood fury; necklace of anguish on the ranged switch
- Best in slot
- Amulet of rancour, with a necklace of rupture for ranged
- Slot
- Cape
- Starting out
- Ranging cape (t), or Ava's accumulator
- Mid game
- Fire cape, with Ava's assembler for ranged
- Best in slot
- Infernal cape, with Dizana's quiver for ranged
- Slot
- Body and legs
- Starting out
- Black d'hide, or dragon platelegs with an obsidian body
- Mid game
- Fighter torso or blood moon with Verac's plateskirt; eclipse moon or Karil's for the ranged switch
- Best in slot
- Oathplate with a slash weapon or Torva; Masori (f) for the ranged switch
- Slot
- Shield
- Starting out
- Dragonfire shield
- Mid game
- Dragon defender
- Best in slot
- Avernic defender, with a twisted buckler only if you are running a crossbow
- Slot
- Hands
- Starting out
- Rune or dragon gloves
- Mid game
- Barrows gloves
- Best in slot
- Ferocious gloves, with Zaryte vambraces for ranged
- Slot
- Feet
- Starting out
- Rune or mixed hide boots
- Mid game
- Dragon, echo or guardian boots; Aranea boots double for both styles
- Best in slot
- Primordial boots, or Avernic treads, with pegasians for the ranged switch
- Slot
- Ring
- Starting out
- Warrior, treasonous or tyrannical ring (i), matched to your style
- Mid game
- Berserker ring (i), brimstone ring or a ring of shadows
- Best in slot
- Ultor ring, or Bellator with a scythe, or a Lightbearer if you lean on specials
- Slot
- Finisher
- Starting out
- Rock hammer
- Mid game
- Rock hammer, or a granite hammer used as your weapon
- Best in slot
- Rock thrownhammer, or the Gargoyle smasher unlock if you have it
The immunity pattern is the reason this table has two weapon rows. Dawn is airborne, so she can only be hit with ranged, magic or a halberd; Dusk's armour repels ranged and magic, so he can only be hit with melee. Magic is technically legal against Dawn and still not recommended, because she resists it more than she resists the other two options.
If you are going melee-only, the noxious halberd is not a preference — it is the requirement. Every other halberd attacks too slowly to keep up with Dawn, and a crystal halberd earns its place as a finishing special attack rather than as a main weapon.
The venator bow is the standout ranged option for a specific mechanical reason. Stack Dawn and Dusk on top of each other, and a charged venator bow ricochets so that its shots hit Dawn twice. A toxic blowpipe fills the gaps while you are waiting for Dusk to walk into position.
Dusk carries minus one flat armour during phase two, which nudges you towards multi-hit weapons — though his Defence and bonuses are poor enough that almost any weapon performs acceptably. He is also immune to burn damage, so burning claws and similar effects are wasted on him.
An eternal slayer ring is worth more here than its stats suggest. It teleports to the Slayer Tower and to the Stronghold Slayer Cave next to a bank, which covers both halves of the trip in one slot.
| Check | Value |
|---|---|
| Prayers for its own attacks | Protect from Melee |
| Its Defence level | 100 |
| Its Magic level | 140 |
| Its lowest defence bonus, per its infobox | stab, slash, crush, light ammunition, standard ammunition, heavy ammunition, magic |
| Elemental weakness | 40% to earth spells |
| Monster attributes | Golem |
- Check
- Prayers for its own attacks
- Value
- Protect from Melee
- Check
- Its Defence level
- Value
- 100
- Check
- Its Magic level
- Value
- 140
- Check
- Its lowest defence bonus, per its infobox
- Value
- stab, slash, crush, light ammunition, standard ammunition, heavy ammunition, magic
- Check
- Elemental weakness
- Value
- 40% to earth spells
- Check
- Monster attributes
- Value
- Golem
- Tagged as a golem.
Inventory and Supplies
| What | Why it is there |
|---|---|
| A rock hammer, granite hammer or rock thrownhammer | Non-negotiable. Both Guardians must be finished with one, so it is needed twice per kill unless you have unlocked Gargoyle smasher. |
| Your ranged switches | Body, legs, cape, neck, hands and the bow itself. The eclipse atlatl exists partly to shrink this list, since it scales off strength and pairs with melee gear. |
| A sustain instead of food | An amulet of blood fury, a full set of Guthan's, or a Saradomin godsword with a Lightbearer. The bosses' Defence is low enough that healing off them is straightforward. |
| Super restores rather than prayer potions | They let you make use of Saradomin brews. The trade is that brews lower your combat stats and the boss's potion drops are not always there to boost you back. |
| Four or more pieces of food or brews | A floor rather than a plan, because the Guardians frequently drop mushroom potatoes and two-dose super combat and ranging potions that extend the trip on their own. |
| Divine super combat and divine ranging potions | One of each, since you are alternating styles inside a single kill and need both sets of stats held up. |
| Special attack weapons | Dragon claws for damage, a crystal halberd specifically for finishing Dawn — the wiki rates last-hitting Dawn as the best use of a crystal halberd special. |
| A slayer ring, ideally eternal | The teleport to the tower and the teleport to a bank in one item. |
| A divine rune pouch and a book of the dead | Runes for Death Charge and thralls. Note that because Dawn is immune to melee and Dusk to ranged and magic, permanent thrall uptime across a kill takes four thralls. |
| A surge potion, on a maximum-gear trip | Run energy, for a fight that is largely about stepping one tile away from things. |
- What
- A rock hammer, granite hammer or rock thrownhammer
- Why it is there
- Non-negotiable. Both Guardians must be finished with one, so it is needed twice per kill unless you have unlocked Gargoyle smasher.
- What
- Your ranged switches
- Why it is there
- Body, legs, cape, neck, hands and the bow itself. The eclipse atlatl exists partly to shrink this list, since it scales off strength and pairs with melee gear.
- What
- A sustain instead of food
- Why it is there
- An amulet of blood fury, a full set of Guthan's, or a Saradomin godsword with a Lightbearer. The bosses' Defence is low enough that healing off them is straightforward.
- What
- Super restores rather than prayer potions
- Why it is there
- They let you make use of Saradomin brews. The trade is that brews lower your combat stats and the boss's potion drops are not always there to boost you back.
- What
- Four or more pieces of food or brews
- Why it is there
- A floor rather than a plan, because the Guardians frequently drop mushroom potatoes and two-dose super combat and ranging potions that extend the trip on their own.
- What
- Divine super combat and divine ranging potions
- Why it is there
- One of each, since you are alternating styles inside a single kill and need both sets of stats held up.
- What
- Special attack weapons
- Why it is there
- Dragon claws for damage, a crystal halberd specifically for finishing Dawn — the wiki rates last-hitting Dawn as the best use of a crystal halberd special.
- What
- A slayer ring, ideally eternal
- Why it is there
- The teleport to the tower and the teleport to a bank in one item.
- What
- A divine rune pouch and a book of the dead
- Why it is there
- Runes for Death Charge and thralls. Note that because Dawn is immune to melee and Dusk to ranged and magic, permanent thrall uptime across a kill takes four thralls.
- What
- A surge potion, on a maximum-gear trip
- Why it is there
- Run energy, for a fight that is largely about stepping one tile away from things.
The unusual thing about a Guardians inventory is that the boss restocks it. Mushroom potatoes, rune equipment and two-dose combat potions arrive often enough that a trip can outlast what you packed, which is why the wiki suggests replacing food with sustain rather than simply carrying more food. It is not guaranteed, though, so treat it as an extension rather than a plan.
If you commit to a melee-only setup with a noxious halberd, dropping the ranged switches frees a surprising amount of room for restores and brews — and the wiki notes that Torva or oathplate can come down to Bandos or blood moon, and an amulet of rancour down to a torture, while still reaching two-minute kills.
Prayer and Spellbook
Protection prayers here reduce rather than remove, which is a different discipline from the all-or-nothing prayer most Slayer bosses train. Across the first three phases, Protect from Melee cuts Dusk's slash damage by 80 per cent, taking his maximum from 15 down to 2. Dawn's attacks are only partially blocked.
The opening of phase one has a specific prayer rhythm worth learning. Start the fight from the leftmost tile beside the bell, which off-ticks the pair automatically, then begin on Protect from Missiles, switch to Protect from Melee when Dawn's attack animation starts, and switch back to Protect from Missiles immediately after Dusk's animation starts. If that is more attention than you want to spend, the low-effort version is to hold Protect from Melee and stand next to Dawn so that she uses melee attacks instead.
Phase four is where prayer becomes genuinely interesting, because Dusk starts using both melee and ranged. Prayer cuts his melee by roughly 80 per cent and his ranged by about 55, bringing the maximums down to around 4 and 14 respectively. On his very first attack of the phase there is a two in three chance he deliberately uses the style you are not praying against. After that he has a one in six chance of switching styles each attack, rising to one in three if you are praying correctly against his current style.
The practical rule the wiki lands on is refreshingly simple given all that: pray against the style he used last. Trying to predict him from inside melee range is not a game you win.
Mechanics That Decide the Fight
| Mechanic | How you see it coming | What it does | Your answer |
|---|---|---|---|
| Split immunity | Structural, and present from the first tick. | Dawn cannot be hit by anything except ranged, magic or a halberd. Dusk cannot be hit by ranged or magic, and is immune to burn damage. | Carry both setups, or commit to a noxious halberd and fight the whole thing in melee. Magic is legal against Dawn and still the worst of her three options. |
| Stone Ball | Dawn launches it during the phases where she is attackable. | A 3x3 area of effect that encases you in stone, stunning you for 10 ticks — six seconds — and dealing up to 15. | Move out of the landing area. Six seconds of standing still while Dusk works on you is the real cost, not the 15 damage. |
| Dusk's blinding attack | His missing wing starts to glow, which begins after his first attack of phase two. | Knocks you back and deals damage in the high twenties. | Step one tile away. You get three attacks in with any four or five tick weapon before you need to move, and it is safe to return once his wings cover his face. |
| Trample | You standing underneath Dusk, at any point where he is active. | Up to 40 damage. | Never stand under him. In phase four, be careful not to click on Dusk until his prison animation has finished, or you may path under him by accident. |
| Rockfall | Looming shadows on the rooftop during phase two, as Dawn drops nine or ten pieces of debris at four different speeds. | Each impact has a 3x3 area of effect. The edges deal up to 22; a direct hit also knocks you out for 10 ticks. | Read the shadows and keep moving. The stun is what kills you, because it holds you in place for whatever lands next. |
| Lightning vortices | The pair fly apart at the start of phase three and charge together. Vortices appear anywhere on the roof, and one always targets the tile you are standing on. | 5 to 10 damage per tick to anyone standing on or adjacent to a vortex. | You get roughly a second of warning from the coloured vortex. Find clear ground and stay there — they all expire the moment the pair become attackable again. |
| Energy spheres | Three of them, launched across the rooftop the moment Dawn becomes attackable in phase three. | They charge through three stages. If Dawn absorbs one at full charge, it heals her for 90 hitpoints. | Absorb them yourself — there is no penalty for doing so at any charge level — or kill Dawn fast enough that she never gets the chance. |
| The prison | Phase four begins with it, and it recurs. Dusk drags you somewhere in the arena and encloses you in a 3x3 barrier of blue flames. | If you do not escape within 5 ticks you take up to 65, and that damage heals Dusk. | One flame is always missing. Step onto that tile. Even when you are dragged to an edge and the exit leads nowhere, standing on the missing flame prevents the damage and the heal. |
| The rock hammer finish | Either Guardian dropping below 10 hitpoints. | Neither of them can be killed by ordinary damage. They stop at low health until you smash them. | Use the hammer, or the Gargoyle smasher ability if you have unlocked it. This happens twice in every kill. |
- Mechanic
- Split immunity
- How you see it coming
- Structural, and present from the first tick.
- What it does
- Dawn cannot be hit by anything except ranged, magic or a halberd. Dusk cannot be hit by ranged or magic, and is immune to burn damage.
- Your answer
- Carry both setups, or commit to a noxious halberd and fight the whole thing in melee. Magic is legal against Dawn and still the worst of her three options.
- Mechanic
- Stone Ball
- How you see it coming
- Dawn launches it during the phases where she is attackable.
- What it does
- A 3x3 area of effect that encases you in stone, stunning you for 10 ticks — six seconds — and dealing up to 15.
- Your answer
- Move out of the landing area. Six seconds of standing still while Dusk works on you is the real cost, not the 15 damage.
- Mechanic
- Dusk's blinding attack
- How you see it coming
- His missing wing starts to glow, which begins after his first attack of phase two.
- What it does
- Knocks you back and deals damage in the high twenties.
- Your answer
- Step one tile away. You get three attacks in with any four or five tick weapon before you need to move, and it is safe to return once his wings cover his face.
- Mechanic
- Trample
- How you see it coming
- You standing underneath Dusk, at any point where he is active.
- What it does
- Up to 40 damage.
- Your answer
- Never stand under him. In phase four, be careful not to click on Dusk until his prison animation has finished, or you may path under him by accident.
- Mechanic
- Rockfall
- How you see it coming
- Looming shadows on the rooftop during phase two, as Dawn drops nine or ten pieces of debris at four different speeds.
- What it does
- Each impact has a 3x3 area of effect. The edges deal up to 22; a direct hit also knocks you out for 10 ticks.
- Your answer
- Read the shadows and keep moving. The stun is what kills you, because it holds you in place for whatever lands next.
- Mechanic
- Lightning vortices
- How you see it coming
- The pair fly apart at the start of phase three and charge together. Vortices appear anywhere on the roof, and one always targets the tile you are standing on.
- What it does
- 5 to 10 damage per tick to anyone standing on or adjacent to a vortex.
- Your answer
- You get roughly a second of warning from the coloured vortex. Find clear ground and stay there — they all expire the moment the pair become attackable again.
- Mechanic
- Energy spheres
- How you see it coming
- Three of them, launched across the rooftop the moment Dawn becomes attackable in phase three.
- What it does
- They charge through three stages. If Dawn absorbs one at full charge, it heals her for 90 hitpoints.
- Your answer
- Absorb them yourself — there is no penalty for doing so at any charge level — or kill Dawn fast enough that she never gets the chance.
- Mechanic
- The prison
- How you see it coming
- Phase four begins with it, and it recurs. Dusk drags you somewhere in the arena and encloses you in a 3x3 barrier of blue flames.
- What it does
- If you do not escape within 5 ticks you take up to 65, and that damage heals Dusk.
- Your answer
- One flame is always missing. Step onto that tile. Even when you are dragged to an edge and the exit leads nowhere, standing on the missing flame prevents the damage and the heal.
- Mechanic
- The rock hammer finish
- How you see it coming
- Either Guardian dropping below 10 hitpoints.
- What it does
- Neither of them can be killed by ordinary damage. They stop at low health until you smash them.
- Your answer
- Use the hammer, or the Gargoyle smasher ability if you have unlocked it. This happens twice in every kill.
Dusk changes substantially in phase four rather than merely getting a new attack. His Attack level rises to 300, with Strength, Magic and Ranged at 250 and Defence at 150, he gains a point of flat armour, and his size grows from 5x5 to 6x6. His ranged attack now hits twice for up to 15 each, and his melee for up to 26.
That ranged attack calculates damage unusually. If the accuracy check succeeds, the first orb always lands for 60 per cent of his maximum hit — halved again if you are praying correctly — rather than rolling. The second orb rolls normally and then rolls again between zero and whatever it just produced, which is why the second hit is so often small.
Two timing details are worth having in advance. Dusk's blinding attack can land as or shortly after he is smashed with the rock hammer, so you can take damage from a boss that is already dead. And if you are inside the prison when he becomes smashable with Gargoyle smasher, you may path straight to him instead of leaving the barrier, or fail to move at all.
When Dusk uses ranged in phase four he stays where he is; when he uses melee he closes the distance. Halberd players can use that, standing one tile back and letting his choice of attack tell them what he is about to do.
| Property | Value |
|---|---|
| Combat level | 248 |
| Attack styles | Slash |
| Attack speed | 6 ticks |
| Attacks on sight | No |
| Poisons you | No |
| Slayer requirement | 75 |
- Property
- Combat level
- Value
- 248
- Property
- Attack styles
- Value
- Slash
- Property
- Attack speed
- Value
- 6 ticks
- Property
- Attacks on sight
- Value
- No
- Property
- Poisons you
- Value
- No
- Property
- Slayer requirement
- Value
- 75
Where Grotesque Guardians Sits in Progression
Within the Slayer boss group, the fights below Grotesque Guardians are Basilisk Knights and Maggot King. Nothing in the Slayer boss group is rated harder — Grotesque Guardians shares the top band with Araxxor and Abyssal Sire and others at the same rating.
Phase by Phase
Phase one — Dawn alone
Dusk is immune to everything in this phase, so the fight is Dawn and only Dawn. She is airborne, which means ranged, magic or a halberd; there is no melee answer that does not involve a noxious halberd.
Start from the leftmost tile next to the bell. That position off-ticks both Guardians automatically, which is a free reduction in incoming damage for no ongoing effort. From there the attentive prayer pattern is Protect from Missiles by default, Protect from Melee when Dawn's animation starts, and back to Missiles as soon as Dusk's animation starts.
The optimal ranged play is to stack Dawn and Dusk on top of one another and use a charged venator bow, which ricochets and hits Dawn twice. While you are waiting for Dusk to wander into position, a toxic blowpipe keeps damage on her.
- Her Stone Ball has a 3x3 area of effect and stuns for six seconds if it lands, on top of up to 15 damage.
- The low-effort alternative is holding Protect from Melee and standing next to her so she uses melee attacks instead. Dancing under Dusk with Protect from Missiles also works.
- At 55 per cent health she ascends and phase two begins.
Phase two — Dusk, and everything falling on you
Now Dusk is the target and melee is the only thing that touches him. After his first attack he begins charging a blinding attack, announced by his missing wing glowing. Stepping one tile away avoids it; failing to means a knockback and damage in the high twenties.
The rhythm is comfortable once you trust it: three attacks with any four or five tick weapon, then move. The window in which the attack can catch you is short, and it is safe to walk back in once his wings cover his face. Returning just as he spreads them is what gets people hit.
Meanwhile Dawn is dropping rockfall from above — nine or ten pieces of debris arriving at four different speeds, each shadowed before it lands, each with a 3x3 area of effect. Clipping an edge costs up to 22; taking one directly also stuns you for six seconds, which is far worse.
- Never stand under Dusk during this phase. The trample deals up to 40 and there is no version of standing there that is worth it.
- Dusk has minus one flat armour here, which slightly favours multi-hit weapons, though his defences are poor enough that anything works.
- Burn damage does nothing to him, so burning claws should be saved for something else.
- At 55 per cent of his health Dawn descends and phase three begins.
Phase three — lightning, then the spheres
Dusk flies west and the pair charge a lightning attack together. Vortices appear across the rooftop, one of them always on your current tile, dealing 5 to 10 damage per tick to anyone standing on or next to them. You get about a second of warning from the coloured vortex; they do not stack on each other, though as many as three can appear close together. All of them expire the instant the pair become attackable.
Then Dawn becomes attackable, Dusk goes invulnerable again, and the phase's real mechanic starts. Dawn launches three energy spheres across the roof. They charge through three stages, and if she absorbs one at full charge it heals her for 90. You can absorb them yourself at any charge level with no penalty at all.
For prayer, the clean spot is one tile west of the eastern wall — not under Dawn and not beside her — taken immediately after the lightning ends. From there you can pray against both of her attacks, starting with melee and alternating.
- With 90 or more in the relevant combat stats you can skip the orbs entirely by killing Dawn before she absorbs any. The wiki puts a toxic blowpipe at roughly a three in four chance and a venator bow at around four in five.
- If your damage is not there yet, absorb the spheres first and then finish her standing beside her with Protect from Melee up.
- A crystal halberd special is at its best as the last hit on Dawn — better used there than anywhere else in the fight.
- Below 10 hitpoints she stops taking damage. Use the rock hammer.
Phase four — Dusk, empowered
Dusk absorbs what is left of Dawn and becomes a substantially different monster: Attack 300, Strength, Magic and Ranged at 250, Defence 150, an extra point of flat armour, and a 6x6 footprint instead of 5x5. He uses both melee, for up to 26, and a double ranged attack for up to 15 per orb.
He opens with the prison. You are dragged somewhere in the arena and enclosed in a 3x3 barrier of blue flames with exactly one flame missing. That gap is your exit, and you have five ticks to take it before the barrier deals up to 65 damage and heals him with it. He is invulnerable the first time he does this, but attackable on every subsequent one — which means you can path out simply by attacking him, though clicking a safe tile first is the safer habit.
For the rest of the phase, pray against whatever style he used last. He has a one in six chance of switching each attack, doubling to one in three when you are praying correctly, and on his very first attack of the phase he is twice as likely to use the style you are not praying against.
- If he drags you to an edge and the exit leads into nothing, simply standing on the missing flame tile is enough to deny both the damage and the heal.
- His trample is active again. Do not click on him until the prison animation has fully finished or you may run underneath him.
- Halberd users should sit one tile back where possible. He stays put when using ranged and closes distance when using melee, so his behaviour tells you which is coming.
- Below 10 hitpoints, the rock hammer again. Be aware his blinding attack can still land as or just after he dies.
Fight Strategy: Dawn and Dusk phase swaps
- Ring the Cloister Bell, or use its quick-start option once you have five kills on the boss.
- Open from the leftmost tile beside the bell so the pair are off-ticked, and go to work on Dawn with ranged or a noxious halberd.
- Stack Dawn and Dusk together if you are running a venator bow, so the ricochet hits her twice.
- At Dawn's 55 per cent, switch to melee for Dusk and settle into three attacks, step out, three attacks.
- Watch the shadows for rockfall throughout, and never stand under Dusk.
- At Dusk's 55 per cent, get clear of the lightning vortices and wait them out.
- When Dawn returns, either kill her before the spheres charge or absorb the spheres yourself, then finish her with the rock hammer below 10 hitpoints.
- Escape the phase four prison through the missing flame, then pray against Dusk's previous attack style until he is low enough to smash.
The kill is really a sequence of equipment states rather than a sequence of tactics, and the players who get fast at it are the ones who make the switching invisible. Every phase change is also a gear change, and the seconds lost fumbling through an inventory are worth more than any single upgrade in the gear table.
The one place where raw damage genuinely converts into a shorter fight is phase three. Killing Dawn before she absorbs a fully charged sphere saves you 90 hitpoints of her health per sphere, which is why the wiki treats the orb skip as the dividing line between a competent kill and a fast one.
Positioning and Movement
The rooftop has three positions that do specific work. The leftmost tile next to the bell is where you start, because it off-ticks both Guardians. One tile west of the eastern wall is where you stand after the lightning, because from there you can pray against both of Dawn's attacks. And one tile away from Dusk is where a halberd user lives, because it keeps you out of trample range while still landing hits.
Everywhere else, the rule is that you are always about to move. Rockfall, the blinding attack, the Stone Ball and the lightning vortices are all solved by stepping, and all four are far more dangerous when they catch you mid-click on something else.
The prison inverts this. It is the one mechanic where the correct move is a single specific tile rather than any free ground, and where hesitating for five ticks costs you 65 hitpoints and hands Dusk the same amount back.
Beginner Plan, Then the Advanced One
Your first trips
- Bring a nosepeg even if you never plan to die. The walk back to the magical chest goes past aberrant spectres, and dying on that walk destroys everything the chest is holding.
- Check for the rock hammer before you ring the bell. It is needed twice per kill and there is no way to finish either boss without one.
- Use the low-effort prayer method for your first attempts: Protect from Melee, standing next to Dawn so she uses melee. Learn the phase structure first and add the prayer switching afterwards.
- Absorb every energy sphere rather than gambling on outdamaging them. Ninety hitpoints back on Dawn is a much longer phase three than the few seconds absorbing costs you.
- Practise the prison escape deliberately. Look for the missing flame, click it, and only then think about attacking — five ticks is not long enough to work it out under pressure.
- Remember the five-minute inactivity timer. If you need to step away mid-trip, ring the Cloister Bell to reset it.
Once the kill is boring
- Build the whole kill around the orb skip. With 90 or more in your relevant stats, a venator bow gives roughly a four in five chance of killing Dawn before she absorbs anything, and a toxic blowpipe around three in four.
- Save the crystal halberd special for last-hitting Dawn. The wiki rates that as its best use in the fight; against Dusk it loses to dragon claws.
- Learn the Dawn and Dusk stack. Positioning yourself next to Dawn so that Dusk walks over lets a charged venator bow ricochet, and it is the single largest source of free damage in phase one.
- Count your thralls. Because Dawn is immune to melee and Dusk to ranged and magic, keeping a thrall up for the entire kill takes four separate summons.
- Think carefully before committing to Death Charge. It works, but the Guardians drop rune equipment often enough that the extra inventory pressure can shorten trips more than the special attack energy lengthens them.
- If you run melee-only with a noxious halberd, use the crystal halberd special at around 65 per cent of Dawn's health to close phase one, then again below 100 hitpoints to skip the orbs.
Drops and What Grotesque Guardians Is Worth
The uniques are the black tourmaline core, the granite gloves, the granite ring, the granite hammer and the granite maul. Only the first four are exclusive; the maul also comes off ordinary gargoyles, so it is not a reason to be here. The core is the one that matters, because it makes guardian boots — but the rest are incremental rather than transformative, which is why this boss tends to be a project rather than a stepping stone.
The ordinary drops are unusually relevant to how you play. Mushroom potatoes, two-dose super combat and ranging potions, and rune equipment all arrive often enough to extend a trip, which is precisely why the strategy page recommends bringing sustain rather than a full inventory of food. The catch is that the potion drops are not reliably paired with the brews you might drink, so a trip built entirely on drops will occasionally leave you under-boosted.
No values or rates here. Both change, and the wiki holds the current numbers.
Drops worth the trip: Black tourmaline core, granite gloves, granite ring. Whether that is worth your time depends on how many kills an hour you personally get, which is a function of Dawn and Dusk phase swaps rather than of your gear list.
Combat Achievements
Grotesque Guardians has Combat Achievement tasks. With a 33 max hit the restrictions are mostly about execution rather than survival.
Task lists move with updates — read the current list in game.
Ironman Notes
Slayer masters who assign Grotesque Guardians: Vannaka, Chaeldar, Konar, Nieve, Duradel, Mortimer. Each kill is 1350 Slayer XP.
Without a Grand Exchange, black tourmaline core, granite gloves, granite ring has to be earned rather than bought, and this is the fastest table it sits on.
The Guardians suit an Ironman better than their difficulty suggests, because the fight partly restocks itself. Mushroom potatoes and two-dose combat and ranging potions are a meaningful supply line for an account that has to make everything it drinks.
The brittle key is the part that requires patience. It only drops from gargoyles while you are on a gargoyle task, so the unlock is bound to the same task rotation as the boss itself — but it is a one-off, and the rooftop stays open permanently once it is used.
The eclipse atlatl deserves a look on a self-sufficient account. It scales off strength rather than ranged damage bonuses, which means it pairs with your melee gear and cuts the ranged switch down to almost nothing — a real saving when you do not have a second full set to spare.
Common Mistakes and Death Causes
| What happened | Why it happened | The fix |
|---|---|---|
| Being trampled under Dusk | Standing beneath him deals up to 40, and in phase four it is easy to path underneath by clicking on him before the prison animation has finished. | Never stand under him, and wait for the prison animation to complete before you click on him at all. |
| Eating the blinding attack | The glow on his missing wing is a short window, and walking back in just as his wings spread puts you exactly where the knockback lands. | Three attacks, then step out. Return when his wings cover his face, not before. |
| Failing the phase four prison | Five ticks is not much time to find the gap, and the barrier deals up to 65 while healing Dusk for the same damage. | Look for the missing flame immediately and click it. If you are dragged to an edge and the exit leads nowhere, standing on that tile still prevents everything. |
| Getting stunned by rockfall or a Stone Ball | Both stun for 10 ticks. The damage is survivable; six seconds of being unable to move while the other boss keeps working is not always. | Treat the shadows and the ball as movement cues rather than damage. The stun is the mechanic; the hitsplat is incidental. |
| Standing next to a lightning vortex | Adjacency counts, not just occupancy, and 5 to 10 per tick adds up quickly across a full charge. | Use the one-second warning to find genuinely clear ground rather than the nearest gap, and remember one vortex always targets your current tile. |
| Dying on the walk back to the magical chest | The route passes aberrant spectres, and an unsafe death before you reclaim destroys everything the chest is holding. | Wear a nosepeg, or use the Ivy shortcut at 81 Agility to reach the roof directly. This is the death that actually costs you something. |
- What happened
- Being trampled under Dusk
- Why it happened
- Standing beneath him deals up to 40, and in phase four it is easy to path underneath by clicking on him before the prison animation has finished.
- The fix
- Never stand under him, and wait for the prison animation to complete before you click on him at all.
- What happened
- Eating the blinding attack
- Why it happened
- The glow on his missing wing is a short window, and walking back in just as his wings spread puts you exactly where the knockback lands.
- The fix
- Three attacks, then step out. Return when his wings cover his face, not before.
- What happened
- Failing the phase four prison
- Why it happened
- Five ticks is not much time to find the gap, and the barrier deals up to 65 while healing Dusk for the same damage.
- The fix
- Look for the missing flame immediately and click it. If you are dragged to an edge and the exit leads nowhere, standing on that tile still prevents everything.
- What happened
- Getting stunned by rockfall or a Stone Ball
- Why it happened
- Both stun for 10 ticks. The damage is survivable; six seconds of being unable to move while the other boss keeps working is not always.
- The fix
- Treat the shadows and the ball as movement cues rather than damage. The stun is the mechanic; the hitsplat is incidental.
- What happened
- Standing next to a lightning vortex
- Why it happened
- Adjacency counts, not just occupancy, and 5 to 10 per tick adds up quickly across a full charge.
- The fix
- Use the one-second warning to find genuinely clear ground rather than the nearest gap, and remember one vortex always targets your current tile.
- What happened
- Dying on the walk back to the magical chest
- Why it happened
- The route passes aberrant spectres, and an unsafe death before you reclaim destroys everything the chest is holding.
- The fix
- Wear a nosepeg, or use the Ivy shortcut at 81 Agility to reach the roof directly. This is the death that actually costs you something.
A death at the Guardians is recoverable and specifically structured. Your items go into the magical chest near the rooftop entrance and cost 50,000 coins to reclaim. The danger is entirely in the interval: die again before you have collected them and they are gone permanently.
That is the whole argument for the Ivy shortcut. At 81 Agility — boostable — you climb straight to the roof and never walk past an aberrant spectre with an unclaimed chest waiting for you. If you are still losing kills, that shortcut is worth more than any gear upgrade in the table above.
If you simply need a pause mid-trip, remember the five-minute inactivity ejection and ring the Cloister Bell to reset the timer rather than risking the walk back in.
FAQ
Why can I not hit Dawn with my weapon?
She is airborne, which means only ranged, magic or a halberd reaches her — and among halberds only the noxious halberd attacks fast enough to be worth using. Dusk has the opposite problem: his armour turns away ranged and magic entirely, so he can only be meleed.
Do I really need a rock hammer?
Yes, and twice per kill. Both Guardians stop taking damage below 10 hitpoints and have to be finished with a rock hammer, granite hammer or rock thrownhammer, unless you have unlocked the Gargoyle smasher ability. There is no workaround.
How do I get the brittle key?
It drops from ordinary gargoyles or their superior marble variant, and only while you are assigned gargoyles as a Slayer task. Using it unlocks the Slayer Tower rooftop permanently — but you still need a gargoyle or boss task each time you want to fight the Guardians.
What is an orb skip?
Killing Dawn in phase three before she absorbs any of the three energy spheres she launches. A fully charged sphere heals her for 90, so skipping them shortens the phase considerably. It generally needs 90 or more in the relevant stats: the wiki puts a venator bow at roughly four in five and a toxic blowpipe at around three in four.
Which prayer do I use in phase four?
Pray against whatever style Dusk used last. He switches with a one in six chance per attack, rising to one in three when you are praying against his current style, and on his opening attack of the phase he is twice as likely to use the style you are not praying. Reacting to his last attack is more reliable than predicting the next.
Can I use magic here?
You can hit Dawn with it, and the strategy page still advises against it — she resists magic more than she resists ranged or a halberd. Dusk is immune to it outright.
What happens to my items if I die?
They go into the magical chest by the rooftop entrance and cost 50,000 coins to reclaim. The important part is what happens next: an unsafe death before you collect them destroys them permanently, which is why a nosepeg or the 81 Agility Ivy shortcut matters more than it looks.
Related Guides
Bottom Line
The Grotesque Guardians reward tidiness rather than reflexes. Two bosses that are immune to each other's weakness means the fight is decided by how cleanly you change equipment, how early you spot a shadow on the rooftop, and whether you find the missing flame in the five ticks you are given. Nothing here hits hard enough to end a well-supplied trip on its own — the losses come from stacked stuns, from standing under Dusk, and from the walk back past the spectres afterwards.
If the thing standing between you and the roof is Priest in Peril rather than the Guardians themselves, that is a quest problem rather than a combat one, and our quest completion service clears the Morytania requirement without you touching it.
If Grotesque Guardians is blocking a Combat Achievement or an unlock you actually want, our PvM service is done by hand — no automation. Otherwise the bosses list has the full index.
Grotesque Guardians — Slayer boss (duo), difficulty 4/5. Combat values here — hitpoints, max hits, attack styles and speed, Defence and Magic levels, immunities and Slayer requirements — were read from the Old School RuneScape Wiki infobox for Grotesque Guardians on 2026-08-03. Kill rates, GP per hour and item prices are deliberately absent because they move with balance patches and the Grand Exchange. Mechanics, gear tiers and phase behaviour on this page were checked against Grotesque Guardians/Strategies on 4 August 2026.
Need a trusted team? Bils Services
Enjoyed the guide?
Drop a like — it helps other Adventurers find the good stuff.
Community
Comments
Silence in the hall…
Be the first Adventurer to leave a mark.
Join the thread
Add a comment
Tips, drops, or “this carried my account” — keep it useful.
bilsservices · bils services · bilsservices.com

