


OSRS Alchemical Hydra Guide: Phases, Gear, Chemicals & Drops
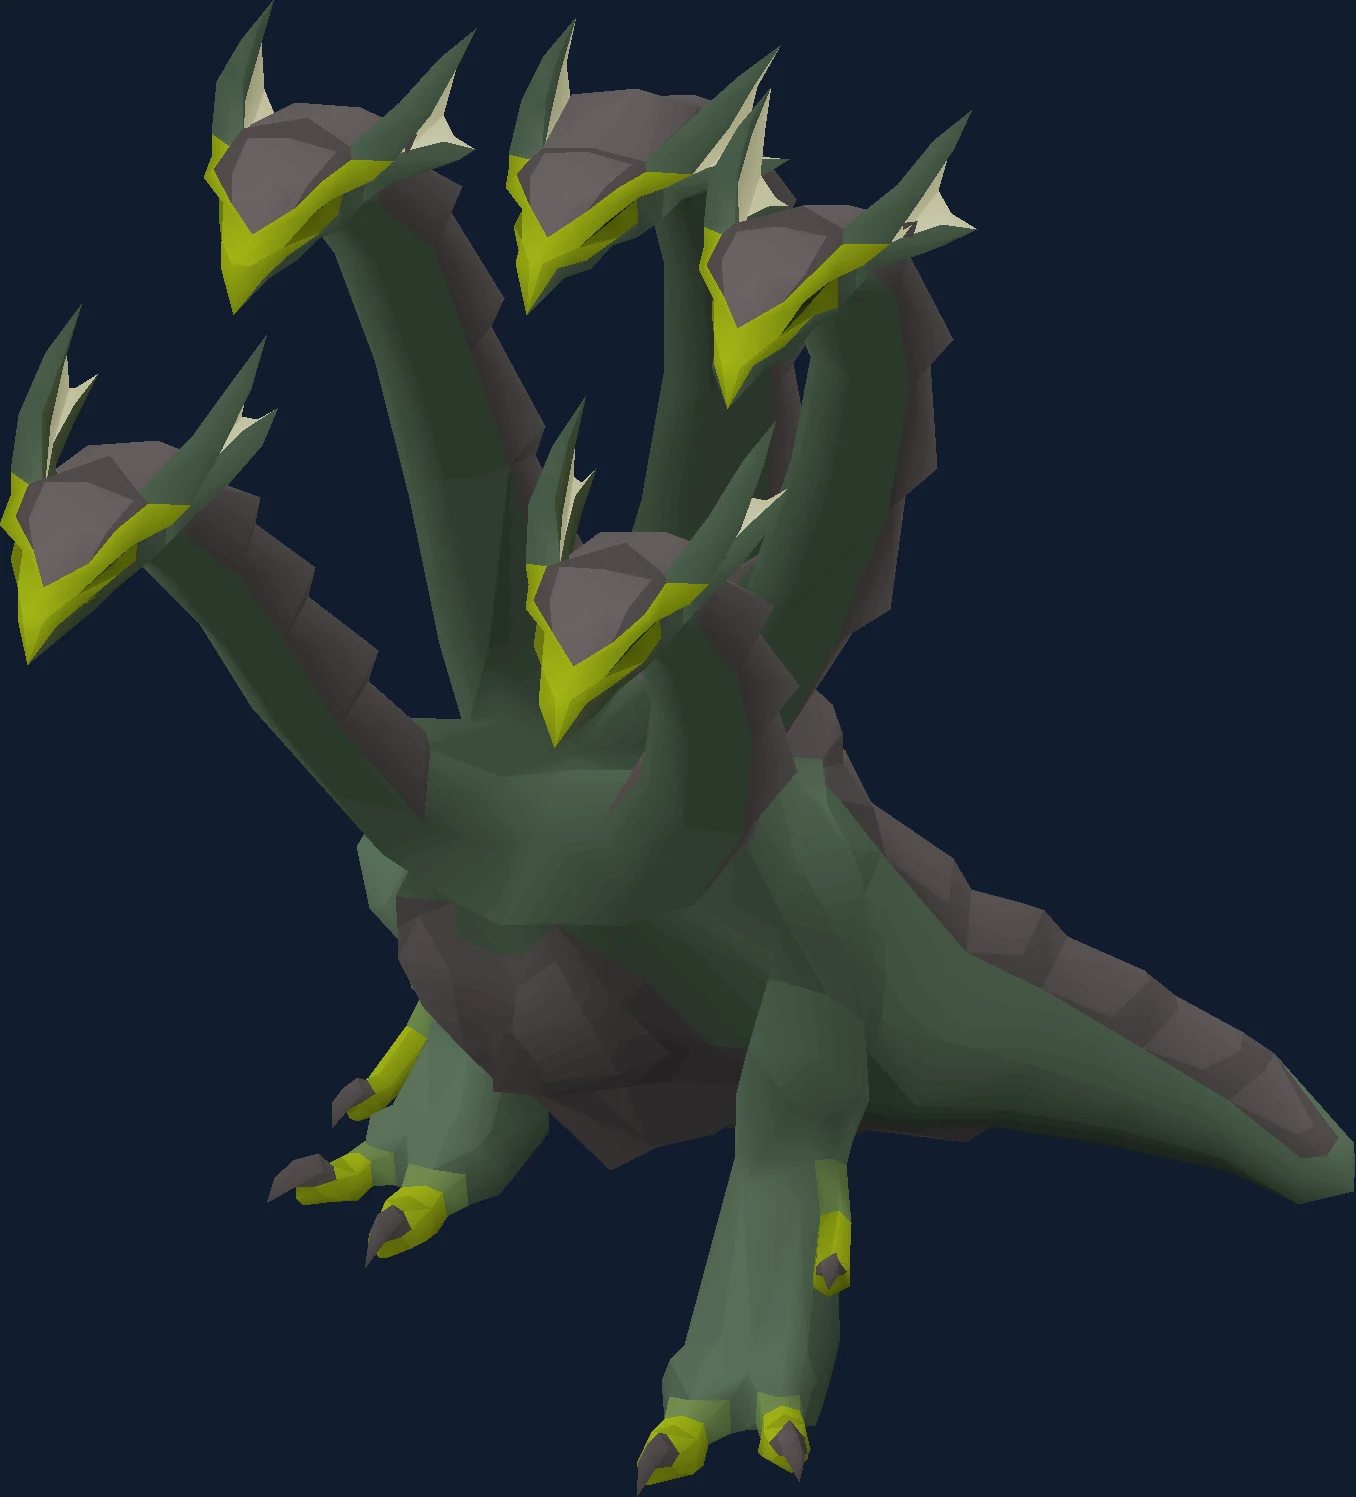
Alchemical Hydra guide for phase colours, chemical vents, gear, and claw/leather chase.
Why People Fight Alchemical Hydra
Most bosses let your gear decide how fast they die. The Alchemical Hydra takes that decision away from you: through its first three phases it reduces all incoming damage by 75 per cent, and it keeps doing so until you have walked it across a specific chemical vent and heard it roar. Until that moment your best weapon is doing a quarter of its work. Two players in identical setups can post very different kill times here purely because one of them knows the room and the other is standing still hitting a boss that is barely feeling it.
What draws people up the Karuulm dungeon is the drop table — the hydra's claw and hydra leather, which only she drops, plus the hydra tail and brimstone ring pieces that ordinary hydras also drop more slowly — but what shapes a trip is the smaller stuff. Every kill leaves hydra bones, and whether you bury them with a bonecrusher, offer them, or run them to a bank changes how many prayer potions you can carry and therefore how long you stay. Rune drops decide whether you carry alchemy runes or leave two pouch slots empty for them. None of that has a number attached in this guide, because prices and rates move and the wiki holds the live copy.
Mechanically it is one monster wearing four separate rule sets. Each 25 per cent threshold — roughly 275 hitpoints of progress — knocks a head off, changes the carapace colour, resets the damage reduction and swaps the vent you need. Green wants red, blue wants green, red wants blue, and the final grey phase wants no vent at all, only a prayer switch on every single attack. That colour mapping is deliberately unintuitive, and getting it wrong does not merely waste time: the wrong chemical increases the damage of the Hydra's attacks for the rest of the phase.
It is locked behind 95 Slayer and a Hydra task, so it can never be a spontaneous trip, and the lair is instanced. That last detail is worth understanding before your first attempt rather than after it: a death costs 100,000 coins to Orrvor quo Maten outside the door, and dying again elsewhere while he is still holding your items loses them permanently.
Its own attacks are ranged and magic, so Protect from Missiles and Magic both have a job.
In our index it sits in the Slayer boss group at difficulty 4 of 5, where kill times come down to chemical vents and phases.
| Field | Detail |
|---|---|
| Classification | Slayer boss (Slayer Monster) |
| Group | Slayer boss |
| Difficulty | 4 / 5 |
| Solo or team | Solo |
| Access requirement | 95 Slayer + hydra task |
| Notable reward | Hydra's claw, hydra leather, brimstone ring pieces |
| Signature mechanic | Chemical vents and phases |
| Hitpoints | 1100 |
| Max hits | 17x2 (default), 26x2 (empowered) |
| Released | 10 January 2019 |
- Field
- Classification
- Detail
- Slayer boss (Slayer Monster)
- Field
- Group
- Detail
- Slayer boss
- Field
- Difficulty
- Detail
- 4 / 5
- Field
- Solo or team
- Detail
- Solo
- Field
- Access requirement
- Detail
- 95 Slayer + hydra task
- Field
- Notable reward
- Detail
- Hydra's claw, hydra leather, brimstone ring pieces
- Field
- Signature mechanic
- Detail
- Chemical vents and phases
- Field
- Hitpoints
- Detail
- 1100
- Field
- Max hits
- Detail
- 17x2 (default), 26x2 (empowered)
- Field
- Released
- Detail
- 10 January 2019
Is Alchemical Hydra the Right Fight for You Yet?
The Hydra is forgiving of damage and unforgiving of confusion. Almost everything it throws can be prayed against or walked away from, and experienced players finish kills having taken only the opening hit. What it punishes is hesitation — a second spent working out which vent is which is a second the boss spends at quarter damage, and a phase that drags is a phase with an extra special attack in it.
You are ready for this fight if:
- You have 95 Slayer and a hydra task in hand. There is no partial version of this gate and no boostable route around the task itself.
- You can hold and swap a protection prayer on a visual cue rather than on reflex, because the style tell is the Hydra swaying its heads back, not the projectile arriving.
- You are comfortable turning run off mid-fight. The flame phase is the one mechanic that gets harder the faster you move.
- You own a ranged setup you are happy to feed, or a melee setup with a dragon hunter lance and a special attack weapon. Both are legitimate; the wiki rates melee as close to ranged once a good special weapon is in the mix.
Come back later if any of these are true:
- You have not looked at the room layout. The red vent sits south-east, green north-east and blue north-west, and learning that under fire is a poor use of a task.
- You are planning to bring magic. The Hydra sits at Magic level 260, and the strategy page rules magic out on that basis alone.
- You cannot spare a bank trip to build a trip inventory properly. This boss rewards carrying twenty prayer doses far more than it rewards carrying food.
- You are on a Hardcore account and have not seen the enraged phase. Four-tick attacks at up to 55 damage each, alternating style every hit, is not something to meet cold.
Access Requirements
Alchemical Hydra is gated behind 95 Slayer + hydra task.
95 Slayer + hydra task also tends to sit alongside the other Slayer boss gates, so it is usually cheaper to clear them together than to come back for each one. The boss requirements checklist lists them by group.
Location and How to Get There
Alchemical Hydra is found in the lower level of the Karuulm Slayer Dungeon inside Mount Karuulm.
Get to Mount Karuulm first — the fairy ring code CIR lands beside it, Rada's blessing 3 or 4 teleports there directly, and a Kourend home teleport with a run north works if you have neither — then take the dungeon's lower level. Boots that protect against the heated floor save a lot of incidental damage on the walk in, and you need a hydra task to fight her at all.
The lair sits at the far side of the Karuulm Slayer Dungeon. The plain route is to run north past the Tasakaal and then east past the ordinary hydras, which brings you to the entrance beside Orrvor quo Maten. It works, and it is tedious.
With 88 Agility you can instead take the mysterious pipe tucked behind Kaal-Ket-Jor, which the wiki describes as the safe way in. On a boss you intend to kill in volume, that shortcut is worth more than most gear upgrades, because it is paid back on every single return trip.
Getting back out is a separate design decision. House tablets or a ring of dueling restore your stats and put you at a bank; if you are running a bow of faerdhinen or a toxic blowpipe, Rada's blessing 4 is the fast teleport back. Whichever you pick, note that the doors jam shut while the Hydra is in the room — teleports still function, so your escape is always a click rather than a walk.
The Hydra respawns twenty seconds after it dies, which is roughly the window you have to bury bones, drink, and reposition next to the red vat before the next one arrives.
Recommended Stats and Gear at Three Budgets
| Skill | Recommended | What it changes |
|---|---|---|
| Slayer | 95, plus an active hydra task | A hard gate on both counts. Nothing about the fight is available without the level and the assignment. |
| Agility | 88 | Unlocks the mysterious pipe behind Kaal-Ket-Jor, which the wiki lists as the safe approach to the lair. |
| Ranged | High enough that a bow of faerdhinen or a blowpipe outperforms your melee | The Hydra is weakest to ranged, and ranged players can keep hitting over the flame walls instead of being dragged into them. |
| Attack, Strength and Defence | High enough to run a dragon hunter lance on stab | Melee is competitive here because the Hydra is draconic and dragonbane weapons apply. The cost is a harder luring job. |
| Hitpoints | Enough headroom to eat a 55 without panic | That is the enraged phase's maximum, delivered on a four-tick cycle, and it is the only number in this fight that can end a trip in two attacks. |
| Prayer | Enough to hold a protection prayer for a whole kill, plus restoration to spare | The wiki's ranged setups deliberately favour prayer bonus over ranged accuracy, because the fight is won by never taking a hit rather than by hitting harder. |
- Skill
- Slayer
- Recommended
- 95, plus an active hydra task
- What it changes
- A hard gate on both counts. Nothing about the fight is available without the level and the assignment.
- Skill
- Agility
- Recommended
- 88
- What it changes
- Unlocks the mysterious pipe behind Kaal-Ket-Jor, which the wiki lists as the safe approach to the lair.
- Skill
- Ranged
- Recommended
- High enough that a bow of faerdhinen or a blowpipe outperforms your melee
- What it changes
- The Hydra is weakest to ranged, and ranged players can keep hitting over the flame walls instead of being dragged into them.
- Skill
- Attack, Strength and Defence
- Recommended
- High enough to run a dragon hunter lance on stab
- What it changes
- Melee is competitive here because the Hydra is draconic and dragonbane weapons apply. The cost is a harder luring job.
- Skill
- Hitpoints
- Recommended
- Enough headroom to eat a 55 without panic
- What it changes
- That is the enraged phase's maximum, delivered on a four-tick cycle, and it is the only number in this fight that can end a trip in two attacks.
- Skill
- Prayer
- Recommended
- Enough to hold a protection prayer for a whole kill, plus restoration to spare
- What it changes
- The wiki's ranged setups deliberately favour prayer bonus over ranged accuracy, because the fight is won by never taking a hit rather than by hitting harder.
The strategy page does not publish suggested combat levels for this boss the way it does for easier Slayer bosses, so these rows describe what each skill does for you rather than inventing a threshold. The only figures there that are genuinely fixed are the 95 Slayer requirement and the 88 Agility shortcut.
| Slot | Starting out | Mid game | Best in slot |
|---|---|---|---|
| Weapon | Eclipse atlatl, built around melee strength gear with ranged accuracy | Bow of faerdhinen, or a toxic blowpipe or dragon hunter crossbow with ruby dragon bolts (e) | Twisted bow |
| Head | Black mask (i) | Slayer helmet (i) | Slayer helmet (i) |
| Neck | Amulet of glory, or an amulet of fury | Dragonbone necklace or necklace of anguish | Necklace of rupture |
| Cape | Ava's accumulator or a ranging cape | Ava's assembler | Dizana's quiver |
| Body and legs | Blessed ancient d'hide | Hueycoatl hide, or crystal and eclipse moon pieces | Masori body (f) and chaps (f) |
| Off-hand | Aquanite hopper or antler guard | Odium ward or dragonfire ward | Twisted buckler |
| Hands | Black d'hide vambraces | Blessed bracers or Hueycoatl hide vambraces | Zaryte vambraces |
| Feet | Boots of brimstone | Devout, Aranea or blessed d'hide boots, once the elite Kourend and Kebos diary is done | Pegasian boots, or Avernic treads |
| Ring | Archers ring (i) or ring of suffering (i) | Ring of the gods (i) or venator ring | Lightbearer, paired with a Zaryte crossbow switch |
- Slot
- Weapon
- Starting out
- Eclipse atlatl, built around melee strength gear with ranged accuracy
- Mid game
- Bow of faerdhinen, or a toxic blowpipe or dragon hunter crossbow with ruby dragon bolts (e)
- Best in slot
- Twisted bow
- Slot
- Head
- Starting out
- Black mask (i)
- Mid game
- Slayer helmet (i)
- Best in slot
- Slayer helmet (i)
- Slot
- Neck
- Starting out
- Amulet of glory, or an amulet of fury
- Mid game
- Dragonbone necklace or necklace of anguish
- Best in slot
- Necklace of rupture
- Slot
- Cape
- Starting out
- Ava's accumulator or a ranging cape
- Mid game
- Ava's assembler
- Best in slot
- Dizana's quiver
- Slot
- Body and legs
- Starting out
- Blessed ancient d'hide
- Mid game
- Hueycoatl hide, or crystal and eclipse moon pieces
- Best in slot
- Masori body (f) and chaps (f)
- Slot
- Off-hand
- Starting out
- Aquanite hopper or antler guard
- Mid game
- Odium ward or dragonfire ward
- Best in slot
- Twisted buckler
- Slot
- Hands
- Starting out
- Black d'hide vambraces
- Mid game
- Blessed bracers or Hueycoatl hide vambraces
- Best in slot
- Zaryte vambraces
- Slot
- Feet
- Starting out
- Boots of brimstone
- Mid game
- Devout, Aranea or blessed d'hide boots, once the elite Kourend and Kebos diary is done
- Best in slot
- Pegasian boots, or Avernic treads
- Slot
- Ring
- Starting out
- Archers ring (i) or ring of suffering (i)
- Mid game
- Ring of the gods (i) or venator ring
- Best in slot
- Lightbearer, paired with a Zaryte crossbow switch
Read the boots row carefully, because several of those options only apply after the elite Kourend and Kebos achievement diary. That is a genuine planning item rather than a footnote: it changes which boots you can wear in a dungeon you were going to be visiting anyway.
Melee is a real alternative and not a consolation. The Hydra is draconic, so a dragon hunter lance on stab applies its dragonbane bonus; its stab defence is slightly higher than its ranged defence, but with a Defence level of only 100 the accuracy stays acceptable. Above that sit the scythe of vitur, Osmumten's fang, a Ghrazi rapier or a soulreaper axe, then a blade of saeldor or inquisitor's mace on stab. For melee, favour strength bonus over prayer bonus — the reverse of the ranged advice. The trade-off the wiki names is that luring the boss over vents without dropping attacks is meaningfully harder with a melee weapon in your hand.
Magic is out. The Hydra's Magic level is 260, and the strategy page recommends against magic setups on that basis without qualification.
Special attacks have specific homes here rather than being spent whenever they are up. A Bandos godsword, elder maul, dragon warhammer or Tonalztics of ralos should go in while you are waiting for the first vent to trigger, and the Bandos godsword special is notable because it applies before the 75 per cent damage reduction. A Zaryte crossbow with ruby dragon bolts (e) is best saved for the flame phase, where the point is to push the boss through the threshold before it ever puts up a flame wall — that combination is especially strong with a Lightbearer. Burning claws are the exception to all of this: use them at the start of the blue or grey phases, because the red phase is immune to burn damage.
On rings, the wiki's summary is blunt. Unless an ultor ring is adding five to your dragon hunter lance's maximum hit, a Lightbearer with a strong special attack weapon produces faster kills.
| Check | Value |
|---|---|
| Prayers for its own attacks | 2 — Protect from Missiles and Magic |
| Its Defence level | 100 |
| Its Magic level | 260 |
| Its lowest defence bonus, per its infobox | light ammunition, standard ammunition, heavy ammunition |
| Elemental weakness | 50% to earth spells |
| Monster attributes | dragon |
- Check
- Prayers for its own attacks
- Value
- 2 — Protect from Missiles and Magic
- Check
- Its Defence level
- Value
- 100
- Check
- Its Magic level
- Value
- 260
- Check
- Its lowest defence bonus, per its infobox
- Value
- light ammunition, standard ammunition, heavy ammunition
- Check
- Elemental weakness
- Value
- 50% to earth spells
- Check
- Monster attributes
- Value
- dragon
- Tagged as a dragon: dragonbane weapons and dragonfire protection apply.
- 260 Magic level rewards magic-defence scaling weapons.
Inventory and Supplies
| What | Why it is there |
|---|---|
| Four to twenty prayer potions or super restores | That range is not vagueness; it is the trip-length dial. More doses means longer trips at the cost of not having the space to bank hydra bones. |
| Four to ten cooked moonlight antelope | Chosen over other food specifically because it cures poison when eaten, which frees the inventory slot an antidote would otherwise take. |
| An antidote++ or sanfew serum, only if you skipped the antelope | Poison is a scheduled part of this fight rather than an accident, so something has to cover it. |
| A divine ranging potion, ranging potion or bastion potion | The wiki calls bastion largely superfluous, because every source of damage in the fight can be answered with prayer and footwork once you know the room. |
| One or two special attack weapons | One for defence reduction at the opening of a kill, one for damage in the flame phase. Two only makes sense with a Lightbearer restoring the energy. |
| A divine rune pouch | High Level Alchemy and Teleport to house, or two slots left deliberately empty so rune drops have somewhere to go. |
| House tablets or a ring of dueling | Stat restoration and a bank. On long trips this is also where a holy wrench or prayer cape earns its slot, by squeezing more out of every restore. |
| A bracelet of slaughter, if you are extending the task | Swap it in during the enraged phase. The poison special is the natural moment, because it is the one attack where your prayer does not need changing. |
| A bonecrusher or bonecrusher necklace | Buries hydra bones without touching your inventory. The necklace has a second use: equipped during the death animation it restores an extra 8 prayer points per kill. |
| A noxious halberd, if you happen to carry one | It cures poison for 50 per cent of your special attack energy, which is occasionally the cheapest answer available mid-phase. |
- What
- Four to twenty prayer potions or super restores
- Why it is there
- That range is not vagueness; it is the trip-length dial. More doses means longer trips at the cost of not having the space to bank hydra bones.
- What
- Four to ten cooked moonlight antelope
- Why it is there
- Chosen over other food specifically because it cures poison when eaten, which frees the inventory slot an antidote would otherwise take.
- What
- An antidote++ or sanfew serum, only if you skipped the antelope
- Why it is there
- Poison is a scheduled part of this fight rather than an accident, so something has to cover it.
- What
- A divine ranging potion, ranging potion or bastion potion
- Why it is there
- The wiki calls bastion largely superfluous, because every source of damage in the fight can be answered with prayer and footwork once you know the room.
- What
- One or two special attack weapons
- Why it is there
- One for defence reduction at the opening of a kill, one for damage in the flame phase. Two only makes sense with a Lightbearer restoring the energy.
- What
- A divine rune pouch
- Why it is there
- High Level Alchemy and Teleport to house, or two slots left deliberately empty so rune drops have somewhere to go.
- What
- House tablets or a ring of dueling
- Why it is there
- Stat restoration and a bank. On long trips this is also where a holy wrench or prayer cape earns its slot, by squeezing more out of every restore.
- What
- A bracelet of slaughter, if you are extending the task
- Why it is there
- Swap it in during the enraged phase. The poison special is the natural moment, because it is the one attack where your prayer does not need changing.
- What
- A bonecrusher or bonecrusher necklace
- Why it is there
- Buries hydra bones without touching your inventory. The necklace has a second use: equipped during the death animation it restores an extra 8 prayer points per kill.
- What
- A noxious halberd, if you happen to carry one
- Why it is there
- It cures poison for 50 per cent of your special attack energy, which is occasionally the cheapest answer available mid-phase.
The shape of the inventory changes as you improve, and it changes in one direction: food out, prayer in. Once the mechanics are automatic the only damage you cannot avoid is the first hit of the kill, plus whatever you inflict on yourself with divine potions or a ruby bolt special. Players who never make that swap end trips with half their food untouched and no prayer left.
Banking hydra bones is a genuine fork rather than a preference. It fills inventory space that would otherwise hold restores, and the running time it adds lowers your overall rate — the wiki advises against it unless you have Rada's blessing 4 to shorten the return.
Prayer and Spellbook
For the first three phases the Hydra alternates between Magic and Ranged on a schedule you can watch rather than count: after every three basic attacks it sways its heads backwards, and that sway is the announcement that the style is about to change. Switch on the sway. There is no reward for switching on the projectile, because by then the roll has been made.
The enraged phase abandons the three-attack rhythm and alternates every single attack, starting with the opposite style to whatever it last used. The useful detail is that you can safely move to the next prayer as soon as the current attack's animation begins, which turns the whole phase into a steady metronome rather than a reaction test.
Protection prayers hold up even when you have made a mess of the vents. Spraying the Hydra with the wrong chemical increases the damage of its attacks, but protection prayers continue to block that damage in full — the punishment for a wrong vent is a longer, riskier phase rather than a hit you cannot stop.
If you are running long trips, the spellbook earns its keep. The wiki's long-trip loadout carries runes for Resurrect Greater Ghost and Death Charge, and optionally Sinister Offering, which converts hydra bones into Prayer experience instead of burying them. Sinister Offering restores slightly less prayer than a bonecrusher necklace at the death animation but pays considerably better experience.
Mechanics That Decide the Fight
| Mechanic | How you see it coming | What it does | Your answer |
|---|---|---|---|
| Chemical damage reduction | It is active from the first tick of each of the first three phases. You will see it in your hitsplats before you see it anywhere else. | Cuts all incoming damage by 75 per cent until the Hydra is lured over and sprayed by the appropriate chemical vent. | Walk it across the correct vent immediately. It roars when the right chemical hits it, and that roar is your permission to start fighting properly. |
| The wrong vent | No roar, and the damage reduction stays on. | Increases the damage of the Hydra's attacks for that phase. | Keep your protection prayer up — it still blocks everything — and get the boss onto the right vent. Green carapace to red, blue to green, red to blue. |
| Style switch | The Hydra sways its heads backwards after every three basic attacks, during the first three phases only. | Swaps between its Magic and its Ranged attack. It can open the fight with either. | Change protection prayer on the sway. In the enraged phase this tell disappears and the styles simply alternate every attack. |
| Poison splatters | The fourth attack of the green phase, and the fourth attack of the enraged phase followed by every ninth after it. | Blobs land on and around you with a 3x3 splatter dealing up to 7, leaving pools that deal up to 12 poison damage per tick. The targeted blob poisons for 6, the others for 4. | Run north on that fourth attack. Getting clear of the landing zone removes the whole attack rather than reducing it. |
| Lightning | An electric ball goes up in the centre of the room, then four currents form in the four corners and start converging on you. | Binds you in place and deals up to 22 damage. | Run west along the northern wall as it closes. The alternative is trapping it: stand in the north-west corner, step one tile diagonally south-east when the lightning is two tiles out, then immediately step one tile north. |
| Flame stun and tracking fire | The Hydra walks to the centre of the chamber and turns to face you. | Stuns you, pushes you out from underneath it, breathes a 5x5 layer of fire to your sides, then launches a fire that follows you. Any of the fires deal up to 25 damage plus a burn of 5 damage over five hits. | Turn run off and walk in a straight line. The tracking fire moves faster the further away you are and faster still if you run, so distance is the enemy here rather than the solution. |
| Enrage | Grey carapace, the middle head gone, no vent left to find. | Attack speed rises to every four ticks and the enrage stack maxes out, allowing up to 55 damage per hit. The damage reduction no longer resets. | Alternate prayers on every attack, starting with the opposite of the style it last used. This is the phase where a slip costs real health. |
| Phase transition | A head falls off, the Hydra roars, the carapace changes colour. | Happens at each 25 per cent threshold, roughly every 275 hitpoints. Resets the damage reduction and changes which vent you need. | Each phase opens with three auto-attacks before its special, so use that window to reposition rather than to squeeze in one more hit. |
- Mechanic
- Chemical damage reduction
- How you see it coming
- It is active from the first tick of each of the first three phases. You will see it in your hitsplats before you see it anywhere else.
- What it does
- Cuts all incoming damage by 75 per cent until the Hydra is lured over and sprayed by the appropriate chemical vent.
- Your answer
- Walk it across the correct vent immediately. It roars when the right chemical hits it, and that roar is your permission to start fighting properly.
- Mechanic
- The wrong vent
- How you see it coming
- No roar, and the damage reduction stays on.
- What it does
- Increases the damage of the Hydra's attacks for that phase.
- Your answer
- Keep your protection prayer up — it still blocks everything — and get the boss onto the right vent. Green carapace to red, blue to green, red to blue.
- Mechanic
- Style switch
- How you see it coming
- The Hydra sways its heads backwards after every three basic attacks, during the first three phases only.
- What it does
- Swaps between its Magic and its Ranged attack. It can open the fight with either.
- Your answer
- Change protection prayer on the sway. In the enraged phase this tell disappears and the styles simply alternate every attack.
- Mechanic
- Poison splatters
- How you see it coming
- The fourth attack of the green phase, and the fourth attack of the enraged phase followed by every ninth after it.
- What it does
- Blobs land on and around you with a 3x3 splatter dealing up to 7, leaving pools that deal up to 12 poison damage per tick. The targeted blob poisons for 6, the others for 4.
- Your answer
- Run north on that fourth attack. Getting clear of the landing zone removes the whole attack rather than reducing it.
- Mechanic
- Lightning
- How you see it coming
- An electric ball goes up in the centre of the room, then four currents form in the four corners and start converging on you.
- What it does
- Binds you in place and deals up to 22 damage.
- Your answer
- Run west along the northern wall as it closes. The alternative is trapping it: stand in the north-west corner, step one tile diagonally south-east when the lightning is two tiles out, then immediately step one tile north.
- Mechanic
- Flame stun and tracking fire
- How you see it coming
- The Hydra walks to the centre of the chamber and turns to face you.
- What it does
- Stuns you, pushes you out from underneath it, breathes a 5x5 layer of fire to your sides, then launches a fire that follows you. Any of the fires deal up to 25 damage plus a burn of 5 damage over five hits.
- Your answer
- Turn run off and walk in a straight line. The tracking fire moves faster the further away you are and faster still if you run, so distance is the enemy here rather than the solution.
- Mechanic
- Enrage
- How you see it coming
- Grey carapace, the middle head gone, no vent left to find.
- What it does
- Attack speed rises to every four ticks and the enrage stack maxes out, allowing up to 55 damage per hit. The damage reduction no longer resets.
- Your answer
- Alternate prayers on every attack, starting with the opposite of the style it last used. This is the phase where a slip costs real health.
- Mechanic
- Phase transition
- How you see it coming
- A head falls off, the Hydra roars, the carapace changes colour.
- What it does
- Happens at each 25 per cent threshold, roughly every 275 hitpoints. Resets the damage reduction and changes which vent you need.
- Your answer
- Each phase opens with three auto-attacks before its special, so use that window to reposition rather than to squeeze in one more hit.
Phase transitions cancel things mid-flight, and that is more useful than it sounds. Lightning still on the field dissipates the instant the phase changes. A flame attack interrupted by a transition ends abruptly, tracking fire included — though any fires already burning before the change stay where they are. This is precisely why the wiki tells melee players to spend damaging specials on the flame phase: pushing the Hydra through the threshold early skips the flame wall entirely.
Two smaller behaviours are worth knowing before they surprise you. While the side fires burn, the Hydra becomes a solid NPC, so the walk-under manoeuvres you might rely on elsewhere stop working. And if you land the killing blow while it is queuing an auto-attack, that attack still launches but deals no damage — poison blobs already in the air, however, still hit for full and still need avoiding.
In the enraged phase the poison attack sometimes launches a single blob rather than five. That is close to guaranteed if any fires from the previous phase are still burning, which is a small mercy on the kills where the flame phase went badly.
| Property | Value |
|---|---|
| Combat level | 426 |
| Attack styles | Ranged, Magic |
| Attack speed | 6 ticks |
| Attacks on sight | Yes |
| Poisons you | Yes |
| Size | 6 tiles |
| Slayer requirement | 95 |
- Property
- Combat level
- Value
- 426
- Property
- Attack styles
- Value
- Ranged, Magic
- Property
- Attack speed
- Value
- 6 ticks
- Property
- Attacks on sight
- Value
- Yes
- Property
- Poisons you
- Value
- Yes
- Property
- Size
- Value
- 6 tiles
- Property
- Slayer requirement
- Value
- 95
Where Alchemical Hydra Sits in Progression
Within the Slayer boss group, the fights below Alchemical Hydra are Basilisk Knights and Maggot King. Nothing in the Slayer boss group is rated harder — Alchemical Hydra shares the top band with Araxxor and Abyssal Sire and others at the same rating.
Phase by Phase
Phase one — green carapace, red vent
The Hydra starts serpentine and green, and the vent it needs is the red one in the south-east. After your first kill this stops being a task at all: stand right beside the red vat to the east and the Hydra lures itself over the pool as soon as it spawns, which is the single biggest time saving available in the whole fight.
Three basic attacks come first. On the fourth, poison blobs land on and around you. The blobs splatter across a 3x3 area for up to 7, and the pools they leave behind deal up to 12 poison damage per tick to anyone standing in them, poisoning you for 6 if the targeted blob catches you and 4 if one of the others does.
- Position yourself next to the red vat before the Hydra spawns.
- Open with your defence-reduction special while you wait for the vent to trigger — a Bandos godsword special applies before the damage reduction, so it is not wasted.
- Track the head sway and swap prayer on it.
- Run north on the fourth attack to clear the poison entirely.
- Keep pushing until 75 per cent, when the bottom-right head falls and the carapace turns blue.
Phase two — blue carapace, green vent
Blue wants green, which sits in the north-east. The phase-specific attack is lightning: the Hydra throws an electric ball into the centre of the room, four currents form in the corners, and they converge on wherever you are standing. Being caught binds you in place and deals up to 22.
The simple answer is to run west along the northern wall as the lightning comes in. The tidier answer is to trap it: stand in the north-west corner, move one tile diagonally south-east when the lightning is two tiles away, then step one tile north immediately. Note that trapping does not despawn anything — step off that tile and the lightning resumes following you.
- The lightning stays on the field until it expires or the phase ends; a transition wipes it instantly.
- This is a good phase for burning claws if you carry them, since the following red phase is immune to burn damage.
- At 50 per cent the bottom-left head falls and the carapace turns red.
Phase three — red carapace, blue vent
Red wants blue, in the north-west, and this is the phase that ends more trips than the other three combined. Periodically the Hydra walks to the centre of the chamber and faces your direction. When it arrives it stuns you — you can still attack, but you cannot move — forces you out if you were standing underneath it, breathes a 5x5 layer of fire to either side of you based on where you are, and then launches a fire that tracks you down the middle.
The counter-intuitive part is the movement. That tracking fire travels faster the further away from it you are, and faster again if you are running. Turn run off and walk in a line, and it trails behind you harmlessly. Panic, sprint, and it catches you for up to 25 damage plus a burn of 5 damage across five hits.
Melee players have a second option: the flames can be trapped by standing on a particular tile adjacent to the green vents. Ranged players rarely need it, because they can keep attacking over the fires without being pulled into one.
- This is where damaging specials belong. Pushing the Hydra to 25 per cent before it can put up the flame wall skips the attack outright, and the wiki is explicit that learning this skip is the largest single improvement to kill times.
- Burning claws are the one exception — this phase is immune to burns.
- While the side fires are burning the Hydra becomes solid, so you cannot walk under it.
- At 25 per cent the middle head falls and the carapace turns grey.
Phase four — grey carapace, enraged
There is no vent for this phase and no damage reduction left to clear, which sounds like relief and is not. Attack speed climbs to every four ticks, the enrage stack maxes out, and each hit can land for up to 55. It opens with the opposite style to whatever it used last, then alternates on every single attack for the rest of the fight.
Handle it as a rhythm rather than a reaction. You can move to the next prayer as soon as the current attack's animation begins, so the correct pattern is to switch continuously rather than waiting to confirm anything. Three auto-attacks in, the poison attack from phase one returns, and it repeats after every ninth auto-attack thereafter.
- The poison special is the natural moment to swap in a bracelet of slaughter, because prayer does not need changing during it.
- Sometimes only one blob is launched instead of five, which is near-certain if fires from the flame phase are still on the ground.
- An auto-attack queued as the Hydra dies still fires but deals nothing. Poison blobs already in the air are not so generous.
Fight Strategy: Chemical vents and phases
- Enter, and position yourself beside the red vat to the east before the Hydra spawns so that phase one lures itself.
- Spend a defence-reduction special while the first vent is triggering, then settle into the head-sway prayer rhythm.
- Run north on the fourth attack to skip the poison, and keep damage on until the bottom-right head falls.
- For blue, lure north-east to the green vent, then run west along the northern wall each time the lightning converges.
- For red, lure north-west to the blue vent and dump your damaging specials immediately. The goal for this phase is to be out of it before the flame wall ever appears.
- If the flames do come out, turn run off and walk in a straight line while the tracking fire follows you.
- In the grey phase, alternate prayer on every attack, dodge the poison on attack four and every ninth after, and swap to a bracelet of slaughter during one of those poison windows if you are extending the task.
The through-line of every good Hydra kill is that the vent comes before the damage. A player who opens each phase by luring, and only then starts attacking properly, will beat a player with better gear who opens each phase by attacking and lures when they get around to it — because the second player has spent the whole opening stretch of every phase doing a quarter damage.
The other habit worth building early is treating each phase's opening three auto-attacks as free movement. They arrive before the phase's special attack every time, without exception, so they are the window to walk somewhere useful rather than the window to squeeze in one more shot from a bad position.
Positioning and Movement
The room is really four landmarks: the red vat in the south-east, the green vent in the north-east, the blue vent in the north-west, and the northern wall you run along when the lightning comes. Learn those four and the fight shrinks considerably.
Standing next to the red vat before the spawn is the habit that separates a practised trip from a first one. It removes the entire opening lure, and with a twenty-second respawn it means you are already in position while the next Hydra is still arriving.
The one place you deliberately give up ground is the flame phase, where distance actively works against you. Everywhere else in this fight, more space is more safety; there, more space makes the tracking fire faster. It is worth saying out loud before your first attempt, because the instinct to back away is exactly wrong.
Beginner Plan, Then the Advanced One
Your first trips
- Write the colour mapping somewhere you can see it. Green to red, blue to green, red to blue. Almost every failed first kill is a vent error rather than a mechanical one.
- Bring more food than the veterans do, and accept that you will bin most of it later. Cooked moonlight antelope is worth the extra cost on early trips purely because it removes the antidote from your inventory.
- Do not chase the flame skip yet. Learn to survive the flame phase with run turned off and a straight walking line, and the skip becomes an optimisation you add later rather than a technique you fail at now.
- Treat the enraged phase as the only phase that can actually kill you and give it your full attention — no bank organising, no bracelet swapping until you have the prayer rhythm.
- Remember that the doors jam but teleports work. If a kill has gone badly there is always an exit, and the reclaim fee is far cheaper than a second death on the way back.
Once the kill is boring
- Build the whole kill around skipping the flame phase. Save damaging specials for red, use a Zaryte crossbow with ruby dragon bolts (e) if you have one, and push the boss through 25 per cent before the flame wall goes up. The wiki singles this out as the largest available improvement to kill times.
- Move from prayer-bonus gear to accuracy gear once your prayer flicking is reliable. The published ranged setup deliberately favours prayer bonus because most players need it; if you flick, you can spend those slots on damage and cut your potion consumption at the same time.
- Run the Lightbearer maths honestly. Unless an ultor ring is worth five maximum hit on your dragon hunter lance, the Lightbearer with a strong special weapon produces faster kills.
- Set up the bone economy deliberately rather than by default. A bonecrusher necklace equipped during the death animation returns an extra 8 prayer points per kill; Sinister Offering trades two of those points for much better Prayer experience. Banking bones outright is the only option the wiki actively advises against without Rada's blessing 4.
- Learn the lightning trap and the flame trap. Neither is required, but both convert a phase that costs you movement into a phase where you keep attacking.
Drops and What Alchemical Hydra Is Worth
The reason a hydra task is worth extending is the hydra's claw, which comes only from her, plus the hydra leather that makes ferocious gloves. The hydra tail and the brimstone ring components are also worth having, though ordinary hydras drop those too, so she is the fast source rather than the only one. Everything else in the table is trip fuel rather than the prize.
The steady output matters more than most guides admit. Hydra bones drop every kill and decide your whole inventory shape: bury them with a bonecrusher, offer them for Prayer experience, or spend supply slots banking them. Rune drops decide whether your rune pouch carries alchemy runes or holds two slots open to catch them.
No prices or rates appear on this page deliberately. Both move, and the wiki's own drop table is the copy that stays current.
Drops worth the trip: Hydra's claw, hydra leather, brimstone ring pieces. Whether that is worth your time depends on how many kills an hour you personally get, which is a function of chemical vents and phases rather than of your gear list.
Combat Achievements
Alchemical Hydra has Combat Achievement tasks. With a 26 max hit the restrictions are mostly about execution rather than survival.
Task lists move with updates — read the current list in game.
Ironman Notes
Slayer masters who assign Alchemical Hydra: Konar, Mortimer. Each kill is 1320 Slayer XP.
Without a Grand Exchange, hydra's claw, hydra leather, brimstone ring pieces has to be earned rather than bought, and this is the fastest table it sits on.
It poisons, so your answer to poison — antidote doses, or food that cures as it heals — is part of planning the trip length.
The Hydra is unusually friendly to a self-sufficient account, because the fight does not require an expensive weapon to be safe — only a competent one. The wiki notes that melee setups often match ranged output once a good special attack weapon is involved, and they carry little or no upkeep, which is exactly the trade an Ironman wants.
Where an Ironman feels the difference is supplies. Cooked moonlight antelope is doing two jobs at once here, healing and curing poison, and if you cannot farm it you will need to give up a slot to antidote++ or sanfew serums instead. The elite Kourend and Kebos diary is also worth chasing before a long grind, because several of the recommended boots are locked behind it.
Banking hydra bones is more tempting on an Ironman than on a main, and it is still the slower option. Unless you have Rada's blessing 4 to shorten the run back, the time cost outweighs what the bones give you.
Common Mistakes and Death Causes
| What happened | Why it happened | The fix |
|---|---|---|
| Standing in a poison pool while repositioning | The pools deal up to 12 poison damage per tick, and it is easy to walk out of one blob's splatter and straight into another's pool. | Run north on the fourth attack rather than stepping sideways. The attack is avoidable in full, so treat any poison damage as a positioning error rather than a cost of doing business. |
| Running from the tracking fire | It moves faster the further away you are and faster again if you are running, so the panic response makes it strictly worse. | Turn run off and walk in a straight line. Decide this before the phase starts, because it is not a decision you will make well while stunned. |
| Being caught under the Hydra during the flame phase | It forces you out in a random direction when it reaches the centre, and once the side fires are up it becomes a solid NPC you cannot walk under. | Be somewhere deliberate before it walks to the middle. The three auto-attacks that open every phase are the window to get there. |
| Losing the prayer rhythm in the enraged phase | Four-tick attacks alternating style every hit, at up to 55 damage each, punish a single missed switch harder than anything earlier in the fight. | Switch on the animation start rather than on the projectile, and do nothing else during this phase — no bank sorting, no gear tinkering except during a poison window. |
| Spraying the wrong chemical | The wrong vent raises the damage of the Hydra's attacks for the rest of the phase, on top of leaving the 75 per cent reduction in place. | Protection prayers still block that damage in full, so the answer is to keep praying and correct the lure. The real cost is the extra time, which is the extra special attack you now have to survive. |
| Relaxing on the kill | Poison blobs already in the air when the Hydra dies still land and still deal damage. | Finish the movement you started before you start looting. The queued auto-attack is harmless; the poison is not. |
- What happened
- Standing in a poison pool while repositioning
- Why it happened
- The pools deal up to 12 poison damage per tick, and it is easy to walk out of one blob's splatter and straight into another's pool.
- The fix
- Run north on the fourth attack rather than stepping sideways. The attack is avoidable in full, so treat any poison damage as a positioning error rather than a cost of doing business.
- What happened
- Running from the tracking fire
- Why it happened
- It moves faster the further away you are and faster again if you are running, so the panic response makes it strictly worse.
- The fix
- Turn run off and walk in a straight line. Decide this before the phase starts, because it is not a decision you will make well while stunned.
- What happened
- Being caught under the Hydra during the flame phase
- Why it happened
- It forces you out in a random direction when it reaches the centre, and once the side fires are up it becomes a solid NPC you cannot walk under.
- The fix
- Be somewhere deliberate before it walks to the middle. The three auto-attacks that open every phase are the window to get there.
- What happened
- Losing the prayer rhythm in the enraged phase
- Why it happened
- Four-tick attacks alternating style every hit, at up to 55 damage each, punish a single missed switch harder than anything earlier in the fight.
- The fix
- Switch on the animation start rather than on the projectile, and do nothing else during this phase — no bank sorting, no gear tinkering except during a poison window.
- What happened
- Spraying the wrong chemical
- Why it happened
- The wrong vent raises the damage of the Hydra's attacks for the rest of the phase, on top of leaving the 75 per cent reduction in place.
- The fix
- Protection prayers still block that damage in full, so the answer is to keep praying and correct the lure. The real cost is the extra time, which is the extra special attack you now have to survive.
- What happened
- Relaxing on the kill
- Why it happened
- Poison blobs already in the air when the Hydra dies still land and still deal damage.
- The fix
- Finish the movement you started before you start looting. The queued auto-attack is harmless; the poison is not.
The doors jam while the Hydra is alive, which reads as a trap and is not one — teleports work throughout, so a house tablet or ring of dueling is always an exit. If a phase has gone badly enough that you are short on prayer with the grey phase approaching, leaving is the correct move.
If you do die, the items go to Orrvor quo Maten outside the lair and cost 100,000 coins to reclaim. The important part is what happens next: die again anywhere else while he is still holding them and they are gone permanently. Reclaim before you do anything else, including before you head back in for another attempt.
FAQ
Which chemical vent goes with which colour?
The green serpentine phase needs the red vent in the south-east, the blue electric phase needs the green vent in the north-east, and the red flame phase needs the blue vent in the north-west. The grey enraged phase needs none. The mapping is deliberately mismatched, which is why it is worth memorising before you arrive rather than during.
Why are my hits so small at the start of every phase?
Because they are supposed to be. For the first three phases the Hydra reduces incoming damage by 75 per cent until you have lured it over the correct vent and it has roared. Until that happens, your damage output is essentially irrelevant.
What happens if I lure it over the wrong vent?
The damage of its attacks increases for that phase, and the damage reduction stays in place. Protection prayers continue to block everything it throws, so it is survivable — but you are now in a longer phase with a stronger boss, which means more special attacks to dodge.
Can I melee it, or do I need a bow?
You can melee it. It is draconic, so a dragon hunter lance on stab applies dragonbane, and with a Defence level of 100 the accuracy holds up even though its stab defence is a little higher than its ranged defence. The honest trade is that luring the boss over vents without losing attacks is harder with a melee weapon, and ranged players can keep shooting over the flame walls instead of being pulled into them.
What does 'skipping the flame phase' mean?
It means killing the red phase fast enough that the Hydra never gets its flame wall out. A phase transition ends the attack abruptly, tracking fire included, so damaging specials spent early in red can remove the entire mechanic. The wiki names this as the single biggest improvement available to kill times.
Should I bank the hydra bones?
Usually not. The slots the bones occupy are slots your prayer restores wanted, and the round trip lowers your overall rate. Unless you have Rada's blessing 4 to shorten the return, a bonecrusher or Sinister Offering is the better answer.
What happens to my items if I die in the instance?
They go to Orrvor quo Maten outside, and cost 100,000 coins to reclaim each time. Dying elsewhere while he is still holding them destroys them permanently, so recover them before you do anything else.
Related Guides
Bottom Line
The Alchemical Hydra rewards preparation over reflexes. If you know which vent each carapace colour wants, if you position beside the red vat before the spawn, and if you turn run off when the flames come out, the fight becomes a fairly quiet routine punctuated by one genuinely dangerous phase at the end. If you do not, you will spend most of every kill doing quarter damage to a boss that keeps getting angrier.
The blocker for most players is not the fight anyway — it is the 95 Slayer sitting in front of it, and the tasks that have to be ground out to reach it. If that is where you are stuck, our hand-played PvM service covers the boss itself, and the task grind is a separate conversation entirely.
If Alchemical Hydra is blocking a Combat Achievement or an unlock you actually want, our PvM service is done by hand — no automation. Otherwise the bosses list has the full index.
Alchemical Hydra — Slayer boss, difficulty 4/5. Combat values here — hitpoints, max hits, attack styles and speed, Defence and Magic levels, immunities and Slayer requirements — were read from the Old School RuneScape Wiki infobox for Alchemical Hydra on 2026-08-03. Kill rates, GP per hour and item prices are deliberately absent because they move with balance patches and the Grand Exchange. Mechanics, gear tiers and phase behaviour on this page were checked against Alchemical Hydra/Strategies on 4 August 2026.
Need a trusted team? Bils Services
Enjoyed the guide?
Drop a like — it helps other Adventurers find the good stuff.
Community
Comments
Silence in the hall…
Be the first Adventurer to leave a mark.
Join the thread
Add a comment
Tips, drops, or “this carried my account” — keep it useful.
bilsservices · bils services · bilsservices.com

