


OSRS Phantom Muspah Guide: Gear, Mechanics, Prayer & Drops
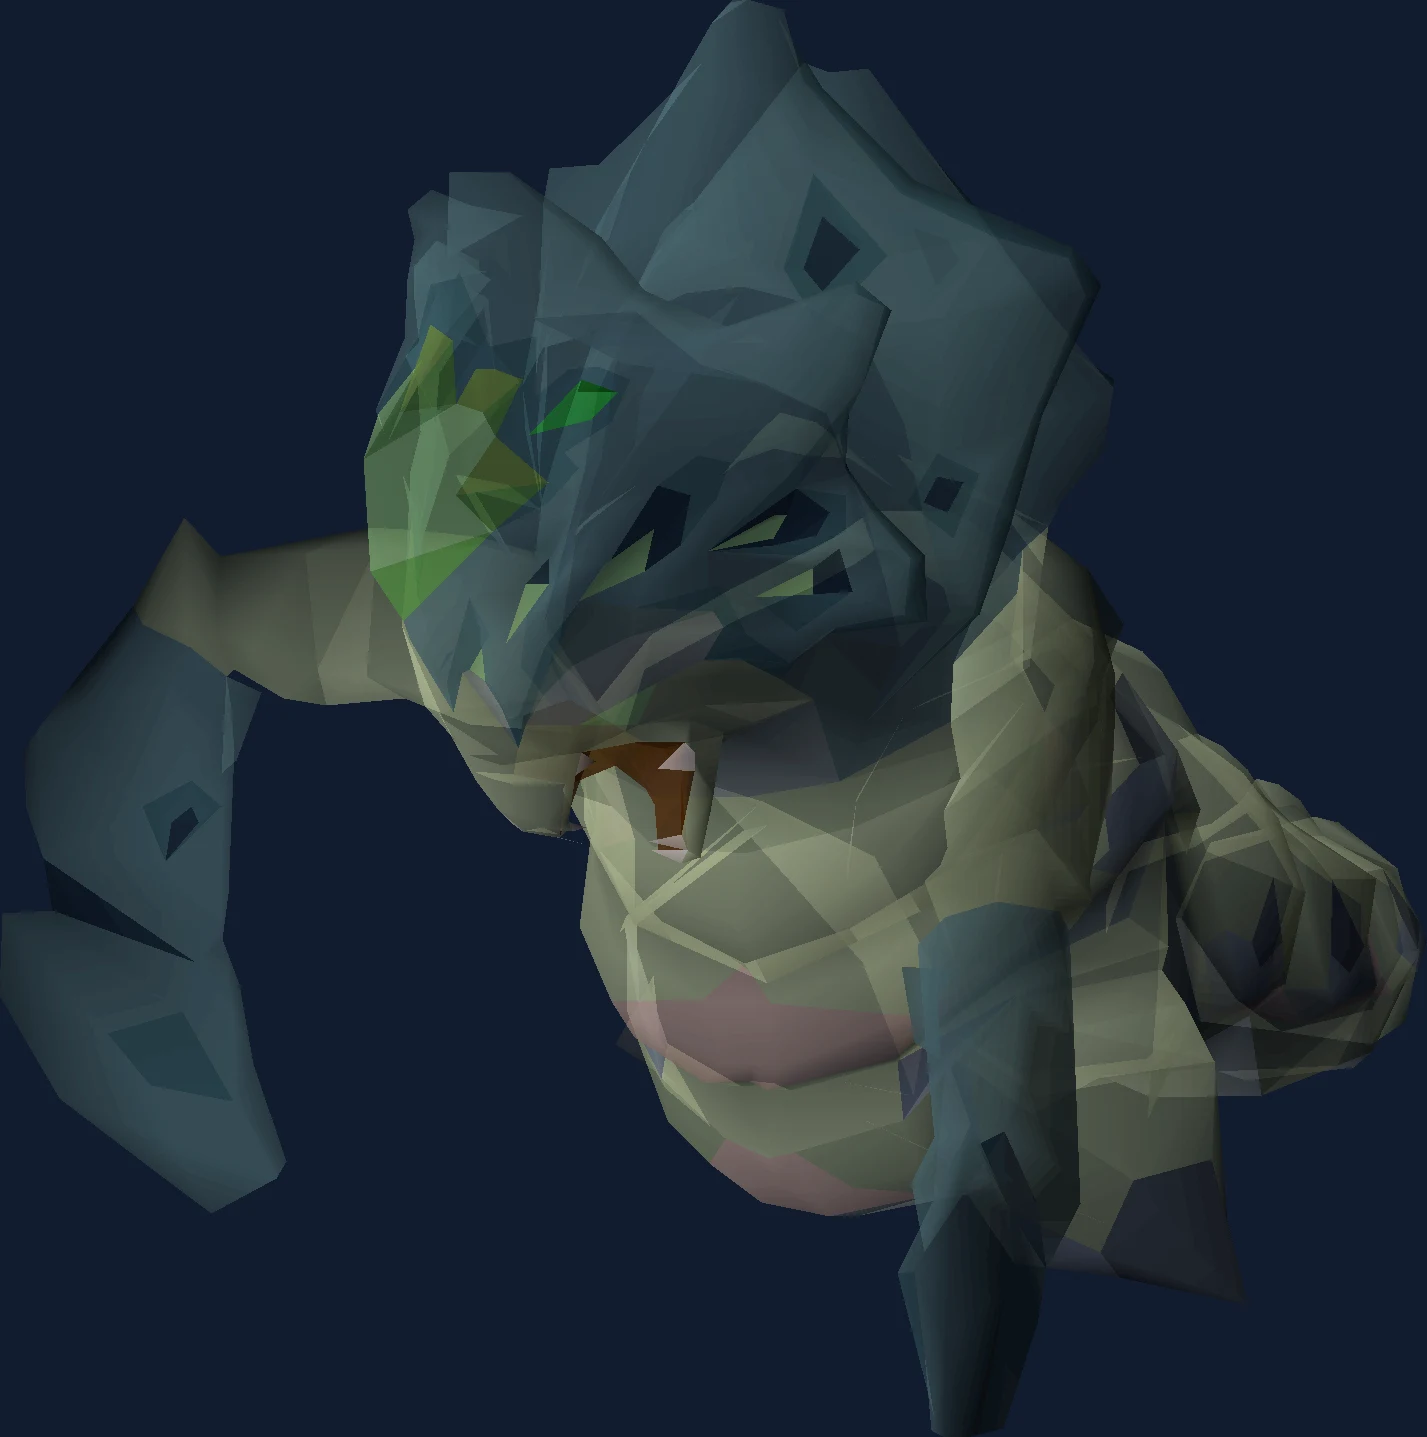
Phantom Muspah guide for prayer-heavy phases, gear choices, and unique chase planning.
Why People Fight Phantom Muspah
You have already met this thing once. Secrets of the North ends with the Strange Creature, and the Phantom Muspah is that same creature come back stronger — a quest boss that turned into a repeatable one. That history matters more than it sounds, because most players walk in with a half-memory of a fight they only had to survive once, and this version expects you to have a plan rather than a lucky run of eating.
The structural oddity is that it does not have phases in the ordinary sense. It alternates between a Ranged form and a Melee form, and it changes between them when you have put enough damage into the current one: a hundred in Ranged form, eighty in Melee form. After the first swap it also has to be hit at least four times before another swap is allowed. That means the shape of the fight is set by your damage output, not by its health bar, and two players with different weapons will see the same fight in a different order.
It also punishes you for damage in two ways that are worth understanding before your first attempt. Every transformation slams spikes out of the arena floor with one guaranteed to appear on the tile you are standing on, and stepping onto a spike both knocks you back and heals it for roughly three quarters of the damage you had just dealt. Then below 127 hitpoints it stops taking damage altogether, teleports to the middle, and raises a prayer shield you have to drain rather than break — with Soul Split running and its accuracy and max hit both increased.
The last thing to know before gearing is that the two forms have opposite defensive profiles. Ranged form has a much lower ranged defence bonus than magic defence bonus; Melee form is the reverse. Camping one style works and a ranged camp is generally the slightly better of the two, but it costs kill time, which is why most setups here carry both.
Its own attacks are ranged and magic, so Protect from Missiles and Magic both have a job.
In our index it sits in the standalone boss group at difficulty 4 of 5, where kill times come down to prayer-heavy phase reading.
| Field | Detail |
|---|---|
| Classification | Standalone (form swapping) (Boss) |
| Group | standalone boss |
| Difficulty | 4 / 5 |
| Solo or team | Solo |
| Access requirement | Secrets of the North |
| Notable reward | Venator bow shard, ancient icon |
| Signature mechanic | Prayer-heavy phase reading |
| Hitpoints | 850 |
| Max hits | 61 (Ranged), 72 (Magic) |
| Released | 11 January 2023 |
- Field
- Classification
- Detail
- Standalone (form swapping) (Boss)
- Field
- Group
- Detail
- standalone boss
- Field
- Difficulty
- Detail
- 4 / 5
- Field
- Solo or team
- Detail
- Solo
- Field
- Access requirement
- Detail
- Secrets of the North
- Field
- Notable reward
- Detail
- Venator bow shard, ancient icon
- Field
- Signature mechanic
- Detail
- Prayer-heavy phase reading
- Field
- Hitpoints
- Detail
- 850
- Field
- Max hits
- Detail
- 61 (Ranged), 72 (Magic)
- Field
- Released
- Detail
- 11 January 2023
Is Phantom Muspah the Right Fight for You Yet?
This is not a fight that filters you on gear so much as on attention. The individual attacks are survivable at the suggested levels; what ends attempts is missing a single animation, or forgetting that the arena floor is now covered in objects that heal the boss when you touch them.
You are ready for this fight if:
- Secrets of the North is finished. That is the only hard gate, and without it there is no Ghorrock Dungeon to walk into.
- You can react to an animation, not just a timer. The magic orb has to be prayed against the moment the creature stands up and starts charging, and nothing about the fight tells you in advance which attack that will be.
- You own a crossbow and enchanted sapphire bolts, or you are happy to Smite. The prayer shield at the end is a drain race, and going into it with only ordinary damage is the slowest version of the fight.
- You are comfortable running the Arceuus spellbook. The wiki recommends it strongly here, and Ward of Arceuus in particular changes how much prayer restoration a trip needs.
Come back later if any of these are true:
- You only own one attacking style and it is melee. Melee performs poorly without first reducing its Defence, and it needs the step-back method to be automatic before it is even safe.
- You have not read what corruption does. It is the effect that quietly costs you the trip: three, then six, then nine prayer points at six-second intervals, eighteen in total, applied every time the magic attack damages you.
- You are relying on food to solve the melee form. Its melee damage climbs the longer it stands still, so the answer is movement, not healing.
Access Requirements
Phantom Muspah is gated behind Secrets of the North.
Secrets of the North also tends to sit alongside the other standalone boss gates, so it is usually cheaper to clear them together than to come back for each one. The boss requirements checklist lists them by group.
Location and How to Get There
Phantom Muspah is found in its arena, unlocked after Secrets of the North.
Access comes from finishing Secrets of the North; the fight is a fixed instance rather than a wander-in encounter. Because it is instanced, you can bank between attempts without losing progress, which makes it unusually friendly to learn.
Everything happens under Weiss. Enter the salt mine from the staircase in Snowflake and My Arm's hut, go deeper into the cave until you reach the Ghorrock Dungeon, and run south from there.
Getting to Weiss is where the route choices sit. An icy basalt drops you nearby, and you go through the gap in the fence. A Weiss teleport built into a portal chamber or portal nexus does the same job from your house. If you have finished Desert Treasure II and hold the frozen tablet from Duke Sucellus, the ring of shadows teleports you straight to the Ghorrock Dungeon, which is the shortest version of this trip by a wide margin. Failing all of that, Larry's boat north-east of Rellekka sails to Weiss, and the DKS fairy ring is the closest teleport to Larry.
The ring of shadows is worth calling out separately because it also lets you resupply and come back without a long walk, which is the difference between learning this fight in one sitting and learning it over a week.
Recommended Stats and Gear at Three Budgets
| Skill or unlock | Suggested | What it is for |
|---|---|---|
| Secrets of the North | Complete | The only hard gate. It is what opens the Ghorrock Dungeon. |
| Ranged | 85+ | The style you will spend most of the fight using, and the one the arena's better weapons sit in. |
| Magic | 85+ if you are using it | For the Melee form, which has the lower magic defence bonus of the two profiles. |
| Defence | 75+ | Against a 61 from Ranged form, a 72 from the magic orb, and an 80 from the shockwave. |
| Prayer | 74 for Rigour, 77 for Augury | Damage on the style you are actually using, and the prayer book you flick Smite from later. |
| Construction | 82 with a boost | An ornate rejuvenation pool at home. The elite Desert diary and a Desert amulet 4 cover the same job. |
| Herblore | 81 (optional) | Surge potions, which matter mainly if you are firing Zaryte crossbow specials. |
- Skill or unlock
- Secrets of the North
- Suggested
- Complete
- What it is for
- The only hard gate. It is what opens the Ghorrock Dungeon.
- Skill or unlock
- Ranged
- Suggested
- 85+
- What it is for
- The style you will spend most of the fight using, and the one the arena's better weapons sit in.
- Skill or unlock
- Magic
- Suggested
- 85+ if you are using it
- What it is for
- For the Melee form, which has the lower magic defence bonus of the two profiles.
- Skill or unlock
- Defence
- Suggested
- 75+
- What it is for
- Against a 61 from Ranged form, a 72 from the magic orb, and an 80 from the shockwave.
- Skill or unlock
- Prayer
- Suggested
- 74 for Rigour, 77 for Augury
- What it is for
- Damage on the style you are actually using, and the prayer book you flick Smite from later.
- Skill or unlock
- Construction
- Suggested
- 82 with a boost
- What it is for
- An ornate rejuvenation pool at home. The elite Desert diary and a Desert amulet 4 cover the same job.
- Skill or unlock
- Herblore
- Suggested
- 81 (optional)
- What it is for
- Surge potions, which matter mainly if you are firing Zaryte crossbow specials.
Read these as the levels that make the fight comfortable rather than as gates. The one figure that is genuinely load-bearing is Prayer, because the shielded phase asks you to hold two protection prayers on a five-tick cycle while flicking a third prayer on top.
| Slot | Starting out | Mid game | Best in slot |
|---|---|---|---|
| Main weapon | Rune crossbow, or an Armadyl or dragon crossbow if you have one | Zaryte crossbow, toxic blowpipe against Ranged form, or a bow of faerdhinen with full crystal | Twisted bow |
| Shield-phase weapon | The same crossbow, loaded differently | Zaryte crossbow with enchanted sapphire dragon bolts | Zaryte crossbow — the twisted bow cannot drain a prayer shield |
| Ammunition | Rune arrows, or ruby bolts (e) | Amethyst arrows, diamond dragon bolts (e), sapphire bolts (e) for the shield | Seeking dragon arrows, with sapphire dragon bolts (e) held back for the shield |
| Head, body, legs | Blessed d'hide, or Karil's | Full crystal, or Hueycoatl hide | Masori (f), or a slayer helmet (i) on task in place of the mask |
| Cape and neck | Ranging cape or Ava's accumulator, amulet of glory | Ava's assembler, necklace of anguish | Dizana's quiver, necklace of rupture |
| Hands and feet | Blessed boots, any decent vambraces | Barrows gloves, ranger or aranea boots | Zaryte vambraces, Avernic treads or pegasian boots |
| Ring | Ring of suffering (ri) | Archers ring (i), or a venator ring | Lightbearer if you lean on specials, otherwise venator |
| Off-hand | Book of law | Odium ward or dragonfire ward | Twisted buckler, when the crossbow is out |
| Magic swap for Melee form | Trident of the seas or swamp, mystic robes | Sanguinesti staff or eye of ayak, occult necklace, Ahrim's | Tumeken's shadow, ancestral, Elidinis' ward (f), Magus ring |
- Slot
- Main weapon
- Starting out
- Rune crossbow, or an Armadyl or dragon crossbow if you have one
- Mid game
- Zaryte crossbow, toxic blowpipe against Ranged form, or a bow of faerdhinen with full crystal
- Best in slot
- Twisted bow
- Slot
- Shield-phase weapon
- Starting out
- The same crossbow, loaded differently
- Mid game
- Zaryte crossbow with enchanted sapphire dragon bolts
- Best in slot
- Zaryte crossbow — the twisted bow cannot drain a prayer shield
- Slot
- Ammunition
- Starting out
- Rune arrows, or ruby bolts (e)
- Mid game
- Amethyst arrows, diamond dragon bolts (e), sapphire bolts (e) for the shield
- Best in slot
- Seeking dragon arrows, with sapphire dragon bolts (e) held back for the shield
- Slot
- Head, body, legs
- Starting out
- Blessed d'hide, or Karil's
- Mid game
- Full crystal, or Hueycoatl hide
- Best in slot
- Masori (f), or a slayer helmet (i) on task in place of the mask
- Slot
- Cape and neck
- Starting out
- Ranging cape or Ava's accumulator, amulet of glory
- Mid game
- Ava's assembler, necklace of anguish
- Best in slot
- Dizana's quiver, necklace of rupture
- Slot
- Hands and feet
- Starting out
- Blessed boots, any decent vambraces
- Mid game
- Barrows gloves, ranger or aranea boots
- Best in slot
- Zaryte vambraces, Avernic treads or pegasian boots
- Slot
- Ring
- Starting out
- Ring of suffering (ri)
- Mid game
- Archers ring (i), or a venator ring
- Best in slot
- Lightbearer if you lean on specials, otherwise venator
- Slot
- Off-hand
- Starting out
- Book of law
- Mid game
- Odium ward or dragonfire ward
- Best in slot
- Twisted buckler, when the crossbow is out
- Slot
- Magic swap for Melee form
- Starting out
- Trident of the seas or swamp, mystic robes
- Mid game
- Sanguinesti staff or eye of ayak, occult necklace, Ahrim's
- Best in slot
- Tumeken's shadow, ancestral, Elidinis' ward (f), Magus ring
The single most important line in that table is the crossbow, and it is there for a mechanical reason rather than a damage one. Enchanted sapphire bolts and sapphire dragon bolts have a chance to fire their special effect against the prayer shield and strip a large chunk of it in one hit, and the dragon version is the better of the two if you are also flicking Smite because its higher maximum hit carries further. A twisted bow will out-damage them everywhere else in the fight and do nothing at all to a shield.
If you carry a magic switch, point it at the Melee form and leave Ranged form to the bow. That is the whole reason for the second setup: the profiles are mirrored, so each style is aimed at the form that resists it least. Two other magic options are worth knowing about even if you never build the full set. Wind spells work because the creature is weak to them, and Ice spells or Entangle will freeze it, which removes the melee problem entirely and also makes the fast attack speed of an eye of ayak easier to use.
Melee is legitimate but conditional. With a defence-reducing special landed first, a scythe of vitur is comparable to a best-in-slot ranged or magic setup; without one it is poor, because you are swinging into an unreduced Defence level. A ranged swap is still needed for the teleport phase and the shield, and the step-back method stops being optional. If you would rather buy the defence reduction than the scythe, an elder maul, a dragon warhammer or the Tonalztics of ralos all do the job, and the reduction can be taken down as far as 125.
The Arceuus spellbook earns its inventory slot several times over. Thralls add free damage, Greater Corruption adds damage specifically against the prayer shield, Ward of Arceuus makes you immune to corruption, Vile Vigour pays for run energy, and Death Charge can be procced off this boss to bank special attack energy if you are not resetting between kills.
| Check | Value |
|---|---|
| Prayers for its own attacks | 2 — Protect from Missiles and Magic |
| Its Defence level | 200 |
| Its Magic level | 150 |
| Its lowest defence bonus, per its infobox | light ammunition, standard ammunition, heavy ammunition |
| Elemental weakness | 65% to air spells |
| Monster attributes | spectral |
- Check
- Prayers for its own attacks
- Value
- 2 — Protect from Missiles and Magic
- Check
- Its Defence level
- Value
- 200
- Check
- Its Magic level
- Value
- 150
- Check
- Its lowest defence bonus, per its infobox
- Value
- light ammunition, standard ammunition, heavy ammunition
- Check
- Elemental weakness
- Value
- 65% to air spells
- Check
- Monster attributes
- Value
- spectral
Inventory and Supplies
| What | Why it is there |
|---|---|
| A crossbow and enchanted sapphire bolts | The prayer shield has 75 points and normally loses 2 per attack. The sapphire special takes roughly 33 off it in a single hit, which is the difference between a short shield phase and a long one. |
| Ruby dragon bolts (e) as a second loadout | Worth firing while its health is still high — at 400 hitpoints the ruby effect lands for 80. |
| Book of the dead and a rune pouch | Blood, fire, cosmic and soul runes cover thralls, Greater Corruption, Ward of Arceuus and Death Charge from one pouch. |
| Super restores, more than the fight looks like it needs | Corruption drains 18 prayer points every time it lands, the shielded phase asks you to flick Smite, and Rigour or Augury is running underneath all of it. |
| A divine bastion or ranging potion, and a saturated heart if you carry magic | Kill speed is what limits how many transformations you have to survive, and every transformation is another spike field. |
| A surge potion | Only if you are built around Zaryte crossbow specials, which benefit greatly from it. |
| Stamina potions | The Melee form is solved by moving, and the lightning cloud phase wants you on a specific tile at a specific moment. |
| A ring of shadows, and a house teleport or Desert amulet 4 | With the frozen tablet the ring is a direct return to the dungeon, which is what makes resupplying cheap enough to bother with. |
- What
- A crossbow and enchanted sapphire bolts
- Why it is there
- The prayer shield has 75 points and normally loses 2 per attack. The sapphire special takes roughly 33 off it in a single hit, which is the difference between a short shield phase and a long one.
- What
- Ruby dragon bolts (e) as a second loadout
- Why it is there
- Worth firing while its health is still high — at 400 hitpoints the ruby effect lands for 80.
- What
- Book of the dead and a rune pouch
- Why it is there
- Blood, fire, cosmic and soul runes cover thralls, Greater Corruption, Ward of Arceuus and Death Charge from one pouch.
- What
- Super restores, more than the fight looks like it needs
- Why it is there
- Corruption drains 18 prayer points every time it lands, the shielded phase asks you to flick Smite, and Rigour or Augury is running underneath all of it.
- What
- A divine bastion or ranging potion, and a saturated heart if you carry magic
- Why it is there
- Kill speed is what limits how many transformations you have to survive, and every transformation is another spike field.
- What
- A surge potion
- Why it is there
- Only if you are built around Zaryte crossbow specials, which benefit greatly from it.
- What
- Stamina potions
- Why it is there
- The Melee form is solved by moving, and the lightning cloud phase wants you on a specific tile at a specific moment.
- What
- A ring of shadows, and a house teleport or Desert amulet 4
- Why it is there
- With the frozen tablet the ring is a direct return to the dungeon, which is what makes resupplying cheap enough to bother with.
There is one genuine judgement call in the supply list and the wiki spells the maths out: Ward of Arceuus is cheaper than a dose of super restore, but it costs you an inventory slot for runes, so it only comes out ahead if you are taking eight or more corruption hits in a trip. If you are still learning the magic orb, you will be. Once you stop being hit by it, the runes stop paying for themselves and the slot is better spent on food.
Quantities are left out deliberately. How much restoration a trip wants depends on whether you run the ward, whether you flick, and how quickly your setup gets through the two forms — the same trip can want a couple of doses or most of a column.
Prayer and Spellbook
Protect from Missiles is the default and it should be on before you are in range. Ranged attacks are the more common of the two things the Ranged form does, and their damage is calculated when the attack starts, so a prayer switched on after you see the projectile is a prayer switched on too late. Left alone, that attack can take 61 off you.
The exception is the magic attack, and it is the single most important animation in the fight. The creature stands up and charges a purple orb before launching it. Swap to Protect from Magic the instant you see that, because an unprotected hit can reach 72 and will also corrupt you. This one attack is unusually forgiving about timing, in that praying while the projectile is still in the air still removes a significant amount of the damage — but it does not stop the corruption, which is the part that costs you supplies.
In Melee form the prayer is Protect from Melee, and the prayer alone is not the answer. Its melee damage increases the longer it stands still, so the plan is to keep it walking. The step-back method exploits the fact that a melee attack does nothing at all if you are praying melee and it was chasing you one tick before the attack was due. On its five-tick cycle that means: take the hit, wait through the hitsplat fading and one empty tick, then on the fourth tick click one tile away. Your movement resolves on the fifth, it follows and attacks on the same tick, and you take nothing.
The shielded phase runs on its own five-tick cycle and you need both prayers in it. Its ranged damage is calculated on tick one, so Protect from Missiles has to be up then; the magic damage is calculated on tick four, so Protect from Magic has to be up then. Ticks two, three and five are empty, and those are the windows where you can flick Smite without being hit off prayer. If you are using a five-tick weapon such as a crossbow on rapid and you attack on the first possible tick of the phase, you will always land on tick two and the Smite flick becomes repeatable; if you find yourself attacking on tick one or four, delay one tick to offset it.
One detail catches people out at the transition into the shield: the cycle there is a tick faster than the rest of the fight, so there is one less tick between a magic projectile hitting you and the next ranged calculation. Expect to switch back faster than your hands are used to.
Mechanics That Decide the Fight
| Mechanic | How you see it coming | What it does | Your answer |
|---|---|---|---|
| Form swap on a damage counter | The transformation animation, not a health percentage. You have to be counting your own damage, not watching its bar. | Changes between Ranged form and Melee form after 100 damage taken in Ranged form or 80 in Melee form. After the first swap it also needs to be hit at least four times before it can swap again. | Have the other style's prayer and switches ready before you reach the threshold. Thrall damage does not count towards either the totals or the hit count, so do not include it in your sums. |
| Transformation spikes | It slams the ground as it changes form. One spike always appears exactly where you are standing. | Fills part of the arena with spikes. Stepping onto one knocks you back to a clear tile and heals it for around 75% of the damage you had just dealt. | Move off your tile as the transformation begins, and then treat the floor as a map rather than an obstacle. Know where the clear tiles are before you need to walk anywhere. |
| The magic orb and corruption | It stands up and charges a purple orb before launching it at you. | Up to 72 damage, and applies corruption: 3, then 6, then 9 prayer points at six-second intervals, 18 in total across 18 seconds. | Protect from Magic immediately. If you are late, praying while the orb is in flight still cuts most of the damage. Ward of Arceuus makes you immune, or clears the corruption after the fact. |
| Melee ramp | You are in Melee form and it has stopped moving. | Melee hits up to 34, and the damage rises the longer it stands still, so a chain of unanswered melee hits is far worse than one. | The step-back method, or a freeze. Lower-level accounts can kite it with ranged instead — its size means an octagonal run pattern works better than a square one. |
| Lightning clouds | It starts teleporting rapidly around the arena. | Spawns clouds that travel across the area for up to 20 damage each. It has Ranged form's combat stats throughout and can be attacked, but damage dealt here does not count towards a form swap. | Stand on the safe tile — but only once the attack has begun, so spikes are not already occupying it. It always reappears to the north-east when the move ends. |
| Homing spikes | A ground slam that produces two to four spikes which then start moving towards you. | The spikes travel one tile every two ticks, never diagonally, and cannot pass through idle spikes. After 34 ticks they harden in place. | Put existing spikes between you and them. Grouped hardened spikes block the homing ones entirely. Spikes next to you and under the boss are never the ones chosen to home. |
| The shockwave | Below 127 hitpoints it teleports to the centre of the arena. | A shockwave across the whole arena for up to 80 damage, with a corruption effect that drains more prayer than the ordinary magic attack does. | Get behind a spike. There are eight tiles where a spike blocks it most efficiently; a full set of eight would negate it completely, which almost never happens, so plan on blocking most of it rather than all of it. |
| Prayer shield and Soul Split | It comes out of the shockwave with a shield up and immune to ordinary damage. | A 75-point prayer shield that only loses 2 per attack, while it runs Soul Split, heals for half of the damage it deals rounded down, and gains accuracy and max hit. | Drain it rather than damage it. Enchanted sapphire bolts, Smite flicks in the empty ticks, and Greater Corruption all take it down faster. Once it falls, the creature returns to Ranged form — but keeps the faster attack speed. |
- Mechanic
- Form swap on a damage counter
- How you see it coming
- The transformation animation, not a health percentage. You have to be counting your own damage, not watching its bar.
- What it does
- Changes between Ranged form and Melee form after 100 damage taken in Ranged form or 80 in Melee form. After the first swap it also needs to be hit at least four times before it can swap again.
- Your answer
- Have the other style's prayer and switches ready before you reach the threshold. Thrall damage does not count towards either the totals or the hit count, so do not include it in your sums.
- Mechanic
- Transformation spikes
- How you see it coming
- It slams the ground as it changes form. One spike always appears exactly where you are standing.
- What it does
- Fills part of the arena with spikes. Stepping onto one knocks you back to a clear tile and heals it for around 75% of the damage you had just dealt.
- Your answer
- Move off your tile as the transformation begins, and then treat the floor as a map rather than an obstacle. Know where the clear tiles are before you need to walk anywhere.
- Mechanic
- The magic orb and corruption
- How you see it coming
- It stands up and charges a purple orb before launching it at you.
- What it does
- Up to 72 damage, and applies corruption: 3, then 6, then 9 prayer points at six-second intervals, 18 in total across 18 seconds.
- Your answer
- Protect from Magic immediately. If you are late, praying while the orb is in flight still cuts most of the damage. Ward of Arceuus makes you immune, or clears the corruption after the fact.
- Mechanic
- Melee ramp
- How you see it coming
- You are in Melee form and it has stopped moving.
- What it does
- Melee hits up to 34, and the damage rises the longer it stands still, so a chain of unanswered melee hits is far worse than one.
- Your answer
- The step-back method, or a freeze. Lower-level accounts can kite it with ranged instead — its size means an octagonal run pattern works better than a square one.
- Mechanic
- Lightning clouds
- How you see it coming
- It starts teleporting rapidly around the arena.
- What it does
- Spawns clouds that travel across the area for up to 20 damage each. It has Ranged form's combat stats throughout and can be attacked, but damage dealt here does not count towards a form swap.
- Your answer
- Stand on the safe tile — but only once the attack has begun, so spikes are not already occupying it. It always reappears to the north-east when the move ends.
- Mechanic
- Homing spikes
- How you see it coming
- A ground slam that produces two to four spikes which then start moving towards you.
- What it does
- The spikes travel one tile every two ticks, never diagonally, and cannot pass through idle spikes. After 34 ticks they harden in place.
- Your answer
- Put existing spikes between you and them. Grouped hardened spikes block the homing ones entirely. Spikes next to you and under the boss are never the ones chosen to home.
- Mechanic
- The shockwave
- How you see it coming
- Below 127 hitpoints it teleports to the centre of the arena.
- What it does
- A shockwave across the whole arena for up to 80 damage, with a corruption effect that drains more prayer than the ordinary magic attack does.
- Your answer
- Get behind a spike. There are eight tiles where a spike blocks it most efficiently; a full set of eight would negate it completely, which almost never happens, so plan on blocking most of it rather than all of it.
- Mechanic
- Prayer shield and Soul Split
- How you see it coming
- It comes out of the shockwave with a shield up and immune to ordinary damage.
- What it does
- A 75-point prayer shield that only loses 2 per attack, while it runs Soul Split, heals for half of the damage it deals rounded down, and gains accuracy and max hit.
- Your answer
- Drain it rather than damage it. Enchanted sapphire bolts, Smite flicks in the empty ticks, and Greater Corruption all take it down faster. Once it falls, the creature returns to Ranged form — but keeps the faster attack speed.
Which special attack you see first is decided at the spawn, not by you. It can appear in either form, and it fires one special at 75% health and the other at 50%. A Ranged spawn gets lightning clouds at 75%; a Melee spawn gets homing spikes at 75%; whichever was not used arrives at 50%.
Two numbers are worth memorising because they buy you a whole extra Ranged form. If you take it below 637 hitpoints before it has dropped under 650, it cannot enter Ranged form before the lightning cloud special — which means you get a clean 100 damage against the form you actually want to hit instead of being pushed into Melee form immediately. In the same spirit, a big damage window during the lightning cloud phase can skip the final Melee form altogether.
Defence reduction is sticky but not permanent. It can be dropped to 125 and the reduction carries across form changes, but the shielded phase resets it to 200, so a warhammer or maul special landed early is not doing anything for you at the end of the fight.
After the shield falls, the spikes get worse rather than better: a large batch appears immediately including one on your tile, and from then on they emerge every four attacks and spread outwards from the clusters that already exist.
| Property | Value |
|---|---|
| Combat level | 741 |
| Attack styles | Ranged, Magic |
| Attack speed | 6 ticks |
| Attacks on sight | Yes |
| Poisons you | No |
| Size | 5 tiles |
| Immune to cannon | Yes |
| Immune to thralls | No |
- Property
- Combat level
- Value
- 741
- Property
- Attack styles
- Value
- Ranged, Magic
- Property
- Attack speed
- Value
- 6 ticks
- Property
- Attacks on sight
- Value
- Yes
- Property
- Poisons you
- Value
- No
- Property
- Size
- Value
- 5 tiles
- Property
- Immune to cannon
- Value
- Yes
- Property
- Immune to thralls
- Value
- No
Where Phantom Muspah Sits in Progression
Within the standalone boss group, the fights below Phantom Muspah are Dagannoth Supreme and The Royal Titans (Branda & Eldric). Above it sit Phosani's Nightmare and Yama.
Phase by Phase
Ranged form
This is the form you want to be fighting. Its ranged defence bonus is much lower than its magic defence bonus, so a bow does real work here, and the counter you are filling is the larger of the two at a hundred damage.
Hold Protect from Missiles and watch for the standing-up animation. Everything else in this form is a matter of not being caught by the orb.
- If it spawns in Melee form, leaving and re-entering the arena is a legitimate way to spend more of your trip on the form your bow prefers.
- A Zaryte crossbow special with ruby bolts is the alternative if you would rather not reset — the ruby effect lands for 80 while its health is still at 400.
Melee form
Eighty damage ends this form, which is less than the Ranged form needs, so it goes by faster than it feels. The danger is not the 34 maximum hit but the fact that the damage escalates while it is stationary.
Its magic defence bonus is the lower one here, which is exactly why the two-style setup exists. If you are on a magic switch, this is where it comes out.
- Run the step-back pattern rather than tanking: hit, one tick of nothing, then step away on the fourth tick of its cycle.
- A freeze removes the problem outright, and makes a fast weapon such as the eye of ayak much easier to get value from.
- Large hits landed at the very end of a Ranged form count towards ending the Melee form, so a big finishing shot can shorten the part of the fight you least want to be in.
The two special attacks
One arrives at 75% and the other at 50%, and the spawn form decides the order. Both are movement problems rather than prayer problems, which makes them the easiest part of the fight to practise deliberately.
- Lightning clouds: get to the safe tile as the attack starts, not before, or a spike will already be occupying it. A weapon with ten tiles of attack range keeps you from being dragged off that tile while you attack.
- Homing spikes: put a group of hardened spikes between yourself and the incoming ones. They cannot move diagonally and cannot pass through idle spikes, so a single well-chosen tile solves the whole attack.
- Entering the shielded form ends an active homing spikes attack early. Left alone, the spikes stop moving after 34 ticks.
The shockwave and the prayer shield
Under 127 hitpoints the fight changes character completely. It teleports to the centre, and the shockwave that follows covers the entire arena — the only defence is a spike between you and it. Plan for this the moment its health gets close, because the spike you need has to already exist.
Then the shield goes up and your damage stops mattering. What matters is prayer drain: 75 points of shield, 2 removed per attack on its own, and everything else you can add on top. This is where the crossbow, the bolts and the Smite flicks earn their inventory space, and where Soul Split plus its raised accuracy makes standing still expensive.
- Get behind a spike before the shockwave lands. Eight specific tiles do this most efficiently.
- Swap to the crossbow and sapphire bolts and start attacking on the first available tick, so your attacks land on tick two of its five-tick cycle.
- Hold Protect from Missiles for tick one and Protect from Magic for tick four, and flick Smite in the gaps.
- Cast Greater Corruption if you have it, and remember that every hit you land heals it for half the damage rounded down — so the shield coming down quickly is worth more than the damage you did to it.
- When it falls, expect an immediate spike field including one on your own tile, and expect the faster attack speed to stay.
Fight Strategy: Prayer-heavy phase reading
- Turn on Protect from Missiles and Rigour before you are in range, and check which form it has spawned in.
- If it is in Melee form and you are ranged-only, consider leaving and re-entering rather than spending the opening on the form your weapon is worst against.
- Land your defence-reducing special early if you carry one, while the reduction still has most of the fight left to apply to.
- Push it below 637 hitpoints before it drops under 650, so it cannot slip into Ranged form ahead of the lightning cloud special.
- Count your own damage rather than watching its health: a hundred ends Ranged form, eighty ends Melee form, and thralls do not contribute to either.
- Step off your tile on every transformation, and treat the resulting spike field as terrain for the rest of the fight.
- Handle the 75% and 50% specials as movement problems. Damage during the lightning clouds does not count towards a swap, but enough of it can skip the last Melee form entirely.
- As its health approaches 127, position behind a spike and get the crossbow and sapphire bolts into your hands.
- Drain the shield rather than fighting it, holding the two protection prayers on the five-tick cycle and flicking Smite in the empty ticks.
- Finish it in the returned Ranged form, remembering that the attack speed is still the faster one and that spikes now appear every four attacks.
The reason to think in counters rather than percentages is that it changes what you do with a big hit. A special attack fired at the tail of a Ranged form is not wasted damage — it spills over and counts towards ending the Melee form, so a well-timed spec shortens the half of the fight you would rather not be in. The same logic works in reverse: dumping damage during the lightning cloud phase does nothing for the swap counter, but it can still be enough to skip a Melee form altogether if you land it in volume.
The other habit worth building early is treating the arena as something you are gradually filling in. Every transformation adds spikes, the shield falling adds a lot of them, and from that point they keep growing out of the existing clusters every four attacks. Spikes are simultaneously the thing that heals the boss when you touch them and the thing that saves you from the shockwave and the homing spikes, so the players who look comfortable here are not avoiding the floor — they are using it.
Positioning and Movement
There are three positions that matter and they belong to different parts of the fight. In Melee form, one tile away and moving, on the step-back rhythm. During the lightning clouds, the specific safe tile, occupied only after the attack has begun. Around the shockwave, directly behind a spike.
The lightning cloud tile has a subtlety that is easy to miss: a weapon with ten tiles of attack range means you are never dragged out of it while attacking. If your weapon reaches less far, the alternative is a two-tile shuffle — sit on the first tile, and when an attack drags you to the second, run back to the first before the clouds arrive.
Kiting is a real option rather than a fallback if freezing is out of reach. Because of its footprint, running an octagonal loop keeps it chasing more reliably than running a square, which is the pattern most players default to.
If you are attempting the shield skip, position is the whole trick: you need to be within one or two tiles of its five-by-five footprint when it teleports to the middle, or your ranged damage arrives late and the window closes.
Beginner Plan, Then the Advanced One
Your first trips
- Do your first attempts as a ranged camp. It is slightly the better of the two single-style options anyway, and it removes the switching workload while you learn which animation means what.
- Practise one thing at a time: first the orb animation, then the step-back rhythm, then the safe tile for the clouds. Trying to learn all three in one attempt is how people end up blaming the spikes.
- Bring Ward of Arceuus while you are still getting hit by the orb. Early on you will take enough corruption for the runes to be cheaper than the restores they replace.
- Get behind a spike well before its health reaches 127. The shockwave is the hit that ends first attempts, and it is entirely predictable.
- Accept that your first shield phases will be slow. Enchanted sapphire bolts and a Smite flick are the fix, and both are cheap compared to the prayer potions a slow shield phase costs.
Once the kill is boring
- Learn the 650-to-637 window properly. Getting it below 637 before it drops under 650 hands you a full hundred damage of Ranged form instead of an immediate push into Melee form, and it is free.
- Run the two-style setup with the magic switch reserved for Melee form. That is where the mirrored defence profiles pay, and it is the single largest kill-time improvement available.
- Chain a defence-reducing special into a scythe if you own one. With the reduction landed, a scythe is comparable to a best-in-slot bow — without it, melee here is a bad trade.
- Use Death Charge on this boss to bank special attack energy for the next kill, which only makes sense if you are not resetting between kills anyway.
- The shield skip is the speedrunner's move and it is worth knowing even if you rarely land it. If its health hits zero before the shield is applied, the phase cancels and it comes out with one hitpoint. There is a five-tick window between the teleport and the shield, three- and four-tick weapons can fit two attacks into it, and the first hit lands before the shockwave with the second after. Any extra damage once it is sitting at zero — a thrall, for instance — fails the skip. The hit that takes it under 127 in the first place is the one that decides whether the skip is even possible, so it is luck-dependent by design.
Drops and What Phantom Muspah Is Worth
The two uniques in the key facts table are the reason anyone farms this fight, and neither of them is affected by anything you can do except getting more kills. What is worth understanding is what actually limits your kill count here, because it is not your damage per second in isolation.
Three things give health back or waste your damage: spikes heal it for roughly three quarters of the damage you had just dealt if you step on one, the shielded phase heals it for half of every hit it lands on you, and damage dealt during the lightning cloud phase does not count towards a form swap even though it does count towards killing it. A player who never touches a spike and gets through the shield in a handful of attacks is getting materially more kills per trip than a player with better gear who does not, which is unusual and is the reason this fight rewards study more than upgrades.
We do not publish drop rates, kills per hour or item values on this page. Those move with balance changes and with the Grand Exchange, and the live tables on the wiki are the only version worth quoting.
Drops worth the trip: Venator bow shard, ancient icon. Whether that is worth your time depends on how many kills an hour you personally get, which is a function of prayer-heavy phase reading rather than of your gear list.
Combat Achievements
One Combat Achievement is worth naming because it changes how people talk about this fight: Phantom Muspah Speed-Runner is the reason the shield skip exists as a technique at all. It is not a trick to make normal kills faster — the skip needs two or three fortunate hits in a five-tick window and fails outright if a thrall lands a stray point of damage. Treat it as a task you attempt deliberately rather than a method you adopt.
Phantom Muspah has Combat Achievement tasks, and a 72 max hit is the number to plan them around: any task that restricts your supplies or your gear is a materially different fight at that damage.
Task lists move with updates — read the current list in game.
Ironman Notes
Slayer masters who assign Phantom Muspah: Konar, Nieve, Duradel. Each kill is 1763.7 Slayer XP.
Without a Grand Exchange, venator bow shard, ancient icon has to be earned rather than bought, and this is the fastest table it sits on.
This is a good Ironman target because it is instanced, repeatable, and gated behind a quest rather than a level, so the entry cost is one afternoon of questing rather than a grind.
The supply question is the interesting one. Without a Grand Exchange you are choosing between carrying runes for Ward of Arceuus and carrying more restores, and the wiki gives you the break-even directly: the ward is cheaper per use but costs an inventory slot, so it wins once you are taking eight or more corruption hits per trip. Early on, that is you.
Two substitutions make the fight cheaper on a self-sufficient account. The standard spellbook gives you wind spells, which it is weak to, and Ice spells or Entangle to freeze the Melee form — which means you can solve the most damaging part of the fight with runes instead of food. And a rune crossbow with enchanted sapphire bolts does the shield job perfectly well; the shield mechanic does not care how expensive your crossbow is.
If you have finished Desert Treasure II, get the frozen tablet from Duke Sucellus and use the ring of shadows. Cheap resupplies are worth more on an Ironman than on any other account type, because a wasted trip costs you gathering time rather than coins.
Common Mistakes and Death Causes
| What happened | Why it happened | The fix |
|---|---|---|
| The magic orb, unprayed | Protect from Missiles is the default and the orb comes with no warning other than the animation, so a player watching their own damage counter instead of the boss eats it. | Watch for it standing up and charging. Even a late switch while the projectile is airborne removes most of the 72, though not the corruption that comes with it. |
| Chained melee hits in Melee form | Its melee damage rises the longer it stands still, so two or three unanswered hits are far worse than one and a player who reacts by eating rather than moving makes it worse. | Step-back on its five-tick cycle, or freeze it. Movement is the answer here, not food. |
| The shockwave with nowhere to hide | It fires below 127 hitpoints, and the only defence is a spike between you and it. A player who has cleared their surroundings has nothing to stand behind. | Position behind a spike before its health gets close. Eight specific tiles block it most efficiently. |
| Running out of prayer during the shield | The shielded form runs Soul Split with raised accuracy and max hit while you are flicking Smite on top of two protection prayers, and every hit it lands heals it for half the damage. | Go into the phase with prayer topped up and sapphire bolts loaded. A shorter shield phase costs less prayer than a well-managed long one. |
| Stepping onto a spike mid-fight | Transformations put one on your tile and the field grows every four attacks after the shield falls, so a panicked click lands on a spike. | Know where your clear tiles are before you need to move. The knockback also heals it for around three quarters of what you had just dealt, so this mistake costs twice. |
| Corruption stacking across a trip | Each magic hit that lands drains 18 prayer over 18 seconds, and several of them in a row will empty a prayer bar that looked healthy. | Carry Ward of Arceuus while you are still being hit by the orb, and remember it clears the effect after the fact as well as preventing it. |
- What happened
- The magic orb, unprayed
- Why it happened
- Protect from Missiles is the default and the orb comes with no warning other than the animation, so a player watching their own damage counter instead of the boss eats it.
- The fix
- Watch for it standing up and charging. Even a late switch while the projectile is airborne removes most of the 72, though not the corruption that comes with it.
- What happened
- Chained melee hits in Melee form
- Why it happened
- Its melee damage rises the longer it stands still, so two or three unanswered hits are far worse than one and a player who reacts by eating rather than moving makes it worse.
- The fix
- Step-back on its five-tick cycle, or freeze it. Movement is the answer here, not food.
- What happened
- The shockwave with nowhere to hide
- Why it happened
- It fires below 127 hitpoints, and the only defence is a spike between you and it. A player who has cleared their surroundings has nothing to stand behind.
- The fix
- Position behind a spike before its health gets close. Eight specific tiles block it most efficiently.
- What happened
- Running out of prayer during the shield
- Why it happened
- The shielded form runs Soul Split with raised accuracy and max hit while you are flicking Smite on top of two protection prayers, and every hit it lands heals it for half the damage.
- The fix
- Go into the phase with prayer topped up and sapphire bolts loaded. A shorter shield phase costs less prayer than a well-managed long one.
- What happened
- Stepping onto a spike mid-fight
- Why it happened
- Transformations put one on your tile and the field grows every four attacks after the shield falls, so a panicked click lands on a spike.
- The fix
- Know where your clear tiles are before you need to move. The knockback also heals it for around three quarters of what you had just dealt, so this mistake costs twice.
- What happened
- Corruption stacking across a trip
- Why it happened
- Each magic hit that lands drains 18 prayer over 18 seconds, and several of them in a row will empty a prayer bar that looked healthy.
- The fix
- Carry Ward of Arceuus while you are still being hit by the orb, and remember it clears the effect after the fact as well as preventing it.
The arena is instanced and the boss does not chase you out of it, which makes retreating unusually cheap: you lose the progress on that attempt and nothing else. If your prayer will not cover the shield phase, leaving before you trigger it is the correct decision rather than a failure.
If corruption has emptied your prayer at an awkward moment, the order is prayer restoration first and healing second. An unprayed magic orb applies another eighteen points of drain on top of the damage, so restoring lets you avoid the next one rather than merely surviving the last.
With a ring of shadows and the frozen tablet, banking and returning is short enough that a half-finished attempt is worth abandoning rather than gambling on. That is the practical case for owning the teleport even though nothing in the fight requires it.
FAQ
Do I have to fight it in the order it chooses?
Largely, yes — but you have more influence than it looks. It can spawn in either form and its special attacks are assigned by that spawn, so if you are ranged-only and it appears in Melee form, leaving and re-entering the arena to get a Ranged spawn is a recognised tactic rather than a cheat.
What is corruption actually doing to me?
Draining prayer on a timer. Every magic hit that lands applies it, and it takes 3, then 6, then 9 prayer points at six-second intervals — 18 in total over 18 seconds. Ward of Arceuus stops it before it starts or removes it afterwards.
Why is it healing?
Two separate mechanics. Standing on a spike knocks you back and heals it for around three quarters of the damage you had just dealt. Separately, during the shielded phase it heals for half of the damage it deals to you, rounded down. Neither is random and both are avoidable.
Can I skip the prayer shield?
Only by killing it before the shield goes up, which is what the shield skip does. There is a five-tick window between its teleport to the centre and the shield being applied; if its health reaches zero inside that window the phase cancels and it comes back with one hitpoint. It needs two or three lucky hits and any extra damage while it sits at zero — including a thrall — fails it.
Is a twisted bow the best weapon here?
For most of the fight, yes. For the prayer shield, no — a shield is drained rather than damaged, so a crossbow with enchanted sapphire bolts does something a bow physically cannot. Most setups carry the bow for the fight and the crossbow for the ending.
Do I need two combat styles?
Not strictly. Camping one style works and a ranged camp is generally slightly the better single-style choice, but it costs kill time, because Ranged form resists magic more and Melee form resists ranged more. Carrying magic for the Melee form is where the two-style setup earns its inventory slots.
Why did my defence-reducing special stop working?
It did not, but the shielded phase resets its Defence to 200 regardless of what you had reduced it to. The reduction carries across ordinary form changes and can go as low as 125; the shield wipes it.
Related Guides
Bottom Line
Treat this as a fight about counters and floor space rather than about health bars. You decide when the forms change by how much damage you have dealt, the arena gets progressively more crowded with objects that either heal it or protect you depending on how you use them, and the last 127 hitpoints are a prayer-drain race rather than a damage one. Get the orb animation into reflex, get the step-back rhythm into muscle memory, and put a crossbow and enchanted sapphire bolts in your inventory before you ever see the shield.
If the thing standing between you and this fight is Secrets of the North rather than the mechanics, that is a questing problem, and our quest completions will clear the gate so you can spend your time learning the boss instead of the requirements.
If Phantom Muspah is blocking a Combat Achievement or an unlock you actually want, our PvM service is done by hand — no automation. Otherwise the bosses list has the full index.
Phantom Muspah — Standalone (form swapping), difficulty 4/5. Combat values here — hitpoints, max hits, attack styles and speed, Defence and Magic levels, immunities and Slayer requirements — were read from the Old School RuneScape Wiki infobox for Phantom Muspah on 2026-08-03. Kill rates, GP per hour and item prices are deliberately absent because they move with balance patches and the Grand Exchange. Mechanics, gear tiers and phase behaviour on this page were checked against Phantom Muspah/Strategies on 4 August 2026.
Need a trusted team? Bils Services
Enjoyed the guide?
Drop a like — it helps other Adventurers find the good stuff.
Community
Comments
Silence in the hall…
Be the first Adventurer to leave a mark.
Join the thread
Add a comment
Tips, drops, or “this carried my account” — keep it useful.
bilsservices · bils services · bilsservices.com

