


OSRS Phosani's Nightmare Guide: Mechanics, Gear and Drops
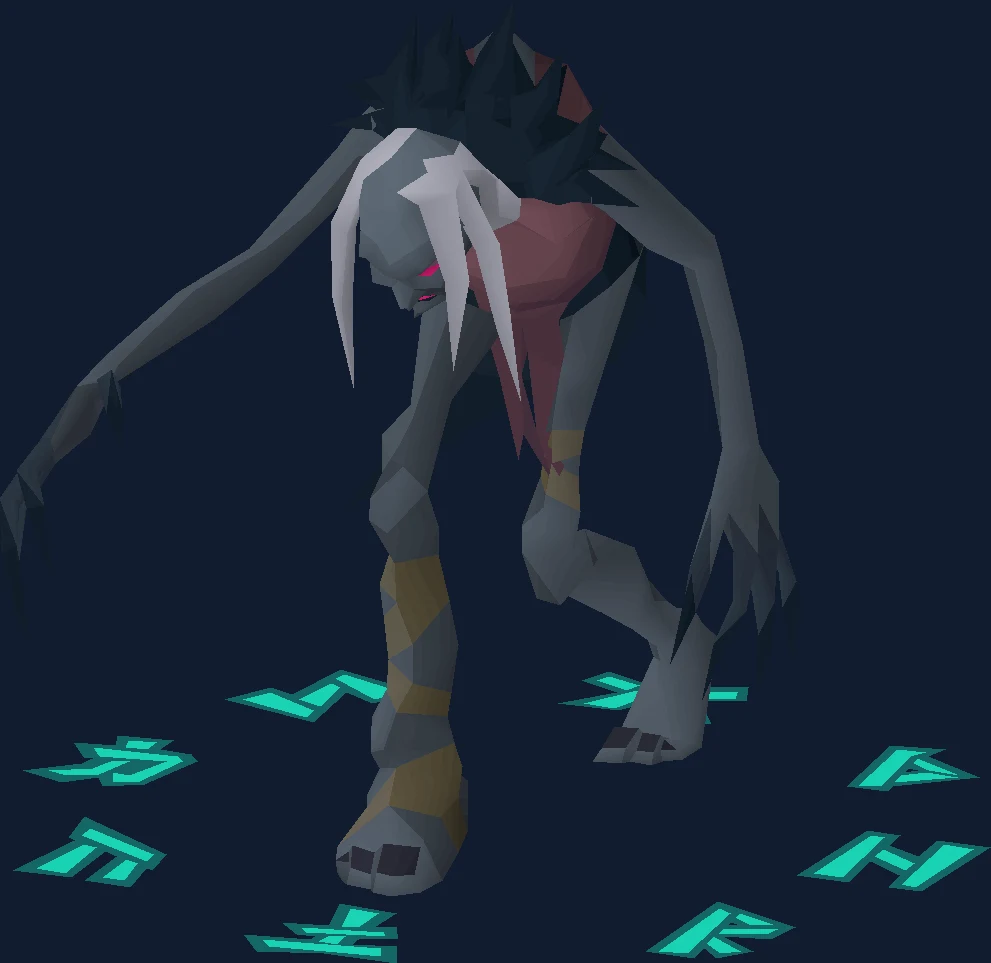
Phosani's Nightmare has no Slayer requirement and no longer needs a normal Nightmare kill first. Here is what actually gates it, how the four phases and their specials work, why crush matters, and every unique drop rate.
Overview
Phosani's Nightmare is the solo, harder version of The Nightmare, released on 30 June 2021. It is a combat level 1,024 fight in an instance beneath Slepe, and the reason people learn it is the drop table: inquisitor's pieces, the nightmare staff, the inquisitor's mace and the three orbs.
Two widely repeated requirements are wrong. There is no Slayer requirement, and since the 13 August 2022 update you no longer need a normal Nightmare kill first. The game still shows a one-time warning if your Nightmare kill count is zero, and you can ignore it. The only quest requirement is Priest in Peril, for Morytania access.
The fight is much shorter than the original — roughly three times faster — because the health pool is structured differently. But praying correctly fully blocks her standard attacks rather than merely reducing them, and unblocked hits are far more punishing, so it is a reaction fight rather than a tanking fight.
| Detail | Value |
|---|---|
| Combat level | 1,024 |
| Hitpoints (infobox) | 3,200 — but the fight is health-gated by shields and totems, see below |
| Slayer requirement | None |
| Quest requirement | Priest in Peril, for Morytania access |
| Nightmare kill needed first? | No, since 13 August 2022 |
| Solo or team | Solo only, in an instance |
| Weak to | Crush at +40, against slash +180 and stab +120 |
| Death cost | 60,000 coins to Sister Senga |
- Detail
- Combat level
- Value
- 1,024
- Detail
- Hitpoints (infobox)
- Value
- 3,200 — but the fight is health-gated by shields and totems, see below
- Detail
- Slayer requirement
- Value
- None
- Detail
- Quest requirement
- Value
- Priest in Peril, for Morytania access
- Detail
- Nightmare kill needed first?
- Value
- No, since 13 August 2022
- Detail
- Solo or team
- Value
- Solo only, in an instance
- Detail
- Weak to
- Value
- Crush at +40, against slash +180 and stab +120
- Detail
- Death cost
- Value
- 60,000 coins to Sister Senga
Requirements and Access
The requirement list is much shorter than its reputation suggests. What actually gates the fight is your ability to react, not your Slayer level.
| Requirement | Detail |
|---|---|
| Slayer | None — this boss has no Slayer requirement |
| Quests | Priest in Peril, for Morytania access. That is the only hard quest requirement |
| Prior Nightmare kill | Not required. Sister Senga has allowed the fight without one since 13 August 2022 |
| Recommended quests | A Taste of Hope for Drakan's Medallion, the fastest travel, or Ghosts Ahoy for the ectophial |
| Suggested stats | 95+ Attack, 95+ Strength, 85+ Defence, 95+ Magic, 95+ Hitpoints, 70+ Prayer |
| Immunities | She cannot be frozen, poisoned, envenomed, or hit by cannons |
- Requirement
- Slayer
- Detail
- None — this boss has no Slayer requirement
- Requirement
- Quests
- Detail
- Priest in Peril, for Morytania access. That is the only hard quest requirement
- Requirement
- Prior Nightmare kill
- Detail
- Not required. Sister Senga has allowed the fight without one since 13 August 2022
- Requirement
- Recommended quests
- Detail
- A Taste of Hope for Drakan's Medallion, the fastest travel, or Ghosts Ahoy for the ectophial
- Requirement
- Suggested stats
- Detail
- 95+ Attack, 95+ Strength, 85+ Defence, 95+ Magic, 95+ Hitpoints, 70+ Prayer
- Requirement
- Immunities
- Detail
- She cannot be frozen, poisoned, envenomed, or hit by cannons
The suggested stats are an indication rather than a gate. The fight will let you in far below them; it simply will not let you finish.
Getting There
The fight is in the Sisterhood Sanctuary, a dungeon beneath Slepe in Morytania. You start it by choosing Drink-from on the Pool of Nightmares, on a raised area north of The Nightmare's arena.
The fastest travel is Drakan's medallion straight to Slepe, which is unlocked with the Slepey tablet — itself a Phosani's drop, at 1/25 and guaranteed on your 25th kill since 25 June 2025.
Before you have the tablet: the spider cave teleport then run east; the Hallowed Sepulchre with a hallowed crystal shard plus the 63 Agility shortcut; Drakan's medallion to Ver Sinhaza then north and east; or the ectophial followed by paying Andras 10,000 coins.
Recommended Stats
The unusual thing about gearing for this fight is that magic accuracy is worthless against the totems, because they have no defensive stats. Prioritise magic damage and skip anything that only adds accuracy without raising your max hit.
| Stat | Comfortable | Why |
|---|---|---|
| Attack | 95+ | Crush is her weakness at +40 defence bonus, against +180 slash |
| Strength | 95+ | Crush weapons always max hit husks and weakened parasites |
| Defence | 85+ | Her max hits are 73 melee, 80 magic and ranged, and around 85 on the dash |
| Magic | 95+ | For the totems, where only damage matters — not accuracy |
| Hitpoints | 95+ | Off-prayer hits land hard, and the reaction window is 2 to 3 ticks |
| Prayer | 70+ | You are switching protection prayers constantly, not holding one |
- Stat
- Attack
- Comfortable
- 95+
- Why
- Crush is her weakness at +40 defence bonus, against +180 slash
- Stat
- Strength
- Comfortable
- 95+
- Why
- Crush weapons always max hit husks and weakened parasites
- Stat
- Defence
- Comfortable
- 85+
- Why
- Her max hits are 73 melee, 80 magic and ranged, and around 85 on the dash
- Stat
- Magic
- Comfortable
- 95+
- Why
- For the totems, where only damage matters — not accuracy
- Stat
- Hitpoints
- Comfortable
- 95+
- Why
- Off-prayer hits land hard, and the reaction window is 2 to 3 ticks
- Stat
- Prayer
- Comfortable
- 70+
- Why
- You are switching protection prayers constantly, not holding one
Gear Setups: Budget, Mid and Best in Slot
Two setups matter: a crush melee setup for her physical phases and husks, and a magic setup for the totems where you want raw damage and nothing else.
The Wiki notes that the Eye of Ayak and Tumeken's shadow produce similar output despite different speeds and max hits — 70 for the shadow, 44 for Ayak with a fortified Elidinis ward. The real difference is longrange range, 10 versus 8, which matters during Corpse Flowers.
| Slot | Budget | Mid | Best in slot |
|---|---|---|---|
| Melee weapon | Zamorakian hasta or a crush option | Inquisitor's mace | Inquisitor's mace — crush, and it is what the fight is designed around |
| Magic weapon | Trident of the swamp | Sanguinesti staff | Tumeken's shadow, or Eye of Ayak with a fortified Elidinis ward |
| Head | Neitiznot faceguard | Inquisitor's great helm | Inquisitor's great helm |
| Body / legs | Bandos | Inquisitor's hauberk and plateskirt | Inquisitor's, or Ancestral for the totems |
| Neck | Amulet of blood fury | Amulet of torture | Amulet of torture — blood fury helps a learner but is not something to rely on |
| Ring | Berserker ring (i) | Ultor ring | Ultor ring — listed rank 1 for the melee setup |
| Special | — | Burning claws | Burning claws, saving energy for three uses in the enrage phase |
- Slot
- Melee weapon
- Budget
- Zamorakian hasta or a crush option
- Mid
- Inquisitor's mace
- Best in slot
- Inquisitor's mace — crush, and it is what the fight is designed around
- Slot
- Magic weapon
- Budget
- Trident of the swamp
- Mid
- Sanguinesti staff
- Best in slot
- Tumeken's shadow, or Eye of Ayak with a fortified Elidinis ward
- Slot
- Head
- Budget
- Neitiznot faceguard
- Mid
- Inquisitor's great helm
- Best in slot
- Inquisitor's great helm
- Slot
- Body / legs
- Budget
- Bandos
- Mid
- Inquisitor's hauberk and plateskirt
- Best in slot
- Inquisitor's, or Ancestral for the totems
- Slot
- Neck
- Budget
- Amulet of blood fury
- Mid
- Amulet of torture
- Best in slot
- Amulet of torture — blood fury helps a learner but is not something to rely on
- Slot
- Ring
- Budget
- Berserker ring (i)
- Mid
- Ultor ring
- Best in slot
- Ultor ring — listed rank 1 for the melee setup
- Slot
- Special
- Budget
- —
- Mid
- Burning claws
- Best in slot
- Burning claws, saving energy for three uses in the enrage phase
An amulet of blood fury is described as useful for learners but not to be relied on, because her off-prayer hits land hard enough that healing cannot be your plan.
Inventory and Supplies
One item is specific to this fight and is easy to forget: Sanfew serum, for the parasites.
- Sanfew serums or Relicym's balm — drinking one before parasites burst weakens them, and you can click the Hitpoints orb to do it
- Saradomin brews and super restores
- Super combat potions and a magic damage boost if your setup uses one
- Karambwans for one-tick combo eating
- Burning claws for the enrage phase, with energy saved for three uses
- A crush weapon for husks and weakened parasites, which you always max hit
- Darts or a fast option is not needed here, unlike Araxxor — the spawns are melee'd
It is an instance with a deathbank. On death you respawn by the Pool of Nightmares and pay Sister Senga 60,000 to reclaim, and any unsafe death deletes the deathbank contents.
Mechanics You Have to Respect
The health structure is what makes this fight fast: three phases of 400 shield durability plus a final phase of 150 health, with three sets of totems — twelve in total — at 200 charge each. That is 1,350 physical damage and 1,200 charge damage when maging, 2,550 in total, against 7,800 for the original Nightmare.
Each phase has three specials: one spawn (husks or parasites), one paired with Grasping Claws (corpse flowers or spores), and one miscellaneous (Curse or Surge). Phase 1 picks set A or B at random and then alternates.
| Mechanic | What it does | Correct response |
|---|---|---|
| Standard attacks | Melee, magic and ranged. Max hits 73, 80 and 80, with the dash around 85 | Praying correctly fully blocks them, unlike the original Nightmare which only reduces them. Your window is 3 ticks for ranged and magic, and 2 ticks for melee. |
| Sleepwalkers | Increase by one per phase, capping at four at the end of phase three. Each has 10 hitpoints and you always max hit them | The number that reach her sets her power blast strength. If none are killed the blast always kills you. |
| Spores | Slow your attack speed by 2 ticks, doubled if you are maging, and drain 6 prayer points per yawn | Spores always precede six consecutive claw attacks in this version, so treat a spore as a warning rather than just a debuff. |
| Husks | Spawn in pairs and freeze you until killed. Blue and skinny uses magic, green and bulky uses ranged | Crush weapons always max hit them. Have no overhead prayer active before they appear, then pray magic once they do — she and the magic husk attack on the same tick. |
| Parasites | Burst out after around 18 ticks for heavy damage, then heal her until killed | Drink a Sanfew serum or Relicym's balm beforehand to weaken them. Weakened parasites are always max hit by crush. |
| Corpse Flowers | Split the room into four quadrants | The white-flower quadrant is safe. A red-berry quadrant deals rapid damage that heals her for double, and your attacks heal her there too. |
| Grasping Claws | Portals dealing 50 to 65 damage | Far more clumped around you than in the normal fight, so movement matters more. |
| Curse | Shuffles your protection prayers one to the right for 5 attacks | Clicking Protect from Melee gives Magic, Magic gives Missiles, Missiles gives Melee. Learn the mapping rather than reading the icons mid-fight. |
| Phase 3 prayer deactivation | She turns off your protection prayer if it was already active before the attack animation, and uses melee more often | Prioritise Protect from Melee, or Ranged while cursed, and expect to re-click. |
| Phase 4, the desperation phase | 150 health. She endlessly uses Grasping Claws and summons sleepwalkers one at a time | Each sleepwalker that reaches her causes a blast for 15 damage. This is where burning claws specials go. |
- Mechanic
- Standard attacks
- What it does
- Melee, magic and ranged. Max hits 73, 80 and 80, with the dash around 85
- Correct response
- Praying correctly fully blocks them, unlike the original Nightmare which only reduces them. Your window is 3 ticks for ranged and magic, and 2 ticks for melee.
- Mechanic
- Sleepwalkers
- What it does
- Increase by one per phase, capping at four at the end of phase three. Each has 10 hitpoints and you always max hit them
- Correct response
- The number that reach her sets her power blast strength. If none are killed the blast always kills you.
- Mechanic
- Spores
- What it does
- Slow your attack speed by 2 ticks, doubled if you are maging, and drain 6 prayer points per yawn
- Correct response
- Spores always precede six consecutive claw attacks in this version, so treat a spore as a warning rather than just a debuff.
- Mechanic
- Husks
- What it does
- Spawn in pairs and freeze you until killed. Blue and skinny uses magic, green and bulky uses ranged
- Correct response
- Crush weapons always max hit them. Have no overhead prayer active before they appear, then pray magic once they do — she and the magic husk attack on the same tick.
- Mechanic
- Parasites
- What it does
- Burst out after around 18 ticks for heavy damage, then heal her until killed
- Correct response
- Drink a Sanfew serum or Relicym's balm beforehand to weaken them. Weakened parasites are always max hit by crush.
- Mechanic
- Corpse Flowers
- What it does
- Split the room into four quadrants
- Correct response
- The white-flower quadrant is safe. A red-berry quadrant deals rapid damage that heals her for double, and your attacks heal her there too.
- Mechanic
- Grasping Claws
- What it does
- Portals dealing 50 to 65 damage
- Correct response
- Far more clumped around you than in the normal fight, so movement matters more.
- Mechanic
- Curse
- What it does
- Shuffles your protection prayers one to the right for 5 attacks
- Correct response
- Clicking Protect from Melee gives Magic, Magic gives Missiles, Missiles gives Melee. Learn the mapping rather than reading the icons mid-fight.
- Mechanic
- Phase 3 prayer deactivation
- What it does
- She turns off your protection prayer if it was already active before the attack animation, and uses melee more often
- Correct response
- Prioritise Protect from Melee, or Ranged while cursed, and expect to re-click.
- Mechanic
- Phase 4, the desperation phase
- What it does
- 150 health. She endlessly uses Grasping Claws and summons sleepwalkers one at a time
- Correct response
- Each sleepwalker that reaches her causes a blast for 15 damage. This is where burning claws specials go.
The Kill, Phase by Phase
The fight is four phases with a totem stage between them. Treat the totems as a damage-only exercise and the phases as a reaction exercise.
- Drink from the Pool of Nightmares to start the instance. If you have zero Nightmare kill count you will get a one-time warning — you can ignore it, since the kill requirement was removed in August 2022.
- Break her 400 shield durability with your crush setup while reacting to her standard attacks. Praying correctly fully blocks them, so the whole phase is about reading the animation inside a 2 to 3 tick window.
- When the phase's spawn special comes, respond by type: kill sleepwalkers before they reach her, weaken parasites with a Sanfew serum before they burst, and for husks drop your overhead prayer, wait for them to appear, then pray magic.
- Switch to your magic setup for the totems. They have no defensive stats, so accuracy is irrelevant — bring damage. Four totems at 200 charge each, three times over.
- Repeat for phases 2 and 3. The sleepwalker count rises by one each phase, capping at four, and phase 1's special set alternates from whichever of A or B it started with.
- In phase 3, expect prayer deactivation and more melee. Prioritise Protect from Melee — or Protect from Missiles while cursed — and re-click after each attack animation rather than trusting the prayer stayed on.
- Handle Corpse Flowers by moving to the white-flower quadrant. Never fight from a red-berry quadrant: it damages you rapidly, heals her double, and your own attacks heal her.
- When Curse lands, remember the shift is one to the right: click Protect from Melee to get Magic, Magic to get Missiles, Missiles to get Melee.
- Phase 4 is 150 health of endless Grasping Claws and single sleepwalkers. Spend your three burning claws specials here and kill each sleepwalker before it reaches her, since each one that lands costs 15.
Solo Versus Team
Phosani's Nightmare is solo only. That is the core design difference from The Nightmare, and it is why the sleepwalker count is fixed per phase rather than scaling to player count.
The practical consequence is that every mechanic is on you simultaneously: prayer switching, spawn management, quadrant positioning and totem damage. There is no role to hide in.
If you are learning, the original Nightmare in a team is a reasonable place to practise reading her attack animations, but be aware the reaction windows and punishment are both harsher here, and that praying correctly fully blocks rather than reduces.
Common Mistakes and What Actually Kills You
This is a fight where most deaths trace back to one of five specific mistakes rather than to general under-gearing.
- Ignoring the sleepwalkers. If none are killed, her power blast always kills you. This is not a damage race you can win by tanking.
- Drinking Sanfew serum after the parasites burst. It has to be before. Click the Hitpoints orb to drink without swapping your inventory around.
- Praying an overhead before husks appear. She and the magic husk attack on the same tick, so go in with no overhead and pray magic once they spawn.
- Fighting from a red-berry quadrant during Corpse Flowers. It damages you fast, heals her double, and your own hits heal her.
- Reading prayer icons during Curse. The shift is one to the right and it lasts 5 attacks. Learn the mapping in advance.
- Assuming your prayer stayed on in phase 3. She deactivates a protection prayer that was already active before the attack animation.
- Bringing magic accuracy for the totems. They have no defensive stats, so accuracy items do nothing. Bring max hit.
- Relying on an amulet of blood fury. Useful for a learner, but her off-prayer hits are heavy enough that healing cannot be the plan.
- Leaving items in the deathbank. An unsafe death deletes them. Reclaim from Sister Senga for 60,000 before your next attempt.
Drops Worth Knowing
Two unique tables can both roll on the same kill: the armour, mace and staff table at 1/140, and the orb table at roughly 1/533. That gives an effective chance of any unique of about 1/111.
| Drop | Why it matters |
|---|---|
| Inquisitor's great helm / hauberk / plateskirt | 1/700 each — the crush set that this fight is built around |
| Nightmare staff | 69/35,000 |
| Inquisitor's mace | 31/35,000 |
| Eldritch orb / Harmonised orb / Volatile orb | 1/1,600 each, on the separate orb table |
| Slepey tablet | 1/25, and guaranteed on your 25th kill since 25 June 2025 — this is your Drakan's medallion teleport straight to Slepe |
| Parasitic egg | 1/200. Unlocks a cosmetic skin for the little nightmare |
| Little nightmare (pet) | 1/1,400 |
| Jar of dreams | 1/4,000 |
| Elite clue scroll | 1/35 |
- Drop
- Inquisitor's great helm / hauberk / plateskirt
- Why it matters
- 1/700 each — the crush set that this fight is built around
- Drop
- Nightmare staff
- Why it matters
- 69/35,000
- Drop
- Inquisitor's mace
- Why it matters
- 31/35,000
- Drop
- Eldritch orb / Harmonised orb / Volatile orb
- Why it matters
- 1/1,600 each, on the separate orb table
- Drop
- Slepey tablet
- Why it matters
- 1/25, and guaranteed on your 25th kill since 25 June 2025 — this is your Drakan's medallion teleport straight to Slepe
- Drop
- Parasitic egg
- Why it matters
- 1/200. Unlocks a cosmetic skin for the little nightmare
- Drop
- Little nightmare (pet)
- Why it matters
- 1/1,400
- Drop
- Jar of dreams
- Why it matters
- 1/4,000
- Drop
- Elite clue scroll
- Why it matters
- 1/35
Combat Achievements
Because the fight is solo and instanced, Combat Achievement attempts here are entirely on your own schedule — there is no team to coordinate and no task requirement to wait for, unlike Araxxor.
Most of the tasks reward playing the phases cleanly rather than adding extra restrictions, so they line up naturally with learning the fight properly. Read the list before your first several kills so you are not repeating attempts later.
The Slepey tablet being guaranteed at 25 kills means the trip gets meaningfully shorter well before you finish a Combat Achievement set, which is worth factoring into your plan.
Ironman Notes
Phosani's Nightmare is one of the more attractive solo grinds for an Ironman because the inquisitor's set, the mace and the orbs are all things you otherwise cannot obtain, and the effective unique rate of about 1/111 is reasonable for what is on the table.
The Slepey tablet at 1/25, guaranteed by kill 25, matters more on an Ironman than it might look: the Drakan's medallion teleport straight to Slepe removes most of the travel time from the grind.
Sanfew serums are a Herblore cost you will pay every trip, so factor them into your herb planning rather than treating them as an occasional purchase.
FAQ
Does Phosani's Nightmare have a Slayer requirement?
No. This is the most common misconception about the fight. There is no Slayer requirement at all — the only hard quest requirement is Priest in Peril, for Morytania access.
Do I need to kill the normal Nightmare first?
No, not since 13 August 2022. Sister Senga will let you fight Phosani's without a Nightmare kill. The game shows a one-time warning if your kill count is zero, and you can ignore it.
Why does everyone say to bring crush?
Her defence bonuses are +40 against crush versus +180 slash and +120 stab. Crush weapons also always max hit husks and weakened parasites, which makes the spawn phases much faster.
Should I bring magic accuracy for the totems?
No. The totems have no defensive stats, so accuracy does nothing there. Bring items that raise your max hit and skip anything that only adds accuracy.
How does the Curse special work exactly?
It shifts your protection prayers one to the right for 5 attacks: clicking Protect from Melee gives Magic, Magic gives Missiles, and Missiles gives Melee. Memorise the mapping rather than trying to read icons mid-fight.
How much faster is Phosani's than the original Nightmare?
Roughly three times faster. The total damage needed is around 2,550 when maging the totems, against 7,800 for the original — but the reaction windows are tighter and unblocked hits hurt much more.
Related Guides
Bottom Line
Phosani's Nightmare is gated by reaction speed and preparation, not by Slayer level or a prior Nightmare kill. If someone told you otherwise, they were describing the fight as it was before August 2022.
Bring crush for her and for the spawns, bring magic damage rather than magic accuracy for the totems, drink Sanfew serum before parasites burst, and always kill the sleepwalkers. Those four things account for most of the difference between a learner and a consistent kill.
If you want the inquisitor's set without learning a 2-tick reaction fight, our PvM service covers Phosani's Nightmare kills.
Mechanics and drop rates change with updates. Verify current details on the Old School RuneScape Wiki.
Need a trusted team? Bils Services
Enjoyed the guide?
Drop a like — it helps other Adventurers find the good stuff.
Community
Comments
Silence in the hall…
Be the first Adventurer to leave a mark.
Join the thread
Add a comment
Tips, drops, or “this carried my account” — keep it useful.
bilsservices · bils services · bilsservices.com

