


OSRS Yama Guide: Contracts, Gear, Mechanics, Teams and Drops
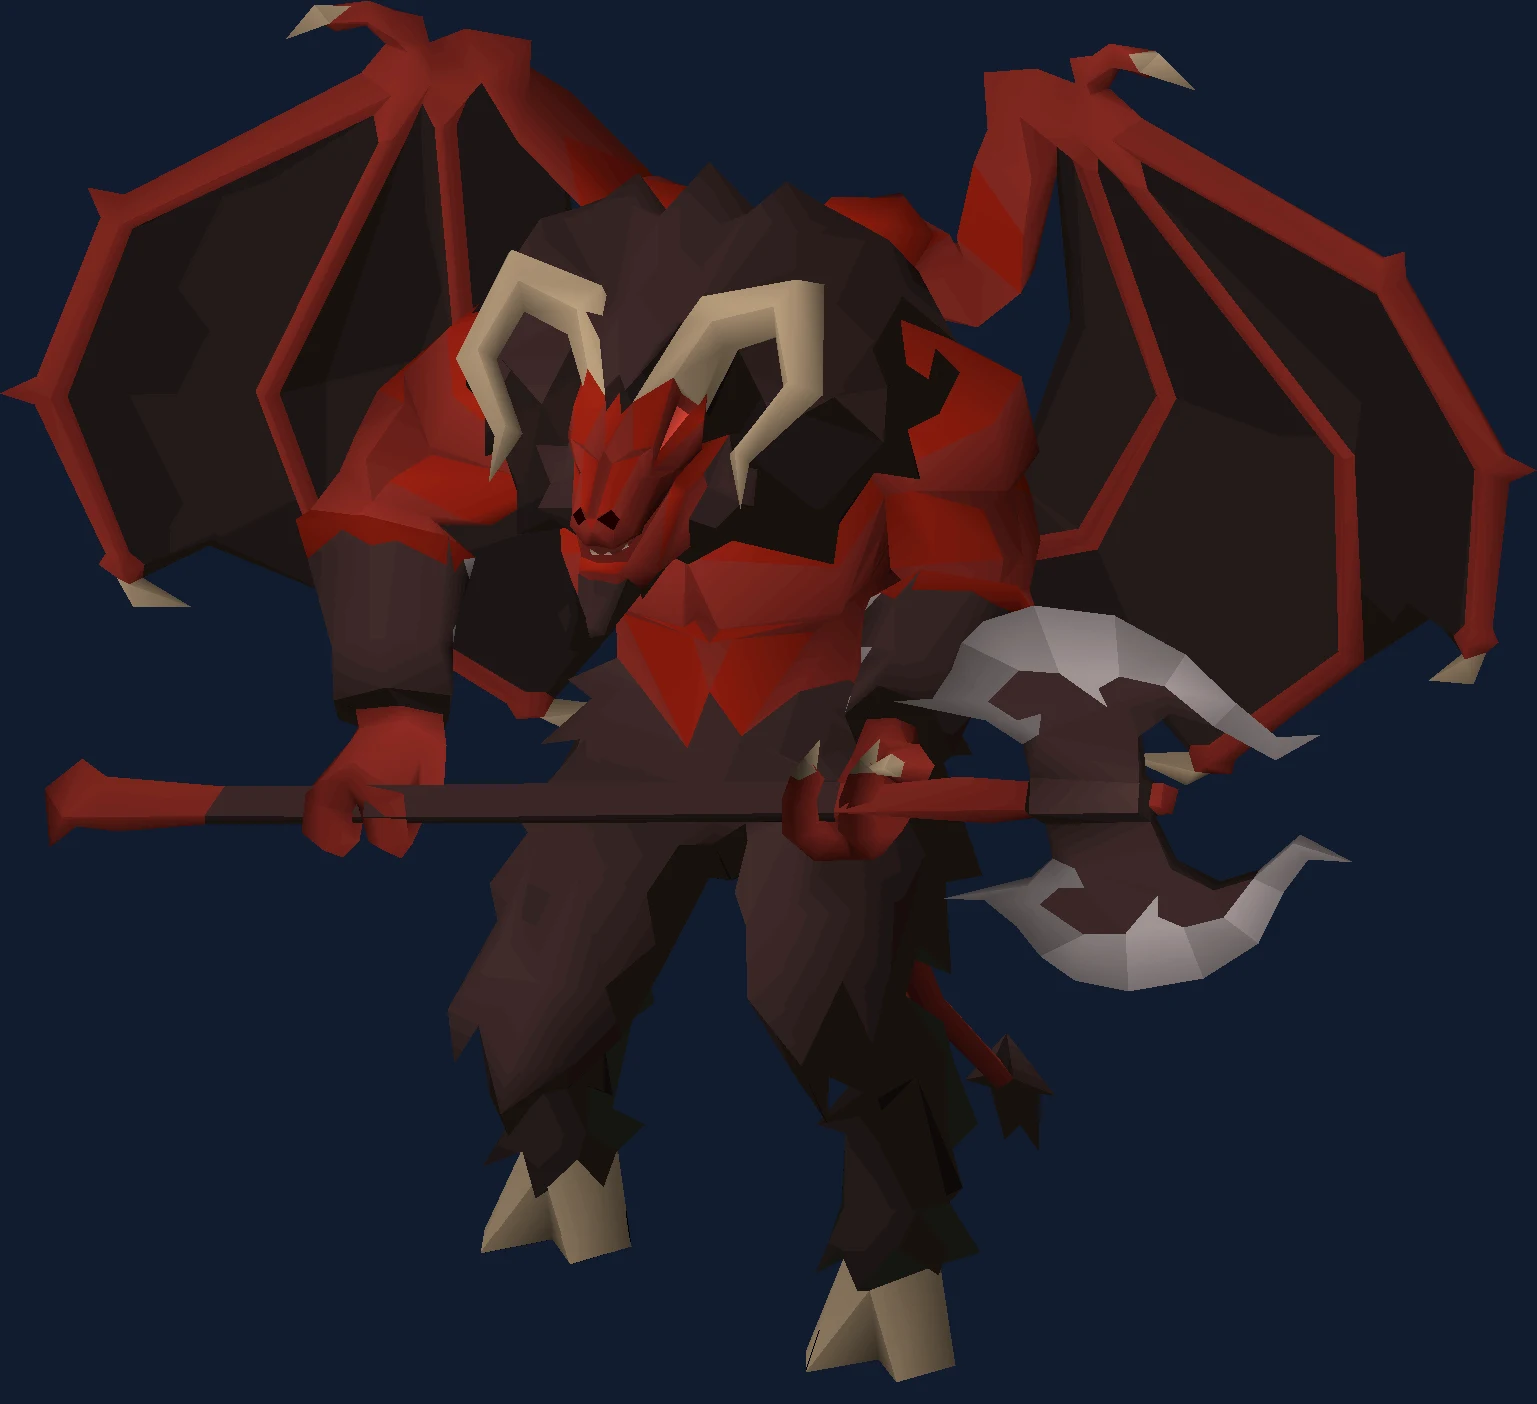
Yama in the Chasm of Fire: how the contract system gates access, what the encounter demands from gear and team size, the mechanics to respect, and what Oathplate and the Soulflame horn are for.
Overview
Yama is the demonic boss of the Chasm of Fire, and the encounter that introduced the contract system. Access itself is free once you have completed A Kingdom Divided — you speak to the Voice of Yama and he offers a contract to fight an inhibited form of himself. Contracts are what change the fight, not what unlocks it.
Jagex designed the base fight as a step up from the Forgotten Four, the post-Desert Treasure II bosses. It emphasises movement and prayer switching rather than raw damage output, and it rewards that with oathplate armour — best-in-slot slash armour — and the soulflame horn.
Beyond the base fight sits a set of tradeable contracts that make Yama stronger in specific ways in exchange for guaranteed rewards. Several are comparable in difficulty to the awakened Desert Treasure II variants.
| Detail | Value |
|---|---|
| Type | Endgame contract boss |
| Location | Chasm of Fire |
| Hard requirement | A Kingdom Divided |
| Recommended style | Melee, with magic as a mandatory secondary for the Judge phases |
| Solo or team | Solo or duo — his stats do not change between the two |
| Main draw | Oathplate armour, soulflame horn, dossier |
| Defining mechanic | Three phases split by Judge of Yama sub-fights, plus glyph-based elemental protection |
| Demonbane | All demonbane modifiers increased by 20% against him |
- Detail
- Type
- Value
- Endgame contract boss
- Detail
- Location
- Value
- Chasm of Fire
- Detail
- Hard requirement
- Value
- A Kingdom Divided
- Detail
- Recommended style
- Value
- Melee, with magic as a mandatory secondary for the Judge phases
- Detail
- Solo or team
- Value
- Solo or duo — his stats do not change between the two
- Detail
- Main draw
- Value
- Oathplate armour, soulflame horn, dossier
- Detail
- Defining mechanic
- Value
- Three phases split by Judge of Yama sub-fights, plus glyph-based elemental protection
- Detail
- Demonbane
- Value
- All demonbane modifiers increased by 20% against him
Requirements and Access
The only hard gate is a quest. Everything else is a recommendation, and the base fight can be repeated as often as you like — Yama can be challenged again immediately after a kill.
| Requirement | Detail |
|---|---|
| A Kingdom Divided | The only hard gate. After the quest, return to the Chasm of Fire and speak to the Voice of Yama on the bottom floor. |
| Chasm of Fire access | Reachable in Shayzien; the Shayzien area is where the chasm entrance sits. |
| 77+ Prayer (recommended) | Augury for a magic switch; Rigour if you are using ranged. The wiki's solo money making entry lists 77+ Prayer as recommended. |
| Two combat styles | Not optional. The Judge of Yama reactively prays and always prays ranged, so you need melee and magic to kill it efficiently. |
| Comfortable prayer switching | His ranged and magic attacks are fully blocked by prayer; his melee is not. |
- Requirement
- A Kingdom Divided
- Detail
- The only hard gate. After the quest, return to the Chasm of Fire and speak to the Voice of Yama on the bottom floor.
- Requirement
- Chasm of Fire access
- Detail
- Reachable in Shayzien; the Shayzien area is where the chasm entrance sits.
- Requirement
- 77+ Prayer (recommended)
- Detail
- Augury for a magic switch; Rigour if you are using ranged. The wiki's solo money making entry lists 77+ Prayer as recommended.
- Requirement
- Two combat styles
- Detail
- Not optional. The Judge of Yama reactively prays and always prays ranged, so you need melee and magic to kill it efficiently.
- Requirement
- Comfortable prayer switching
- Detail
- His ranged and magic attacks are fully blocked by prayer; his melee is not.
That subsidy is worth using deliberately. Contracts are a separate, optional layer on top — those are consumed per attempt and are where the real cost of failure sits.
Getting There
Yama is fought in his own domain, reached through the Chasm of Fire in Shayzien. The route is short once you know it.
- Complete A Kingdom Divided if you have not already.
- Travel to the Chasm of Fire and descend to the bottom floor.
- Speak to the Voice of Yama, who teleports you to Yama's domain.
- Accept the contract Yama offers, which grants you the ability to challenge his inhibited form.
- If you want a modified fight, show him a contract item before starting — otherwise the base fight is repeatable for free.
Because deaths return you to the Voice of Yama rather than your respawn point, your return route after a death is already short. Set your supply restock plan rather than your travel plan.
Recommended Stats
Yama is an endgame encounter and the stat expectations reflect that. Below these levels, you are fighting the mechanics and your own damage output at the same time.
| Stat | Comfortable | Why |
|---|---|---|
| Primary combat skill | 90+ | Whether melee or ranged, you need endgame damage to finish before supplies run out. |
| Hitpoints | 90+ | Yama's damage output leaves little room for a mistimed prayer. |
| Prayer | 74+ | Rigour or Augury and enough prayer points for a long fight. |
| Defence | 80+ | Reduces incidental damage between mechanic responses. |
| Secondary combat skill | 80+ | For any style switching your route requires. |
- Stat
- Primary combat skill
- Comfortable
- 90+
- Why
- Whether melee or ranged, you need endgame damage to finish before supplies run out.
- Stat
- Hitpoints
- Comfortable
- 90+
- Why
- Yama's damage output leaves little room for a mistimed prayer.
- Stat
- Prayer
- Comfortable
- 74+
- Why
- Rigour or Augury and enough prayer points for a long fight.
- Stat
- Defence
- Comfortable
- 80+
- Why
- Reduces incidental damage between mechanic responses.
- Stat
- Secondary combat skill
- Comfortable
- 80+
- Why
- For any style switching your route requires.
Gear Setups: Budget, Mid and Best in Slot
Yama expects a genuine endgame setup. There is no meaningful budget bracket that makes this fight comfortable — the 'budget' column below is the realistic minimum rather than a recommendation.
| Slot | Budget | Mid | Best in slot |
|---|---|---|---|
| Melee weapon | Abyssal tentacle / Osmumten's fang | Scythe of vitur | Scythe of vitur / Soulreaper axe |
| Ranged weapon | Toxic blowpipe | Zaryte crossbow | Twisted bow / Zaryte crossbow |
| Head | Neitiznot faceguard | Torva full helm | Torva full helm / Oathplate helm |
| Body | Bandos chestplate | Torva platebody | Torva platebody / Oathplate chest |
| Legs | Bandos tassets | Torva platelegs | Torva platelegs / Oathplate legs |
| Cape | Fire cape | Infernal cape | Infernal cape |
| Amulet | Amulet of torture | Amulet of torture | Amulet of rancour |
| Ring | Berserker ring (i) | Ultor ring | Ultor ring / Lightbearer |
| Gloves | Barrows gloves | Ferocious gloves | Ferocious gloves |
| Boots | Dragon boots | Primordial boots | Primordial boots |
- Slot
- Melee weapon
- Budget
- Abyssal tentacle / Osmumten's fang
- Mid
- Scythe of vitur
- Best in slot
- Scythe of vitur / Soulreaper axe
- Slot
- Ranged weapon
- Budget
- Toxic blowpipe
- Mid
- Zaryte crossbow
- Best in slot
- Twisted bow / Zaryte crossbow
- Slot
- Head
- Budget
- Neitiznot faceguard
- Mid
- Torva full helm
- Best in slot
- Torva full helm / Oathplate helm
- Slot
- Body
- Budget
- Bandos chestplate
- Mid
- Torva platebody
- Best in slot
- Torva platebody / Oathplate chest
- Slot
- Legs
- Budget
- Bandos tassets
- Mid
- Torva platelegs
- Best in slot
- Torva platelegs / Oathplate legs
- Slot
- Cape
- Budget
- Fire cape
- Mid
- Infernal cape
- Best in slot
- Infernal cape
- Slot
- Amulet
- Budget
- Amulet of torture
- Mid
- Amulet of torture
- Best in slot
- Amulet of rancour
- Slot
- Ring
- Budget
- Berserker ring (i)
- Mid
- Ultor ring
- Best in slot
- Ultor ring / Lightbearer
- Slot
- Gloves
- Budget
- Barrows gloves
- Mid
- Ferocious gloves
- Best in slot
- Ferocious gloves
- Slot
- Boots
- Budget
- Dragon boots
- Mid
- Primordial boots
- Best in slot
- Primordial boots
Oathplate armour comes from Yama itself, which means the boss partly funds its own gear progression once you can clear it.
Inventory and Supplies
Two items on this list are Yama-specific rather than generic boss kit, and skipping either is a common reason a first attempt fails.
- Saradomin brews and super restores as your main sustain.
- Antipoison. His poison starts at 20, the highest value in the game, and it is not chip damage you can ignore.
- A magic switch. This is not optional — the Judge always prays ranged and reacts to your last style, so melee alone stalls the sub-fight.
- Divine potions for your primary style.
- An escape teleport, though deaths here are unusually forgiving.
He is fully immune to poison and venom himself, and immune to cannons, so leave those out. Water is his elemental weakness at 50%, which is worth knowing if you are building a magic setup.
Mechanics You Have to Respect
Yama uses all three combat styles: melee with his axe, ranged as engulfing shadow, and magic as fire. The single most useful thing to understand is that he reads the weapon you are holding and behaves differently because of it.
| Mechanic | What it does | Correct response |
|---|---|---|
| Weapon check | Holding a melee weapon makes him close the distance. Holding magic or ranged makes him stand off and attack from afar. The check also affects his magic defence. | Decide which behaviour you want before you switch weapons, because switching mid-fight changes his positioning. |
| Melee axe swing | Hits through prayer, and hits everyone within three tiles of his target. | In a duo, do not stand within three tiles of whoever he is targeting. Protection prayer will not save you here. |
| Ranged and magic auto-attacks | Fully blocked by the matching protection prayer for most of the fight. | Switch on the animation. These are the attacks prayer actually stops, so getting them right is free damage avoided. |
| Shadow and fire elemental attacks | Heavy damage that protection prayer does not fully stop. | Stand on the matching glyph. Glyphs grant temporary protection against that element and are the only full block. |
| Poison | He inflicts poison starting at 20 — the highest value in the game. | Bring antipoison or accept a large chunk of chip damage. Do not plan your food budget without accounting for it. |
| Judge of Yama phase transitions | Shortly after 66.6% and 33.3% health he slams his axe, teleporting you to side pockets of the arena to fight a Judge of Yama. He gains 50% damage resistance from the threshold until the teleport. | Stop pushing damage once you see the threshold coming. Kill the Judge, then resume. |
| Judge prayer behaviour | The Judge prays against two styles, one of which is always ranged, and reactively prays against your last attack. | Bring melee and magic and alternate them. A single-style setup stalls here. |
| Final phase flares | He stays static in the centre and summons flares that damage you and heal him if left alive. | Kill the flares. Letting them live is how a nearly-finished fight resets. |
| Final phase behaviour split | Out of melee range he launches three sets of fireballs at everyone. In melee range he does a quick axe swipe that also summons a flare. | Pick a position and commit. Drifting in and out of melee range gives you both patterns at once. |
- Mechanic
- Weapon check
- What it does
- Holding a melee weapon makes him close the distance. Holding magic or ranged makes him stand off and attack from afar. The check also affects his magic defence.
- Correct response
- Decide which behaviour you want before you switch weapons, because switching mid-fight changes his positioning.
- Mechanic
- Melee axe swing
- What it does
- Hits through prayer, and hits everyone within three tiles of his target.
- Correct response
- In a duo, do not stand within three tiles of whoever he is targeting. Protection prayer will not save you here.
- Mechanic
- Ranged and magic auto-attacks
- What it does
- Fully blocked by the matching protection prayer for most of the fight.
- Correct response
- Switch on the animation. These are the attacks prayer actually stops, so getting them right is free damage avoided.
- Mechanic
- Shadow and fire elemental attacks
- What it does
- Heavy damage that protection prayer does not fully stop.
- Correct response
- Stand on the matching glyph. Glyphs grant temporary protection against that element and are the only full block.
- Mechanic
- Poison
- What it does
- He inflicts poison starting at 20 — the highest value in the game.
- Correct response
- Bring antipoison or accept a large chunk of chip damage. Do not plan your food budget without accounting for it.
- Mechanic
- Judge of Yama phase transitions
- What it does
- Shortly after 66.6% and 33.3% health he slams his axe, teleporting you to side pockets of the arena to fight a Judge of Yama. He gains 50% damage resistance from the threshold until the teleport.
- Correct response
- Stop pushing damage once you see the threshold coming. Kill the Judge, then resume.
- Mechanic
- Judge prayer behaviour
- What it does
- The Judge prays against two styles, one of which is always ranged, and reactively prays against your last attack.
- Correct response
- Bring melee and magic and alternate them. A single-style setup stalls here.
- Mechanic
- Final phase flares
- What it does
- He stays static in the centre and summons flares that damage you and heal him if left alive.
- Correct response
- Kill the flares. Letting them live is how a nearly-finished fight resets.
- Mechanic
- Final phase behaviour split
- What it does
- Out of melee range he launches three sets of fireballs at everyone. In melee range he does a quick axe swipe that also summons a flare.
- Correct response
- Pick a position and commit. Drifting in and out of melee range gives you both patterns at once.
Two more details worth knowing before you commit a setup. His auto-attacks alternate styles in the final phase, so if he used shadow last hit, the next is magic — that regularity is exploitable. And his ranged and magic attacks pierce prayer slightly in the final phase, so the earlier 'prayer fully blocks it' rule stops being exactly true right at the end.
Fight Strategy: Approach and Kill Plan
The base fight has a fixed shape: two phase transitions with a Judge fight in between each, then a static final phase. Plan around those three landmarks rather than improvising.
- Enter with full health, full prayer and a protection prayer already active.
- Decide your weapon before you engage. Melee pulls him to you; magic or ranged keeps him at distance and changes his magic defence.
- Switch protection prayer on his ranged and magic animations — those are fully blocked. Do not try to pray off the melee swing; it hits through prayer.
- Step onto the matching glyph for shadow and fire attacks. Glyphs are the only full block for those, and standing in the open is a choice.
- Ease off damage as you approach 66.6%. He gains 50% damage resistance between hitting the threshold and the teleport, so those hits are wasted.
- In the Judge pocket, alternate melee and magic. It prays reactively against your last attack and always prays ranged, so a single style stalls.
- Repeat at 33.3%, then commit to a position for the final phase.
- In the final phase, kill flares on sight. They damage you and heal Yama, and ignoring them is the usual reason a near-complete kill falls apart.
Deaths return you to the Voice of Yama with your grave in the same room, and your reclamation fee is cut by 75% until your tenth kill. Use those ten attempts to learn the phase transitions rather than to bank a safe kill.
Contracts: The Harder Versions of the Fight
Contracts are the reason this boss has long-term depth. They work like awakener's orbs: tradeable, consumed on the attempt, and they modify the encounter in exchange for a guaranteed reward. Acquisition contracts come only from dossiers; the sigil contracts also drop from Yama's demons.
The wiki notes that some of these sit at roughly awakened Desert Treasure II difficulty. Treat them as a separate skill ceiling rather than a way to farm the base fight faster.
| Contract | Duo allowed | Guaranteed reward | Key modifications |
|---|---|---|---|
| Catalyst acquisition | Yes | 2,000 aether catalyst | Enhanced voidflares and incantations; you regain 50% less prayer and health. |
| Worm acquisition | Yes | 250 diabolic worms | Same modifier set as the catalyst contract. |
| Shard acquisition | Yes | 45 oathplate shards | Same modifier set as the catalyst contract. |
| Oathplate acquisition | No | One oathplate piece | Same modifiers, solo only. |
| Harmony acquisition | No | Soulflame horn | Same modifiers, solo only. Shadow pools appear here and in oathplate acquisition. |
| Familiar acquisition | Yes | 1/100 Yami | Extra prayer damage, continuous voidflares, no healing or prayer restore from consumables, enhanced specials. Refunded on a kill, and the only contract that still rolls the standard table. |
| Forfeit breath | No | Purifying sigil (top) | Yama drains your stamina passively and on damage dealt; hitting 0 stamina is a loss. |
| Glyphic attenuation | No | Purifying sigil (bottom) | Glyphs protect for less time and punish harder; Yama is weak to crush and nothing else; your prayer bonus both raises your damage and inversely affects drain. |
| Sensory clouding | No | Purifying sigil (left) | Increased prayer penetration, he pursues forever, lethal voidflare explosions, and your attack range is halved. |
| Divine severance | No | Purifying sigil (right) | He deactivates protection prayers on sight but no longer penetrates them; continuous voidflares with lethal explosions. |
| Bloodied blows | No | Purifying sigil (middle) | More voidflares, more resistant to attacks, and both of you gain Wretched Strength. |
- Contract
- Catalyst acquisition
- Duo allowed
- Yes
- Guaranteed reward
- 2,000 aether catalyst
- Key modifications
- Enhanced voidflares and incantations; you regain 50% less prayer and health.
- Contract
- Worm acquisition
- Duo allowed
- Yes
- Guaranteed reward
- 250 diabolic worms
- Key modifications
- Same modifier set as the catalyst contract.
- Contract
- Shard acquisition
- Duo allowed
- Yes
- Guaranteed reward
- 45 oathplate shards
- Key modifications
- Same modifier set as the catalyst contract.
- Contract
- Oathplate acquisition
- Duo allowed
- No
- Guaranteed reward
- One oathplate piece
- Key modifications
- Same modifiers, solo only.
- Contract
- Harmony acquisition
- Duo allowed
- No
- Guaranteed reward
- Soulflame horn
- Key modifications
- Same modifiers, solo only. Shadow pools appear here and in oathplate acquisition.
- Contract
- Familiar acquisition
- Duo allowed
- Yes
- Guaranteed reward
- 1/100 Yami
- Key modifications
- Extra prayer damage, continuous voidflares, no healing or prayer restore from consumables, enhanced specials. Refunded on a kill, and the only contract that still rolls the standard table.
- Contract
- Forfeit breath
- Duo allowed
- No
- Guaranteed reward
- Purifying sigil (top)
- Key modifications
- Yama drains your stamina passively and on damage dealt; hitting 0 stamina is a loss.
- Contract
- Glyphic attenuation
- Duo allowed
- No
- Guaranteed reward
- Purifying sigil (bottom)
- Key modifications
- Glyphs protect for less time and punish harder; Yama is weak to crush and nothing else; your prayer bonus both raises your damage and inversely affects drain.
- Contract
- Sensory clouding
- Duo allowed
- No
- Guaranteed reward
- Purifying sigil (left)
- Key modifications
- Increased prayer penetration, he pursues forever, lethal voidflare explosions, and your attack range is halved.
- Contract
- Divine severance
- Duo allowed
- No
- Guaranteed reward
- Purifying sigil (right)
- Key modifications
- He deactivates protection prayers on sight but no longer penetrates them; continuous voidflares with lethal explosions.
- Contract
- Bloodied blows
- Duo allowed
- No
- Guaranteed reward
- Purifying sigil (middle)
- Key modifications
- More voidflares, more resistant to attacks, and both of you gain Wretched Strength.
Two rules are worth committing to memory. The resource and pet contracts allow a duo as long as one of you holds the contract; the equipment and sigil contracts must be done alone. And the sigil and pet contracts are refunded on a successful kill, so a clean clear costs you nothing but supplies.
Five sigil pieces combine into the purifying sigil, which unlocks Radiant Oathplate — the white variant. That is the actual completionist goal behind the contract system, and it requires clearing five different solo-only modified fights.
Solo Versus Duo
Yama can be fought alone or with one other player who has signed the initial contract, and his stats are identical either way. That is unusual — most group bosses scale — and it means a duo is straightforwardly easier rather than a different fight.
He only focuses one player at a time, though he can switch aggression between the two of you. The practical effect is that a duo halves the prayer-switching burden while you learn, and the Judge phases go faster because you can cover melee and magic between you rather than switching solo.
The catch is his melee swing, which hits everyone within three tiles of his target. Positioning discipline matters more in a duo, not less. And contracts change the rules — each states its own party requirement, so read it before inviting a partner.
For other endgame team content at this level, see best group bosses and the bosses index.
Common Mistakes and What Actually Kills You
The base fight is cheap to fail while you are under ten kills, so the mistakes worth naming are the ones that keep repeating rather than the ones that cost you gold.
- Bringing one combat style. The Judge phases are built specifically to punish this and you will simply be unable to progress efficiently.
- Praying against the melee swing. It hits through prayer; the answer is distance, not a prayer switch.
- Standing within three tiles of your partner's position when he is targeting them. His melee splashes across that radius.
- Trying to pray off shadow and fire attacks instead of stepping onto the matching glyph.
- Pushing damage into the 66.6% and 33.3% thresholds while he holds 50% damage resistance.
- Ignoring flares in the final phase and watching him heal back out of kill range.
- Skipping antipoison and then attributing the health loss to mechanics you did not misplay.
- Drifting in and out of melee range in the final phase, which triggers both of his behaviour patterns instead of one.
- Spending a contract on a fight you have not yet cleared unmodified.
Drops Worth Knowing
Oathplate is best-in-slot slash armour and the soulflame horn has a special attack that boosts allies' next melee attack. The dossier is arguably the most interesting drop, since it supplies contracts and upgrades Death Charge.
The drop roll is a cascade rather than a single table, and it is worth understanding because it explains why contribution matters. Jagex published these rates: if you dealt less than 375 damage — 15% of his health — you only roll the junk table. Otherwise you roll 1/120 for the unique table, scaled by contribution, and a success there is 3/5 for an oathplate piece and 2/5 for the soulflame horn. Failing that, 1/12 for the dossier, then 1/30 for a forgotten lockbox, then 1/15 for 12 oathplate shards, then the standard table. Tertiary rolls are separate: 1/2,500 for Yami and 1/30 for an elite clue.
| Drop | Rate | Why it matters |
|---|---|---|
| Oathplate helm / chest / legs | 3/5 of the 1/120 unique roll | Best-in-slot slash armour. The boss funds its own gear progression. |
| Soulflame horn | 2/5 of the 1/120 unique roll | Special attack that boosts allies' next melee attack. |
| Dossier | 1/12 | Supplies contracts, including some exclusive to Yama, and upgrades Death Charge. |
| Oathplate shards (12) | 1/15 | Bad-luck mitigation toward the armour set. Quantity scales with contribution. |
| Forgotten lockbox | 1/30 | Secondary reward on the cascade. |
| Elite clue scroll | 1/30 (tertiary) | Rolled separately from the main cascade. |
| Yami | 1/2,500 (tertiary) | The boss pet. |
- Drop
- Oathplate helm / chest / legs
- Rate
- 3/5 of the 1/120 unique roll
- Why it matters
- Best-in-slot slash armour. The boss funds its own gear progression.
- Drop
- Soulflame horn
- Rate
- 2/5 of the 1/120 unique roll
- Why it matters
- Special attack that boosts allies' next melee attack.
- Drop
- Dossier
- Rate
- 1/12
- Why it matters
- Supplies contracts, including some exclusive to Yama, and upgrades Death Charge.
- Drop
- Oathplate shards (12)
- Rate
- 1/15
- Why it matters
- Bad-luck mitigation toward the armour set. Quantity scales with contribution.
- Drop
- Forgotten lockbox
- Rate
- 1/30
- Why it matters
- Secondary reward on the cascade.
- Drop
- Elite clue scroll
- Rate
- 1/30 (tertiary)
- Why it matters
- Rolled separately from the main cascade.
- Drop
- Yami
- Rate
- 1/2,500 (tertiary)
- Why it matters
- The boss pet.
Combat Achievements
Yama received its own Combat Achievement tasks shortly after release, and as with all recent content they emphasise clean mechanic handling and restricted completions rather than speed alone.
One planning note specific to Yama: contracted fights are not tracked separately the way awakened Desert Treasure II kills are. Check the exact task list in-game before building an attempt around it, since the task set has been adjusted post-release.
Ironman Notes
For an Ironman, Oathplate is a substantial untradeable-in-practice upgrade, which makes Yama a genuine endgame target rather than an optional one.
The supply cost is the constraint. Yama attempts consume brews and restores at endgame rates, so treat it as a Herblore and Farming project first and a PvM project second.
One iron-specific rule to know: on the familiar acquisition contract, a duo normally lets both players benefit from whoever's contract was used — but an ironman has to supply their own contract to get the increased pet rate. Do not plan a duo around a partner's contract.
FAQ
How do I get to fight Yama?
Complete A Kingdom Divided, then go to the bottom floor of the Chasm of Fire and speak to the Voice of Yama. He teleports you to Yama's domain, where Yama offers the initial contract that lets you fight his inhibited form. That base fight is repeatable for free.
Do I need a contract every time?
No. Contracts are optional and make the fight harder in exchange for a guaranteed reward. The base fight can be re-entered immediately after a kill without spending anything.
Can I solo Yama?
Yes, and his stats are identical whether you go solo or duo. A duo is easier because he only focuses one player at a time, but it is the same fight rather than a scaled one. Several contracts are solo-only by rule.
Do I really need two combat styles?
Yes. The Judge of Yama sub-fights at 66.6% and 33.3% pray against two styles, one of which is always ranged, and re-pray reactively against your last attack. Melee plus magic is the standard answer.
How expensive are deaths?
Cheaper than at most endgame bosses while you are learning. You respawn at the Voice of Yama with your grave in the same area, and your reclamation fee is reduced by 75% until you reach ten kills.
Is Oathplate better than Torva?
They serve overlapping roles and the comparison depends on the content and current stats. Check the OSRS Wiki equipment tables rather than trusting a fixed claim.
Should I learn Yama or the raids first?
Raids, generally. They give you the gear and the mechanical habits Yama assumes you already have.
Related Guides
- Doom of Mokhaiotl guide — the other recent endgame solo boss.
- Best group bosses — other endgame team content.
- Boss gear progression — building an endgame setup.
- Combat Achievements progression — planning Yama tasks.
- Bossing progression: easiest to hardest — where Yama sits.
- OSRS bosses index — every boss with its requirement.
Bottom Line
Yama is more accessible than his reputation suggests. One quest, a free repeatable base fight, and a 75% death discount for your first ten kills mean the learning curve is subsidised. What it demands is two combat styles, glyph discipline, and the patience to stop pushing damage at the phase thresholds.
Contracts are where the difficulty actually lives. Clear the base fight consistently before you spend one, because they are consumed on the attempt and only the sigil and pet contracts refund on a win.
If Oathplate is the goal and the learning curve is the blocker, our PvM team runs it hand-done.
Mechanics, contract terms and drop rates were verified against the Old School RuneScape Wiki on 3 August 2026. Prices and hourly profit are intentionally not quoted because they track live Grand Exchange data.
Need a trusted team? Bils Services
Enjoyed the guide?
Drop a like — it helps other Adventurers find the good stuff.
Community
Comments
Silence in the hall…
Be the first Adventurer to leave a mark.
Join the thread
Add a comment
Tips, drops, or “this carried my account” — keep it useful.
bilsservices · bils services · bilsservices.com

