


OSRS Nightmare Guide: Team Sizes, Gear, Mechanics & Drops
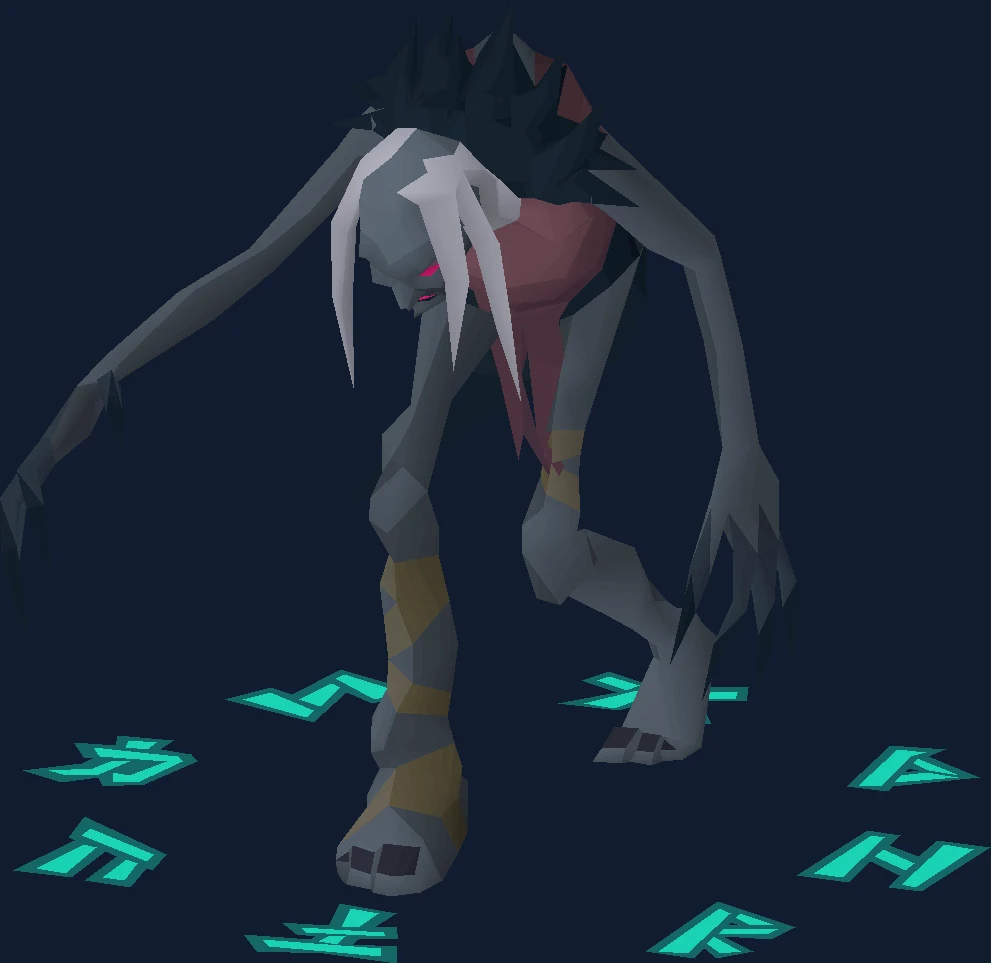
Nightmare group guide for team sizes, role clarity, and drop EV honesty.
Why People Fight The Nightmare
The Nightmare is the only major group boss in the game where hitting the boss is not how you kill the boss. Her physical health is 2,400 and you never touch it with a weapon. Instead each phase gives you a shield to break, and once it shatters your attacks on her stop doing anything at all — you leave her alone and go and charge the four totems in the corners of the room. When all four are full they fire a magical blast into her for 800 damage. Three of those, and the fight is over.
That structure is why team size changes this encounter more than it changes almost any other. The shield has a minimum durability of 2,000 per phase and a cap of 19,600, and it grows by 200 from the base for every player in a six-man or larger group. The totems have a minimum charge requirement of 300, capping at 2,640, growing by 30 per player on the same terms. And by default she scales her shield and totem charge to a five-man encounter, so everything below five players is fighting a five-man shield with fewer people. A solo kill generally takes well over sixteen minutes for exactly that reason, which is why solos are usually done for Combat Achievements or as practice for Phosani's rather than for value.
Her targeting is the other thing that separates her from her neighbours. She looks at each player's highest Defence roll across all five attack types and focuses whoever has the highest overall value, which makes a designated tank something you can create simply by wearing more defensive gear than everybody else. Full justiciar is targeted over oathplate. That inverts the usual advice about optimising, and it means the tank's job is a gear decision made before the fight rather than a positioning one made during it.
The rest is three phases that share one special attack and nothing else. Grasping Claws appears in all three. Phase one adds husks and corpse flowers, phase two adds the curse and the parasites, phase three adds spores and the surge. Learning her is really learning which three attacks are possible right now, because the ones that are not possible are the ones you can stop watching for.
Its own attacks are melee (slash), ranged and magic, so Protect from Melee, Missiles and Magic all have a job.
In our index it sits in the standalone boss group at difficulty 4 of 5, where kill times come down to team size vs unique rates.
| Field | Detail |
|---|---|
| Classification | Standalone (multi-phase) (Boss) |
| Group | standalone boss |
| Difficulty | 4 / 5 |
| Solo or team | Solo or team |
| Access requirement | Sins of the Father |
| Notable reward | Inquisitor's armour, nightmare staff, harmonised orb |
| Signature mechanic | Team size vs unique rates |
| Hitpoints | 2400 |
| Max hits | 50/60 (Melee), 33/39 (Ranged and Magic), Increased by 20% if using incorrect protection prayer |
| Released | 6 February 2020 |
- Field
- Classification
- Detail
- Standalone (multi-phase) (Boss)
- Field
- Group
- Detail
- standalone boss
- Field
- Difficulty
- Detail
- 4 / 5
- Field
- Solo or team
- Detail
- Solo or team
- Field
- Access requirement
- Detail
- Sins of the Father
- Field
- Notable reward
- Detail
- Inquisitor's armour, nightmare staff, harmonised orb
- Field
- Signature mechanic
- Detail
- Team size vs unique rates
- Field
- Hitpoints
- Detail
- 2400
- Field
- Max hits
- Detail
- 50/60 (Melee), 33/39 (Ranged and Magic), Increased by 20% if using incorrect protection prayer
- Field
- Released
- Detail
- 6 February 2020
Is The Nightmare the Right Fight for You Yet?
The Nightmare has almost no access requirements — Priest in Peril for Morytania, and that is it — which makes her unusually easy to walk into and unusually easy to be underprepared for. What actually gates her is whether you can hold three-tick prayer reactions while doing something else, and whether you have a team that will turn up more than once.
You are ready for this fight if:
- You can react to an attack in three ticks. That is the window on her ranged and magic attacks, and her melee gives you two.
- You have people. She scales her shield to a five-man encounter no matter how few of you show up, so a duo is doing a five-man's work with two sets of hands.
- You are carrying Sanfew serums or Relicym's balm. A dose taken before a parasite bursts halves the problem — a weakened parasite has 40 hitpoints instead of 80 and does far less damage on the way out.
- Somebody has agreed to be the tank and has the gear to actually win the targeting check.
Come back later if any of these are true:
- You are planning to solo her for profit. Each solo kill generally runs well over sixteen minutes because the shield does not scale down below five players, and the wiki treats solos as Combat Achievement or Phosani's practice rather than a method.
- Your magic gear is your upgrade priority. The wiki is explicit that melee upgrades should come before magic ones here, and that you should only bring a magic switch if the rest of the group is doing the same.
- You are counting on a salve amulet. She is not undead, so it does nothing.
- Nobody in your duo knows the failure condition. If one player dies in a small team, the survivor has to keep up enough damage or be teleported out with the message that the Nightmare grows tired of your poor efforts.
Access Requirements
The Nightmare is gated behind Sins of the Father.
Sins of the Father also tends to sit alongside the other standalone boss gates, so it is usually cheaper to clear them together than to come back for each one. The boss requirements checklist lists them by group.
Location and How to Get There
The Nightmare is found in the Sisterhood Sanctuary beneath the town of Slepe in Morytania.
Get to Slepe and take the sanctuary entrance below the town. Morytania access is the only requirement, which surprises people — the difficulty here is the fight and the team, not the unlock.
She is in the Sisterhood Sanctuary, the dungeon beneath Slepe in Morytania, and the only hard requirement to be there is Priest in Peril for Morytania access. The travel is worth optimising because you will be doing it repeatedly.
The five quickest routes to Slepe, fastest first: Drakan's medallion teleported directly to Slepe, which is unlocked with a Slepey tablet from Phosani's Nightmare; the Spider cave teleport, which lands you north-west of Slepe; the Hallowed Sepulchre teleport with a hallowed crystal shard, then east via an agility shortcut needing 63 Agility and two long ropes installed; Drakan's medallion to Ver Sinhaza, then north past the small dock and east; and the ectophial to the Ectofuntus, then north to the dock to pay Andras 10,000 coins to row you to Slepe, arriving at a dock south-west of the town.
A Taste of Hope is the quest worth having for this, since it gives you Drakan's medallion. If you do not have it, Ghost Ahoy and the ectophial is the second-quickest option.
Starting the fight means disturbing her while she is sleeping. If somebody else is already in there she will be floating, with a symbol on the ground beneath her showing which of the three phases the current fight is in — and her instance cannot be joined mid-fight, so your options are to wait it out or hop worlds.
Recommended Stats and Gear at Three Budgets
| Skill | Recommended | What it is doing here |
|---|---|---|
| Attack | 85 or higher | Landing crush weapons on her. The recommended weapons are overwhelmingly crush options, from a scythe of vitur set to crush down to a zombie axe. |
| Strength | 85 or higher | Shield damage, which is the phase's actual timer. A slow shield break means more special attacks per phase, not just a longer kill. |
| Defence | 85 or higher | Surviving her chip damage, and — if you are the tank — winning the targeting check outright. |
| Magic | 85 or higher | The totems, which take double damage from magic. This is the only place magic matters in the fight, and it matters a lot. |
| Hitpoints | 85 or higher | Headroom for the unavoidable damage. Her power blast after the sleepwalkers can exceed 70 to every player in the room in a mass, and it cannot be prayed or dodged. |
| Prayer | 70 or higher | Three protection prayers cycled on two- and three-tick reactions, plus Piety held throughout. Flicking it is a large supply saving on longer kills. |
| Quests | Priest in Peril, ideally A Taste of Hope | Priest in Peril is the only requirement. A Taste of Hope gives Drakan's medallion and the fastest route in; Ghost Ahoy and the ectophial is the fallback. |
- Skill
- Attack
- Recommended
- 85 or higher
- What it is doing here
- Landing crush weapons on her. The recommended weapons are overwhelmingly crush options, from a scythe of vitur set to crush down to a zombie axe.
- Skill
- Strength
- Recommended
- 85 or higher
- What it is doing here
- Shield damage, which is the phase's actual timer. A slow shield break means more special attacks per phase, not just a longer kill.
- Skill
- Defence
- Recommended
- 85 or higher
- What it is doing here
- Surviving her chip damage, and — if you are the tank — winning the targeting check outright.
- Skill
- Magic
- Recommended
- 85 or higher
- What it is doing here
- The totems, which take double damage from magic. This is the only place magic matters in the fight, and it matters a lot.
- Skill
- Hitpoints
- Recommended
- 85 or higher
- What it is doing here
- Headroom for the unavoidable damage. Her power blast after the sleepwalkers can exceed 70 to every player in the room in a mass, and it cannot be prayed or dodged.
- Skill
- Prayer
- Recommended
- 70 or higher
- What it is doing here
- Three protection prayers cycled on two- and three-tick reactions, plus Piety held throughout. Flicking it is a large supply saving on longer kills.
- Skill
- Quests
- Recommended
- Priest in Peril, ideally A Taste of Hope
- What it is doing here
- Priest in Peril is the only requirement. A Taste of Hope gives Drakan's medallion and the fastest route in; Ghost Ahoy and the ectophial is the fallback.
These are the wiki's advised levels rather than gates — nothing stops a lower-levelled account walking in. What lower stats actually cost you here is time, and time at the Nightmare is measured in special attacks survived rather than in minutes.
The Magic row is the one people skip and should not. Totems have no stats at all, so magic accuracy is irrelevant, but they take double damage from magic — which makes your magic switch the difference between a brisk totem phase and a long one spent still eating her phase attacks.
| Slot | Starting out | Mid game | Best in slot |
|---|---|---|---|
| Weapon | Saradomin's blessed sword on crush, a zombie axe, a Zamorakian hasta or an Osmumten's fang | Abyssal bludgeon, dual macuahuitl with full blood moon armour, ursine chainmace or sarachnis cudgel | Scythe of vitur set to crush, then inquisitor's mace or a soulreaper axe on crush |
| Head | Helm of neitiznot or a zombie helmet | Serpentine helm, blood moon helm or a Neitiznot faceguard | Inquisitor's great helm, then Torva full helm |
| Body | Fighter torso | Blood moon chestplate or Bandos chestplate | Inquisitor's hauberk, then Torva platebody |
| Legs | Obsidian platelegs | Blood moon tassets or Bandos tassets | Inquisitor's plateskirt, then Torva platelegs |
| Neck | Amulet of glory | Amulet of fury, then amulet of torture | Amulet of rancour, or an amulet of blood fury for the chip damage |
| Cape | Obsidian cape | Mythical cape or fire cape | Infernal cape |
| Shield | Dragon defender | Dragon defender | Avernic defender |
| Hands | Combat bracelet or granite gloves | Barrows gloves | Ferocious gloves |
| Feet | Dragon boots or guardian boots | Echo boots, then primordial boots | Avernic treads (max) |
| Ring | Berserker ring (i) | Berserker ring (i) | Ultor ring |
| Ammunition slot | Any god blessing | Rada's blessing 3 | Rada's blessing 4 |
| Special attack | Dragon claws or a Bandos godsword | Dragon warhammer or a Voidwaker | Elder maul, a Saradomin godsword for the sleepwalkers, and a crimson kisten once her defence is already reduced |
| Totem switch | Ahrim's robes with a trident of the seas and a mage's book | Virtus robes with a sanguinesti staff or trident of the swamp, plus an occult necklace and an Elidinis' ward | Ancestral robes with a Tumeken's shadow, eye of ayak or harmonised staff, occult necklace, confliction gauntlets, magus ring and a tome of fire |
- Slot
- Weapon
- Starting out
- Saradomin's blessed sword on crush, a zombie axe, a Zamorakian hasta or an Osmumten's fang
- Mid game
- Abyssal bludgeon, dual macuahuitl with full blood moon armour, ursine chainmace or sarachnis cudgel
- Best in slot
- Scythe of vitur set to crush, then inquisitor's mace or a soulreaper axe on crush
- Slot
- Head
- Starting out
- Helm of neitiznot or a zombie helmet
- Mid game
- Serpentine helm, blood moon helm or a Neitiznot faceguard
- Best in slot
- Inquisitor's great helm, then Torva full helm
- Slot
- Body
- Starting out
- Fighter torso
- Mid game
- Blood moon chestplate or Bandos chestplate
- Best in slot
- Inquisitor's hauberk, then Torva platebody
- Slot
- Legs
- Starting out
- Obsidian platelegs
- Mid game
- Blood moon tassets or Bandos tassets
- Best in slot
- Inquisitor's plateskirt, then Torva platelegs
- Slot
- Neck
- Starting out
- Amulet of glory
- Mid game
- Amulet of fury, then amulet of torture
- Best in slot
- Amulet of rancour, or an amulet of blood fury for the chip damage
- Slot
- Cape
- Starting out
- Obsidian cape
- Mid game
- Mythical cape or fire cape
- Best in slot
- Infernal cape
- Slot
- Shield
- Starting out
- Dragon defender
- Mid game
- Dragon defender
- Best in slot
- Avernic defender
- Slot
- Hands
- Starting out
- Combat bracelet or granite gloves
- Mid game
- Barrows gloves
- Best in slot
- Ferocious gloves
- Slot
- Feet
- Starting out
- Dragon boots or guardian boots
- Mid game
- Echo boots, then primordial boots
- Best in slot
- Avernic treads (max)
- Slot
- Ring
- Starting out
- Berserker ring (i)
- Mid game
- Berserker ring (i)
- Best in slot
- Ultor ring
- Slot
- Ammunition slot
- Starting out
- Any god blessing
- Mid game
- Rada's blessing 3
- Best in slot
- Rada's blessing 4
- Slot
- Special attack
- Starting out
- Dragon claws or a Bandos godsword
- Mid game
- Dragon warhammer or a Voidwaker
- Best in slot
- Elder maul, a Saradomin godsword for the sleepwalkers, and a crimson kisten once her defence is already reduced
- Slot
- Totem switch
- Starting out
- Ahrim's robes with a trident of the seas and a mage's book
- Mid game
- Virtus robes with a sanguinesti staff or trident of the swamp, plus an occult necklace and an Elidinis' ward
- Best in slot
- Ancestral robes with a Tumeken's shadow, eye of ayak or harmonised staff, occult necklace, confliction gauntlets, magus ring and a tome of fire
The most important thing about the totem switch is that it is a damage switch and not an accuracy one. Totems have no stats whatsoever, so magic accuracy does nothing for you — only magic damage bonus has any effect, and totems take double damage when struck with magic. That is also why the ghost thrall is the best thrall here: it deals magic damage, so it inherits the doubling.
The tank's gear advice runs backwards from everywhere else in the game, and it is worth reading twice. She targets whoever has the highest Defence roll across all five attack types, so if you want to be the tank you deliberately wear more defensive and less offensive gear — guardian boots instead of Avernic treads, Torva instead of Inquisitor's, Barrows gloves instead of Ferocious. If you do not want to be the tank, do not accidentally win that contest.
She is not undead, so a salve amulet does nothing at all. That trips up players coming from the rest of Morytania, where it is usually the correct answer.
Defence reduction works with an expiry date. She is susceptible to a dragon warhammer special, but she restores her Defence at 20 points per minute, which is why the recommendation is one defence-reducing special per phase rather than a stack at the start. The crimson kisten's special is best used after her defence has already been reduced.
Two upgrade-order notes. Melee gear should be prioritised over magic gear, because melee is what breaks the shield and the shield is the timer. And you should only bring a magic armour switch if everybody else in the group is bringing one too — a lone player switching for the totem phase while nobody else does is spending inventory space for a fraction of the benefit.
An amulet of blood fury is worth carrying while you are learning, for the passive healing on a long kill, with the honest caveat that it raises your supply cost per kill and slightly lowers your damage.
| Check | Value |
|---|---|
| Prayers for its own attacks | 3 — Protect from Melee, Missiles and Magic |
| Its Defence level | 150 |
| Its Magic level | 150 |
| Its lowest defence bonus, per its infobox | crush |
- Check
- Prayers for its own attacks
- Value
- 3 — Protect from Melee, Missiles and Magic
- Check
- Its Defence level
- Value
- 150
- Check
- Its Magic level
- Value
- 150
- Check
- Its lowest defence bonus, per its infobox
- Value
- crush
Inventory and Supplies
| What | Why it is there |
|---|---|
| Sanfew serums or Relicym's balm | The parasites in phase two. Drinking a dose before the parasite bursts weakens it — 40 hitpoints instead of 80 — and greatly reduces the damage you take when it emerges. You can click the Hitpoints orb to drink rather than hunting for the potion. |
| Anglerfish and super restores | The staple pairing. Pre-pot with an anglerfish and a sip of stamina before you run in from the bank, and expect prayer to be the resource that decides your trip. |
| A Saradomin godsword | The sleepwalkers between phases. Its special always maximum hits on them, which turns an unavoidable mechanic into a health and prayer restore. Everybody who is not carrying a dragon warhammer should be using it there. |
| A magic switch for the totems | Totems take double damage from magic. A saturated heart is convenient if you are using a powered staff, and a sanguinesti staff is especially useful on solo kills because that doubled damage feeds its healing. |
| A rune pouch with fire, cosmic and blood runes | Thralls, and blood barrage in larger teams for clearing several sleepwalkers at once. |
| A secondary weapon for spawns | The scythe has poor damage against husks and parasites. A crimson kisten or an inquisitor's mace covers them, and on solo kills the kisten's special attack is the standard answer. |
| Saradomin brews, in smaller teams | In smaller group sizes the advice is to swap some anglerfish and divine super combats for regular super combats and brews, because kills run long and mistakes need absorbing rather than out-healing. |
- What
- Sanfew serums or Relicym's balm
- Why it is there
- The parasites in phase two. Drinking a dose before the parasite bursts weakens it — 40 hitpoints instead of 80 — and greatly reduces the damage you take when it emerges. You can click the Hitpoints orb to drink rather than hunting for the potion.
- What
- Anglerfish and super restores
- Why it is there
- The staple pairing. Pre-pot with an anglerfish and a sip of stamina before you run in from the bank, and expect prayer to be the resource that decides your trip.
- What
- A Saradomin godsword
- Why it is there
- The sleepwalkers between phases. Its special always maximum hits on them, which turns an unavoidable mechanic into a health and prayer restore. Everybody who is not carrying a dragon warhammer should be using it there.
- What
- A magic switch for the totems
- Why it is there
- Totems take double damage from magic. A saturated heart is convenient if you are using a powered staff, and a sanguinesti staff is especially useful on solo kills because that doubled damage feeds its healing.
- What
- A rune pouch with fire, cosmic and blood runes
- Why it is there
- Thralls, and blood barrage in larger teams for clearing several sleepwalkers at once.
- What
- A secondary weapon for spawns
- Why it is there
- The scythe has poor damage against husks and parasites. A crimson kisten or an inquisitor's mace covers them, and on solo kills the kisten's special attack is the standard answer.
- What
- Saradomin brews, in smaller teams
- Why it is there
- In smaller group sizes the advice is to swap some anglerfish and divine super combats for regular super combats and brews, because kills run long and mistakes need absorbing rather than out-healing.
The wiki gives full inventories for melee, totem and solo setups, and the solo one is instructive: it drops the Ancestral robes for extra Saradomin brews, on the reasoning that kills are long and you want room for mistakes rather than marginal totem damage. That trade — supplies over optimisation — is the right one whenever you are still learning.
If you are running kills back to back with an alt account, you can trade supplies or cast Energy Transfer between kills, which is how longer trips are actually achieved.
Prayer and Spellbook
Her three standard attacks come with different reaction windows, and knowing which is which is most of the prayer work. The ranged attack has her contorting and firing projectiles, with a loud clicking sound per contortion, and you have three ticks to get Protect from Missiles up. The magic attack has her flailing sideways in a cloud of pink petals before spinning back to fire them, again with three ticks to react with Protect from Magic. The melee attack is a claw charge and slash, and it gives you only two.
Praying wrongly is worse than not praying at all in at least one case. Her melee damage is multiplied by 6/5 — 120 per cent of her maximum hit — when you have the wrong protection prayer up, which is a deliberate design choice rather than a quirk. The same may apply to her magic and ranged attacks, though that has not been confirmed.
Her melee has an escape that her other attacks do not. It damages everyone in front of her, including diagonally, as well as anyone underneath — and it always hits regardless of your defensive bonuses. But it only reaches the direction she is facing, so standing anywhere else, or walking one tile away if she is looking at you, avoids it entirely. Everybody who is not the tank should be spending the fight out of her arc.
The curse in phase two is the prayer mechanic that catches experienced players. Your screen fills with a pink glow and your protection prayers are shuffled: clicking Protect from Magic gives you Protect from Missiles, clicking Missiles gives you Melee, and clicking Melee gives you Magic. It lasts five attacks. The answer is to click one step back around the cycle rather than to panic, and to count the five.
Keep Piety on throughout, and flick it if you can. Flicking offensive prayers on a fight this long is a large enough saving to change how many brews you can afford to bring.
Mechanics That Decide the Fight
| Mechanic | How you see it coming | What it does | Your answer |
|---|---|---|---|
| Shields and totems | Her shield breaking, at which point your attacks on her stop registering. | You never damage her 2,400 physical health directly. Break the shield, then charge the four corner totems; when all four are full they blast her for 800. Three blasts ends the fight, and she does not regenerate that health. | Stop attacking her the moment the shield goes and move to a totem. Bring magic for the totems, which take double damage from it. |
| Aggression targeting | Whoever she turns to face. | She checks each player's highest Defence roll across all five attack types and focuses whoever has the highest overall value, which also means her melee only hits in the direction she is facing. | Designate a tank and gear them to win that check on purpose. Everybody else stays out of her arc. |
| Grasping Claws | A black portal opening beneath her, plus a scatter of smaller end portals, before she reaches into it. | Up to 50 damage to anyone standing on any portal. She uses this in all three phases. | Step to a tile with no portal on it. In phase three, work out that tile in advance — spores are usually still on the floor when this lands. |
| Sleepwalkers | The start of phases two and three. | Between one and 24 sleepwalkers, depending on how many players are present, walk towards her. They have 10 health but die instantly to any damage. When the attack ends she fires a power blast at everybody for at least 5 damage, scaling with how many she absorbed — over 70 each in a mass. | Kill as many as you can before they reach her; the blast is unavoidable and only its size is negotiable. In a solo, failing to kill the sleepwalker is always fatal. |
| Husks | Two husks spawning around random players, in phase one only. | Freezes the targeted players in place until the husks are killed. The blue skinny one attacks with magic, the green bulky one with ranged. | Kill them. Frozen players usually will not get a Grasping Claws portal under them — but if they are frozen underneath her, they still take that damage. |
| Corpse Flowers | Lines of flowers dividing the room into four quadrants, in phase one only. | The safe quadrant has white nightmare flowers on both sides; the rest have red nightmare berries, which attack for up to 20 damage every tick and heal her for double what they deal. Attacks made from a wrong quadrant also heal her. | Find the quadrant with flowers on both of its sides and get there. Standing in a quadrant with only berries doubles the damage, because both sides attack you. |
| Curse | A pink glow filling your screen, in phase two only. | Shuffles your protection prayers for five attacks: Magic gives Missiles, Missiles gives Melee, Melee gives Magic. | Click one step back around the cycle and count to five. It lifts on its own. |
| Parasites | Your Hitpoints icon turning pink, in phase two only. | After roughly 18 ticks it bursts out of you for heavy damage, then heals her shield by 31 to 50 units at a time — or the totems, if the totem phase has started. With nothing to heal, it attacks you instead, alternating ranged and magic. | Drink a Sanfew serum or Relicym's balm before it emerges. That weakens it to 40 hitpoints instead of 80 and cuts the damage sharply. Clicking the Hitpoints orb drinks for you. |
| Surge | She teleports to one of the four edges of the room, in phase three only. | Charges straight across to the opposite side, dealing up to 60 damage to anyone in the path. | Step out of the line. It is a clean dodge with a clear tell, and it is one of the few attacks in the fight that gives you the whole width of the room to work with. |
| Spores | Puffshroom-like objects appearing in patterns around the arena, in phase three only. | They look like one tile but have a three-by-three area. Triggering one makes you weary: your run is disabled and your attack speed slows by a tick for a short time, and it can spread to other players. | Route around them, and do not walk your lethargy into a teammate. The reason this matters is that Grasping Claws frequently lands while spores are still up. |
- Mechanic
- Shields and totems
- How you see it coming
- Her shield breaking, at which point your attacks on her stop registering.
- What it does
- You never damage her 2,400 physical health directly. Break the shield, then charge the four corner totems; when all four are full they blast her for 800. Three blasts ends the fight, and she does not regenerate that health.
- Your answer
- Stop attacking her the moment the shield goes and move to a totem. Bring magic for the totems, which take double damage from it.
- Mechanic
- Aggression targeting
- How you see it coming
- Whoever she turns to face.
- What it does
- She checks each player's highest Defence roll across all five attack types and focuses whoever has the highest overall value, which also means her melee only hits in the direction she is facing.
- Your answer
- Designate a tank and gear them to win that check on purpose. Everybody else stays out of her arc.
- Mechanic
- Grasping Claws
- How you see it coming
- A black portal opening beneath her, plus a scatter of smaller end portals, before she reaches into it.
- What it does
- Up to 50 damage to anyone standing on any portal. She uses this in all three phases.
- Your answer
- Step to a tile with no portal on it. In phase three, work out that tile in advance — spores are usually still on the floor when this lands.
- Mechanic
- Sleepwalkers
- How you see it coming
- The start of phases two and three.
- What it does
- Between one and 24 sleepwalkers, depending on how many players are present, walk towards her. They have 10 health but die instantly to any damage. When the attack ends she fires a power blast at everybody for at least 5 damage, scaling with how many she absorbed — over 70 each in a mass.
- Your answer
- Kill as many as you can before they reach her; the blast is unavoidable and only its size is negotiable. In a solo, failing to kill the sleepwalker is always fatal.
- Mechanic
- Husks
- How you see it coming
- Two husks spawning around random players, in phase one only.
- What it does
- Freezes the targeted players in place until the husks are killed. The blue skinny one attacks with magic, the green bulky one with ranged.
- Your answer
- Kill them. Frozen players usually will not get a Grasping Claws portal under them — but if they are frozen underneath her, they still take that damage.
- Mechanic
- Corpse Flowers
- How you see it coming
- Lines of flowers dividing the room into four quadrants, in phase one only.
- What it does
- The safe quadrant has white nightmare flowers on both sides; the rest have red nightmare berries, which attack for up to 20 damage every tick and heal her for double what they deal. Attacks made from a wrong quadrant also heal her.
- Your answer
- Find the quadrant with flowers on both of its sides and get there. Standing in a quadrant with only berries doubles the damage, because both sides attack you.
- Mechanic
- Curse
- How you see it coming
- A pink glow filling your screen, in phase two only.
- What it does
- Shuffles your protection prayers for five attacks: Magic gives Missiles, Missiles gives Melee, Melee gives Magic.
- Your answer
- Click one step back around the cycle and count to five. It lifts on its own.
- Mechanic
- Parasites
- How you see it coming
- Your Hitpoints icon turning pink, in phase two only.
- What it does
- After roughly 18 ticks it bursts out of you for heavy damage, then heals her shield by 31 to 50 units at a time — or the totems, if the totem phase has started. With nothing to heal, it attacks you instead, alternating ranged and magic.
- Your answer
- Drink a Sanfew serum or Relicym's balm before it emerges. That weakens it to 40 hitpoints instead of 80 and cuts the damage sharply. Clicking the Hitpoints orb drinks for you.
- Mechanic
- Surge
- How you see it coming
- She teleports to one of the four edges of the room, in phase three only.
- What it does
- Charges straight across to the opposite side, dealing up to 60 damage to anyone in the path.
- Your answer
- Step out of the line. It is a clean dodge with a clear tell, and it is one of the few attacks in the fight that gives you the whole width of the room to work with.
- Mechanic
- Spores
- How you see it coming
- Puffshroom-like objects appearing in patterns around the arena, in phase three only.
- What it does
- They look like one tile but have a three-by-three area. Triggering one makes you weary: your run is disabled and your attack speed slows by a tick for a short time, and it can spread to other players.
- Your answer
- Route around them, and do not walk your lethargy into a teammate. The reason this matters is that Grasping Claws frequently lands while spores are still up.
Every mechanic in the fight scales with the number of players in the instance when it starts, and the numbers are worth committing to memory because they explain why small teams feel so different. The shield has a minimum durability of 2,000 per phase and a cap of 19,600, rising by 200 from the base per player in a six-man or larger group. The totems have a minimum charge requirement of 300, capping at 2,640, rising by 30 per player on the same terms. The number of sleepwalkers grows with headcount, from one to 24. And she scales her shield and totem charge to a five-man by default, so any team smaller than five is doing a five-man's work.
There is one timing interaction in phase one that costs teams whole kills, and it is not obvious. If she casts husks at the same moment your totems finish charging, players can be frozen while the phase-two sleepwalkers spawn — and frozen players cannot kill sleepwalkers with a melee weapon. The advice is to be cautious about fully charging the totems if she has not recently used husks, and for frozen players to switch to their magic weapon to help clear sleepwalkers.
Two smaller interactions worth knowing. Players immobilised by husks usually do not get a Grasping Claws portal underneath them, and she does not appear to use Corpse Flowers while players are immobilised. And during Corpse Flowers you need to know where the tank is: anyone who ends up on the same side of her as the tank can be caught by her melee afterwards.
| Property | Value |
|---|---|
| Combat level | 814 |
| Attack styles | Slash, Ranged, Magic |
| Attack speed | 6 ticks |
| Attacks on sight | No |
| Poisons you | No |
| Size | 5 tiles |
| Immune to cannon | Yes |
| Immune to thralls | No |
- Property
- Combat level
- Value
- 814
- Property
- Attack styles
- Value
- Slash, Ranged, Magic
- Property
- Attack speed
- Value
- 6 ticks
- Property
- Attacks on sight
- Value
- No
- Property
- Poisons you
- Value
- No
- Property
- Size
- Value
- 5 tiles
- Property
- Immune to cannon
- Value
- Yes
- Property
- Immune to thralls
- Value
- No
Where The Nightmare Sits in Progression
Within the standalone boss group, the fights below The Nightmare are Dagannoth Supreme and The Royal Titans (Branda & Eldric). Above it sit Phosani's Nightmare and Yama.
Phase by Phase
Phase one — husks and corpse flowers
Her opening phase gives you Grasping Claws, husks and corpse flowers, and the job is to break the shield while dealing with all three. Corpse flowers is the one that punishes carelessness the hardest: the wrong quadrant attacks you for up to 20 every tick, heals her for double what it deals, and any attack you make from the wrong quadrant heals her as well. Standing in a quadrant with berries on both sides doubles the incoming damage again.
When the shield goes down, stop hitting her. Your attacks do nothing from that point, and the four totems become vulnerable instead. She keeps using her phase-one attacks throughout the totem phase, so this is not a break.
Before you finish the last totem, check whether she has used husks recently. If she casts them just as the totems complete, one or more players will be frozen when the phase-two sleepwalkers spawn, and a frozen player who cannot reach the sleepwalkers means a much bigger power blast for the whole team. If you are the one frozen, switch to your magic weapon and kill what you can reach.
Phase two — the curse and the parasites
The phase opens with sleepwalkers, which is also the best moment in the fight to use a Saradomin godsword special: it always maximum hits on them, restoring health and prayer at the point you most want both.
Then it becomes the awkward phase. The curse shuffles your protection prayers for five attacks — Magic gives Missiles, Missiles gives Melee, Melee gives Magic — while parasites are being thrown at random players. Your Hitpoints icon turns pink when you have one, and you have about 18 ticks before it bursts out for heavy damage. Drinking a Sanfew serum or Relicym's balm in that window weakens it to 40 hitpoints instead of 80 and cuts the damage substantially.
Killing the parasite afterwards is not optional. Left alive it restores her shield by 31 to 50 units at a time, and does the same for the totems if the totem phase has already begun. Only if there is nothing for it to heal does it turn on you, alternating ranged and magic attacks until something takes damage.
- On solo kills, walk underneath her just before the parasite bursts — roughly five bludgeon or mace attacks, or four scythe attacks, after the parasite lands. A parasite that spawns under her cannot heal her until it moves.
- The scythe is poor against parasites and husks. A crimson kisten or an inquisitor's mace clears them far faster.
- Solo players will often face several parasite specials back to back, which is the single biggest reason solo kills run long.
Phase three — spores and the surge
Another sleepwalker opening, handled the same way — Saradomin godsword special or blood barrage, depending on team size — and then the last set of specials: Grasping Claws, spores and the surge.
Spores are scattered in set patterns and are more dangerous than they look, because they appear as one tile but carry a three-by-three area. Triggering one disables your run and slows your attack speed by a tick, and the effect can spread to other players. The reason that matters is that she frequently uses Grasping Claws while spores are still active, so the tile you need to step to in order to dodge a portal may be a tile that will cripple you.
The surge is the cleanest attack she has. She teleports to one of the four edges of the room and charges straight across to the opposite side, dealing up to 60 to anyone in the way. Get out of the lane.
Break the shield, charge the four totems one last time, and the third 800-damage blast finishes her.
Fight Strategy: Team size vs unique rates
- Pre-pot with an anglerfish and a sip of stamina before you leave the bank, then run in and disturb her while she is sleeping.
- Confirm the tank before the first attack. She targets whoever has the highest Defence roll across all five attack types, so this is decided by gear rather than by who clicks first.
- Everybody who is not the tank stays out of the direction she is facing. Her melee hits everyone in front of her, diagonals included, and always lands regardless of defensive bonuses.
- Break the phase-one shield while handling Grasping Claws, husks and corpse flowers. Get to the quadrant with flowers on both sides, and stop attacking from a berry quadrant — it heals her.
- When the shield shatters, stop hitting her and go to a totem. Switch to magic if you brought it; totems take double damage from magic and have no stats for accuracy to matter against.
- Before completing the last totem, check whether husks have recently been used. Finishing into a fresh husk cast means frozen players during the sleepwalker spawn.
- Open phase two on the sleepwalkers with a Saradomin godsword special for the health and prayer restore, then handle the curse by clicking one step back around the prayer cycle.
- Drink a Sanfew serum or Relicym's balm the moment your Hitpoints icon turns pink, then kill the parasite before it starts topping her shield back up.
- Open phase three the same way, then route around spores, step out of the surge lane, and finish the last set of totems.
The rhythm of a good Nightmare kill is unusual because there are two entirely different jobs and they alternate. The shield phase is a melee damage race with prayer switching on top; the totem phase is a magic damage race with the same prayer switching and none of the target you have been hitting for the last few minutes. Teams that treat those as one continuous fight tend to keep hitting her for a few seconds after the shield breaks, which is pure lost time.
The other thing worth building as a habit is dealing with her healing sources before her health. A parasite left alive restores her shield by 31 to 50 at a time. Attacking from the wrong corpse-flower quadrant heals her. Berry damage heals her for double. She has more ways to undo your progress than to kill you, and a team that removes those first usually finds the damage race was never the problem.
Positioning and Movement
The most important positional rule has nothing to do with the special attacks. Only the tank should be standing in the direction she is facing, because her melee hits everyone in front of her — diagonals included — and under her, and it always lands regardless of your defensive bonuses. Everybody else fights from her flanks or behind her.
During corpse flowers, that rule interacts with the quadrant you have to move to. Players who end up on the same side of her as the tank can be caught by her melee immediately afterwards, so getting to the safe quadrant is only half the problem — you also need to know which part of it you can stand in.
For sleepwalkers, teams commonly assign players to specific sections of the arena. It is a simple habit that turns an unavoidable, scaling power blast into a predictable, small one, and in larger teams putting blood barrage on one or two players clears several at once.
In phase three, plan your Grasping Claws dodge before the portals appear. Spores have a three-by-three area despite their one-tile appearance, and she routinely uses claws while spores are still on the floor — the players who get caught are the ones working out both problems at the same moment.
Beginner Plan, Then the Advanced One
Your first trips
- Learn her in a five-man before you try anything smaller. Below five players she still uses five-man shield and totem values, so a duo or a trio is a harder version of the same fight rather than an easier one.
- Bring an amulet of blood fury for your learning kills. The passive healing on a long fight covers a lot of small mistakes, with the caveat that it costs upkeep and slightly lowers your damage.
- Get the parasite habit early: the instant your Hitpoints icon turns pink, drink. You can click the Hitpoints orb rather than finding the potion in your inventory, which is faster under pressure.
- Memorise the curse cycle before you meet it rather than during it. Magic gives Missiles, Missiles gives Melee, Melee gives Magic, and it lifts after five attacks.
- Stay out of her facing arc unless you are the tank, and check that you are not accidentally winning the targeting contest with your own defensive gear.
- Bring a magic switch, but only if the rest of the group is bringing one. Totems take double damage from magic and have no stats for accuracy to matter against, so it is a damage switch and nothing else.
Once the kill is boring
- Spend one defence-reducing special per phase rather than stacking them. She restores 20 Defence per minute, so anything beyond that is drained value, and the crimson kisten's special is best saved until after her Defence is already down.
- Use ghost thralls specifically. They deal magic damage, so they inherit the doubling on the totems, which no other thrall does.
- Time the last totem around her husk casts. Completing the totems into a fresh husk means frozen players during the sleepwalker spawn and a much larger power blast, and it is entirely preventable by waiting a few seconds.
- On solos, walk under her just before a parasite bursts — roughly five bludgeon or mace attacks, or four scythe attacks, after it lands. A parasite that spawns underneath her cannot heal her until it moves.
- Flick Piety rather than camping it. On a fight measured in phases rather than minutes, that is the difference between a comfortable prayer bill and bringing brews you would rather have spent on food.
- If you are running kills back to back, an alt account lets you trade supplies or cast Energy Transfer between them, which extends trips considerably.
Team Roles
| Role | The job | Gets it wrong by |
|---|---|---|
| Tank | Win the targeting check on purpose and hold her attention. She focuses whoever has the highest Defence roll across all five attack types, so this is achieved by wearing guardian boots over Avernic treads, Torva over Inquisitor's, and Barrows gloves over Ferocious. | Losing the check mid-fight to a teammate in tankier gear, which puts her melee arc onto somebody who is not expecting it. |
| Shield damage | Break the shield in each phase with crush melee, since the shield's durability is the phase timer and every extra second is another special attack the team has to survive. | Continuing to attack her after the shield shatters, when attacks stop having any effect at all. |
| Totem damage | Switch to magic and charge the four corner totems. They take double damage from magic and have no stats, so only magic damage bonus matters — accuracy gear is wasted. | Bringing magic accuracy instead of magic damage, or being the only person in the group who brought a switch at all. |
| Sleepwalker duty | Cover an assigned section of the arena when the sleepwalkers spawn at the start of phases two and three, so that as few as possible reach her before the power blast. | Everybody clearing the same corner, which lets the far side walk in and pushes the unavoidable blast past 70 per player. |
| Spawn cleanup | Kill husks to free frozen teammates in phase one, and kill parasites in phase two before they start restoring 31 to 50 shield per blast. | Using a scythe on them. It has poor damage against both, which is why a crimson kisten or an inquisitor's mace is the standard switch. |
- Role
- Tank
- The job
- Win the targeting check on purpose and hold her attention. She focuses whoever has the highest Defence roll across all five attack types, so this is achieved by wearing guardian boots over Avernic treads, Torva over Inquisitor's, and Barrows gloves over Ferocious.
- Gets it wrong by
- Losing the check mid-fight to a teammate in tankier gear, which puts her melee arc onto somebody who is not expecting it.
- Role
- Shield damage
- The job
- Break the shield in each phase with crush melee, since the shield's durability is the phase timer and every extra second is another special attack the team has to survive.
- Gets it wrong by
- Continuing to attack her after the shield shatters, when attacks stop having any effect at all.
- Role
- Totem damage
- The job
- Switch to magic and charge the four corner totems. They take double damage from magic and have no stats, so only magic damage bonus matters — accuracy gear is wasted.
- Gets it wrong by
- Bringing magic accuracy instead of magic damage, or being the only person in the group who brought a switch at all.
- Role
- Sleepwalker duty
- The job
- Cover an assigned section of the arena when the sleepwalkers spawn at the start of phases two and three, so that as few as possible reach her before the power blast.
- Gets it wrong by
- Everybody clearing the same corner, which lets the far side walk in and pushes the unavoidable blast past 70 per player.
- Role
- Spawn cleanup
- The job
- Kill husks to free frozen teammates in phase one, and kill parasites in phase two before they start restoring 31 to 50 shield per blast.
- Gets it wrong by
- Using a scythe on them. It has poor damage against both, which is why a crimson kisten or an inquisitor's mace is the standard switch.
Team size is the single biggest variable in this fight and the numbers are published, so there is no guesswork involved. The shield has a floor of 2,000 durability per phase and a ceiling of 19,600, gaining 200 from the base for every player in a six-man or larger encounter. Totems have a floor of 300 charge and a ceiling of 2,640, gaining 30 per player on the same basis. Sleepwalker counts scale from one to 24. And crucially, she defaults to five-man values, so anything below five players fights a five-man shield.
That default is why solos are a different activity rather than a harder version of the same one. Solo kills generally take well over sixteen minutes, and the wiki's framing is that players solo her for Combat Achievements or as practice for Phosani's Nightmare rather than for output. If you do solo her, an amulet of blood fury or a sanguinesti staff is effectively required to cover the chip damage across a kill that long.
Small teams have their own failure condition. In a duo, if one player dies, the survivor has to deal enough damage on their own or the instance ejects them with the message that the Nightmare grows tired of your poor efforts. Losing a player in a two-man is often the end of the kill rather than a setback.
Drops and What The Nightmare Is Worth
The Nightmare's own strategy page documents the fight rather than the loot, and one drop it does mention is worth knowing because it changes your travel: the Slepey tablet, which unlocks the Slepe teleport on Drakan's medallion and is a Phosani's Nightmare drop rather than one from the group version. That is the fastest route back for anyone doing this repeatedly.
Beyond that, treat the reward table as something to read live. Values and rates move with rebalances and with the Grand Exchange, and a figure fixed into a guide page will be misleading long before it is updated. The wiki's tables are the place to check what a kill is currently worth.
Drops worth the trip: Inquisitor's armour, nightmare staff, harmonised orb. Whether that is worth your time depends on how many kills an hour you personally get, which is a function of team size vs unique rates rather than of your gear list.
Combat Achievements
The Nightmare has Combat Achievement tasks, and a 60 max hit is the number to plan them around: any task that restricts your supplies or your gear is a materially different fight at that damage.
Task lists move with updates — read the current list in game.
Ironman Notes
Without a Grand Exchange, inquisitor's armour, nightmare staff, harmonised orb has to be earned rather than bought, and this is the fastest table it sits on.
Two of the supplies this fight depends on are things a self-sufficient account can simply make. Sanfew serums and Relicym's balm both weaken parasites, and having a stack of either turns the phase-two problem from heavy damage into a manageable one.
The alt-account routine the wiki suggests — trading supplies or casting Energy Transfer between kills to extend trips — is not available to you, which makes trip length a real constraint. Plan around fewer, longer kills rather than a chain of them, and lean on flicking Piety to stretch the prayer supply.
An amulet of blood fury is the recommended learning item and the one hardest to justify on an Ironman because of the upkeep. A sanguinesti staff covers a similar role on the totem phase, where its healing benefits from magic damage being doubled against totems.
Common Mistakes and Death Causes
| What happened | Why it happened | The fix |
|---|---|---|
| The power blast after the sleepwalkers | It cannot be prayed against or avoided, and it scales with how many sleepwalkers she absorbed — over 70 damage to every player in the room in a mass. | Assign arena sections so that all of them die before reaching her, and use blood barrage in larger teams. In a solo, missing the sleepwalker is always fatal. |
| Standing in a berry quadrant during corpse flowers | The berries attack for up to 20 damage every tick, and a quadrant with berries on both sides attacks you twice over. She also heals for double what they deal. | Find the quadrant with white flowers on both of its sides. If you are unsure, move rather than attack — attacking from the wrong quadrant heals her too. |
| A parasite that was never weakened | Left unweakened it bursts for heavy damage, spawns with 80 hitpoints and better defences, and then restores her shield by 31 to 50 per blast. | Drink a Sanfew serum or Relicym's balm as soon as your Hitpoints icon turns pink. Clicking the Hitpoints orb is faster than finding the potion. |
| Praying wrongly during the curse | The curse shuffles your prayers for five attacks, so clicking what you intend gives you the next one round the cycle — and a wrong protection prayer on her melee means 120 per cent of her max hit rather than a reduced one. | Click one step back around the cycle and count the five attacks out. It lifts by itself. |
| Frozen by husks at the wrong moment | If she casts husks as the totems finish charging, players are immobilised while the next phase's sleepwalkers spawn, which inflates the power blast for the whole team. | Hold the last totem for a few seconds if she has not used husks recently, and if you are frozen, use your magic weapon to kill what you can reach. |
| Caught by the surge in phase three | She teleports to an edge and charges the full width of the room for up to 60 damage, and players focused on spores or portals miss the tell. | Watch for the teleport itself rather than the charge. Once she is at an edge, the lane is obvious and the whole rest of the room is safe. |
| Standing in her melee arc as a non-tank | Her melee hits everyone in front of her, diagonals included, and under her, and it always hits regardless of defensive bonuses. | Fight from her flanks or behind. If she is facing you and you are not the tank, walking one tile away is enough to avoid the attack entirely. |
- What happened
- The power blast after the sleepwalkers
- Why it happened
- It cannot be prayed against or avoided, and it scales with how many sleepwalkers she absorbed — over 70 damage to every player in the room in a mass.
- The fix
- Assign arena sections so that all of them die before reaching her, and use blood barrage in larger teams. In a solo, missing the sleepwalker is always fatal.
- What happened
- Standing in a berry quadrant during corpse flowers
- Why it happened
- The berries attack for up to 20 damage every tick, and a quadrant with berries on both sides attacks you twice over. She also heals for double what they deal.
- The fix
- Find the quadrant with white flowers on both of its sides. If you are unsure, move rather than attack — attacking from the wrong quadrant heals her too.
- What happened
- A parasite that was never weakened
- Why it happened
- Left unweakened it bursts for heavy damage, spawns with 80 hitpoints and better defences, and then restores her shield by 31 to 50 per blast.
- The fix
- Drink a Sanfew serum or Relicym's balm as soon as your Hitpoints icon turns pink. Clicking the Hitpoints orb is faster than finding the potion.
- What happened
- Praying wrongly during the curse
- Why it happened
- The curse shuffles your prayers for five attacks, so clicking what you intend gives you the next one round the cycle — and a wrong protection prayer on her melee means 120 per cent of her max hit rather than a reduced one.
- The fix
- Click one step back around the cycle and count the five attacks out. It lifts by itself.
- What happened
- Frozen by husks at the wrong moment
- Why it happened
- If she casts husks as the totems finish charging, players are immobilised while the next phase's sleepwalkers spawn, which inflates the power blast for the whole team.
- The fix
- Hold the last totem for a few seconds if she has not used husks recently, and if you are frozen, use your magic weapon to kill what you can reach.
- What happened
- Caught by the surge in phase three
- Why it happened
- She teleports to an edge and charges the full width of the room for up to 60 damage, and players focused on spores or portals miss the tell.
- The fix
- Watch for the teleport itself rather than the charge. Once she is at an edge, the lane is obvious and the whole rest of the room is safe.
- What happened
- Standing in her melee arc as a non-tank
- Why it happened
- Her melee hits everyone in front of her, diagonals included, and under her, and it always hits regardless of defensive bonuses.
- The fix
- Fight from her flanks or behind. If she is facing you and you are not the tank, walking one tile away is enough to avoid the attack entirely.
The reliable stabiliser is the sleepwalker phase. A Saradomin godsword special always maximum hits on sleepwalkers, restoring a large amount of health and prayer at the exact moment a phase transition would otherwise be pure incoming damage. If your team is running rough, that is the moment to fix it.
If a teammate goes down, the fight does not end but the maths changes: the shield and totem values were set when the instance started and do not shrink to match your reduced team, so the phase you are in will take longer with fewer people and more special attacks to survive. In a duo it can end the attempt outright, since a lone survivor who cannot maintain damage is teleported out.
FAQ
Why are my attacks doing nothing to her?
Because her shield has broken, and once it does you cannot damage her at all. Move to the four totems in the corners and charge them instead. When all four are full they deal 800 damage to her; three of those finishes her 2,400 physical health, which she never regenerates.
How does team size change the fight?
Substantially, and the numbers are published. The shield runs from 2,000 durability per phase up to 19,600, rising by 200 from the base for each player in a six-man or larger group, and the totems run from 300 charge to 2,640 on the same basis. She scales to a five-man by default, so any team smaller than five is fighting a five-man shield with fewer hands.
Is soloing her worth it?
Rarely for output. Because the shield does not scale below five players, a solo kill generally takes well over sixteen minutes, and the usual reasons to do it are Combat Achievements or practice for Phosani's Nightmare. If you do, an amulet of blood fury or a sanguinesti staff is close to required for the chip damage.
How do I become the tank?
Wear more defensive gear than everyone else. She checks each player's highest Defence roll across all five attack types and focuses whoever has the highest, so a player in full justiciar is targeted over one in oathplate. Guardian boots over Avernic treads, Torva over Inquisitor's and Barrows gloves over Ferocious are the standard swaps.
What do I do about the parasites?
Drink a Sanfew serum or Relicym's balm before it bursts — you have roughly 18 ticks from the moment your Hitpoints icon turns pink. A weakened parasite has 40 hitpoints instead of 80 and deals far less damage on the way out. Then kill it, because a live parasite restores her shield by 31 to 50 per blast.
Does a salve amulet work on her?
No. She is not undead, so it has no effect at all — which surprises people who have been using it elsewhere in Morytania.
Do defence-reducing specials work?
Yes, but with a decay. She is susceptible to a dragon warhammer special and similar, and she restores her Defence at 20 points per minute. The practical advice is one defence-reducing special per phase rather than a stack early, and to save a crimson kisten special for after her Defence is already down.
Related Guides
Bottom Line
The Nightmare rewards teams that understand what they are actually fighting: a shield, then four totems, then the same again twice more, with a boss on top that has more ways to heal herself than to kill you. Get the tank sorted by gear rather than by volunteering, bring magic for the totems because they take double damage from it, drink the moment your Hitpoints icon turns pink, and remember that any team below five players is fighting a five-man shield.
The advised levels here are 85 across the combat stats and 70 Prayer, and for a lot of accounts that is the real barrier rather than the fight. If those levels are what is standing between you and a weekly team, getting them to 85 first is the shorter road.
If The Nightmare is blocking a Combat Achievement or an unlock you actually want, our PvM service is done by hand — no automation. Otherwise the bosses list has the full index.
The Nightmare — Standalone (multi-phase), difficulty 4/5. Combat values here — hitpoints, max hits, attack styles and speed, Defence and Magic levels, immunities and Slayer requirements — were read from the Old School RuneScape Wiki infobox for The Nightmare on 2026-08-03. Kill rates, GP per hour and item prices are deliberately absent because they move with balance patches and the Grand Exchange. Mechanics, gear tiers and phase behaviour on this page were checked against The Nightmare/Strategies on 4 August 2026.
Need a trusted team? Bils Services
Enjoyed the guide?
Drop a like — it helps other Adventurers find the good stuff.
Community
Comments
Silence in the hall…
Be the first Adventurer to leave a mark.
Join the thread
Add a comment
Tips, drops, or “this carried my account” — keep it useful.
bilsservices · bils services · bilsservices.com

