


OSRS Zulrah Guide: Forms, Rotations, Gear and Beginner Strategy
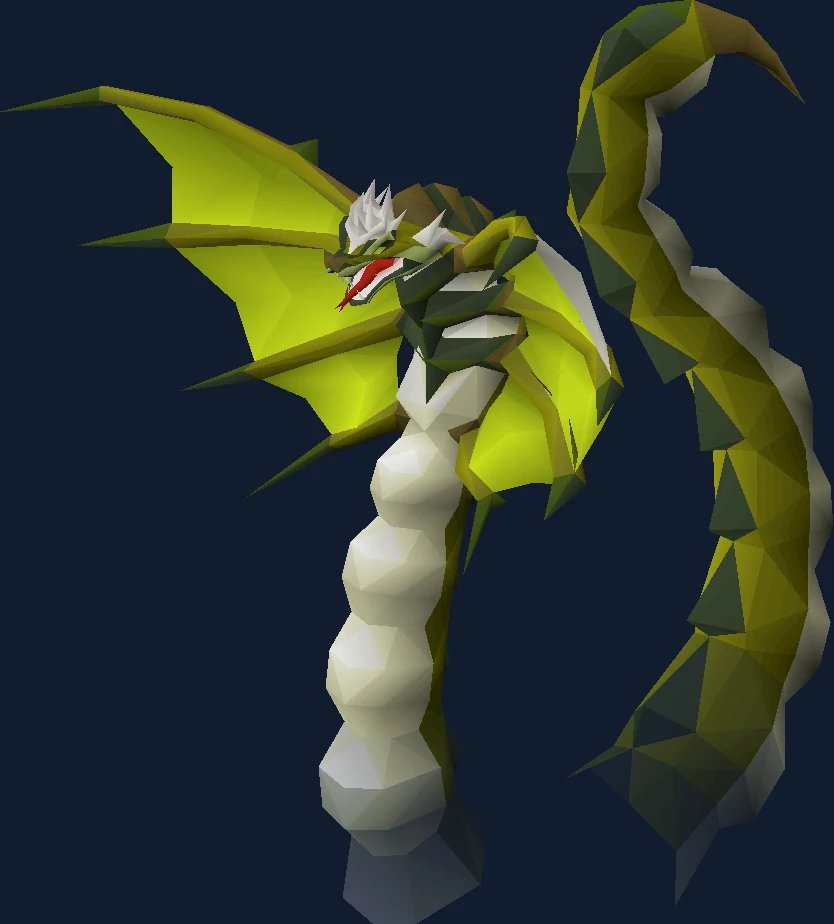
Zulrah explained properly: the three forms and their prayers, how rotations are identified, budget through best-in-slot switch setups, venom handling, and the beginner routine that gets you to consistent kills.
Overview
Zulrah is the rotational snake boss at Zul-Andra and the game's classic test of gear switching. Unlike most bosses, Zulrah does not stay in one place or one combat style — it dives, resurfaces somewhere else in a different form, and expects you to have already changed prayer, gear and position.
The fight has a reputation for being hard. It is really just unforgiving of hesitation. Zulrah uses a small set of fixed rotations, so experienced killers are not reacting at all — they identified the rotation in the first thirty seconds and are executing a script.
This guide covers the three forms and their correct prayers, how rotation identification actually works, why venom immunity changes the fight, and a beginner routine that accepts slow kills in exchange for surviving them.
| Detail | Value |
|---|---|
| Type | Standalone rotational boss, solo instance |
| Location | Zul-Andra, south-west of the Poison Waste |
| Hard requirement | Regicide (to reach Zul-Andra) |
| Recommended style | Ranged and Magic switching |
| Solo or team | Solo — private instance |
| Main draw | Tanzanite fang, magic fang, serpentine visage, onyx |
| Defining mechanic | Fixed rotations of form + position |
- Detail
- Type
- Value
- Standalone rotational boss, solo instance
- Detail
- Location
- Value
- Zul-Andra, south-west of the Poison Waste
- Detail
- Hard requirement
- Value
- Regicide (to reach Zul-Andra)
- Detail
- Recommended style
- Value
- Ranged and Magic switching
- Detail
- Solo or team
- Value
- Solo — private instance
- Detail
- Main draw
- Value
- Tanzanite fang, magic fang, serpentine visage, onyx
- Detail
- Defining mechanic
- Value
- Fixed rotations of form + position
Requirements and Access
Zulrah's gate is travel, not combat. Once you can reach Zul-Andra you can fight it — which is exactly why so many undergeared accounts die there.
| Requirement | Detail |
|---|---|
| Regicide | Required to access Zul-Andra. There is no combat level or Slayer gate. |
| Venom handling | Zulrah applies venom. Anti-venom+ or a serpentine helm is effectively mandatory, not optional. |
| 43 Prayer | For Protect from Missiles and Protect from Magic. 74 for Rigour or Augury. |
| A ranged and a magic option | You must be able to deal real damage with two styles. A one-style setup makes some phases painfully slow. |
| Fairy ring or Zul-Andra teleport | Not required, but travel time dominates your kills per hour. |
- Requirement
- Regicide
- Detail
- Required to access Zul-Andra. There is no combat level or Slayer gate.
- Requirement
- Venom handling
- Detail
- Zulrah applies venom. Anti-venom+ or a serpentine helm is effectively mandatory, not optional.
- Requirement
- 43 Prayer
- Detail
- For Protect from Missiles and Protect from Magic. 74 for Rigour or Augury.
- Requirement
- A ranged and a magic option
- Detail
- You must be able to deal real damage with two styles. A one-style setup makes some phases painfully slow.
- Requirement
- Fairy ring or Zul-Andra teleport
- Detail
- Not required, but travel time dominates your kills per hour.
The Zul-Andra teleport scroll is the single best quality-of-life purchase before a Zulrah grind. Walking from the fairy ring every trip adds up fast.
Getting There
Zul-Andra sits south-west of the Poison Waste in Tirannwn. There are three practical routes, and which you use directly changes how many kills you get per hour.
- Zul-Andra teleport scroll — the fastest option and worth buying in bulk before a grind.
- Fairy ring code to the Zul-Andra area, then a short run south.
- The Isafdar route on foot, which is only worth it if you have nothing else available.
Talk to the ferryman at the dock to enter the instance. Set up your return teleport before your first trip so banking is one click.
Recommended Stats
Zulrah has no stat requirement, but low stats turn a five-minute kill into a twelve-minute supply drain. These are the levels where the fight becomes sustainable.
| Stat | Comfortable | Why |
|---|---|---|
| Ranged | 75+ | Carries the green form and most of your overall damage. |
| Magic | 75+ | Needed for the blue form; a trident or better makes phases much shorter. |
| Hitpoints | 75+ | Mistimed prayer switches hurt, and venom stacks on top. |
| Prayer | 43 minimum, 74+ preferred | Rigour and Augury cut kill times noticeably. |
| Defence | 60+ | Barely matters — you should be praying correctly, not tanking. |
- Stat
- Ranged
- Comfortable
- 75+
- Why
- Carries the green form and most of your overall damage.
- Stat
- Magic
- Comfortable
- 75+
- Why
- Needed for the blue form; a trident or better makes phases much shorter.
- Stat
- Hitpoints
- Comfortable
- 75+
- Why
- Mistimed prayer switches hurt, and venom stacks on top.
- Stat
- Prayer
- Comfortable
- 43 minimum, 74+ preferred
- Why
- Rigour and Augury cut kill times noticeably.
- Stat
- Defence
- Comfortable
- 60+
- Why
- Barely matters — you should be praying correctly, not tanking.
Gear Setups: Budget, Mid and Best in Slot
Zulrah is a two-setup fight. Your ranged setup handles the green form, your magic setup handles the blue form, and the red form is a ranged phase where you also have to deal with snakelings.
The most common beginner mistake is over-investing in one style. A balanced pair of mid-tier setups beats one best-in-slot setup and one useless one.
| Slot | Budget | Mid | Best in slot |
|---|---|---|---|
| Ranged weapon | Rune crossbow | Toxic blowpipe | Toxic blowpipe / Twisted bow |
| Magic weapon | Iban's staff / Trident of the seas | Trident of the swamp | Sanguinesti staff / Tumeken's shadow |
| Head | Helm of neitiznot | Serpentine helm | Serpentine helm (venom immunity is worth the slot) |
| Ranged body | Black d'hide body | Karil's leathertop | Masori body (f) |
| Magic body | Mystic robe top | Ahrim's robetop | Ancestral robe top |
| Legs | Black d'hide chaps / Mystic bottoms | Karil's / Ahrim's | Masori chaps (f) / Ancestral bottoms |
| Cape | Ava's accumulator | Ava's assembler | Ava's assembler / Imbued god cape for magic |
| Amulet | Amulet of glory | Amulet of fury | Necklace of anguish / Occult necklace |
| Ring | Explorer's ring | Archers ring / Seers ring | Venator ring / Magus ring |
| Gloves | Combat bracelet | Barrows gloves | Zaryte vambraces / Tormented bracelet |
| Boots | Snakeskin boots | Ranger boots | Pegasian boots / Eternal boots |
- Slot
- Ranged weapon
- Budget
- Rune crossbow
- Mid
- Toxic blowpipe
- Best in slot
- Toxic blowpipe / Twisted bow
- Slot
- Magic weapon
- Budget
- Iban's staff / Trident of the seas
- Mid
- Trident of the swamp
- Best in slot
- Sanguinesti staff / Tumeken's shadow
- Slot
- Head
- Budget
- Helm of neitiznot
- Mid
- Serpentine helm
- Best in slot
- Serpentine helm (venom immunity is worth the slot)
- Slot
- Ranged body
- Budget
- Black d'hide body
- Mid
- Karil's leathertop
- Best in slot
- Masori body (f)
- Slot
- Magic body
- Budget
- Mystic robe top
- Mid
- Ahrim's robetop
- Best in slot
- Ancestral robe top
- Slot
- Legs
- Budget
- Black d'hide chaps / Mystic bottoms
- Mid
- Karil's / Ahrim's
- Best in slot
- Masori chaps (f) / Ancestral bottoms
- Slot
- Cape
- Budget
- Ava's accumulator
- Mid
- Ava's assembler
- Best in slot
- Ava's assembler / Imbued god cape for magic
- Slot
- Amulet
- Budget
- Amulet of glory
- Mid
- Amulet of fury
- Best in slot
- Necklace of anguish / Occult necklace
- Slot
- Ring
- Budget
- Explorer's ring
- Mid
- Archers ring / Seers ring
- Best in slot
- Venator ring / Magus ring
- Slot
- Gloves
- Budget
- Combat bracelet
- Mid
- Barrows gloves
- Best in slot
- Zaryte vambraces / Tormented bracelet
- Slot
- Boots
- Budget
- Snakeskin boots
- Mid
- Ranger boots
- Best in slot
- Pegasian boots / Eternal boots
A serpentine helm gives permanent venom immunity, which removes an entire category of death and frees inventory space. It is the highest-value quality-of-life item for this boss.
Blowpipe darts matter. If you are using cheap darts to save GP, your kill times will show it.
Inventory and Supplies
Zulrah trips are long and switching-heavy, so inventory layout matters as much as inventory contents. Keep your switches in the same slots every trip.
- Your magic switch and ranged switch, arranged in fixed slots so muscle memory works.
- Anti-venom+ (or nothing, if you wear a serpentine helm).
- Prayer potions or super restores.
- Food — sharks, or saradomin brews plus super restores for longer trips.
- Ranging potion and magic potion, or a divine variant of each.
- Stamina potion for repositioning if you are still learning the safe spots.
- Teleport out — house tab or your standard escape.
Do not fill your inventory with everything you own. Every extra item is one more thing to misclick during a two-tick switch.
Mechanics You Have to Respect
Zulrah cycles between three forms. Each form has its own attack style, and the correct protection prayer is determined entirely by the form's colour — that mapping never changes.
Between forms Zulrah dives, becomes untargetable, and resurfaces at a different position. Your job during the dive is to move to the correct tile and finish your switch before it comes back up.
| Mechanic | What it does | Correct response |
|---|---|---|
| Green form (serpentine) | Attacks with Ranged. | Protect from Missiles, attack with your magic setup. |
| Blue form (tanzanite) | Attacks with Magic. | Protect from Magic, attack with your ranged setup. |
| Red form (magma) | Moves into melee range and attacks with Melee, and spawns snakelings. | Protect from Melee and stay out of melee distance; kill or avoid snakelings. |
| Snakelings | Small adds that deal steady damage and interrupt your rhythm if ignored. | Kill them with an AoE or ranged option, or reposition so they cannot reach you. |
| Toxic clouds | Zulrah leaves expanding poison clouds on the arena floor. | Move out of the cloud immediately. Do not trade damage for one extra attack. |
| Venom | Escalating damage that will out-pace food if left untreated. | Serpentine helm for permanent immunity, or cure with anti-venom+ the moment it applies. |
| The dive | Zulrah becomes untargetable and resurfaces elsewhere in a new form. | Use the window to move to the next safe tile and complete your gear and prayer switch. |
- Mechanic
- Green form (serpentine)
- What it does
- Attacks with Ranged.
- Correct response
- Protect from Missiles, attack with your magic setup.
- Mechanic
- Blue form (tanzanite)
- What it does
- Attacks with Magic.
- Correct response
- Protect from Magic, attack with your ranged setup.
- Mechanic
- Red form (magma)
- What it does
- Moves into melee range and attacks with Melee, and spawns snakelings.
- Correct response
- Protect from Melee and stay out of melee distance; kill or avoid snakelings.
- Mechanic
- Snakelings
- What it does
- Small adds that deal steady damage and interrupt your rhythm if ignored.
- Correct response
- Kill them with an AoE or ranged option, or reposition so they cannot reach you.
- Mechanic
- Toxic clouds
- What it does
- Zulrah leaves expanding poison clouds on the arena floor.
- Correct response
- Move out of the cloud immediately. Do not trade damage for one extra attack.
- Mechanic
- Venom
- What it does
- Escalating damage that will out-pace food if left untreated.
- Correct response
- Serpentine helm for permanent immunity, or cure with anti-venom+ the moment it applies.
- Mechanic
- The dive
- What it does
- Zulrah becomes untargetable and resurfaces elsewhere in a new form.
- Correct response
- Use the window to move to the next safe tile and complete your gear and prayer switch.
Zulrah uses a small number of fixed rotations. You identify which one you are in from the opening form and position, then follow it. Learn one rotation properly before trying to memorise all of them — the OSRS Wiki Zulrah page has the position maps.
A Beginner Routine That Survives
Your first twenty kills should not be fast. They should be alive. This routine deliberately trades DPS for safety until the switches stop feeling like a scramble.
- Before entering: drink your potions, and set Protect from Missiles as your default so a surprise green form does not catch you praying wrong.
- Identify the opening form and Zulrah's starting position. That combination tells you which rotation you are in.
- Pray by colour, always. Green means missiles, blue means magic, red means melee. Do not try to reason about it mid-fight.
- Attack with the opposite style: magic into green, ranged into blue.
- When Zulrah dives, move first and switch second. Being on the wrong tile is worse than losing two attacks.
- On the red form, step away from melee range and deal with snakelings before resuming damage on Zulrah.
- Step out of every toxic cloud immediately, even if it costs you an attack.
- Cure venom on sight unless you are wearing a serpentine helm.
- If you lose track of the rotation, stop attacking, pray by colour, and just survive until the pattern becomes obvious again.
Losing the rotation is normal early on and is not a reason to die. Defaulting to correct prayer and zero damage keeps you alive long enough to recover.
Solo Versus Team
Zulrah is solo only. The arena is instanced and there is no scaling or shared loot, so every improvement is your own.
This makes it the best possible practice ground for switching, which is the exact skill that gates raids. If your Zulrah switches are clean, Chambers of Xeric and the Nylocas room in Theatre of Blood will feel far less alien.
If you want a solo boss with a fixed script instead of rotations, Vorkath is the easier neighbour.
Common Mistakes and What Actually Kills You
Zulrah deaths cluster around four errors, and all four are fixable without better gear.
- Praying against the form you expect rather than the form you can see.
- Switching gear before moving to the correct tile during the dive.
- Ignoring venom because your HP looks healthy right now.
- Standing in a toxic cloud to land one extra hit.
- Bringing only one usable combat style and grinding through phases you cannot damage.
- Trying to memorise all rotations at once instead of learning one thoroughly.
- Cluttering the inventory so switches become misclicks.
- Chasing a kill you have already lost instead of teleporting and resetting.
Drops Worth Knowing
Zulrah's unique table is what keeps it relevant years after release, and the bulk scale drops fund Herblore for a lot of accounts.
| Drop | Why it matters |
|---|---|
| Tanzanite fang | Becomes the toxic blowpipe — one of the most used ranged weapons in the game. |
| Magic fang | Combines into the trident of the swamp or toxic staff of the dead. |
| Serpentine visage | Becomes the serpentine helm and permanent venom immunity. |
| Uncut onyx | A large single drop; also the base for the amulet of fury and berserker necklace. |
| Zulrah's scales | Bulk income and the charge currency for serpentine and toxic gear. |
| Jar of swamp | Collection log demand. |
| Pet snakeling | The pet. Long odds, pure prestige. |
- Drop
- Tanzanite fang
- Why it matters
- Becomes the toxic blowpipe — one of the most used ranged weapons in the game.
- Drop
- Magic fang
- Why it matters
- Combines into the trident of the swamp or toxic staff of the dead.
- Drop
- Serpentine visage
- Why it matters
- Becomes the serpentine helm and permanent venom immunity.
- Drop
- Uncut onyx
- Why it matters
- A large single drop; also the base for the amulet of fury and berserker necklace.
- Drop
- Zulrah's scales
- Why it matters
- Bulk income and the charge currency for serpentine and toxic gear.
- Drop
- Jar of swamp
- Why it matters
- Collection log demand.
- Drop
- Pet snakeling
- Why it matters
- The pet. Long odds, pure prestige.
Combat Achievements
Zulrah's Combat Achievement tasks reward the same things this guide pushes: perfect prayer usage, avoiding venom damage entirely, and finishing kills without taking avoidable hits from clouds or snakelings.
The restricted tasks are much easier once you can reliably identify rotations, so leave them until rotation reading is automatic rather than fighting the boss and the task at once.
Ironman Notes
Zulrah is one of the strongest Ironman targets in the mid game because it supplies its own upgrades: the blowpipe, the serpentine helm and the trident of the swamp all come from here, and none of them can be bought on an iron account.
Scales are the practical bottleneck for Ironmen — they charge your serpentine helm and toxic gear, so budget them rather than dumping them into one item.
Bring your own herbs for anti-venom+ until you get the serpentine visage. That single drop removes the whole venom supply chain, which is why many irons treat it as the real goal.
FAQ
What prayer do I use for each Zulrah form?
Green uses Ranged so pray Protect from Missiles, blue uses Magic so pray Protect from Magic, and red uses Melee so pray Protect from Melee. Pray by colour and you will never get it wrong.
Do I have to memorise all the rotations?
No. Learn to identify the rotation from the opening form and position, then follow it. If you lose track, pray by colour and survive — the pattern becomes obvious again within a phase or two.
Is a blowpipe required?
No, but it is the largest single upgrade for this boss. A rune crossbow with diamond bolts (e) is a workable starting point.
Can I do Zulrah without venom immunity?
You can, with anti-venom+, but it costs inventory space and attention. A serpentine helm removes the problem permanently and is worth prioritising.
How long should a kill take?
It varies far too much with gear and rotation to quote a figure honestly. Time your own kills once you stop dying and use that as your baseline.
Should I learn Zulrah or Vorkath first?
Vorkath, if you want an easier introduction — its script is fixed and it needs one combat style. Zulrah teaches switching, which matters more long term.
Related Guides
- Vorkath guide — the other classic solo money boss.
- Which boss should you learn first? — where Zulrah fits.
- Boss gear progression — what the fangs and visage unlock.
- Best bosses for money — comparing Zulrah's income to alternatives.
- Which raid to learn first — where switching practice pays off.
- OSRS bosses index — every boss with its requirement.
Bottom Line
Zulrah is a switching drill with a fixed answer key. Pray by colour, move during the dive, treat venom as a hard rule rather than a nuisance, and learn one rotation properly before worrying about the rest.
Slow, alive kills beat fast, dead ones. Once the switches stop feeling frantic, your kill times drop on their own without any gear upgrade.
If Zulrah is the wall between you and a blowpipe, our PvM team can run it hand-done or coach the rotations with you.
Mechanics and drop rates change with updates. Verify current details on the Old School RuneScape Wiki.
Need a trusted team? Bils Services
Enjoyed the guide?
Drop a like — it helps other Adventurers find the good stuff.
Community
Comments
Silence in the hall…
Be the first Adventurer to leave a mark.
Join the thread
Add a comment
Tips, drops, or “this carried my account” — keep it useful.
bilsservices · bils services · bilsservices.com

