


OSRS Doom of Mokhaiotl Guide: Delve Levels, Gear, Mechanics and Rewards
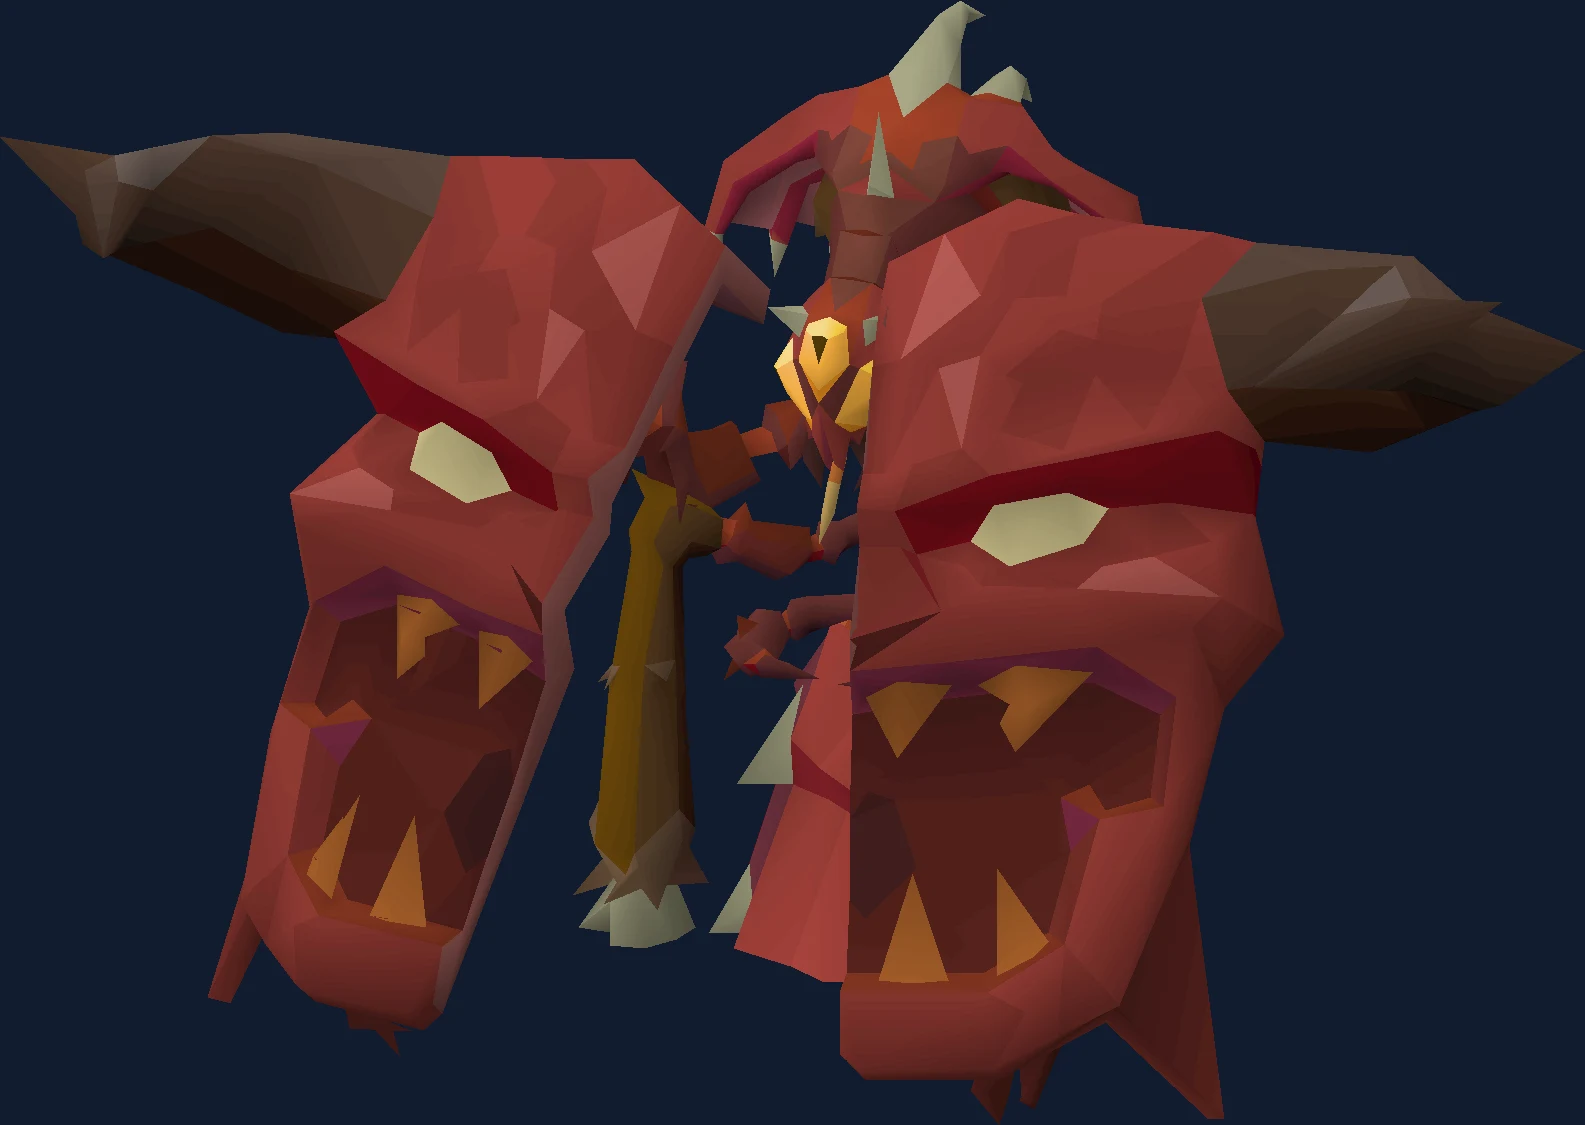
Doom of Mokhaiotl explained: how the endless delve system scales, why supply planning decides your ceiling rather than your gear, the mechanics to respect, and what the Eye of Ayak and avernic treads are for.
Overview
The Doom of Mokhaiotl — Osto-Ayak to the Old Ones — is a solo delve boss in the Ruins of Mokhaiotl beneath the Tlati Rainforest. Instead of one fight at a fixed difficulty, you descend through delve levels that get progressively harder, and you choose when to cash out.
The developers pitched the early delves as roughly Corrupted Gauntlet difficulty, with the deepest levels needing genuine mechanical fluency. That framing is accurate: delve 1 is approachable and delve 8 is not.
Difficulty scales in a specific way that is worth understanding before your first run. Its health rises modestly per level — 525 at delve 1 up to 675 at delve 8 — while its combat stats stay flat. What actually escalates is attack speed and max hit, plus new mechanics layered on top. Attack speed goes from 6 ticks at delve 1 to 4 ticks at delve 7 and beyond, and the charge attack's max hit climbs from 60 to 99.
So your gear determines how fast you clear a level, and your supply management determines how deep you get. Most players' ceiling is a logistics ceiling, not a mechanical one.
| Detail | Value |
|---|---|
| Type | Solo endless-delve boss |
| Location | Ruins of Mokhaiotl, beneath the Tlati Rainforest |
| Hard requirement | The Final Dawn |
| Structure | Delve levels 1 to 8, then repeatable deep delves at delve 8 difficulty |
| Solo or team | Solo only |
| Weakness | Crush on paper (300 stab/slash defence versus 60 crush), but ranged is the recommended style |
| Main draw | Eye of ayak, avernic treads, mokhaiotl cloth, demon tears |
| Defining mechanic | You choose how deep to go, and descending risks the loot you already earned |
- Detail
- Type
- Value
- Solo endless-delve boss
- Detail
- Location
- Value
- Ruins of Mokhaiotl, beneath the Tlati Rainforest
- Detail
- Hard requirement
- Value
- The Final Dawn
- Detail
- Structure
- Value
- Delve levels 1 to 8, then repeatable deep delves at delve 8 difficulty
- Detail
- Solo or team
- Value
- Solo only
- Detail
- Weakness
- Value
- Crush on paper (300 stab/slash defence versus 60 crush), but ranged is the recommended style
- Detail
- Main draw
- Value
- Eye of ayak, avernic treads, mokhaiotl cloth, demon tears
- Detail
- Defining mechanic
- Value
- You choose how deep to go, and descending risks the loot you already earned
Requirements and Access
There is one hard gate and it is a quest. Everything else on this list is a recommendation, and because you choose your own depth, the boss is genuinely usable well below endgame.
| Requirement | Detail |
|---|---|
| The Final Dawn | The only hard gate. The Ruins of Mokhaiotl are first accessed during the quest. |
| 43 Prayer minimum | You need all three protection prayers. 62 for Deadeye, and 74 Prayer with 70 Defence for Rigour, which the wiki strongly recommends. |
| 90+ Ranged (recommended) | Ranged is the recommended style despite the crush weakness, because the mechanics punish standing in melee distance. |
| A demonbane weapon | Not optional past delve 3. The shield phase can only be damaged by demonbane weapons, holy water excluded. |
| 75 Agility (recommended) | Unlocks the pit jump shortcut in the ruins, which shortens every trip. |
| Supply discipline | The real requirement. Your depth ceiling is a supply-management outcome, not a DPS one. |
- Requirement
- The Final Dawn
- Detail
- The only hard gate. The Ruins of Mokhaiotl are first accessed during the quest.
- Requirement
- 43 Prayer minimum
- Detail
- You need all three protection prayers. 62 for Deadeye, and 74 Prayer with 70 Defence for Rigour, which the wiki strongly recommends.
- Requirement
- 90+ Ranged (recommended)
- Detail
- Ranged is the recommended style despite the crush weakness, because the mechanics punish standing in melee distance.
- Requirement
- A demonbane weapon
- Detail
- Not optional past delve 3. The shield phase can only be damaged by demonbane weapons, holy water excluded.
- Requirement
- 75 Agility (recommended)
- Detail
- Unlocks the pit jump shortcut in the ruins, which shortens every trip.
- Requirement
- Supply discipline
- Detail
- The real requirement. Your depth ceiling is a supply-management outcome, not a DPS one.
Because you choose when to stop, this is a rare endgame boss where a weaker account still gets value — just at shallower depths. Delve 1 and 2 are legitimate farming targets for a mid-game account.
Getting There
There are four routes into the Ruins of Mokhaiotl, and the difference between the fastest and slowest is significant if you are doing repeated short runs.
- Mokhaiotl waystone — a single-use item that teleports you to the centre of the ruins, just south of the pit jump shortcut. This is the one you want.
- Pendant of ates to Kastori, then run north-west from south-east of the lift platform.
- Quetzal Transport System to Tal Teklan, which has a bank, then east to the Tonali Cavern.
- Inside the Crypt of Tonali, open the chest west of the lift platform for two ancient teleporters. Place one a tile or two north of the lift and the other beside the door to skip the entry delay.
Set the teleporters on your first visit. It is a one-time job that pays for itself across every run afterwards.
Recommended Stats
Stats determine how quickly you clear each delve level, which in turn determines how many levels your supplies cover.
| Stat | Comfortable | Why |
|---|---|---|
| Ranged | 90+ | The wiki's recommendation. Faster clears per level mean less accumulated damage and acid blood. |
| Prayer | 43 / 62 / 74 | 43 is the hard minimum for all three protection prayers. 62 unlocks Deadeye, 74 with 70 Defence unlocks Rigour. |
| Hitpoints | 90+ | The beam deals 99 at delve 6 and above. Below 99 HP, a single missed interrupt is fatal. |
| Agility | 75 | The pit jump shortcut in the ruins, which shortens every trip. |
| Strength | Higher is better | Melee punish bonus damage is a fifth of your visible Strength bonus, so this scales your interrupts. |
- Stat
- Ranged
- Comfortable
- 90+
- Why
- The wiki's recommendation. Faster clears per level mean less accumulated damage and acid blood.
- Stat
- Prayer
- Comfortable
- 43 / 62 / 74
- Why
- 43 is the hard minimum for all three protection prayers. 62 unlocks Deadeye, 74 with 70 Defence unlocks Rigour.
- Stat
- Hitpoints
- Comfortable
- 90+
- Why
- The beam deals 99 at delve 6 and above. Below 99 HP, a single missed interrupt is fatal.
- Stat
- Agility
- Comfortable
- 75
- Why
- The pit jump shortcut in the ruins, which shortens every trip.
- Stat
- Strength
- Comfortable
- Higher is better
- Why
- Melee punish bonus damage is a fifth of your visible Strength bonus, so this scales your interrupts.
Gear Setups: Budget, Mid and Best in Slot
This is a ranged fight with two mandatory secondary weapons rather than a three-style fight, so the setup looks different from most boss loadouts. Better gear does not make a given delve level easier — it buys you depth before your supplies run out.
| Slot | Budget | Mid | Best in slot |
|---|---|---|---|
| Main weapon | Scorching bow | Scorching bow / Zaryte crossbow | Twisted bow (his Magic is 275) |
| Demonbane | Emberlight / Scorching bow | Emberlight | Emberlight — required for the shield phase |
| Melee punish | Crystal halberd | Crystal halberd | Crystal halberd or scythe of vitur |
| Special attack | Rosewood blowpipe | Zaryte crossbow with ruby bolts (e) | Zaryte crossbow with ruby bolts (e) |
| Head | Void ranger helm | Masori mask (f) | Masori mask (f) |
| Body | Elite void top | Masori body (f) | Masori body (f) |
| Legs | Elite void robe | Masori chaps (f) | Masori chaps (f) |
| Cape | Ava's assembler | Ava's assembler | Dizana's quiver |
| Amulet | Amulet of fury | Necklace of anguish | Necklace of anguish |
| Ring | Archers ring (i) | Venator ring | Lightbearer or Venator ring |
| Boots | Pegasian boots | Pegasian boots | Avernic treads |
- Slot
- Main weapon
- Budget
- Scorching bow
- Mid
- Scorching bow / Zaryte crossbow
- Best in slot
- Twisted bow (his Magic is 275)
- Slot
- Demonbane
- Budget
- Emberlight / Scorching bow
- Mid
- Emberlight
- Best in slot
- Emberlight — required for the shield phase
- Slot
- Melee punish
- Budget
- Crystal halberd
- Mid
- Crystal halberd
- Best in slot
- Crystal halberd or scythe of vitur
- Slot
- Special attack
- Budget
- Rosewood blowpipe
- Mid
- Zaryte crossbow with ruby bolts (e)
- Best in slot
- Zaryte crossbow with ruby bolts (e)
- Slot
- Head
- Budget
- Void ranger helm
- Mid
- Masori mask (f)
- Best in slot
- Masori mask (f)
- Slot
- Body
- Budget
- Elite void top
- Mid
- Masori body (f)
- Best in slot
- Masori body (f)
- Slot
- Legs
- Budget
- Elite void robe
- Mid
- Masori chaps (f)
- Best in slot
- Masori chaps (f)
- Slot
- Cape
- Budget
- Ava's assembler
- Mid
- Ava's assembler
- Best in slot
- Dizana's quiver
- Slot
- Amulet
- Budget
- Amulet of fury
- Mid
- Necklace of anguish
- Best in slot
- Necklace of anguish
- Slot
- Ring
- Budget
- Archers ring (i)
- Mid
- Venator ring
- Best in slot
- Lightbearer or Venator ring
- Slot
- Boots
- Budget
- Pegasian boots
- Mid
- Pegasian boots
- Best in slot
- Avernic treads
The scorching bow deserves a specific note. It only trails the twisted bow slightly because the Doom is demonic, and it is far cheaper — but its faster attack speed makes him generate roughly 20% more acid blood, which matters a great deal past delve 5 when the blood persists between levels. Budget setups should expect to stop shallower for that reason alone, not just because of damage.
Avernic treads come from this boss at delve 4 and deeper, which means deep runs fund the gear that enables deeper runs.
Inventory and Supplies
This is the section that actually decides your result. In a delve boss, inventory is depth.
- Saradomin brews and super restores — the majority of your inventory.
- A demonbane weapon. Mandatory past delve 3 for the shield phase.
- A crystal halberd or other multi-hit melee weapon for melee punishes. A halberd punish guarantees at least 46 damage and the bonus duplicates per hitsplat.
- Divine ranged potions.
- Antivenom rather than antipoison. Acid blood applies venom, and it is up to 7 damage per tick if you stand in it.
Two special-attack notes that change your loadout. A Zaryte crossbow with regular enchanted ruby bolts is the strongest option, and the dragon variant adds nothing here. And because you deal your max hit to volatile earth despite it having 1 HP, a toxic blowpipe or eldritch nightmare staff special on volatile earth restores a large amount of health or prayer for free — worth planning around when supplies get tight.
Decide your target depth before you enter and pack for it. Open-ended runs with a vague plan are how people die two levels past where they should have left.
Mechanics You Have to Respect
Mechanics are introduced level by level rather than all at once, which is what makes learning shallow and scaling up genuinely work here. Delve 1 has four things to track; delve 8 has nine.
The standard attack is a single projectile colour-coded by style: blue for magic, green for ranged, and red for melee from delve 2 onward. Damage is calculated on impact, so you can pray after the projectile launches. Standing adjacent gets you a tongue lash for up to 40, halved by Protect from Melee.
| Mechanic | What it does | Correct response |
|---|---|---|
| Demonic larvae | Spawn around you and crawl toward the Doom. Reaching its centre heals it and damages you, and adds a permanent 'demonic charge' stack that is not reset between delve levels. | Kill them. They have 2 HP and are only one-shot by demonbane weapons, multi-hit weapons or the Eye of Ayak. Kill them near the Doom — the 21-damage explosion hits it for 5-10 instead of you, or 100 shield damage. |
| Rock Throw | A rock explodes after 7 ticks into falling debris on shadowed tiles for 15-20, then disables your protection prayers and fires 100%-accurate projectiles. A normal rock leads with ranged; a blue-glowing rock leads with magic. Melee is never used. | Move off your tile before it lands or you get shoved. Re-pray immediately after the explosion, because prayer still negates the projectiles fully. |
| Special Beam Cannon | A yellow charge bar. Uninterrupted it deals 60, rising to 80 at delves 4-5 and 99 at delve 6+. It charges faster the deeper you are. | Highest priority in the fight. Interrupt it — melee only during a melee charge, demonbane only during the shield phase, any attack during the car phase. |
| Melee punish | Interrupting a melee charge with melee deals bonus damage equal to a fifth of your visible Strength bonus, and delays his next attack by 6-8 ticks depending on depth. | Carry a crystal halberd or similar. A halberd punish guarantees at least 46 damage across two bonus hits. Killing him with a melee punish also scatters holy water, restoring 28 HP, 14 prayer and 25% special energy. |
| Shockwave | Around a minute in, volatile earth spawns. 20 ticks later shockwaves land for 30-41 each — one at delves 1-2, scaling to five at delve 8+. | Attack two volatile earth to spawn an earthen shield and stand in it. The first one you destroy sets the destination, the second sets the spawn point, so pick two far apart along a straight line. |
| Acid blood | From delve 3, he sprays acid blood whenever damaged outside the shield or car phase, including thrall and multi-hit damage. It does up to 7 venom damage per tick and carries between delve levels. | This is why thralls and the scythe become liabilities at depth. Delve 6 wipes the arena once; after that only holy water and the earthen shield's centre tile clear it. |
| Demonic shield | From delve 3, at around 75% health he gains a 500-HP shield and charges the beam constantly. His name changes to 'Doom of Mokhaiotl (Shielded)' and the health bar turns blue. | Only demonbane weapons harm it, and they hit with 100% accuracy and reset the charge. Larva explosions do 100 shield damage each, so route larvae into him. |
| Burrowing — the car phase | From delve 5, after the shield ends he burrows, spawns a yellow eye four tiles past you, and zooms into it, trampling anything in the path. Trample damage is 10 at delve 5 and 40 at delve 8+. | He charges the beam constantly here, so every attack is 100% accurate — this is the window for a Zaryte crossbow or blowpipe special. Position so the eye lands where you want him. |
| Car slams and Rockblock | From delve 6, Car Slams destroy every rock within 15 tiles unless a rock is shielded by another rock. | Place a Rock Throw rock on the Doom's own centre tile before a slam and it blocks the whole slam. That is 'Rockblock', and it is the technique that makes delve 8 sustainable. |
- Mechanic
- Demonic larvae
- What it does
- Spawn around you and crawl toward the Doom. Reaching its centre heals it and damages you, and adds a permanent 'demonic charge' stack that is not reset between delve levels.
- Correct response
- Kill them. They have 2 HP and are only one-shot by demonbane weapons, multi-hit weapons or the Eye of Ayak. Kill them near the Doom — the 21-damage explosion hits it for 5-10 instead of you, or 100 shield damage.
- Mechanic
- Rock Throw
- What it does
- A rock explodes after 7 ticks into falling debris on shadowed tiles for 15-20, then disables your protection prayers and fires 100%-accurate projectiles. A normal rock leads with ranged; a blue-glowing rock leads with magic. Melee is never used.
- Correct response
- Move off your tile before it lands or you get shoved. Re-pray immediately after the explosion, because prayer still negates the projectiles fully.
- Mechanic
- Special Beam Cannon
- What it does
- A yellow charge bar. Uninterrupted it deals 60, rising to 80 at delves 4-5 and 99 at delve 6+. It charges faster the deeper you are.
- Correct response
- Highest priority in the fight. Interrupt it — melee only during a melee charge, demonbane only during the shield phase, any attack during the car phase.
- Mechanic
- Melee punish
- What it does
- Interrupting a melee charge with melee deals bonus damage equal to a fifth of your visible Strength bonus, and delays his next attack by 6-8 ticks depending on depth.
- Correct response
- Carry a crystal halberd or similar. A halberd punish guarantees at least 46 damage across two bonus hits. Killing him with a melee punish also scatters holy water, restoring 28 HP, 14 prayer and 25% special energy.
- Mechanic
- Shockwave
- What it does
- Around a minute in, volatile earth spawns. 20 ticks later shockwaves land for 30-41 each — one at delves 1-2, scaling to five at delve 8+.
- Correct response
- Attack two volatile earth to spawn an earthen shield and stand in it. The first one you destroy sets the destination, the second sets the spawn point, so pick two far apart along a straight line.
- Mechanic
- Acid blood
- What it does
- From delve 3, he sprays acid blood whenever damaged outside the shield or car phase, including thrall and multi-hit damage. It does up to 7 venom damage per tick and carries between delve levels.
- Correct response
- This is why thralls and the scythe become liabilities at depth. Delve 6 wipes the arena once; after that only holy water and the earthen shield's centre tile clear it.
- Mechanic
- Demonic shield
- What it does
- From delve 3, at around 75% health he gains a 500-HP shield and charges the beam constantly. His name changes to 'Doom of Mokhaiotl (Shielded)' and the health bar turns blue.
- Correct response
- Only demonbane weapons harm it, and they hit with 100% accuracy and reset the charge. Larva explosions do 100 shield damage each, so route larvae into him.
- Mechanic
- Burrowing — the car phase
- What it does
- From delve 5, after the shield ends he burrows, spawns a yellow eye four tiles past you, and zooms into it, trampling anything in the path. Trample damage is 10 at delve 5 and 40 at delve 8+.
- Correct response
- He charges the beam constantly here, so every attack is 100% accurate — this is the window for a Zaryte crossbow or blowpipe special. Position so the eye lands where you want him.
- Mechanic
- Car slams and Rockblock
- What it does
- From delve 6, Car Slams destroy every rock within 15 tiles unless a rock is shielded by another rock.
- Correct response
- Place a Rock Throw rock on the Doom's own centre tile before a slam and it blocks the whole slam. That is 'Rockblock', and it is the technique that makes delve 8 sustainable.
Delve Strategy: How Deep Should You Go?
You do not have to guess where the difficulty jumps are. The mechanic additions are published, and three levels matter more than the rest: delve 3 adds the shield and acid blood, delve 5 adds the car phase, and delve 6 raises the beam to 99 and introduces Car Slams.
| Delve | HP | Beam damage | New or escalated |
|---|---|---|---|
| 1 | 525 | 60 | Baseline. One rock projectile, one shockwave, neutral larvae, no acid blood. |
| 2 | 550 | 60 | Red melee projectile added. Two rock projectiles. |
| 3 | 575 | 60 | Acid blood and the demonic shield phase both begin. Two shockwaves. This is the first real jump. |
| 4 | 600 | 80 | Larvae become colour-coded with two protection prayers. Three rock projectiles. |
| 5 | 625 | 80 | Car phase begins with two zooms and 10 trample damage. Two larvae at a time. Three shockwaves. |
| 6 | 650 | 99 | Beam hits 99. Car Slams begin, three per phase, trample 20. Arena acid blood is wiped once on arrival. |
| 7 | 650 | 99 | Attack speed reaches 4 ticks. Four shockwaves, trample 30, rock projectiles arrive 2 ticks after debris. |
| 8 | 675 | 99 | Two identical rock throws per attack. Five shockwaves. Giant larvae. Trample 40, fewer falling rocks. |
| 8+ (deep delve) | 625 | 99 | Mechanically identical to delve 8 with less health, but accumulated acid blood makes it harder in practice. |
- Delve
- 1
- HP
- 525
- Beam damage
- 60
- New or escalated
- Baseline. One rock projectile, one shockwave, neutral larvae, no acid blood.
- Delve
- 2
- HP
- 550
- Beam damage
- 60
- New or escalated
- Red melee projectile added. Two rock projectiles.
- Delve
- 3
- HP
- 575
- Beam damage
- 60
- New or escalated
- Acid blood and the demonic shield phase both begin. Two shockwaves. This is the first real jump.
- Delve
- 4
- HP
- 600
- Beam damage
- 80
- New or escalated
- Larvae become colour-coded with two protection prayers. Three rock projectiles.
- Delve
- 5
- HP
- 625
- Beam damage
- 80
- New or escalated
- Car phase begins with two zooms and 10 trample damage. Two larvae at a time. Three shockwaves.
- Delve
- 6
- HP
- 650
- Beam damage
- 99
- New or escalated
- Beam hits 99. Car Slams begin, three per phase, trample 20. Arena acid blood is wiped once on arrival.
- Delve
- 7
- HP
- 650
- Beam damage
- 99
- New or escalated
- Attack speed reaches 4 ticks. Four shockwaves, trample 30, rock projectiles arrive 2 ticks after debris.
- Delve
- 8
- HP
- 675
- Beam damage
- 99
- New or escalated
- Two identical rock throws per attack. Five shockwaves. Giant larvae. Trample 40, fewer falling rocks.
- Delve
- 8+ (deep delve)
- HP
- 625
- Beam damage
- 99
- New or escalated
- Mechanically identical to delve 8 with less health, but accumulated acid blood makes it harder in practice.
From delve 6 the rotation is fixed and worth memorising: standard attacks, shield phase at 75% health, car phase with three zoom-and-slam cycles, volatile earth, four attacks including a rock throw, shockwave, two attacks including a rock throw, then back to the shield.
- Pick a target depth based on the table above rather than a vague 'as deep as I can'.
- Clear to your target and note how many brews and restores each level actually cost you.
- Kill every larva. The demonic charge stacks persist across levels, so ignoring them early makes level 7 harder than it needs to be.
- Re-pray immediately after every rock throw explosion — that prayer disable is the most common source of avoidable damage.
- Interrupt every beam charge. A single 99 at delve 6+ is worth more than several mistakes elsewhere.
- Descend only while you have enough sustain for the next level and an exit.
- Claim your loot at the burrow hole when your rule says to stop. Descending risks what you already earned.
Solo Versus Team
Doom of Mokhaiotl is solo content. There is no team scaling, which means your depth is entirely a function of your own gear and discipline.
That makes it an unusually honest benchmark — nobody can carry you, and nobody can drain your supplies.
If you want endgame content with team support instead, Yama and the raids are the alternatives.
Common Mistakes and What Actually Kills You
Nearly every failed delve run is a discipline failure rather than a mechanical one.
- Ignoring larvae. Demonic charge stacks never reset between delve levels, so every larva you let through makes the rest of the run permanently worse.
- Forgetting to re-pray after a rock throw. The explosion disables your prayers and the follow-up projectiles are 100% accurate.
- Letting a beam charge complete at delve 6 or deeper. That is 99 damage and usually the end of the run.
- Bringing thralls or a scythe to a deep delve. Every hit outside the shield and car phases sprays more acid blood, and it persists between levels.
- Killing larvae far from the Doom, which puts the 21-damage explosion on you instead of doing 5-10 to him.
- Trying to damage the shield phase with a non-demonbane weapon and wondering why nothing lands.
- Standing in melee range as the shield phase ends before delve 5 — he resumes attacking instantly, often with no animation.
- Spawning the earthen shield between two volatile earth that are too close together, so it dissipates before the shockwaves end.
- Descending past a yellow glowing burrow hole. That glow means a unique was rolled and you are about to risk it.
Drops Worth Knowing
Depth is the currency here, and it works two ways. Each unique has a minimum delve level before it can be rolled at all, and every unique's rate improves as you go deeper. That is the entire economic argument for descending.
| Delve | Unlocks | Per-unique rate | Overall unique chance |
|---|---|---|---|
| 2 | Mokhaiotl cloth | 1/2,500 | 1/2,500 |
| 3 | Eye of ayak | 1/2,000 each | 1/1,000 |
| 4 | Avernic treads | 1/1,350 each | 1/450 |
| 5 | — | 1/810 each | 1/270 |
| 6 | Dom (pet) | 1/765 each, Dom at 1/1,000 | 1/255 |
| 7 | — | 1/720 each, Dom at 1/750 | 1/240 |
| 8 | — | 1/630 each, Dom at 1/500 | 1/210 |
| 9+ | — | 1/540 each, Dom at 1/250 | 1/180 |
- Delve
- 2
- Unlocks
- Mokhaiotl cloth
- Per-unique rate
- 1/2,500
- Overall unique chance
- 1/2,500
- Delve
- 3
- Unlocks
- Eye of ayak
- Per-unique rate
- 1/2,000 each
- Overall unique chance
- 1/1,000
- Delve
- 4
- Unlocks
- Avernic treads
- Per-unique rate
- 1/1,350 each
- Overall unique chance
- 1/450
- Delve
- 5
- Unlocks
- —
- Per-unique rate
- 1/810 each
- Overall unique chance
- 1/270
- Delve
- 6
- Unlocks
- Dom (pet)
- Per-unique rate
- 1/765 each, Dom at 1/1,000
- Overall unique chance
- 1/255
- Delve
- 7
- Unlocks
- —
- Per-unique rate
- 1/720 each, Dom at 1/750
- Overall unique chance
- 1/240
- Delve
- 8
- Unlocks
- —
- Per-unique rate
- 1/630 each, Dom at 1/500
- Overall unique chance
- 1/210
- Delve
- 9+
- Unlocks
- —
- Per-unique rate
- 1/540 each, Dom at 1/250
- Overall unique chance
- 1/180
The gap between delve 2 and delve 9 is roughly fourteen times better per delve. That is why 'farm delve 1 forever' is not a strategy — a mid-game account grinding shallow levels will not see uniques at a meaningful rate.
The common table works differently and catches people out. Every delve rolls it once, but quantities are scaled by a per-level multiplier applied to a delve-3 baseline: -0.5x at delve 1, -0.35x at delve 2, flat at delve 3, then rising to +0.2x past delve 8. So shallow delves actively reduce your resource quantities rather than simply not improving them.
| Delve | Tears at this level | Cumulative from a full descent |
|---|---|---|
| 1-2 | 0 | 0 |
| 3 | 50 | 50 |
| 4 | 60 | 110 |
| 5 | 70 | 180 |
| 6 | 80 | 260 |
| 7 | 90 | 350 |
| 8 | 100 | 450 |
| 9+ | 100 | 550+ |
- Delve
- 1-2
- Tears at this level
- 0
- Cumulative from a full descent
- 0
- Delve
- 3
- Tears at this level
- 50
- Cumulative from a full descent
- 50
- Delve
- 4
- Tears at this level
- 60
- Cumulative from a full descent
- 110
- Delve
- 5
- Tears at this level
- 70
- Cumulative from a full descent
- 180
- Delve
- 6
- Tears at this level
- 80
- Cumulative from a full descent
- 260
- Delve
- 7
- Tears at this level
- 90
- Cumulative from a full descent
- 350
- Delve
- 8
- Tears at this level
- 100
- Cumulative from a full descent
- 450
- Delve
- 9+
- Tears at this level
- 100
- Cumulative from a full descent
- 550+
One detail worth exploiting: if you carry an Eye of Ayak already charged with demon tears, every floor you clear silently adds 10 to 20 charges on top of the tears you are given.
Combat Achievements
Combat Achievements for this boss revolve around reaching specific delve depths and clearing levels under restrictions.
Because depth is voluntary, these tasks are plannable: measure your cost per level first, then target a specific depth with supplies built for it.
Ironman Notes
For an Ironman, the avernic treads and Eye of Ayak are untradeable-in-practice upgrades, which makes the delve a real target rather than a curiosity.
Because your depth is set by supplies, an iron's ceiling here is directly a Herblore and Farming ceiling. Build the supply chain first and the depth follows.
Shallow, repeatable runs are more valuable on an iron than occasional deep ones, because they are sustainable against your own supply production.
FAQ
How do delve levels work?
You descend through progressively harder levels and choose when to stop. Leaving preserves your progress, so depth is a decision rather than a pass/fail.
How deep should I go?
As deep as your supplies support with a margin for the exit. Measure your supply cost per level across a few runs and set your target from that.
Is this boss gear-gated?
Gear determines your depth rather than your access. Weaker setups can still farm shallow levels productively.
Can I do it in a team?
No — it is solo content.
Do I need a demonbane weapon?
Past delve 3, yes. The demonic shield phase has 500 shield health and can only be damaged by demonbane weapons — holy water excluded — and those attacks also reset the beam charge. Without one you cannot progress through the shield.
Melee or ranged?
Ranged, despite his crush weakness. His Defence is only 90 and drains to 60, which offsets his higher ranged defence bonus, and the mechanics punish standing in melee distance. Twisted bow is best given his 275 Magic; scorching bow is the budget pick, at the cost of about 20% more acid blood. Keep a crystal halberd for melee punishes.
Where does the difficulty actually jump?
Delve 3, delve 5 and delve 6. Delve 3 adds acid blood and the shield phase, delve 5 adds the car phase, and delve 6 raises the beam to 99 while introducing Car Slams. Between those, the increases are incremental.
Should I learn this or Yama first?
Either works — both subsidise your early deaths. The delve is more forgiving because you choose the difficulty level yourself, and delve 1 is comparable to Corrupted Gauntlet rather than to endgame content.
Related Guides
- Yama guide — the other recent endgame boss.
- Boss gear progression — building the setup depth requires.
- Bossing progression: easiest to hardest — where this sits.
- Combat Achievements progression — planning delve tasks.
- Prayer 1–99 — the Prayer levels this assumes.
- OSRS bosses index — every boss with its requirement.
Bottom Line
Doom of Mokhaiotl is a supply-management boss wearing an endgame costume. Gear buys depth, discipline keeps the loot, and an exit rule set before you enter is worth more than a stronger weapon.
The delve levels that matter are 3, 5 and 6, and the reward maths strongly favours depth: uniques go from 1/2,500 at delve 2 to 1/180 at delve 9, and shallow delves actively reduce your common-drop quantities. Farming delve 1 forever is not a plan.
Practical order of operations: get a demonbane weapon, learn to interrupt every beam charge, learn the earthen shield timing, then push depth. Your first twenty delves cost 75% less to reclaim, so use them on the mechanics rather than on safe clears.
Scaling, mechanics and unique rates were verified against the Old School RuneScape Wiki and its strategy page on 3 August 2026. Item prices and hourly profit are intentionally not quoted because they track live Grand Exchange data.
Need a trusted team? Bils Services
Enjoyed the guide?
Drop a like — it helps other Adventurers find the good stuff.
Community
Comments
Silence in the hall…
Be the first Adventurer to leave a mark.
Join the thread
Add a comment
Tips, drops, or “this carried my account” — keep it useful.
bilsservices · bils services · bilsservices.com

