


OSRS Mining Guide 1–99: Fastest XP and AFK Training
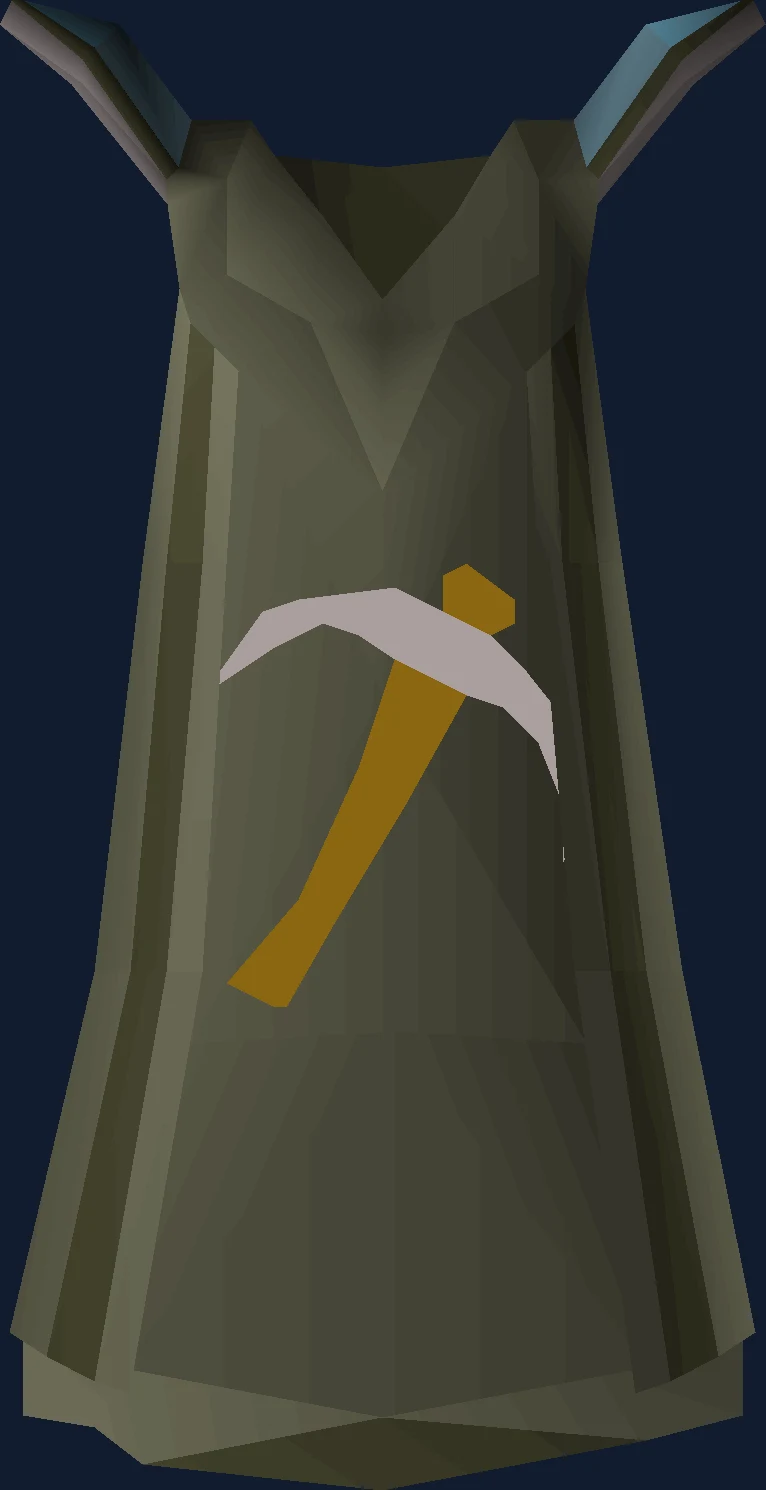
Mining 1–99 guide for fastest XP methods, AFK ore paths, Motherlode Mine, shooting stars, and when to prioritise pay-to-play tick methods.
Why Mining Is Worth 1–99
Mining is the gathering skill where the fastest method and the productive method point in opposite directions, and almost every argument about how to train it comes back to that. Three-tick granite is the quickest experience in the skill from level 45 onwards, and it hands you nothing you would keep: granite is dropped on the ground between mines, and the pickaxe most people use for it destroys a third of what it produces on purpose. The methods that fill a bank instead — pay-dirt at the Motherlode Mine, gem rocks under Shilo Village, runite out of the Blast Mine — are all slower. So the first question is not which method is best. It is whether you want a level or a stockpile, because Mining feeds Smithing and the ore you drop today is the bar you do not have later.
The second oddity is that your pickaxe does not make you better at mining. Tier only changes how often the game rolls to give you a rock — eight ticks apart with a bronze pickaxe, three with a rune one, and 2.83 on average with a dragon — while the chance on each of those rolls comes from your Mining level alone. A bronze pickaxe and a rune pickaxe succeed equally often per roll. Tick manipulation is built on exactly that gap: use swamp tar on a clean herb to set up a three-tick cycle, step to the next rock, and the roll timer is bypassed, which is why the wiki notes that a bronze pickaxe can be made to roll every three ticks instead of eight. It is also why the crystal pickaxe, the best tool in the skill, does nothing at all for the fastest method in the skill.
The rest is geography and admission fees, and they are decided before you mine anything. Granite comes from the Bandit Camp Quarry, which damages you with desert heat until you carry a specific counter for it, or from the Cape Conch mine, which does not, provided you have partly finished Troubled Tortugans. Volcanic Mine wants Bone Voyage and thirty numulites every time you walk in. Gem rocks are barely worth mining until the medium Karamja Diary opens the underground part of the Shilo Village mine. And the prospector kit is not a drop at all — it is a purchase, 180 golden nuggets from Prospector Percy, roughly ten hours of Motherlode Mine, for two and a half per cent.
Bils Services offers hand-done Mining training if you would rather outsource the grind. This article stays educational first — use the service link only if it fits your plan.
We have not put XP per hour or supply costs in this guide. Mining rates move whenever Jagex adjusts a method, and the cost of the mining supplies below moves with the Grand Exchange — a frozen number here would mislead you into budgeting the wrong bank. The OSRS Wiki carries live figures.
Quest XP and the Unlocks That Matter
| Unlock | What it gives | What it changes |
|---|---|---|
| The Dig Site | 15,300 Mining XP. Needs 10 Agility, 10 Herblore and 25 Thieving. | The largest early award by a wide margin and the anchor of the questing start. Nothing you mine in the first hour comes close. |
| Doric's Quest, Plague City, The Giant Dwarf, The Lost Tribe, Another Slice of H.A.M. | 1,300, 2,425, 2,500, 3,000 and 3,000 Mining XP. | With The Dig Site these six total 27,525 XP, which is level 1 to 37 without swinging a pickaxe, and they leave you able to wield an adamant pickaxe from your first real trip. |
| Varrock Diary task sets | Varrock armour: a 10% chance to mine two ores at once. | Tier 1 covers iron, tier 2 covers granite and tier 4 covers amethyst. It does nothing at the Motherlode Mine, the Blast Mine, the Volcanic Mine or on gem rocks, so it is worth knowing which method you are dressing for. |
| Medium Falador Diary | A Motherlode shortcut needing 54 Agility, landing you near the bank chest and reasonably near the hopper. | Turns Motherlode from a walk into a loop. The elite diary separately raises your chance of the higher-level ores, and the hard diary is why some players own a prospector helmet at all. |
| Medium Karamja Diary | The underground section of the Shilo Village mine, with many gem rocks and a bank deposit box. | Without it, gem rocks are not worth mining — the surface has far fewer rocks. With it, they are the fastest route to the rock golem on average. |
| Troubled Tortugans, started | The Cape Conch mine, which holds granite and sandstone with no desert heat. | Removes an entire equipment problem from the fastest method. 61 Agility shortens the trip there considerably; without it you go by rowboat. |
| Bone Voyage | Fossil Island, and therefore the Volcanic Mine. | This is the gate on the whole non-tick route above 70, so it is worth doing before you reach the level rather than after. |
| Perilous Moons, started | Calcified rocks in the Cam Torum Mine. | A low-attention band that also pays in blessed bone shards, which is Prayer experience rather than ore. |
| Song of the Elves | 40,000 Mining XP, Prifddinas, Zalcano and the crystal pickaxe. Needs 70 Mining and seven other level 70s. | A grandmaster quest you do for other reasons that happens to move your Mining bar and unlock a skilling boss fought entirely with Mining, Smithing and Runecraft. |
| A Kingdom Divided | Infernal shale in the Chasm of Fire, at 78 Mining. | Shale is untradeable until it is crushed with a hammer and chisel, and crushing gives no experience — the reason it is a profit method rather than an XP one. |
| 60 Sailing and Red Reef, started | Rubium rocks in the Charred Dungeon on Charred Island, from 48 Mining. | A low-attention option whose real requirement is the trip: aggressive red and black dragons sit between you and the rocks, so bring dragonfire protection or 37 Prayer for Protect from Magic. |
| The late quest lumps | Dragon Slayer II 60,000 at 68 Mining, Making Friends with My Arm 50,000 at 72, The Curse of Arrav 40,000 at 64, The Heart of Darkness 8,000 at 55, Enakhra's Lament 7,000, Between a Rock... 5,000 at 40, Fallen From Grace 5,000 at 53, Heroes' Quest 2,575 at 50, The Forsaken Tower 500. | Every quest that awards Mining XP adds up to 240,600, and most of it sits above level 60 where the levels are long. Clearing these is the cheapest chunk of the second half of the skill. |
- Unlock
- The Dig Site
- What it gives
- 15,300 Mining XP. Needs 10 Agility, 10 Herblore and 25 Thieving.
- What it changes
- The largest early award by a wide margin and the anchor of the questing start. Nothing you mine in the first hour comes close.
- Unlock
- Doric's Quest, Plague City, The Giant Dwarf, The Lost Tribe, Another Slice of H.A.M.
- What it gives
- 1,300, 2,425, 2,500, 3,000 and 3,000 Mining XP.
- What it changes
- With The Dig Site these six total 27,525 XP, which is level 1 to 37 without swinging a pickaxe, and they leave you able to wield an adamant pickaxe from your first real trip.
- Unlock
- Varrock Diary task sets
- What it gives
- Varrock armour: a 10% chance to mine two ores at once.
- What it changes
- Tier 1 covers iron, tier 2 covers granite and tier 4 covers amethyst. It does nothing at the Motherlode Mine, the Blast Mine, the Volcanic Mine or on gem rocks, so it is worth knowing which method you are dressing for.
- Unlock
- Medium Falador Diary
- What it gives
- A Motherlode shortcut needing 54 Agility, landing you near the bank chest and reasonably near the hopper.
- What it changes
- Turns Motherlode from a walk into a loop. The elite diary separately raises your chance of the higher-level ores, and the hard diary is why some players own a prospector helmet at all.
- Unlock
- Medium Karamja Diary
- What it gives
- The underground section of the Shilo Village mine, with many gem rocks and a bank deposit box.
- What it changes
- Without it, gem rocks are not worth mining — the surface has far fewer rocks. With it, they are the fastest route to the rock golem on average.
- Unlock
- Troubled Tortugans, started
- What it gives
- The Cape Conch mine, which holds granite and sandstone with no desert heat.
- What it changes
- Removes an entire equipment problem from the fastest method. 61 Agility shortens the trip there considerably; without it you go by rowboat.
- Unlock
- Bone Voyage
- What it gives
- Fossil Island, and therefore the Volcanic Mine.
- What it changes
- This is the gate on the whole non-tick route above 70, so it is worth doing before you reach the level rather than after.
- Unlock
- Perilous Moons, started
- What it gives
- Calcified rocks in the Cam Torum Mine.
- What it changes
- A low-attention band that also pays in blessed bone shards, which is Prayer experience rather than ore.
- Unlock
- Song of the Elves
- What it gives
- 40,000 Mining XP, Prifddinas, Zalcano and the crystal pickaxe. Needs 70 Mining and seven other level 70s.
- What it changes
- A grandmaster quest you do for other reasons that happens to move your Mining bar and unlock a skilling boss fought entirely with Mining, Smithing and Runecraft.
- Unlock
- A Kingdom Divided
- What it gives
- Infernal shale in the Chasm of Fire, at 78 Mining.
- What it changes
- Shale is untradeable until it is crushed with a hammer and chisel, and crushing gives no experience — the reason it is a profit method rather than an XP one.
- Unlock
- 60 Sailing and Red Reef, started
- What it gives
- Rubium rocks in the Charred Dungeon on Charred Island, from 48 Mining.
- What it changes
- A low-attention option whose real requirement is the trip: aggressive red and black dragons sit between you and the rocks, so bring dragonfire protection or 37 Prayer for Protect from Magic.
- Unlock
- The late quest lumps
- What it gives
- Dragon Slayer II 60,000 at 68 Mining, Making Friends with My Arm 50,000 at 72, The Curse of Arrav 40,000 at 64, The Heart of Darkness 8,000 at 55, Enakhra's Lament 7,000, Between a Rock... 5,000 at 40, Fallen From Grace 5,000 at 53, Heroes' Quest 2,575 at 50, The Forsaken Tower 500.
- What it changes
- Every quest that awards Mining XP adds up to 240,600, and most of it sits above level 60 where the levels are long. Clearing these is the cheapest chunk of the second half of the skill.
The six-quest opening is the one piece of Mining advice that is almost universal, and it is worth understanding why rather than just doing it. Copper and tin give 17.5 experience a rock and iron gives 35, so levels 1 to 37 are the band where each individual click is worth least. Handing that band to quests you would probably do anyway costs you nothing and skips the part of the skill nobody defends.
Enakhra's Lament deserves a separate mention because its reward is a route rather than a number. It gives the camulet, which teleports you to Enakhra's Temple, a short run north-east of the Bandit Camp Quarry — the standard way in for anyone three-ticking granite in the desert. Finish the hard Desert Diary and you can teleport to the quarry entrance directly instead.
One thing to check before you plan around a diary: the Varrock armour tiers and the Mining cape both grant an extra-ore chance, and neither works everywhere. The armour is blocked at four of the methods on this page outright, and the cape's bonus applies to ore up to adamantite, which means it stops mattering at runite and amethyst.
Mining 1–99 Level Path
| Levels | What to do | Why the band ends where it does |
|---|---|---|
| 1–37, in parallel | Doric's Quest, The Dig Site, Plague City, The Giant Dwarf, The Lost Tribe and Another Slice of H.A.M. | 27,525 experience between them, which lands exactly on 37. The requirements are low and the alternative is the slowest experience in the skill. |
| 1–15 | Copper or tin, anywhere. The Lumbridge Swamp site is the pick for its lack of players and aggressive monsters and its mix of both rock types. | 15 is the iron requirement, and iron more than doubles the experience per rock. There is no reason to spend a minute longer here. |
| 15–45 | Iron at a spot with three rocks in a triangle, dropped as you go. Shift-click dropping on, Varrock armour 1 or better if you have it. | Iron respawns in roughly five seconds and the triangle formation lets you work all three rocks without moving your feet, so the band runs on rhythm rather than travel. |
| 45, the fork | Decide whether you will tick manipulate. If yes, granite from here. If no, stay on iron. | 45 is the granite requirement and the single most consequential choice in the skill. Granite without tick manipulation is not worth mining; the wiki is blunt about that. |
| 45–99, tick route | Three-tick granite at Cape Conch or the Bandit Camp Quarry, cycling four rocks and dropping one or two pieces between mines. | It does not end. Granite is the fastest experience in the skill from 45 all the way to 99, which is why the route has no further branches. |
| 45–60, no-tick route | Keep mining iron at your triangle spot. | 60 opens the members' area of the Mining Guild, and that is a real change rather than a marginal one. |
| 60–70, no-tick route | Iron in the members' Mining Guild, dropping between mines. | Respawns in that area are halved, so you stop waiting for rocks entirely, and the area grants an invisible +7 to your Mining level. 70 is where Volcanic Mine becomes the recommendation. |
| 70–99, no-tick route | Volcanic Mine in a team of three to five, keeping the mine stable while you break the boulder. | The fastest thing available to a player who will not tick manipulate. Entry is 30 numulites a run or 3,000 once, and you will take heavy damage, so bring good food. |
| 30–99, low attention | Motherlode Mine: veins into pay-dirt, pay-dirt into the hopper, sack into the bank. | Never stops being available and never becomes the fastest. Unlock the upper level as soon as you can — its veins last 36 to 40 seconds against 23 to 27 on the lower level. |
| 40–99, profit | Gem rocks in the underground Shilo Village mine with a charged amulet of glory and a gem bag. | With tick manipulation these are comparable to granite and they pay; without it they are slow, and mainly for irons who want opals, jades and red topazes. |
| 41–99 and 48–99, low attention | Calcified rocks in Cam Torum, or rubium rocks in the Charred Dungeon. | Two bands that overlap everything above and compete on comfort rather than speed. Calcified rocks pay in blessed bone shards; rubium splinters stack, so you barely bank. |
| 60–99, very low attention | Crashed stars, whenever one is findable. | Fully available at 60 because the lowest star falls at tier 6. Each tier can be mined for seven minutes with no input at all, and a star lasts 42 to 63 minutes depending on its size. |
| 75–99, profit | Blast Mine, with dynamite, a chisel and a tinderbox. | 75 is where runite enters the ore pool, and runite is the point of the method. Below that the ores are not worth the dynamite. |
| 78–99, profit only | Infernal shale in the Chasm of Fire, crushed for oathplate armour. | Included for completeness rather than recommendation: without tick manipulation and Jim's wet cloth the experience is very low, and with them it is one of the most demanding methods in the game. |
| 92–99, the quiet end | Amethyst in the members' Mining Guild, with expert mining gloves. | 240 experience per crystal, the highest single figure in the skill, at close to the lowest click rate on this page. Varrock armour 4 works here; the Mining cape's extra-ore chance does not. |
- Levels
- 1–37, in parallel
- What to do
- Doric's Quest, The Dig Site, Plague City, The Giant Dwarf, The Lost Tribe and Another Slice of H.A.M.
- Why the band ends where it does
- 27,525 experience between them, which lands exactly on 37. The requirements are low and the alternative is the slowest experience in the skill.
- Levels
- 1–15
- What to do
- Copper or tin, anywhere. The Lumbridge Swamp site is the pick for its lack of players and aggressive monsters and its mix of both rock types.
- Why the band ends where it does
- 15 is the iron requirement, and iron more than doubles the experience per rock. There is no reason to spend a minute longer here.
- Levels
- 15–45
- What to do
- Iron at a spot with three rocks in a triangle, dropped as you go. Shift-click dropping on, Varrock armour 1 or better if you have it.
- Why the band ends where it does
- Iron respawns in roughly five seconds and the triangle formation lets you work all three rocks without moving your feet, so the band runs on rhythm rather than travel.
- Levels
- 45, the fork
- What to do
- Decide whether you will tick manipulate. If yes, granite from here. If no, stay on iron.
- Why the band ends where it does
- 45 is the granite requirement and the single most consequential choice in the skill. Granite without tick manipulation is not worth mining; the wiki is blunt about that.
- Levels
- 45–99, tick route
- What to do
- Three-tick granite at Cape Conch or the Bandit Camp Quarry, cycling four rocks and dropping one or two pieces between mines.
- Why the band ends where it does
- It does not end. Granite is the fastest experience in the skill from 45 all the way to 99, which is why the route has no further branches.
- Levels
- 45–60, no-tick route
- What to do
- Keep mining iron at your triangle spot.
- Why the band ends where it does
- 60 opens the members' area of the Mining Guild, and that is a real change rather than a marginal one.
- Levels
- 60–70, no-tick route
- What to do
- Iron in the members' Mining Guild, dropping between mines.
- Why the band ends where it does
- Respawns in that area are halved, so you stop waiting for rocks entirely, and the area grants an invisible +7 to your Mining level. 70 is where Volcanic Mine becomes the recommendation.
- Levels
- 70–99, no-tick route
- What to do
- Volcanic Mine in a team of three to five, keeping the mine stable while you break the boulder.
- Why the band ends where it does
- The fastest thing available to a player who will not tick manipulate. Entry is 30 numulites a run or 3,000 once, and you will take heavy damage, so bring good food.
- Levels
- 30–99, low attention
- What to do
- Motherlode Mine: veins into pay-dirt, pay-dirt into the hopper, sack into the bank.
- Why the band ends where it does
- Never stops being available and never becomes the fastest. Unlock the upper level as soon as you can — its veins last 36 to 40 seconds against 23 to 27 on the lower level.
- Levels
- 40–99, profit
- What to do
- Gem rocks in the underground Shilo Village mine with a charged amulet of glory and a gem bag.
- Why the band ends where it does
- With tick manipulation these are comparable to granite and they pay; without it they are slow, and mainly for irons who want opals, jades and red topazes.
- Levels
- 41–99 and 48–99, low attention
- What to do
- Calcified rocks in Cam Torum, or rubium rocks in the Charred Dungeon.
- Why the band ends where it does
- Two bands that overlap everything above and compete on comfort rather than speed. Calcified rocks pay in blessed bone shards; rubium splinters stack, so you barely bank.
- Levels
- 60–99, very low attention
- What to do
- Crashed stars, whenever one is findable.
- Why the band ends where it does
- Fully available at 60 because the lowest star falls at tier 6. Each tier can be mined for seven minutes with no input at all, and a star lasts 42 to 63 minutes depending on its size.
- Levels
- 75–99, profit
- What to do
- Blast Mine, with dynamite, a chisel and a tinderbox.
- Why the band ends where it does
- 75 is where runite enters the ore pool, and runite is the point of the method. Below that the ores are not worth the dynamite.
- Levels
- 78–99, profit only
- What to do
- Infernal shale in the Chasm of Fire, crushed for oathplate armour.
- Why the band ends where it does
- Included for completeness rather than recommendation: without tick manipulation and Jim's wet cloth the experience is very low, and with them it is one of the most demanding methods in the game.
- Levels
- 92–99, the quiet end
- What to do
- Amethyst in the members' Mining Guild, with expert mining gloves.
- Why the band ends where it does
- 240 experience per crystal, the highest single figure in the skill, at close to the lowest click rate on this page. Varrock armour 4 works here; the Mining cape's extra-ore chance does not.
Read the fork at 45 as the real structure of this table. Everything above it is agreed on by everyone: quests, then copper or tin for a few minutes, then iron at a triangle. Everything below it splits into a route built around hand speed and a route built around unlocks, and the two never rejoin. Players who drift between them tend to arrive at 70 with neither the Volcanic Mine access nor the three-tick muscle memory.
There is a cheap way to test which side you belong on before you commit fifty levels to it. Three-tick iron works at the Legends' Guild mine and the Isle of Souls mine, both of which have four iron rocks close together, using a herb and tar to start the cycle while you move between rocks. The wiki recommends it specifically as practice for granite, and iron is forgiving: a botched cycle costs you a rock rather than a session. If it feels impossible after an hour, take the iron-to-70 route and stop reading the granite section.
The low-attention bands are deliberately listed as overlapping rather than sequential, because that is how people actually use them. Motherlode from 30, calcified rocks from 41, rubium from 48, stars from 60 and amethyst from 92 are all things you drop into for an evening when the granite cycle is not happening, and none of them is a route to 99 that anyone would defend on speed.
- 1–15: Quest XP + copper/tin
- 15–30/40: Iron (drop or bank depending on goal)
- 30–72: optional coal/MLM progression
- 72–99: Motherlode Mine as the AFK backbone for most players
- Alternatives: stars, amethyst, granite/tick methods for speed accounts
Fastest XP Methods
The fastest route has three parts and only one of them is difficult. Clear the six quests for 27,525 experience and level 37. Mine iron at a triangle spot to 45. Then three-tick granite — "3t4g", three-tick four granite — at the Cape Conch mine or the Bandit Camp Quarry, for the remaining fifty-four levels.
The cycle itself is mechanical. Use swamp tar on a clean herb to start a three-tick action, then click a granite rock; timed correctly you skip the delay that normally comes from walking to a rock, and you get a roll every three ticks. Four rocks is the number that keeps the cycle fed. The pieces of granite go on the floor between mines rather than into a bank trip, which means starting the three-tick action, clicking the next rock, dropping the granite, and clicking the rock again — and doing it one or two pieces at a time rather than in batches, because a late click on the next rock is what breaks everything.
That late click costs more than it looks like it should, and this is the mechanic worth internalising. Moving to the next rock grants you a second roll if the first one failed, so a clean cycle is effectively rolling twice per rock. Click late and you forfeit the extra roll. It is a separate system from the extra-ore effects — Varrock armour and the like apply after a successful roll, not instead of one — so the two do not compensate for each other.
Equipment on this route is mostly about not wasting slots. An infernal pickaxe is strongly recommended if you can afford it: it combusts a third of the granite so you have less to drop, and it pays out passive Smithing experience while you do it. A full charge lasts around 960,000 Mining experience and is topped up with smouldering stones or dragon pickaxes. If you are not using one, the pickaxe tier genuinely does not matter here, because tick manipulation bypasses the roll timer that tier controls — which is also why the crystal pickaxe brings no benefit whatsoever to this specific method.
The last few percent comes from the client rather than the game. Shrink the window, use the resizable Modern layout, zoom in and turn the camera south so the trip from your inventory to the rocks is as short as possible, and turn data orbs off so they cannot eat a click aimed at the southernmost rock. Bird snares, box traps or rabbit snares work in place of tar and herbs for the three-tick action, and snares have the advantage of stacking in large quantities cheaply, so a mistimed cycle costs you almost nothing.
3-tick granite and other intensive methods are the speed ceiling for dedicated miners.
If you will not tick manipulate, chase “best non-tick” rates instead of copying a video you will not sustain.
Gemstone crab / seasonal methods can appear — verify live rates before rearranging your plan.
Cheapest / Budget Approach
Mining is close to free to train, and the interesting thing about its budget route is that the usual sacrifice — a worse tool — costs you less here than in any other gathering skill. Pickaxe tier changes only the interval between rolls, never the chance on a roll, so a cheap pickaxe makes rocks arrive less often rather than less reliably. The gap is real at eight ticks against three, but it is a speed penalty, not a competence one, and it disappears entirely the moment you tick manipulate.
Beyond the pickaxe the affordable route has almost no bill. The 27,525 experience from the opening quests costs time you were spending on quests anyway. Copper, tin and iron need nothing. The Mining Guild costs 60 Mining and a run from Falador. Crashed stars cost nothing but the scouting, and hand back stardust you can spend on a celestial ring — an item the wiki says is worth owning uncharged, because the invisible +4 to your level applies whether or not you feed it.
If you do tick manipulate, the consumables are the only real line item, and bird snares are the answer rather than logs: they stack in bulk for very little, so you can afford to fumble cycles while you learn. The genuinely expensive optional purchase is the infernal pickaxe, which needs 85 Smithing to make and is charged with smouldering stones or dragon pickaxes. It is a convenience — fewer pieces of granite to drop, some free Smithing experience — and skipping it slows you rather than stopping you.
The item that most often gets bought when it should not is the prospector kit. It is 180 nuggets for 2.5%, and the wiki's own verdict is that it does not pay for itself in time if your plan is 99 by the fastest methods. If you happen to be at Motherlode for the ore anyway, the nuggets accumulate for free and the maths changes; going to Motherlode specifically to buy an experience bonus for granite mining is the classic budget mistake in this skill.
Mining is usually GP-positive or near break-even if you bank ores.
Dropping iron for XP is “cheap” on GP but expensive on attention.
Crystal pickaxe / expert mining gloves are long-term investments — buy when they save real hours.
AFK & Lower-Intensity Options
Crashed stars are the lowest-attention Mining in the game, and by some distance. Each tier of a star can be mined for a full seven minutes without any input, and you only click again when it degrades a tier. A star lasts 42 to 63 minutes depending on how big it was when it landed, which means one find can cover most of an hour with a handful of clicks in total.
The catch is the finding, and it is a genuine catch rather than a footnote. Stars fall at a random spot from a fixed list, roughly one per world every ninety minutes, and some of those spots are in the Wilderness or otherwise unpleasant. An oak telescope or better in a house study gives you a window and a region to work from, and world-hopping or a clan that shares scouting fills the rest. You also need something planned for the moment a star runs out, because the method has hard stops built into it in a way that a rock face does not.
For uninterrupted low-attention hours, the Motherlode Mine is the honest default from 30 upwards. Veins last 36 to 40 seconds on the upper level, the sack collects the output while you work, and the only rhythm to keep is vein, hopper, vein. Calcified rocks in Cam Torum deplete after about seventy seconds, which is slower still, and they occasionally ooze water — mining a vein while that is happening raises your success rate, so the one thing worth watching for is the only thing you need to watch for.
Rubium rocks and amethyst round out the quiet end. Rubium splinters stack in your inventory, so you can ignore the bank chest on Charred Island entirely and just keep mining. Amethyst at 92 is the slowest experience worth naming and the least demanding: expert mining gloves save the crystals from depleting, which means longer stretches at the same spot.
Motherlode Mine is the default AFK 1–99 path for members.
Shooting stars are excellent AFK XP + stardust rewards when you find them.
Amethyst is slower XP but strong AFK profit at high level.
The Profitable Route
The profitable methods in Mining are a different list from the fast ones, and the divide is unusually clean. Nothing about three-ticking granite produces income — the granite goes on the floor, and an infernal pickaxe deliberately burns a third of it. Volcanic Mine pays in reward points rather than goods. If you want the skill to fund something, you have to choose against the experience.
The Blast Mine is the method built for this. From 75 you start pulling runite out of it, and runite is what makes the method worth the dynamite, the chisel and the tinderbox you have to bring. It is also unusual in giving you ores with requirements above your own level — the Blast Mine can hand you ore up to ten levels beyond what you could mine directly — and the dragon pickaxe special attack is worth carrying purely to nudge that roll upward, even though you do not otherwise need a pickaxe there.
Gem rocks are the other serious answer, and they are the one method where fast and profitable overlap: with tick manipulation they are comparable to granite while also producing gems. The prerequisites are specific — the medium Karamja Diary for the underground part of Shilo Village, a charged amulet of glory for the best rates, and a gem bag or the upgraded gem sack so you are not constantly banking. They are also, on average, the quickest route to the rock golem.
The Motherlode Mine occupies its own category, because its output is ores you did not choose plus nuggets you spend inside the mine. Crushed infernal shale is the high-effort extreme: untradeable until you crush it with a hammer and chisel, worth carrying only if you are willing to run Jim's wet cloth and tick manipulate, and worthless as an experience method otherwise. Current values for all of these live on the wiki, which recalculates them against the Grand Exchange rather than freezing them in an article.
Equipment Progression
| Item | Requirement | What it changes |
|---|---|---|
| Bronze and iron pickaxe | 1 Mining | 8 and 7 ticks between rolls. Identical success chance to everything below them. |
| Steel pickaxe | 6 Mining | 6 ticks between rolls. |
| Black and mithril pickaxe | 11 and 21 Mining | 5 ticks between rolls each. The black pickaxe is not sold and weighs almost nothing. |
| Adamant pickaxe | 31 Mining | 4 ticks between rolls. This is the tier the opening six quests put you at immediately. |
| Rune pickaxe | 41 Mining | 3 ticks between rolls. The gilded pickaxe is functionally the same tool. |
| Dragon pickaxe | 61 Mining, 60 Attack to wield | 3 ticks by default with a 1 in 6 chance of 2, so 2.83 on average. Its special attack raises your Mining level temporarily, which is the reason to carry one at the Blast Mine. |
| Infernal pickaxe | 61 Mining and 85 Smithing | Same 2.83-tick timing as a dragon pickaxe, plus a 1 in 3 chance to combust the ore for passive Smithing experience. A full charge covers about 960,000 Mining experience, topped up with smouldering stones or dragon pickaxes. |
| Crystal pickaxe | 71 Mining, 70 Attack, 50 Agility, Song of the Elves | 3 ticks with a 1 in 4 chance of 2, so 2.75 on average — the best tool in the skill, and specifically useless for three-tick granite, where the roll timer is bypassed anyway. |
| Prospector jacket, legs, helmet, boots | 60, 50, 40 and 30 golden nuggets | +0.8%, +0.6%, +0.4% and +0.2% Mining experience, plus a +0.5% set bonus: 2.5% for all four, at 180 nuggets and roughly ten hours of Motherlode Mine. |
| Varrock armour | Varrock Diary task sets | A 10% chance at two ores. Tier 1 for iron, tier 2 for granite, tier 4 for amethyst — and tier 4 doubles as a prospector jacket. Inert at Motherlode, Blast Mine, Volcanic Mine and gem rocks. |
| Celestial ring | Stardust from Shooting Stars | An invisible +4 to Mining even uncharged, which is why the wiki says to get one. Charged with stardust it adds a 10% extra-ore chance up to adamantite, and the boost never lets you mine above your real level. |
| Mining cape | 99 Mining | A 5% chance of an extra ore, on ore up to adamantite — so it does nothing at runite or amethyst. |
| Mining, superior and expert mining gloves | Unidentified minerals, traded with Belona at the Mining Guild Mineral Exchange | Each tier stops rocks from depleting: iron, silver, coal and gold at the base tier, mithril and adamantite at superior, sandstone, runite and amethyst at expert. The tiers stack downward, so the expert pair protects the low ores three times over. |
| Amulet of glory, gem bag, coal bag | Charged glory; the bags from Prospector Percy | The glory raises your chance of a random gem while mining and significantly improves gem rocks. The bags cut how often you stop to bank, which is most of what "efficient" means at Motherlode and Shilo Village. |
- Item
- Bronze and iron pickaxe
- Requirement
- 1 Mining
- What it changes
- 8 and 7 ticks between rolls. Identical success chance to everything below them.
- Item
- Steel pickaxe
- Requirement
- 6 Mining
- What it changes
- 6 ticks between rolls.
- Item
- Black and mithril pickaxe
- Requirement
- 11 and 21 Mining
- What it changes
- 5 ticks between rolls each. The black pickaxe is not sold and weighs almost nothing.
- Item
- Adamant pickaxe
- Requirement
- 31 Mining
- What it changes
- 4 ticks between rolls. This is the tier the opening six quests put you at immediately.
- Item
- Rune pickaxe
- Requirement
- 41 Mining
- What it changes
- 3 ticks between rolls. The gilded pickaxe is functionally the same tool.
- Item
- Dragon pickaxe
- Requirement
- 61 Mining, 60 Attack to wield
- What it changes
- 3 ticks by default with a 1 in 6 chance of 2, so 2.83 on average. Its special attack raises your Mining level temporarily, which is the reason to carry one at the Blast Mine.
- Item
- Infernal pickaxe
- Requirement
- 61 Mining and 85 Smithing
- What it changes
- Same 2.83-tick timing as a dragon pickaxe, plus a 1 in 3 chance to combust the ore for passive Smithing experience. A full charge covers about 960,000 Mining experience, topped up with smouldering stones or dragon pickaxes.
- Item
- Crystal pickaxe
- Requirement
- 71 Mining, 70 Attack, 50 Agility, Song of the Elves
- What it changes
- 3 ticks with a 1 in 4 chance of 2, so 2.75 on average — the best tool in the skill, and specifically useless for three-tick granite, where the roll timer is bypassed anyway.
- Item
- Prospector jacket, legs, helmet, boots
- Requirement
- 60, 50, 40 and 30 golden nuggets
- What it changes
- +0.8%, +0.6%, +0.4% and +0.2% Mining experience, plus a +0.5% set bonus: 2.5% for all four, at 180 nuggets and roughly ten hours of Motherlode Mine.
- Item
- Varrock armour
- Requirement
- Varrock Diary task sets
- What it changes
- A 10% chance at two ores. Tier 1 for iron, tier 2 for granite, tier 4 for amethyst — and tier 4 doubles as a prospector jacket. Inert at Motherlode, Blast Mine, Volcanic Mine and gem rocks.
- Item
- Celestial ring
- Requirement
- Stardust from Shooting Stars
- What it changes
- An invisible +4 to Mining even uncharged, which is why the wiki says to get one. Charged with stardust it adds a 10% extra-ore chance up to adamantite, and the boost never lets you mine above your real level.
- Item
- Mining cape
- Requirement
- 99 Mining
- What it changes
- A 5% chance of an extra ore, on ore up to adamantite — so it does nothing at runite or amethyst.
- Item
- Mining, superior and expert mining gloves
- Requirement
- Unidentified minerals, traded with Belona at the Mining Guild Mineral Exchange
- What it changes
- Each tier stops rocks from depleting: iron, silver, coal and gold at the base tier, mithril and adamantite at superior, sandstone, runite and amethyst at expert. The tiers stack downward, so the expert pair protects the low ores three times over.
- Item
- Amulet of glory, gem bag, coal bag
- Requirement
- Charged glory; the bags from Prospector Percy
- What it changes
- The glory raises your chance of a random gem while mining and significantly improves gem rocks. The bags cut how often you stop to bank, which is most of what "efficient" means at Motherlode and Shilo Village.
The prospector kit has an internal order that is easy to get wrong when you are buying pieces one at a time. Per nugget spent, the jacket is the best value, then the legs, then the helmet, then the boots — the boots cost 30 nuggets for 0.2%, which is the worst rate in the set. Buy in that order if you are buying at all. And if you own Varrock armour 4, it counts as a prospector jacket, so the 60 nuggets you were going to spend on the jacket should go somewhere else.
Desert heat is the piece of equipment logic unique to granite, and it only applies at the Bandit Camp Quarry. The counters are a Desert amulet 4, a Hitpoints cape with a regen bracelet, which simply outheals the damage, humidified waterskins, or the circlet of water. The circlet is the trap: it occupies your head slot, which costs you the prospector helmet's 0.4% and the set bonus of 0.5%. Cape Conch sidesteps all of this, which is most of why it is the recommended granite spot.
Read the pickaxe table as a table of intervals, not of power. Every tier from bronze to crystal has exactly the same chance of producing a rock on any given roll; what you are buying is a shorter wait between rolls. The Attack level listed against each pickaxe is only needed to wield it as a weapon — you can mine with a pickaxe you cannot equip, sitting in your inventory. And the entire column stops mattering if you tick manipulate, because the three-tick cycle overrides the interval the tier controls.
Where to Train
| Place | What it is for | The catch |
|---|---|---|
| Lumbridge Swamp mining site | Copper and tin, levels 1 to 15 | Chosen for what it lacks — players and aggressive monsters — rather than for what it has. You are leaving within the hour regardless. |
| Al Kharid Mine, Legends' Guild, Piscatoris, Lovakengj, Verdant Valley, Mount Karuulm and the rest | Iron at a three-rock triangle, levels 15 to 60 | Sixteen locations qualify, so pick on convenience. Al Kharid is the only free-to-play option and its scorpions bite at low combat levels. |
| Legends' Guild mine and Isle of Souls mine | Three-tick iron, as practice for granite | Both have four iron rocks close together, which is what the cycle needs. Only worth learning if granite is the plan. |
| Members' Mining Guild | Iron from 60, amethyst from 92, two runite rocks, unidentified minerals for the gloves | 60 Mining to enter, boostable. Halved respawns and an invisible +7 inside, plus a bank chest — the best-value area in the skill and the reason 60 is a milestone. |
| Bandit Camp Quarry | Granite, reached by camulet to Enakhra's Temple and a short run south-west | Desert heat damages you the whole time you are there, so one of the four counters is mandatory. The hard Desert Diary teleports you straight to the entrance instead. |
| Cape Conch mine | Granite and sandstone with no heat problem | Needs Troubled Tortugans started. With 61 Agility it is a fairy ring to cjq and two shortcuts; without it, a charter ship and a rowboat to the east of the island. |
| Necropolis mine | Granite beside the akp fairy ring | Only open if you have started Beneath Cursed Sands, and worth checking as an alternative before you commit to the desert. |
| Motherlode Mine | Pay-dirt, mixed ores and golden nuggets from 30 | You need a pickaxe just to clear the rockfalls into the deeper section, and the upper level is worth unlocking the moment it is available. |
| Underground Shilo Village mine | Gem rocks and the rock golem from 40 | Gated behind the medium Karamja Diary. The surface rocks are not a substitute — there are far fewer of them. |
| Cam Torum Mine | Calcified rocks, blessed bone shards and calcified deposits from 41 | Needs Perilous Moons started. A crushed calcified moth teleports you straight back, which is a neater loop than it sounds. |
| Charred Dungeon, Charred Island | Rubium rocks and stackable splinters from 48 | 60 Sailing, a rope found on the island, and aggressive red and black dragons between you and the rocks. |
| Volcanic Mine, Fossil Island | Team mining for ore fragments and reward points from 50, recommended from 70 | Bone Voyage, 30 numulites a visit or 3,000 for permanent access, good food for the heavy damage, and a team — three to five is optimal, world 323 is the official world and the Grouping interface has a clan chat for it. |
| Blast Mine, Lovakengj | Dynamite mining for ores, worthwhile from 75 | Dynamite, a chisel and a tinderbox, and enough run energy management that weight-reducing clothing and a ring of endurance are part of the method rather than an optimisation. |
| Prifddinas | Zalcano, fought with Mining, Smithing and Runecraft rather than weapons | Song of the Elves, and a choice at Rhiannon between resource rewards and increased experience. Loot needs a minimum contribution and at least five damage dealt to her stone armour. |
| Wherever a star lands | Crashed stars from 60, or from 10 if you find one already worn down | The spots are from a fixed list but the choice is not yours, and some of them are in the Wilderness. A house telescope narrows the search to a region and a window. |
- Place
- Lumbridge Swamp mining site
- What it is for
- Copper and tin, levels 1 to 15
- The catch
- Chosen for what it lacks — players and aggressive monsters — rather than for what it has. You are leaving within the hour regardless.
- Place
- Al Kharid Mine, Legends' Guild, Piscatoris, Lovakengj, Verdant Valley, Mount Karuulm and the rest
- What it is for
- Iron at a three-rock triangle, levels 15 to 60
- The catch
- Sixteen locations qualify, so pick on convenience. Al Kharid is the only free-to-play option and its scorpions bite at low combat levels.
- Place
- Legends' Guild mine and Isle of Souls mine
- What it is for
- Three-tick iron, as practice for granite
- The catch
- Both have four iron rocks close together, which is what the cycle needs. Only worth learning if granite is the plan.
- Place
- Members' Mining Guild
- What it is for
- Iron from 60, amethyst from 92, two runite rocks, unidentified minerals for the gloves
- The catch
- 60 Mining to enter, boostable. Halved respawns and an invisible +7 inside, plus a bank chest — the best-value area in the skill and the reason 60 is a milestone.
- Place
- Bandit Camp Quarry
- What it is for
- Granite, reached by camulet to Enakhra's Temple and a short run south-west
- The catch
- Desert heat damages you the whole time you are there, so one of the four counters is mandatory. The hard Desert Diary teleports you straight to the entrance instead.
- Place
- Cape Conch mine
- What it is for
- Granite and sandstone with no heat problem
- The catch
- Needs Troubled Tortugans started. With 61 Agility it is a fairy ring to cjq and two shortcuts; without it, a charter ship and a rowboat to the east of the island.
- Place
- Necropolis mine
- What it is for
- Granite beside the akp fairy ring
- The catch
- Only open if you have started Beneath Cursed Sands, and worth checking as an alternative before you commit to the desert.
- Place
- Motherlode Mine
- What it is for
- Pay-dirt, mixed ores and golden nuggets from 30
- The catch
- You need a pickaxe just to clear the rockfalls into the deeper section, and the upper level is worth unlocking the moment it is available.
- Place
- Underground Shilo Village mine
- What it is for
- Gem rocks and the rock golem from 40
- The catch
- Gated behind the medium Karamja Diary. The surface rocks are not a substitute — there are far fewer of them.
- Place
- Cam Torum Mine
- What it is for
- Calcified rocks, blessed bone shards and calcified deposits from 41
- The catch
- Needs Perilous Moons started. A crushed calcified moth teleports you straight back, which is a neater loop than it sounds.
- Place
- Charred Dungeon, Charred Island
- What it is for
- Rubium rocks and stackable splinters from 48
- The catch
- 60 Sailing, a rope found on the island, and aggressive red and black dragons between you and the rocks.
- Place
- Volcanic Mine, Fossil Island
- What it is for
- Team mining for ore fragments and reward points from 50, recommended from 70
- The catch
- Bone Voyage, 30 numulites a visit or 3,000 for permanent access, good food for the heavy damage, and a team — three to five is optimal, world 323 is the official world and the Grouping interface has a clan chat for it.
- Place
- Blast Mine, Lovakengj
- What it is for
- Dynamite mining for ores, worthwhile from 75
- The catch
- Dynamite, a chisel and a tinderbox, and enough run energy management that weight-reducing clothing and a ring of endurance are part of the method rather than an optimisation.
- Place
- Prifddinas
- What it is for
- Zalcano, fought with Mining, Smithing and Runecraft rather than weapons
- The catch
- Song of the Elves, and a choice at Rhiannon between resource rewards and increased experience. Loot needs a minimum contribution and at least five damage dealt to her stone armour.
- Place
- Wherever a star lands
- What it is for
- Crashed stars from 60, or from 10 if you find one already worn down
- The catch
- The spots are from a fixed list but the choice is not yours, and some of them are in the Wilderness. A house telescope narrows the search to a region and a window.
Which Route Should You Actually Pick?
Answer one question honestly and most of this guide collapses to a single route: are you actually going to tick manipulate for fifty-four levels? Not whether you can learn it — nearly anyone can — but whether you will sit in a three-tick cycle with four rocks and a drop between each mine, for the length of a 99. If the answer is yes, the route is quests, iron to 45, granite to 99, and you do not need to read about anything else. If it is no, the route is quests, iron to 70 with the Mining Guild from 60, then Volcanic Mine. Those are the two spines. Everything else on this page is a detour.
Test the answer rather than guessing it. Three-tick iron at the Legends' Guild mine or the Isle of Souls mine uses the same cycle on cheaper rocks, and it is explicitly recommended as practice before granite. An hour there tells you what fifty levels of granite would feel like, and it costs you almost nothing because iron is fast anyway at those levels.
The second question is what you want in your bank at the end, because Mining is the skill where that changes the method rather than the mood. If you need ore for Smithing, three-ticking granite gives you nothing and an infernal pickaxe actively destroys a third of what you mine. Motherlode gives you ores you did not pick, the Blast Mine gives you runite from 75, and gem rocks give you gems that are worth banking with a gem bag. Choosing the fast route and then regretting the empty bank is the most common version of this mistake; choosing the profitable route and then resenting the slower bar is the second.
The third question is which unlocks you already hold, and it decides more than people expect. Bone Voyage or no Bone Voyage is the difference between the non-tick route working at 70 and stalling on iron. Medium Karamja Diary or not is the difference between gem rocks being a real method and being a waste of an evening. Troubled Tortugans decides whether granite involves a head-slot compromise. Before you plan around a method, check the requirement line — the level is rarely the thing standing in your way.
If you cannot give the screen your attention, none of the above applies and the answer is a different shape. Crashed stars ask for a click every seven minutes; Motherlode asks for a rhythm; calcified rocks and rubium rocks ask for very little. Those are the methods to use for the hours you have rather than the hours you wish you had, and they are worth treating as a deliberate second track rather than as a failure to do granite.
Practical Tips That Actually Matter
- Prospectors outfit and Varrock armour quietly add up.
- Dragon pickaxe spec helps; crystal pick is the endgame tool for many.
- Decide if Mining is a 99 goal or a money skill — methods diverge hard.
Tools worth turning on:
- Shift-click dropping, switched on under Options before your first iron trip. Every fast method on this page assumes the ore never reaches a bank, and on mobile the equivalent is the tap-drop toggle.
- The resizable Modern client layout, shrunk small, zoomed in and pointed south. The wiki treats this as part of the granite method rather than as a preference, because it shortens the mouse travel between your inventory and the rocks on every single cycle.
- Data orbs turned off. They sit exactly where a misclick on the southernmost granite rock happens, and one misclick costs you the cycle.
- An oak telescope or better in a house study, if you intend to mine crashed stars. It gives you the window and the region a star will fall in, which converts scouting from luck into a plan.
- The Grouping interface's Volcanic Mine clan chat, and world 323. Solo Volcanic Mine is possible and slower; the whole method is balanced around a team of three to five, so finding one is the first step rather than a nicety.
- Tick counters and timing overlays, if your client's plugin list carries them. Nothing here requires one, but three-tick granite is a fixed cycle and a counter tells you whether your rhythm slipped rather than leaving you to infer it from a bad hour.
- A gem bag or gem sack, and a coal bag. Not client tools, but they do the same job as one: fewer interruptions to bank, which is most of the difference between a good and a bad hour at Shilo Village or Motherlode.
Common Mistakes
| The mistake | What it costs you |
|---|---|
| Grinding nuggets for the prospector kit as part of a 99 plan | 180 nuggets is about ten hours of Motherlode Mine for a 2.5% bonus, and the wiki's own conclusion is that it does not pay back if you are going to 99 by the fastest methods. Buy it for the master clue step and the hard Falador Diary helmet, or buy it with nuggets you accumulated while mining Motherlode for the ore — not as an investment in granite mining. |
| Buying a crystal pickaxe to three-tick granite | Tick manipulation bypasses the roll timer that pickaxe tier controls, so the crystal pickaxe's faster rolls do nothing at all on the fastest method in the skill. It is a genuine upgrade for Volcanic Mine and the other non-tick methods; on granite it is an expensive ornament. |
| Assuming a better pickaxe makes you mine more successfully | Tier only changes ticks between rolls. A bronze pickaxe and a rune pickaxe have exactly the same chance on each roll, because the chance comes from your Mining level. Players who upgrade expecting fewer failed swings have bought something they were not shopping for. |
| Wearing Varrock armour at Motherlode, the Blast Mine, Volcanic Mine or on gem rocks | The double-ore effect is disabled at all four. Worse, if you own Varrock armour 4 it already counts as a prospector jacket, so wearing both wastes 60 nuggets' worth of bonus you could have spent on the legs. |
| Dropping a full inventory of granite | The method wants one or two pieces on the floor between mines. Filling up and then dropping breaks the three-tick cycle for the length of the drop, and the wiki is explicit that dropping in small amounts is much more efficient than clearing an inventory. |
| Clicking the next granite rock a beat late | Moving between rocks grants you a second roll when the first one fails, so a tight cycle rolls twice per rock. Late clicks forfeit that. It is also a separate mechanic from extra-ore effects, which only trigger after a successful roll, so nothing compensates for the loss. |
| Banking iron ore because throwing it away feels wasteful | Banking iron slows the experience considerably and iron is not worth much. If you genuinely need the ore, the answer is the members' Mining Guild triangle beside the bank chest, or the Monastery Mine below 60 with an Ardougne cloak in and a Castle Wars teleport out — not a walk to a bank from a normal spot. |
| Arriving at the Bandit Camp Quarry with no answer to desert heat | The heat damages you continuously, so a session there without a Desert amulet 4, a Hitpoints cape and regen bracelet, humidified waterskins or a circlet of water is a session of eating. The circlet also costs you 0.9% of experience bonus by occupying your head slot, which is why Cape Conch is the recommended granite spot instead. |
| Treating experience methods and ore methods as the same list | Mining is the skill where they diverge hardest. The fastest method drops everything it produces and the recommended pickaxe for it combusts a third of your granite on purpose. If your reason for training Mining is Smithing, the fast route hands you a number and an empty bank. |
| Paying 30 numulites a run at Volcanic Mine indefinitely | There is a one-time 3,000-numulite fee for permanent access. If Volcanic Mine is your route from 70 to 99, you will pass that break-even and keep going, and the entry fee is the least interesting thing to be spending attention on. |
| Charging the celestial ring specifically to speed up granite | The wiki works this one through and the answer is no: efficient level-99 play burns charges faster than mining stars replaces them, so time spent gathering stardust purely to charge the ring does not improve your combined rate over simply mining granite with an uncharged ring. The uncharged +4 is still worth owning. |
- The mistake
- Grinding nuggets for the prospector kit as part of a 99 plan
- What it costs you
- 180 nuggets is about ten hours of Motherlode Mine for a 2.5% bonus, and the wiki's own conclusion is that it does not pay back if you are going to 99 by the fastest methods. Buy it for the master clue step and the hard Falador Diary helmet, or buy it with nuggets you accumulated while mining Motherlode for the ore — not as an investment in granite mining.
- The mistake
- Buying a crystal pickaxe to three-tick granite
- What it costs you
- Tick manipulation bypasses the roll timer that pickaxe tier controls, so the crystal pickaxe's faster rolls do nothing at all on the fastest method in the skill. It is a genuine upgrade for Volcanic Mine and the other non-tick methods; on granite it is an expensive ornament.
- The mistake
- Assuming a better pickaxe makes you mine more successfully
- What it costs you
- Tier only changes ticks between rolls. A bronze pickaxe and a rune pickaxe have exactly the same chance on each roll, because the chance comes from your Mining level. Players who upgrade expecting fewer failed swings have bought something they were not shopping for.
- The mistake
- Wearing Varrock armour at Motherlode, the Blast Mine, Volcanic Mine or on gem rocks
- What it costs you
- The double-ore effect is disabled at all four. Worse, if you own Varrock armour 4 it already counts as a prospector jacket, so wearing both wastes 60 nuggets' worth of bonus you could have spent on the legs.
- The mistake
- Dropping a full inventory of granite
- What it costs you
- The method wants one or two pieces on the floor between mines. Filling up and then dropping breaks the three-tick cycle for the length of the drop, and the wiki is explicit that dropping in small amounts is much more efficient than clearing an inventory.
- The mistake
- Clicking the next granite rock a beat late
- What it costs you
- Moving between rocks grants you a second roll when the first one fails, so a tight cycle rolls twice per rock. Late clicks forfeit that. It is also a separate mechanic from extra-ore effects, which only trigger after a successful roll, so nothing compensates for the loss.
- The mistake
- Banking iron ore because throwing it away feels wasteful
- What it costs you
- Banking iron slows the experience considerably and iron is not worth much. If you genuinely need the ore, the answer is the members' Mining Guild triangle beside the bank chest, or the Monastery Mine below 60 with an Ardougne cloak in and a Castle Wars teleport out — not a walk to a bank from a normal spot.
- The mistake
- Arriving at the Bandit Camp Quarry with no answer to desert heat
- What it costs you
- The heat damages you continuously, so a session there without a Desert amulet 4, a Hitpoints cape and regen bracelet, humidified waterskins or a circlet of water is a session of eating. The circlet also costs you 0.9% of experience bonus by occupying your head slot, which is why Cape Conch is the recommended granite spot instead.
- The mistake
- Treating experience methods and ore methods as the same list
- What it costs you
- Mining is the skill where they diverge hardest. The fastest method drops everything it produces and the recommended pickaxe for it combusts a third of your granite on purpose. If your reason for training Mining is Smithing, the fast route hands you a number and an empty bank.
- The mistake
- Paying 30 numulites a run at Volcanic Mine indefinitely
- What it costs you
- There is a one-time 3,000-numulite fee for permanent access. If Volcanic Mine is your route from 70 to 99, you will pass that break-even and keep going, and the entry fee is the least interesting thing to be spending attention on.
- The mistake
- Charging the celestial ring specifically to speed up granite
- What it costs you
- The wiki works this one through and the answer is no: efficient level-99 play burns charges faster than mining stars replaces them, so time spent gathering stardust purely to charge the ring does not improve your combined rate over simply mining granite with an uncharged ring. The uncharged +4 is still worth owning.
Ironman Notes
Mining is the supply line for Smithing, and on an account with no Grand Exchange that reverses the usual advice about dropping everything. The wiki's compromise is the members' Mining Guild: a triangle of iron rocks beside a bank chest, with respawns halved so the banking costs you steps rather than trips. Below 60, the Monastery Mine works with an Ardougne cloak teleport in and a ring of dueling out to Castle Wars.
Three things exist here largely for irons. Gem rocks are the only sensible source of opals, jades and red topazes, and they are worth mining slowly if that is what you need. Calcified rocks in Cam Torum pay in blessed bone shards, which turns a Mining session into Prayer progress. And the Camdozaal barronite rocks, minable from 14, hand out deposits that break down into the broken Imcando hammer, which is a permanent quality-of-life item rather than a stat.
Buy the mining gloves early. Each tier stops specific rocks from depleting — iron, silver, coal and gold at the base tier, mithril and adamantite at superior, sandstone, runite and amethyst at expert, with the protections stacking downward — and for an account mining to stock its own bank that is worth more than any experience bonus in the skill.
Mining on an Ironman is the front end of Smithing, so the question of whether to drop the ore answers itself differently than it does on a main. Powermining iron is still the fast route to a level, but the level is not the point if your account needs bars. The wiki's compromise is the members' Mining Guild, which has a triangle of iron rocks near a bank chest — halved respawns, and banking that costs you a few steps rather than a trip. Below 60, the Monastery Mine works with an Ardougne cloak teleport in and a ring of dueling out to Castle Wars.
Two methods exist mostly for irons. Gem rocks without tick manipulation are slow and still worth doing if you want opals, jades or red topazes, because there is no other reasonable source. Calcified rocks in Cam Torum hand you blessed bone shards alongside the Mining experience, which is Prayer training arriving from a skill that has no business providing it. Motherlode is the third: random ores at your level, plus nuggets that buy the coal bag, the gem bag and the prospector kit.
Worth knowing about the prospector kit: Prospector Percy is not the only shop that sells it. The Volcanic Mine reward shop will trade the set for 120,000 points, which matters if you were going to be at Volcanic Mine for the experience anyway. The set also sells back to Percy for 144 nuggets of the 180 you paid, so an iron who buys it for the master clue step and the hard Falador Diary helmet is not stuck with it.
The mining gloves are the Ironman purchase most people skip and should not. Bought from Belona at the Mining Guild Mineral Exchange with unidentified minerals from the members' area, each tier stops specific rocks from depleting: the base pair covers iron, silver, coal and gold, the superior pair adds mithril and adamantite, and the expert pair adds sandstone, runite and amethyst while stacking the protection on everything below. For an account that mines to supply itself rather than to level, that is more useful than any experience bonus in the skill.
When Paid Training Makes Sense
The case for buying Mining rests on what it is blocking. The cost of a gathering skill is hours rather than gold. Worth buying if those hours are the only thing between you and the content you actually log in for; not worth buying if you find the rhythm of it relaxing, which plenty of people genuinely do.
If you do order it, the thing to specify is the route as well as the level range: fastest XP and AFK are different jobs on this skill, with different timelines and different supply bills for the same 99. Our Mining page lists what we need from you, and the work is played rather than botted.
FAQ
Do I have to learn tick manipulation to get 99 Mining?
No, and the wiki spells out the alternative: mine iron to 70 instead of 45, then move to the Volcanic Mine. It is slower than three-tick granite and it is a real route rather than a consolation, with its own requirement in Bone Voyage and its own habits in team play and food. Granite without tick manipulation, on the other hand, is not worth doing — that is the combination to avoid.
Is the prospector kit worth 180 nuggets?
Not as an experience purchase if your plan is 99 by the fastest methods; the wiki says so directly. It is worth owning for two other reasons — a master clue step needs the set and a hard Falador Diary task needs the helmet — and it sells back to Prospector Percy for 144 nuggets, so the commitment is smaller than the sticker. If you are at Motherlode for ore anyway, the nuggets are free and the question goes away.
Which pickaxe should I actually be using?
The best one you can, with two caveats that matter more than the tier. If you are three-ticking, the tier is irrelevant because the cycle bypasses the roll timer — so an infernal pickaxe for the combustion and passive Smithing experience, or whatever you own. If you are not, the crystal pickaxe is the fastest tool in the skill and the dragon pickaxe is the practical one, and neither improves your chance of success on a roll.
Motherlode Mine or Volcanic Mine at high level?
Volcanic Mine is the faster of the two and the wiki recommends it over Motherlode once you are past the level for it. Motherlode stays the answer when you want something straightforward: veins, hopper, sack, with ores and nuggets coming out the other end and no team to organise. They are not competing for the same hour.
Cape Conch or the quarry for granite?
Cape Conch, if you have started Troubled Tortugans, because it has granite and sandstone with no desert heat and therefore no compromise in your head slot. The Bandit Camp Quarry is the fallback and it works fine with a Desert amulet 4 or a Hitpoints cape and regen bracelet. There is also a spot at the Necropolis mine by the akp fairy ring if you have started Beneath Cursed Sands.
What does the Mining Guild actually give me at 60?
Halved respawn times in the members' area, an invisible +7 to your Mining level while you are inside, a bank chest, two runite rocks, the only amethyst in the game, and unidentified minerals that buy the mining gloves from Belona. The 60 requirement can be boosted, but the area is worth having permanently rather than by potion.
How do I get the rock golem?
It can come from any Mining, with the chance depending on your level and how long each resource takes to gather. Gem rocks are the fastest route to it on average, which is a reason to consider the underground Shilo Village mine even if the experience is not what you are optimising for.
Why does the guide keep telling me to drop the ore?
Because experience is awarded when the rock produces, not when the ore reaches a bank, so the fastest possible Mining is mining with nothing in your inventory to slow you down. That is the whole logic of powermining, and it is also the reason an infernal pickaxe helps rather than hurts: burning the ore removes the drop you would otherwise have to make.
Final Takeaway
Mining resolves into two honest routes and a shelf of alternatives. Clear the six quests for 27,525 experience and level 37, mine iron at a triangle to 45, and then decide once: three-tick granite for the fastest 99 in the skill, or iron to 70 with the Mining Guild from 60 and then the Volcanic Mine. Both work. The failure mode is starting one and finishing neither, usually because Bone Voyage was never done and the granite cycle never stuck.
Everything else on this page is a second track rather than a competitor. Motherlode for the evenings you cannot concentrate, crashed stars for the ones where you can barely click, the Blast Mine from 75 and gem rocks from 40 for the hours you want the bank to grow instead of the bar. Keep the two tracks separate in your head and you will stop being disappointed by whichever one you are on. Current experience and profit figures for all of it are on the wiki, where they get recalculated rather than frozen.
The thing worth deciding before you start is what the level is for. If it is Smithing, mine for ore and accept the slower bar. If it is the cape, the granite cycle is what stands between you and it, and if fifty-four levels of three-ticking is not a thing you will do, our Mining training is the alternative — tell us whether you want the granite route or the iron-and-Volcanic-Mine route, because they finish in different times and leave different things in your bank.
Browse Mining training, more skill guides, or the full blog for related progression help.
XP rates and prices change — verify details on the Old School RuneScape Wiki. Level thresholds, unlocks, tool tiers and outfit bonuses on this page were checked against Mining training and Mining on 4 August 2026.
Need a trusted team? Bils Services
Enjoyed the guide?
Drop a like — it helps other Adventurers find the good stuff.
Community
Comments
Silence in the hall…
Be the first Adventurer to leave a mark.
Join the thread
Add a comment
Tips, drops, or “this carried my account” — keep it useful.
bilsservices · bils services · bilsservices.com

