


OSRS Dragon Slayer I Guide: Requirements and Walkthrough
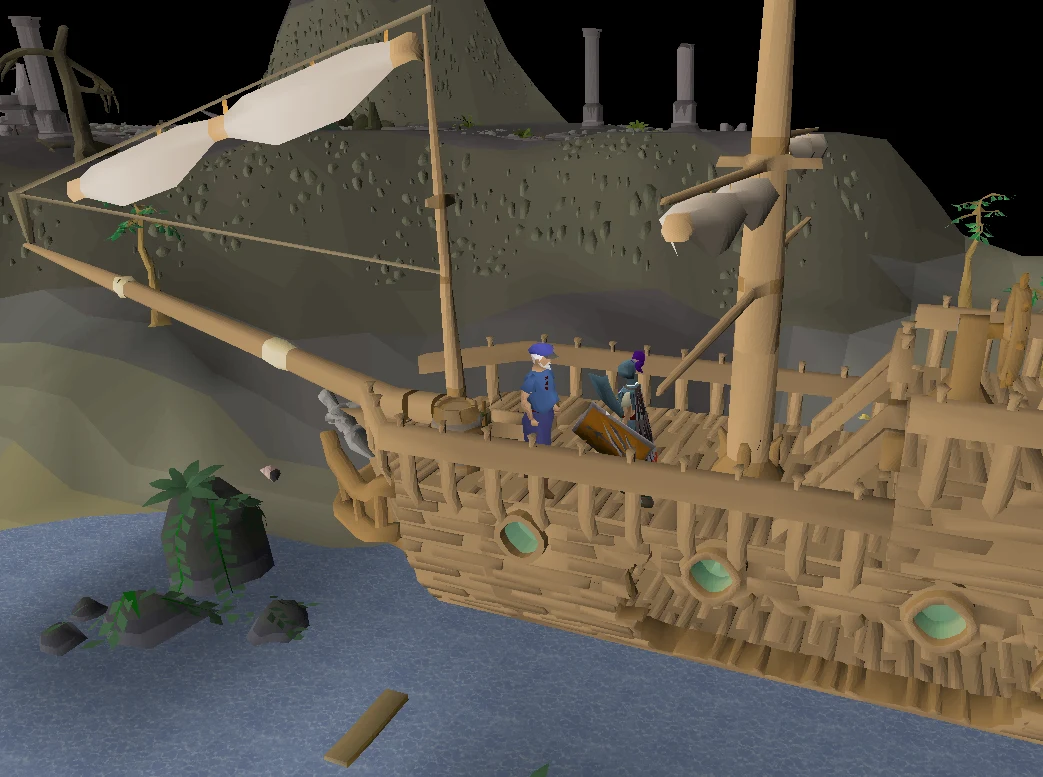
Dragon Slayer I is the Experienced Free-to-play classic that unlocks rune platebodies. Thirty-two quest points to start, Crandor logistics, and Elvarg with an anti-dragon shield.
Overview
Dragon Slayer I remains the Free-to-play skillcape-adjacent milestone: Experienced difficulty, Medium length, and the unlock for rune platebodies and green d'hide bodies.
You need 32 quest points to enter the Champions' Guild and start. After that it is map pieces, ship repair and a Crandor fight against Elvarg that still kills players who forget the anti-dragon shield.
Members should bring antifires for comfort, but the quest is designed to be completable on F2P rules. It also sits under Dragon Slayer II as story prerequisite.
| Detail | Value |
|---|---|
| Difficulty | Experienced |
| Length | Medium |
| Quest points | 2 |
| Quest number | 17 |
| Released | 23 September 2001 |
| Starting point | Talk to the Guildmaster in the Champions' Guild. |
| Members | Yes (unless noted otherwise on the Wiki) |
| Updated / fact checked | 2026-08-04 |
- Detail
- Difficulty
- Value
- Experienced
- Detail
- Length
- Value
- Medium
- Detail
- Quest points
- Value
- 2
- Detail
- Quest number
- Value
- 17
- Detail
- Released
- Value
- 23 September 2001
- Detail
- Starting point
- Value
- Talk to the Guildmaster in the Champions' Guild.
- Detail
- Members
- Value
- Yes (unless noted otherwise on the Wiki)
- Detail
- Updated / fact checked
- Value
- 2026-08-04
Requirements and Prerequisites
Skill and quest gates below are taken from the OSRS Wiki quest-details block for this quest. Boostability notes follow the Wiki markers — if a level is unboostable, train it before you start.
| Skill | Level | Boostable? |
|---|---|---|
| Quest | 32 | Yes |
- Skill
- Quest
- Level
- 32
- Boostable?
- Yes
Quest prerequisites (chains can be longer than this summary):
- The ability to defeat a level 83 dragon — verify chain on the Wiki
If the Wiki lists alternate item unlocks instead of a skill (for example a gas mask instead of Slayer), either option is valid.
Items to Bring
Pack required items before the first travel segment. Recommended gear is comfort, not a hard gate, unless a fight forces a specific style.
Required
- Unfired bowl (can be made with soft clay on a Potter's Wheel with Crafting 8 Crafting)
- Wizard's mind bomb (can be bought in the Rising Sun Inn in Falador or The Toad and Chicken in Burthorpe)
- Lobster pot (can be bought from any fishing shop)
- Silk (can be bought from Thessalia for 30 coins or the Al Kharid silk stall for 3 coins -- members can steal it from the Ardougne silk stall with Thieving 20 Thieving)
- Magic/ranged weapon as well as a law and air rune (to cast Telekinetic Grab if your Magic level is 33 or higher) or 10,000 coins
- Hammer
- Anti-dragon shield (obtainable during the quest)
- 90 steel nails (Members can buy these from the Sawmill operator north-east of Varrock, they can also be smithed at Smithing 34 Smithing using 6 steel bars by all players)
- 3 planks (only normal planks work)
- Free-to-play: Buy from Sawmill operator at the sawmill or pick up the spawns in the Graveyard of Shadows, level 19 Wilderness
- Member: Several other spawn locations or buy them at the sawmill
- 2,000 coins
Recommended
- Combat 45
- Magic 33(boostable), otherwise you will have to pay 10,000 coins.
- Prayer 37(not boostable) for Protect from Magic against Elvarg's magic attacks.
- (Members only) Antifire potions to significantly lower Elvarg's dragonfire attack damage
- Weight-reducing clothing (Members only) and stamina (Members only) or energy potions
- Fast travel to several locations
- Champions' Guild to start the quest, plus one additional trip - Chronicle, Varrock Teleport, or combat bracelet (Members only)
- Edgeville (2 trips) - Amulet of glory (Members only), Combat bracelet (Members only), fairy ring (Members only), Varrock Teleport, Canoe
- Melzar's Maze (1 trip) - Teleport to House (Members only) (Rimmington), Skills necklace to Crafting Guild (Members only)
- Ice Mountain (1 trip) - Combat bracelet to Edgeville Monastery (Members only), Amulet of glory to Edgeville (Members only), Falador Teleport
- Port Sarim (1 trip) - Amulet of glory to Draynor Village (Members only), Explorer's ring 2-4 (Members only), Teleport to House (Rimmington) (Members only), Skills necklace to Crafting Guild (Members only)
- Optional: Karamja Volcano for shortcut to return to the Elvarg fight - amulet of glory to Karamja (Members only)
Ultimate Ironmen should split heavy deliveries across trips where the Wiki notes that is allowed.
Where to Start
Starting location: Talk to the Guildmaster in the Champions' Guild.
Use the travel method that fits your unlocks — games necklace, fairy rings, spirit trees, carpets, or spellbook teleports — and keep a teleport out for deaths during combat sections.
Quest List blurb (paraphrased intent): Prove yourself a true champion. Kill the mighty dragon Elvarg of Crandor and earn the right to buy and wear the Rune platebody.
Walkthrough, Stage by Stage
Numbered steps follow the Wiki quick-guide order, rewritten for BILS readers. Dialogue choices that gate progress are called out inline. For puzzle tiles or randomised layouts, use the dedicated puzzles section and the Wiki map if a step still feels unclear.
- Beginning. Speak with the Guildmaster in the Champions' Guild. (dialogue: Can I have a quest?)
- Speak with Oziach in Edgeville. (dialogue: Can you sell me a rune platebody? → The Guildmaster of the Champions' Guild told me. → I thought you were going to give me a quest. → A dragon, that sounds like fun.)
- Speak with the Guildmaster in the Champions' Guild. Make sure you get the maze key by asking about Melzar's map piece, and also ask about Thalzar and Lozar's map pieces as well as where to find the right ship. (dialogue: I talked to Oziach... → How can I find the route to Crandor? → Where is Melzar's map piece? → Where is Thalzar's map piece? → Where is Lozar's map piece? → Where can I find the…
- If you don't already have an anti-dragon shield, speak to Duke Horacio on the of the Lumbridge Castle. (dialogue: I seek a shield that will protect me from dragonbreath. → Elvarg, the dragon of Crandor island! → Yes → So, are you going to give me the shield or not?)
- Map pieces. Map pieces can be obtained in any order.}}
- =Thalzar's map piece=. Speak with Oracle on Ice Mountain. Make sure you have talked to the Guildmaster about where the Thalzar's map piece is. (dialogue: I seek a piece of the map to the island of Crandor.)
- Enter the Dwarven mine and use silk, lobster pot, unfired bowl, (make sure to right click) wizard's mind bomb on the magic door at the north-east side of the mine. You should automatically enter the door.
- Enter the magic door, open the chest, and search the chest to receive a map piece. Press space or ensure that you finish the dialogue. (Re-entry doesn't require the re-use of the items if you make a mistake.)
- =Melzar's map piece=. Once you've gotten the Maze key from the Guildmaster head to Rimmington.
- Enter Melzar's Maze.
- Defeat the small zombie rat with a long tail to get the key and enter the north-western door and climb up the ladder.
- Defeat the ghost wearing a hood, a tube top, and no cape to get the key and enter the second door from the north on the eastern wall and climb up the ladder.
- Defeat the skeleton with the round shield to get the key and enter the westmost door on the southern wall and climb down the ladder 3 times.
- Defeat the zombies to get the key and enter the blue door.
- Defeat Melzar the Mad to get the key and enter the purple (magenta) door.
- Defeat the lesser demon to get the key and enter the green door. (Can be safespotted by luring him to the magenta door)
- Open and search the chest to receive a map piece.
- Obtaining a boat. Grab 3 wood planks, 90 steel nails, a hammer, and 2,000 coins out of the bank.
- Speak with Klarense in the southern docks of Port Sarim by the Void Outpost boat and pay him 2,000 coins. (dialogue: I'd like to buy her. → Yep, sounds good.)
- Go on board, climb down the ladder and repair the hole 3 times.
- Speak with Ned in Draynor Village with the map in your inventory. (dialogue: You're a sailor? Could you take me to Crandor?)
- The fight. : if you leave Elvarg's cave for any reason you will need planks and nails again to re-repair the ship; however, if you complete the optional task of opening the wall south of Elvarg's cave, you will gain access to the lair easily through the Karamja volcano dungeon and without the need to travel to Crandor again.
- Prepare for the fight. Make sure you have your Antifire potion and Anti-dragon shield with you.
- Return to the boat you previously repaired in Port Sarim. Board the ship and talk to Captain Ned. (dialogue: Yep, sounds good.)
- Climb on top of the volcano and enter the hole. (After the cutscene climb back out of the hole for a Karamja medium task.)
- (Optional) Before teleporting out, head south from Elvarg's cave and open the wall to unlock another Karamja medium task.
- Head south and kill Elvarg. Depending on your level, you may flinch Elvarg in the south-east corner of her cave for a long, but safe fight. You will automatically collect her head as proof of your victory.
- Finishing up. Speak with Oziach in Edgeville.
- Finish the closing dialogue — the quest is complete.
If a mid-quest fight sends you to your respawn, return with the same key items — several quests do not store progress for partially completed combat.
Puzzles and How They Work
Puzzle sections in modern quests are often randomised per account. The table below covers the puzzle types you should expect; exact tile solutions belong on the Wiki when they change per player.
| Puzzle | Type | How it works |
|---|---|---|
| Light / mirror / beam puzzles | Spatial | Rotate emitters until the beam hits the target; reset if you over-rotate |
| Agility / pathing sections | Movement | Fail-safe by banking food; some obstacles drain run energy only |
| Dialogue / logic gates | Conversation | Pick the options listed in the walkthrough — wrong branches usually loop safely |
| Combat puzzles | Fight | Correct prayer or attack style matters more than DPS |
- Puzzle
- Light / mirror / beam puzzles
- Type
- Spatial
- How it works
- Rotate emitters until the beam hits the target; reset if you over-rotate
- Puzzle
- Agility / pathing sections
- Type
- Movement
- How it works
- Fail-safe by banking food; some obstacles drain run energy only
- Puzzle
- Dialogue / logic gates
- Type
- Conversation
- How it works
- Pick the options listed in the walkthrough — wrong branches usually loop safely
- Puzzle
- Combat puzzles
- Type
- Fight
- How it works
- Correct prayer or attack style matters more than DPS
Skip this section emotionally if the quest is combat-only — still skim for any mid-quest door puzzles.
Boss Fights
Combat encounters listed on the Wiki quest-details block. Death usually means a run-back with lost unprotected items outside safe instances — check each fight before you commit expensive gear.
| Fight | Attacks with | Pray | What decides the fight |
|---|---|---|---|
| Zombie rats * | See fight notes | Match the attack style that works | Preparation and prayer switches |
| Ghosts * | See fight notes | Match the attack style that works | Preparation and prayer switches |
| Skeletons * | See fight notes | Match the attack style that works | Preparation and prayer switches |
| Zombies * | See fight notes | Match the attack style that works | Preparation and prayer switches |
| Melzar the Mad | See fight notes | Match the attack style that works | Preparation and prayer switches |
| Lesser demon | See fight notes | Match the attack style that works | Preparation and prayer switches |
| Wormbrain - optional | See fight notes | Match the attack style that works | Preparation and prayer switches |
| Elvarg | See fight notes | Match the attack style that works | Preparation and prayer switches |
- Fight
- Zombie rats *
- Attacks with
- See fight notes
- Pray
- Match the attack style that works
- What decides the fight
- Preparation and prayer switches
- Fight
- Ghosts *
- Attacks with
- See fight notes
- Pray
- Match the attack style that works
- What decides the fight
- Preparation and prayer switches
- Fight
- Skeletons *
- Attacks with
- See fight notes
- Pray
- Match the attack style that works
- What decides the fight
- Preparation and prayer switches
- Fight
- Zombies *
- Attacks with
- See fight notes
- Pray
- Match the attack style that works
- What decides the fight
- Preparation and prayer switches
- Fight
- Melzar the Mad
- Attacks with
- See fight notes
- Pray
- Match the attack style that works
- What decides the fight
- Preparation and prayer switches
- Fight
- Lesser demon
- Attacks with
- See fight notes
- Pray
- Match the attack style that works
- What decides the fight
- Preparation and prayer switches
- Fight
- Wormbrain - optional
- Attacks with
- See fight notes
- Pray
- Match the attack style that works
- What decides the fight
- Preparation and prayer switches
- Fight
- Elvarg
- Attacks with
- See fight notes
- Pray
- Match the attack style that works
- What decides the fight
- Preparation and prayer switches
Item-loss risk: standard death rules apply unless the quest instance is a safe minigame-style fight. Do not bring items you cannot afford to lose into dangerous multi-combat areas.
Rewards and Unlocks
Rewards below summarise the Wiki reward scroll. Experience amounts and unlock text can change with updates — re-check before you plan a grind around them.
| Reward | Detail |
|---|---|
| Quest points | 2 |
| Difficulty | Experienced |
| Length | Medium |
| Reward | Strength 18,650 Strength experience |
| Reward | Defence 18,650 Defence experience |
| Reward | The ability to be assigned dragons as a Slayer task (immediately after starting the quest) |
| Reward | The ability to use dragonfire protection (partial completion required) |
| Reward | The ability to equip a green d'hide body, rune platebody, and dragon platebody |
| Reward | The ability to hire the ghost of Cabin Boy Jenkins as a crewmate with Sailing 60. |
- Reward
- Quest points
- Detail
- 2
- Reward
- Difficulty
- Detail
- Experienced
- Reward
- Length
- Detail
- Medium
- Reward
- Reward
- Detail
- Strength 18,650 Strength experience
- Reward
- Reward
- Detail
- Defence 18,650 Defence experience
- Reward
- Reward
- Detail
- The ability to be assigned dragons as a Slayer task (immediately after starting the quest)
- Reward
- Reward
- Detail
- The ability to use dragonfire protection (partial completion required)
- Reward
- Reward
- Detail
- The ability to equip a green d'hide body, rune platebody, and dragon platebody
- Reward
- Reward
- Detail
- The ability to hire the ghost of Cabin Boy Jenkins as a crewmate with Sailing 60.
What it opens up
- Strength 18,650 Strength experience
- Defence 18,650 Defence experience
- The ability to be assigned dragons as a Slayer task (immediately after starting the quest)
- The ability to use dragonfire protection (partial completion required)
- The ability to equip a green d'hide body, rune platebody, and dragon platebody
- The ability to hire the ghost of Cabin Boy Jenkins as a crewmate with Sailing 60.
Fact checked 2026-08-04 against the OSRS Wiki quest page and quick guide.
Common Mistakes and Warnings
Elvarg deaths are almost always dragonfire disrespect.
- Fighting Elvarg without an anti-dragon shield.
- Starting without 32 quest points and bouncing at the Champions' Guild.
- Misplacing maze keys or map pieces and redoing Melzar segments.
- Under-bringing nails for the ship repair and walking Port Sarim twice.
- Showing up in melee-only denial without food for dragonfire chip.
- On members worlds, skipping antifire QOL that makes the fight trivial.
Ironman Notes
Craft the unfired bowl, gather silk and smith steel nails before the guild day.
F2P irons should overpack food; members irons should add antifire discipline.
Ask Guildmaster all follow-ups — skipped questions softlock later stages.
FAQ
What does Dragon Slayer I unlock?
Rune platebody and green d'hide body equip unlocks, plus Crandor access and DS2 prereq value.
Do I need 32 quest points?
Yes, to enter the Champions' Guild and start.
Is antifire required?
Not on F2P; strongly recommended for members.
How hard is Elvarg now?
Fair with the shield and food; brutal without the shield.
Is this required for Dragon Slayer II?
Yes.
Related Guides
Bottom Line
Get 32 QP, assemble the map the patient way, then fight Elvarg with the shield as non-negotiable.
Still one of the highest-impact Medium quests for account power.
Updated and fact checked 2026-08-04. Primary sources: OSRS Wiki — Dragon Slayer I and its quick guide. Requirements and rewards change with game updates.
Need a trusted team? Bils Services
Enjoyed the guide?
Drop a like — it helps other Adventurers find the good stuff.
Community
Comments
Silence in the hall…
Be the first Adventurer to leave a mark.
Join the thread
Add a comment
Tips, drops, or “this carried my account” — keep it useful.
bilsservices · bils services · bilsservices.com
