


OSRS Dragon Slayer II Guide: Requirements, Bosses and Rewards
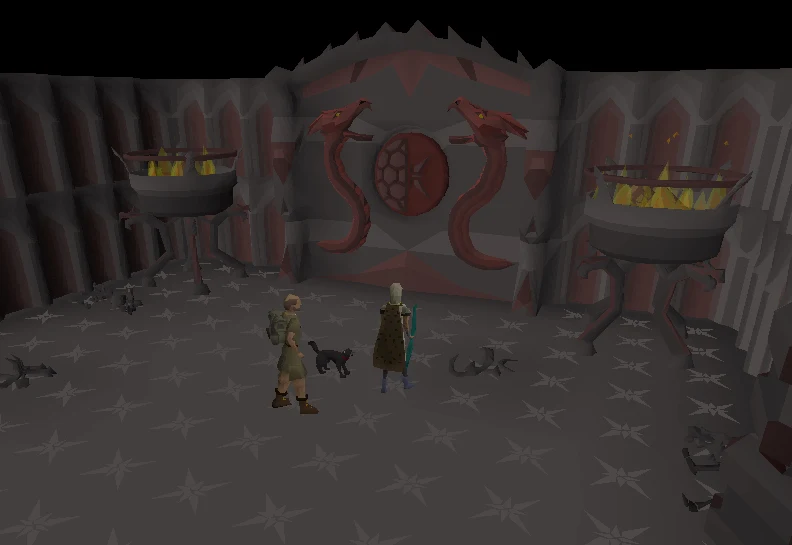
Dragon Slayer II is a Grandmaster quest with 200 quest points, nine skill requirements and three boss fights, ending with Galvek. Here are the exact requirements, the items you cannot skip, how each fight works, and what the quest unlocks.
Overview
Dragon Slayer II is the quest that gates a large amount of late-game content: Vorkath, adamant and rune dragons, super antifire, the Wrath Altar, Ava's assembler and the Myths' Guild all sit behind it. It is rated Grandmaster and Very Long, and it asks for 200 quest points before you can start.
The quest is really four things stitched together: an investigation across Karamja and Fossil Island, a hunt for four dragon key pieces, a war council, and a five-part assault that ends at Galvek. The combat is front-loaded into three fights — Robert the Strong, Vorkath and Galvek — and each one punishes a different mistake.
This guide covers what you need before you start, which items are genuinely mandatory, the shape of the walkthrough, how every puzzle works, and what each boss actually does to you.
| Detail | Value |
|---|---|
| Difficulty | Grandmaster |
| Length | Very Long |
| Quest points | 5 |
| Quest points needed to start | 200 |
| Released | 4 January 2018 |
| Boss fights | Robert the Strong, Vorkath, Galvek |
| Deathbank cost | 100,000 coins |
| Combat recommended | 100 (75+ Ranged) |
- Detail
- Difficulty
- Value
- Grandmaster
- Detail
- Length
- Value
- Very Long
- Detail
- Quest points
- Value
- 5
- Detail
- Quest points needed to start
- Value
- 200
- Detail
- Released
- Value
- 4 January 2018
- Detail
- Boss fights
- Value
- Robert the Strong, Vorkath, Galvek
- Detail
- Deathbank cost
- Value
- 100,000 coins
- Detail
- Combat recommended
- Value
- 100 (75+ Ranged)
Requirements and Prerequisites
None of the skill requirements can be boosted, and all of them are checked before you can start. Get them out of the way before you commit an evening to this.
| Skill | Level | Boostable? |
|---|---|---|
| Magic | 75 | No |
| Smithing | 70 | No |
| Mining | 68 | No |
| Crafting | 62 | No |
| Agility | 60 | No — higher is genuinely more comfortable |
| Thieving | 60 | No |
| Construction | 50 | No |
| Hitpoints | 50 | No |
| Quest points | 200 | — |
- Skill
- Magic
- Level
- 75
- Boostable?
- No
- Skill
- Smithing
- Level
- 70
- Boostable?
- No
- Skill
- Mining
- Level
- 68
- Boostable?
- No
- Skill
- Crafting
- Level
- 62
- Boostable?
- No
- Skill
- Agility
- Level
- 60
- Boostable?
- No — higher is genuinely more comfortable
- Skill
- Thieving
- Level
- 60
- Boostable?
- No
- Skill
- Construction
- Level
- 50
- Boostable?
- No
- Skill
- Hitpoints
- Level
- 50
- Boostable?
- No
- Skill
- Quest points
- Level
- 200
- Boostable?
- —
You also need these quests finished. Each of them has its own chain behind it, so check them well ahead of time:
- Legends' Quest
- Dragon Slayer I
- Dream Mentor
- Shilo Village
- Eadgar's Ruse
- A Tail of Two Cats
- Animal Magnetism
- Ghosts Ahoy
- Bone Voyage
- Client of Kourend and X Marks the Spot
- 100 Kudos at the Varrock Museum
- The pyre ship section of Barbarian Training started — without it you cannot enter the Ancient Cavern and will be washed ashore instead
That last one catches people out repeatedly. You do not need to finish Barbarian Training, but the pyre ship portion has to be started or the Ancient Cavern step is a dead end.
Items to Bring
This is a long item list and most of it genuinely gets used. Bring spare nails — the game will bend some of them while you build the rowboat.
Required
- Pickaxe, axe, hammer, saw, spade, machete
- 8 oak planks, 10 swamp paste, 12+ nails of any kind (bring extra)
- Catspeak amulet and ghostspeak amulet (Morytania legs 2 or better substitute for the ghostspeak amulet)
- Goutweed, astral rune and a pestle and mortar for the dream potion
- Cut dragonstone, 2 molten glass and a glassblowing pipe
- Seal of passage, or the elite Fremennik Diary completed
- Tinderbox
- Runes for three casts of Fire Wave or Fire Surge
Recommended
- Venom protection — a serpentine helm or anti-venom+ — for Vorkath and the laboratory spiders
- Super antifire is not available yet, so bring an anti-dragon shield or dragonfire ward plus extended antifire
- Stamina potions and weight-reducing gear; there is a lot of running
- High-healing food and prayer potions for the three fights
- Teleports to Musa Point, Fossil Island, Lunar Isle and Rellekka, plus spirit trees and gliders
- Insulated boots for the Ancient Cavern section
Robert the Strong, Vorkath and the Assault are all instanced with a 100,000 coin deathbank. Any unsafe death while items are sitting in that deathbank deletes them, so clear it between attempts.
Where to Start
Talk to Alec Kincade outside the Myths' Guild in the far south of Feldip Hills. He will send you to Dallas Jones, who is in Karamja Wines, Spirits, and Beers on Musa Point.
The fastest route to Alec is a Feldip Hills teleport or the gnome glider to Gandius, then run south. Bring a machete for the jungle either way.
Walkthrough, Stage by Stage
Twelve stages, roughly in order. The assault at the end is checkpointed part by part, but the Galvek fight itself is not.
- Alec Kincade sends you to Dallas Jones on Musa Point. Meet him inside Elvarg's old lair on Crandor and mine the covered wall to reveal an ancient laboratory. A level 100 Spawn bursts out of the strange egg — kill it.
- Travel to Fossil Island and search the House on the Hill for 24 map scraps, then assemble the map jigsaw. It identifies a location called Lithkren.
- Speak to Jardric, then build a rowboat on the north-west coast of the Mushroom Forest using 8 oak planks, 10 swamp paste, 12 nails, a saw and a hammer.
- Sail to Lithkren. You will find sealed ancient doors and Aivas' diary, which reveals that Robert the Strong was reincarnated as Bob the cat.
- Track Bob down using an enchanted catspeak amulet as a compass, then visit the Sphinx in Sophanem for permanent cat-speech, then the Oneiromancer on Lunar Isle.
- Brew a dream potion from a dream vial, water, goutweed and a ground astral rune. Light the brazier, enter Bob's dream and fight Robert the Strong.
- Collect four dragon key pieces. Karamja: a trap maze in the Kharazi Jungle temple. Morytania: census records, then Sarah, then Ava's locator orb and a dig in Mort Myre. Ungael: kill Vorkath and loot the stone chest for a key piece and the ancient key. Kourend: the Shayzien Crypts bust riddle in Camorra's tomb.
- Go to the Ancient Cavern, open the mithril door with the ancient key, cast Fire Wave or Fire Surge on three dragon-head structures to light the dragon forge, then forge the four pieces on the anvil.
- Open the ancient doors at Lithkren. A cutscene introduces Zorgoth and Galvek, and Dallas is killed.
- Recruit the kingdoms: King Roald, King Lathas (or King Thoros), Sir Amik Varze and Brundt, then attend the war council in Varrock.
- The Assault, in five checkpointed parts: defend Brundt's ship for four minutes, cross the shipwrecks, defend Varrock's ship, clear two waves of three dragons, and then face Galvek.
- Mourn Bob in Burthorpe and return to Alec Kincade to join the Myths' Guild. If you have already finished While Guthix Sleeps you get an extra Dragonkin cutscene.
In the Ungael laboratory, take both the key piece and the ancient key before you leave. Coming back is a long trip for a mistake that takes two seconds to avoid.
Puzzles and How They Work
None of these can be skipped, and two of them re-randomise if you get them wrong.
| Puzzle | Type | How it works |
|---|---|---|
| Fossil Island map | 24-tile jigsaw | Five tiles are fixed in place; the rest drag and rotate. If it looks correct but will not complete, you have a piece rotated wrongly — check the top-left first. |
| Karamjan Temple maze | Trap course plus combat | Spike traps are disabled with Thieving, man traps are leapt with Agility. Level 124 stone guardians sit in multicombat and each uses a single attack style, shown by its colour. |
| Locator orb dig | Search 1 of 24 spots | Ava's locator orb narrows down Mort Myre dig sites. Using the orb damages you, so keep food handy. |
| Camorra's tomb | Logic riddle | Place four busts — Robert, Camorra, Tristan and Aivas — on plinths using weapon and location clues. A wrong answer teleports you to the top floor and re-randomises the whole puzzle. |
| Ship defence | Timed minigame | Repair masts with a hammer, douse fires with a water container, plug leaks with swamp paste and heal rowers with revitalisation potion. If ship integrity reaches 0% the part restarts. |
- Puzzle
- Fossil Island map
- Type
- 24-tile jigsaw
- How it works
- Five tiles are fixed in place; the rest drag and rotate. If it looks correct but will not complete, you have a piece rotated wrongly — check the top-left first.
- Puzzle
- Karamjan Temple maze
- Type
- Trap course plus combat
- How it works
- Spike traps are disabled with Thieving, man traps are leapt with Agility. Level 124 stone guardians sit in multicombat and each uses a single attack style, shown by its colour.
- Puzzle
- Locator orb dig
- Type
- Search 1 of 24 spots
- How it works
- Ava's locator orb narrows down Mort Myre dig sites. Using the orb damages you, so keep food handy.
- Puzzle
- Camorra's tomb
- Type
- Logic riddle
- How it works
- Place four busts — Robert, Camorra, Tristan and Aivas — on plinths using weapon and location clues. A wrong answer teleports you to the top floor and re-randomises the whole puzzle.
- Puzzle
- Ship defence
- Type
- Timed minigame
- How it works
- Repair masts with a hammer, douse fires with a water container, plug leaks with swamp paste and heal rowers with revitalisation potion. If ship integrity reaches 0% the part restarts.
Boss Fights
Three fights, three completely different problems. The quest version of Vorkath wakes up and attacks the moment you arrive, so drink your potions before you enter.
| Fight | Attacks with | Pray | What decides the fight |
|---|---|---|---|
| Robert the Strong (level 224) | Ranged | Protect from Missiles | Every 25 seconds or so he says "See if you can hide from this!" and lightning strikes his bow. Get fully behind a pillar or take 50+ and lose your prayers. He is weak to crush, and he partly hits through prayer, so bring Ranged defence. |
| Vorkath (level 392, 460 hitpoints) | Melee, Ranged, Magic and dragonfire | Protect from Magic with antifire, or Protect from Missiles with a crossbow and anti-dragon shield | Six standard attacks then a special, alternating between two specials. The aerial fireball lands on your tile and must be dodged by two tiles — one tile still hits for 60+, and dragonfire protection does nothing against it. The Zombified Spawn special must be killed with Crumble Undead or it explodes for 30+. |
| Galvek (level 608, 1,200 hitpoints, four phases) | One element per phase | Protect from Magic in phase 1, then Protect from Missiles from phase 2 onward | Phase 1 fire traps hit a 3x3 for up to your max hitpoints. Phase 2 hurricanes drain stats and run energy. Phase 3's tsunami sweeps the ship and must be dodged through a one-tile gap. Phase 4's rock projectiles entomb you — step one tile. Fireballs hit for up to 115 throughout and ignore dragonfire protection. Turn off Auto Retaliate. |
- Fight
- Robert the Strong (level 224)
- Attacks with
- Ranged
- Pray
- Protect from Missiles
- What decides the fight
- Every 25 seconds or so he says "See if you can hide from this!" and lightning strikes his bow. Get fully behind a pillar or take 50+ and lose your prayers. He is weak to crush, and he partly hits through prayer, so bring Ranged defence.
- Fight
- Vorkath (level 392, 460 hitpoints)
- Attacks with
- Melee, Ranged, Magic and dragonfire
- Pray
- Protect from Magic with antifire, or Protect from Missiles with a crossbow and anti-dragon shield
- What decides the fight
- Six standard attacks then a special, alternating between two specials. The aerial fireball lands on your tile and must be dodged by two tiles — one tile still hits for 60+, and dragonfire protection does nothing against it. The Zombified Spawn special must be killed with Crumble Undead or it explodes for 30+.
- Fight
- Galvek (level 608, 1,200 hitpoints, four phases)
- Attacks with
- One element per phase
- Pray
- Protect from Magic in phase 1, then Protect from Missiles from phase 2 onward
- What decides the fight
- Phase 1 fire traps hit a 3x3 for up to your max hitpoints. Phase 2 hurricanes drain stats and run energy. Phase 3's tsunami sweeps the ship and must be dodged through a one-tile gap. Phase 4's rock projectiles entomb you — step one tile. Fireballs hit for up to 115 throughout and ignore dragonfire protection. Turn off Auto Retaliate.
Galvek has no checkpoints. If you die you restart the whole fight, though the earlier Assault parts stay done. Both Galvek and Vorkath are weak to stab and Ranged.
Rewards and Unlocks
The experience rewards were raised substantially in the 30 November 2022 poll update, so older guides quoting 25,000 Smithing are out of date.
| Reward | Detail |
|---|---|
| Quest points | 5 |
| Smithing | 80,000 XP |
| Mining | 60,000 XP |
| Agility | 50,000 XP |
| Thieving | 50,000 XP |
| Ellen's lamps | 4 x 25,000 XP in Magic, Ranged, Strength, Attack, Defence or Hitpoints |
| Ava's assembler | Vorkath's head plus 75 mithril arrows and 4,999 coins, or an accumulator |
| Locator orb | Kept as a reusable item |
- Reward
- Quest points
- Detail
- 5
- Reward
- Smithing
- Detail
- 80,000 XP
- Reward
- Mining
- Detail
- 60,000 XP
- Reward
- Agility
- Detail
- 50,000 XP
- Reward
- Thieving
- Detail
- 50,000 XP
- Reward
- Ellen's lamps
- Detail
- 4 x 25,000 XP in Magic, Ranged, Strength, Attack, Defence or Hitpoints
- Reward
- Ava's assembler
- Detail
- Vorkath's head plus 75 mithril arrows and 4,999 coins, or an accumulator
- Reward
- Locator orb
- Detail
- Kept as a reusable item
What it opens up
- Vorkath as a repeatable boss, in a stronger post-quest form
- Adamant and rune dragons in the Lithkren Vault
- Super antifire potions, made via Primula
- The Wrath Altar for wrath runes
- Myths' Guild access, the mythical cape shop and a pettable dog
- The Fountain of Uhld for recharging dragonstone jewellery, and the Pool of Dreams for refighting Galvek
- Reforging a dragon platebody and kiteshield, and ferocious gloves from hydra leather
- Speaking to cats without an amulet, and a digsite pendant teleport to Lithkren
Common Mistakes and Warnings
Almost every avoidable failure here comes from the instanced fights and the deathbank.
- Leaving items in the deathbank between attempts. An unsafe death deletes whatever is sitting in it. Reclaim from the Item Chest by the brazier or from Torfinn before you try again.
- Entering the quest Vorkath fight unpotted. He is awake and attacking immediately, unlike the post-quest version.
- Standing one tile from Vorkath's aerial fireball. You need two tiles of separation; one tile still hits for 60+.
- Not starting the pyre ship part of Barbarian Training. Without it the Ancient Cavern step cannot be completed and you get washed ashore.
- Forgetting the ancient key in the Ungael laboratory. Grab it at the same time as the key piece.
- Leaving Auto Retaliate on for Galvek. Phases 3 and 4 both require you to move on a specific tick; retaliating anchors you in place.
- Guessing at Camorra's busts. A wrong placement re-randomises the puzzle, so read the weapon and location clues properly the first time.
- Arriving without venom protection. Vorkath's green dragonfire and the laboratory spiders both envenom you.
FAQ
Do I need 200 quest points before I can start Dragon Slayer II?
Yes, and it is checked at the start rather than partway through. The required quest list gets you most of the way there on its own, but check your total before you begin gathering items.
Can any of the skill requirements be boosted?
No. All nine are listed as unboostable and all are checked before the quest will start.
Is Vorkath in the quest the same as the one people farm afterwards?
It is a weaker version, but it attacks the instant you enter rather than waiting to be woken. The post-quest Vorkath you farm for money is stronger and can be started on your terms.
How much does dying cost?
The instanced fights use a 100,000 coin deathbank. The real risk is not the fee — it is that a second unsafe death deletes anything still sitting in the deathbank from the first one.
What is the single hardest part?
Galvek, because it has no checkpoints and four phases with different dodge patterns. Most players who fail the quest fail there rather than at Robert or Vorkath.
Is Dragon Slayer II worth doing before Song of the Elves?
They unlock different things and neither blocks the other. Dragon Slayer II is usually done first because Vorkath is a reliable money maker and super antifire helps everywhere dragons appear.
Related Guides
Bottom Line
Dragon Slayer II is a gear-check and a mechanics-check rather than a grind. The skill requirements are all unboostable, so the real preparation is levels and the Barbarian Training pyre ship, not supplies.
If you get there and stall, it will be on Galvek. Learn the four phase patterns in the Pool of Dreams afterwards if you want to refight him, and treat the tsunami gap and the phase 4 rocks as movement puzzles rather than damage races.
If the quest is blocking Vorkath money or rune dragons and you would rather not spend the evening on it, our quest service is hand-completed by the BILS team.
Quest requirements and reward experience change with updates. Verify current details on the Old School RuneScape Wiki.
Need a trusted team? Bils Services
Enjoyed the guide?
Drop a like — it helps other Adventurers find the good stuff.
Community
Comments
Silence in the hall…
Be the first Adventurer to leave a mark.
Join the thread
Add a comment
Tips, drops, or “this carried my account” — keep it useful.
bilsservices · bils services · bilsservices.com

