


OSRS Monkey Madness II Guide: Requirements and Full Walkthrough
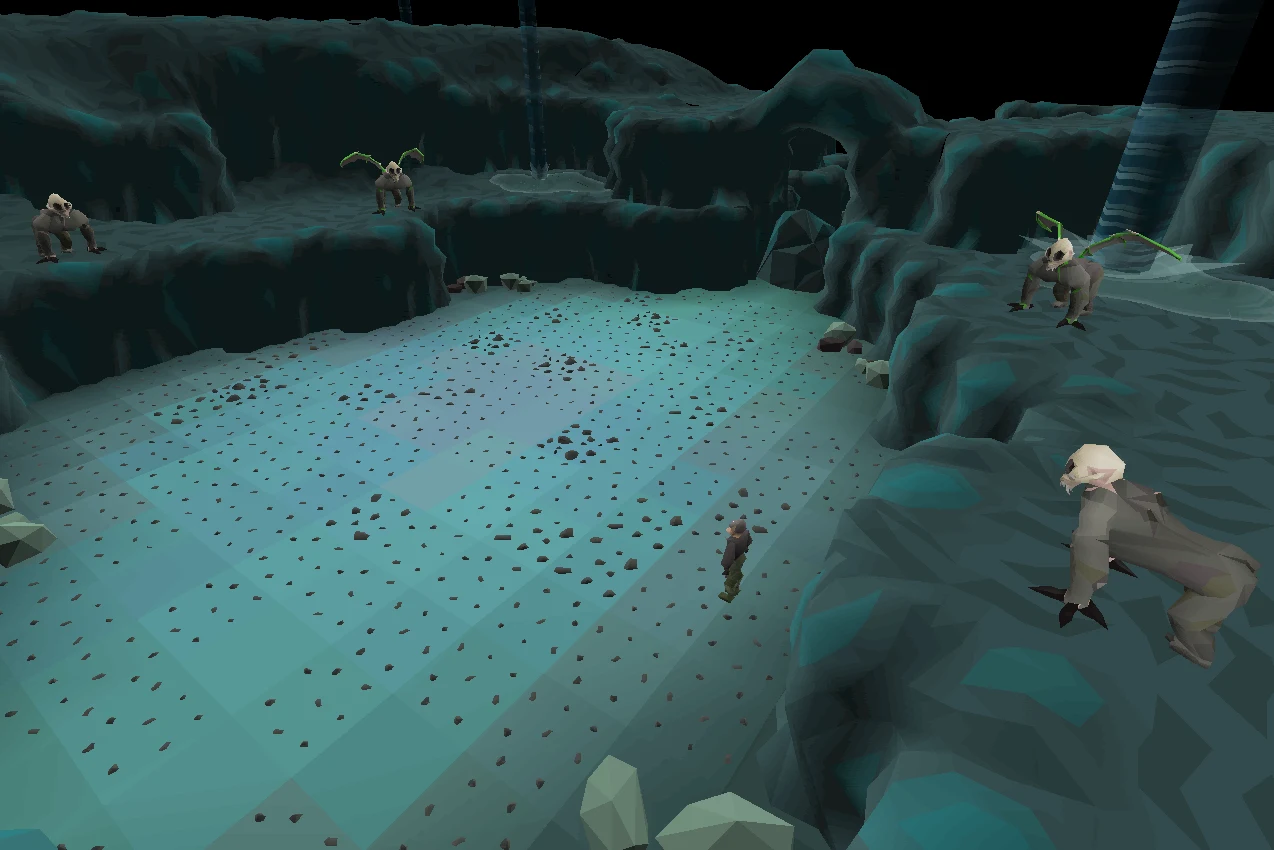
Monkey Madness II needs 69 Slayer and five other unboostable levels, and it ends with a three-phase Glough fight that resets completely on death. Here are the requirements, the Kruk's Dungeon routes, every fight and what it unlocks.
Overview
Monkey Madness II was the first quest made specifically for Old School RuneScape and the first to be classified Grandmaster. It unlocks demonic gorillas, the heavy ballista, the royal seed pod and a maniacal monkey hunting area, plus 240,000 experience across four skills.
The quest is a long infiltration: decrypt a note, follow a trail to Ape Atoll, get through Kruk's Dungeon, break an alliance by winning two deathmatches, sabotage an airship, and then fight your way through the Crash Site Cavern to Glough.
Two things define the difficulty. Kruk's Dungeon has a randomised correct path that you find by trial and error, and the Glough fight resets to phase one on any death, teleport or exit. Everything else is manageable with normal preparation.
| Detail | Value |
|---|---|
| Difficulty | Grandmaster |
| Length | Very Long |
| Quest points | 4 |
| Quest number | 128 |
| Released | 6 May 2016 |
| Boss fights | Kruk, Kob, Keef, demonic gorillas, Glough |
| Death handling | Instanced with a grave outside, not a deathbank |
| Combat recommended | 90 |
- Detail
- Difficulty
- Value
- Grandmaster
- Detail
- Length
- Value
- Very Long
- Detail
- Quest points
- Value
- 4
- Detail
- Quest number
- Value
- 128
- Detail
- Released
- Value
- 6 May 2016
- Detail
- Boss fights
- Value
- Kruk, Kob, Keef, demonic gorillas, Glough
- Detail
- Death handling
- Value
- Instanced with a grave outside, not a deathbank
- Detail
- Combat recommended
- Value
- 90
Requirements and Prerequisites
Six skill requirements, all unboostable and all checked before you start. The 69 Slayer is the usual blocker.
| Skill | Level | Boostable? |
|---|---|---|
| Slayer | 69 | No |
| Crafting | 70 | No |
| Hunter | 60 | No |
| Firemaking | 60 | No — needed for the Gnome Stronghold route |
| Agility | 55 | No — higher is genuinely easier |
| Thieving | 55 | No |
- Skill
- Slayer
- Level
- 69
- Boostable?
- No
- Skill
- Crafting
- Level
- 70
- Boostable?
- No
- Skill
- Hunter
- Level
- 60
- Boostable?
- No
- Skill
- Firemaking
- Level
- 60
- Boostable?
- No — needed for the Gnome Stronghold route
- Skill
- Agility
- Level
- 55
- Boostable?
- No — higher is genuinely easier
- Skill
- Thieving
- Level
- 55
- Boostable?
- No
The direct quest prerequisites:
- Enlightened Journey — the balloon route to the Gnome Stronghold must be unlocked before you can start
- The Eyes of Glouphrie
- Recipe for Disaster – Freeing King Awowogei
- Monkey Madness I and The Grand Tree
- Tree Gnome Village, Troll Stronghold, Death Plateau
- Watchtower
You must have accepted Daero's training during Monkey Madness I to claim the two 50,000 XP lamps from Duke afterwards. If you skipped that dialogue, the lamps are not available.
Items to Bring
Short list by Grandmaster standards, but the greegree requirement catches people out.
Required
- A lemon, grapes and a pestle and mortar for the invisible-ink note
- M'speak amulet and a monkey talisman (the talisman is obtainable during the quest)
- A ninja monkey greegree, small or medium
- The Translation book from The Grand Tree — King Narnode will replace it if you lost yours
- Logs, a light source, a hammer and a chisel (the last two are obtainable in-quest)
- A pickaxe and a slash weapon for webs if you take the tanking route through Kruk's Dungeon
Recommended
- A Wilderness sword, which slashes webs at a 100% success rate
- Magic logs to balloon back to the Gnome Stronghold
- Monkfish or better, plus prayer potions
- Antidote+ or a serpentine helm — Ape Atoll poisons freely
- Graceful or other weight-reducing gear, and stamina potions
- Two forms of combat for the demonic gorillas, since they pray against a single style
- A one-click emergency teleport
Your greegree is wrenched out of your hands when you enter Kruk's Dungeon, and it drops to the floor if your inventory is full. Leave a free slot.
Where to Start
Talk to King Narnode Shareen in the Grand Tree. The quest opens with searching Glough's house nearby, so you do not need to travel far to begin.
You will need to fly the balloon to Entrana partway through, and all weapons and armour must be banked for that trip. Plan a bank visit before it rather than discovering it at the balloon.
Walkthrough, Stage by Stage
Fifteen stages. The middle sections move between Ape Atoll, the Troll Stronghold and Gu'Tanoth.
- Search Glough's house and investigate the tree branch for a handkerchief, then speak to Anita.
- Return to the upper level of Glough's house for the gnome statue switch, the book of spyology, a brush and a mysterious note.
- Decrypt the note: lemon juice through the pestle and mortar, held over candles, then grape juice on the brush and brush the note. Translate it with the Translation book and Anita.
- You learn Assistant Le Smith helped Glough escape. Speak to Assistant Lori, then fly the balloon to Entrana — banking all weapons and armour — and speak to Auguste.
- On Ape Atoll, speak to Garkor then Awowogei, who will only talk to Kruk. Track Kruk from the monkey archers' hill to a hidden trapdoor.
- Traverse Kruk's Dungeon by either the Agility route or the tanking route, then kill Kruk and take his paw. Investigate the marked wall to unlock a shortcut back to the entrance.
- Have Zooknock make the Kruk monkey greegree, then return to Awowogei and learn of the alliance with the Gu'Tanoth ogres and the Troll Stronghold generals.
- Break the alliance by winning deathmatches against Kob in the Troll Stronghold and Keef in Gu'Tanoth. Keef costs 20 coins for the bridges, or you can use the 71 Agility shortcut, which is boostable.
- Find Assistant Le Smith on one of four rooftop locations in Marim and learn about the airship fleet.
- Sabotage the airship platform: collect six satchels, fill them with explosives, and plant charges on two pillars on the ground floor, two floorboards on the middle floor and two gas cylinders on the top floor. Then get caught deliberately to leave.
- Return to Kruk's Dungeon via the monkey bars. Ride the stunted demonic gorilla, drive three tortured gorillas back into their cage, and watch Glough's mutagen device. Take the charged onyx, invert it with a hammer and chisel into a deconstructed onyx, replace it, and corrupt an incubation chamber.
- Report to Awowogei as Kruk that the attack is off. Glough launches his airship anyway.
- Recruit Nieve, then kill tortured gorillas in the north-west Gnome Stronghold until she is satisfied.
- In the Crash Site Cavern, fight two tortured gorillas and two demonic gorillas alongside Nieve. You must kill all four or the whole encounter restarts.
- Glough drinks his own mutagen and Nieve is killed by a boulder, dropping an Elysian spirit shield you cannot use. Fight Glough across three chambers, then report back to Narnode. Awowogei signs a peace treaty.
There is a documented glitch where taking the north-easternmost route in Kruk's Dungeon without the matching key can strand you, requiring a teleport and a reset. If the route feels wrong, back out.
Puzzles and How They Work
Three non-combat challenges, none skippable, and one of them is randomised per player.
| Puzzle | Type | How it works |
|---|---|---|
| Invisible-ink note | Item sequence | Lemon and pestle and mortar for juice, hold the note over candles, apply grape juice with the brush, then brush the note and translate it. |
| Kruk's Dungeon Agility maze | Randomised path, trial and error | The layout is fixed but the correct path is randomised per player. Five holes numbered 1 to 5 act as checkpoints. The message "Something about this route feels wrong." means that obstacle has a 100% failure rate for you — take another route. Failing drops you to a dark lower floor of hard-hitting maniacal monkeys and archers. |
| Kruk's Dungeon tanking route | Alternative to the maze | Slash webs, mine rock, and take either the east or west path depending on whether you find a combat scratched key or a combat damaged key. Dart traps, floor blades and spinning blades deal damage along the way. |
| Airship platform stealth | Line-of-sight avoidance | Guards see two to four squares. Corner-tricking works. Getting caught soaks your explosives, though you keep the satchels and any charges already planted. |
- Puzzle
- Invisible-ink note
- Type
- Item sequence
- How it works
- Lemon and pestle and mortar for juice, hold the note over candles, apply grape juice with the brush, then brush the note and translate it.
- Puzzle
- Kruk's Dungeon Agility maze
- Type
- Randomised path, trial and error
- How it works
- The layout is fixed but the correct path is randomised per player. Five holes numbered 1 to 5 act as checkpoints. The message "Something about this route feels wrong." means that obstacle has a 100% failure rate for you — take another route. Failing drops you to a dark lower floor of hard-hitting maniacal monkeys and archers.
- Puzzle
- Kruk's Dungeon tanking route
- Type
- Alternative to the maze
- How it works
- Slash webs, mine rock, and take either the east or west path depending on whether you find a combat scratched key or a combat damaged key. Dart traps, floor blades and spinning blades deal damage along the way.
- Puzzle
- Airship platform stealth
- Type
- Line-of-sight avoidance
- How it works
- Guards see two to four squares. Corner-tricking works. Getting caught soaks your explosives, though you keep the satchels and any charges already planted.
Boss Fights
Five combat encounters. The demonic gorillas are the reason you must bring two attack styles, and Glough is the reason you should bring an emergency plan.
| Fight | Attacks with | Pray | What decides the fight |
|---|---|---|---|
| Kruk (level 207) | Melee and Ranged | Protect from Missiles — his ranged hits harder at max 37 | His melee still hits 33, so keep your health above 40. He has no particular weakness. The reliable method is to range him while stepping out of melee range, or flinch him against a cave wall. |
| Kob (level 185) | Melee, max 57 | Protect from Melee, though he still hits 28 through it | Safespot at the door with Ranged, Magic or a halberd if you would rather not tank him. |
| Keef (level 178) | Crush, max 47 | Protect from Melee before the dialogue starts | He hits through prayer at reduced output. There is a tree nearby to safespot from. |
| Demonic gorillas (level 275) | All three styles | Switch to match: white throwing is Ranged, green is Magic, claw swipe is Melee | They use protection prayers that fully block a style and switch after missing three hits in it, so two attack styles are mandatory. They also chest-beat to drop a boulder on your tile — move away when they do. |
| Glough (level 431, three chambers) | Melee, then Ranged, then Magic | Protect from Missiles in phase 2, Protect from Magic in phase 3 | Phase 1 is melee only and can be safespotted from the hallway. Phase 2 adds a ground stomp for 30+ and can be safespotted with a 10-square-range weapon. Phase 3's melee knocks you back for up to 66, so keep health above 80, and his magic attack drags you to him. Turn off Auto Retaliate. Any death, teleport or exit resets him to phase 1. |
- Fight
- Kruk (level 207)
- Attacks with
- Melee and Ranged
- Pray
- Protect from Missiles — his ranged hits harder at max 37
- What decides the fight
- His melee still hits 33, so keep your health above 40. He has no particular weakness. The reliable method is to range him while stepping out of melee range, or flinch him against a cave wall.
- Fight
- Kob (level 185)
- Attacks with
- Melee, max 57
- Pray
- Protect from Melee, though he still hits 28 through it
- What decides the fight
- Safespot at the door with Ranged, Magic or a halberd if you would rather not tank him.
- Fight
- Keef (level 178)
- Attacks with
- Crush, max 47
- Pray
- Protect from Melee before the dialogue starts
- What decides the fight
- He hits through prayer at reduced output. There is a tree nearby to safespot from.
- Fight
- Demonic gorillas (level 275)
- Attacks with
- All three styles
- Pray
- Switch to match: white throwing is Ranged, green is Magic, claw swipe is Melee
- What decides the fight
- They use protection prayers that fully block a style and switch after missing three hits in it, so two attack styles are mandatory. They also chest-beat to drop a boulder on your tile — move away when they do.
- Fight
- Glough (level 431, three chambers)
- Attacks with
- Melee, then Ranged, then Magic
- Pray
- Protect from Missiles in phase 2, Protect from Magic in phase 3
- What decides the fight
- Phase 1 is melee only and can be safespotted from the hallway. Phase 2 adds a ground stomp for 30+ and can be safespotted with a 10-square-range weapon. Phase 3's melee knocks you back for up to 66, so keep health above 80, and his magic attack drags you to him. Turn off Auto Retaliate. Any death, teleport or exit resets him to phase 1.
Kruk, the Crash Site Cavern and the Glough fight are instanced. Unprotected items go to a grave outside the instance rather than a deathbank, and ground items are lost. If you and Glough die at the same time, you repeat the entire fight.
Rewards and Unlocks
The experience rewards were raised in the 30 November 2022 poll update, so older guides quoting 25,000 Slayer are out of date.
| Reward | Detail |
|---|---|
| Quest points | 4 |
| Slayer | 80,000 XP |
| Agility | 60,000 XP |
| Thieving | 50,000 XP |
| Hunter | 50,000 XP |
| Duke's lamps | 2 x 50,000 XP in Magic, Ranged, Attack, Defence, Strength or Hitpoints |
| Royal seed pod | Unlimited Grand Tree teleports, usable up to level 30 Wilderness |
- Reward
- Quest points
- Detail
- 4
- Reward
- Slayer
- Detail
- 80,000 XP
- Reward
- Agility
- Detail
- 60,000 XP
- Reward
- Thieving
- Detail
- 50,000 XP
- Reward
- Hunter
- Detail
- 50,000 XP
- Reward
- Duke's lamps
- Detail
- 2 x 50,000 XP in Magic, Ranged, Attack, Defence, Strength or Hitpoints
- Reward
- Royal seed pod
- Detail
- Unlimited Grand Tree teleports, usable up to level 30 Wilderness
What it opens up
- Demonic gorillas in the Crash Site Cavern, a well-known zenyte shard source
- The ability to wield the heavy ballista, and dragon javelin tips from various dragons
- A maniacal monkey hunting area in Kruk's old lab
- The Ape Atoll bank and Oobapohk's Javelin Store
- A glider straight to Ape Atoll, and speaking to monkeys without the amulet
- All surface Ape Atoll NPCs become non-aggressive without greegrees
- Refighting Glough via the burning brazier in Zooknock's house, and a cosmetic Monkey cape-slot item
Common Mistakes and Warnings
Ape Atoll punishes under-preparation more than most quest areas.
- Bringing only one attack style. The demonic gorillas pray against a single style and switch after three misses, so one style means you cannot kill them.
- Leaving Auto Retaliate on for Glough. Phase 3 knocks you back and drags you in; retaliating stops you repositioning.
- Dying to Glough and expecting a checkpoint. He resets to phase 1 on death, teleport or exit. Bring enough supplies for the whole fight.
- Leaving the Crash Site Cavern before all four gorillas are dead. The entire encounter restarts.
- A full inventory entering Kruk's Dungeon. Your greegree is taken from your hands and drops on the floor if there is no room.
- Not banking weapons and armour for Entrana. You will be turned away at the balloon.
- No anti-poison. Ape Atoll poisons constantly and it will eat your food budget.
- Ignoring the "this route feels wrong" message. It means a guaranteed failure on that obstacle. Take a different route rather than retrying.
Ironman Notes
Monkey Madness II is a priority quest for Ironmen because demonic gorillas are one of the few realistic sources of zenyte shards, and the heavy ballista gives a strong ranged option without a big grind.
The 69 Slayer requirement usually arrives naturally, but 70 Crafting can lag. Plan it into your Crafting route rather than rushing it at the end.
The royal seed pod is a permanent free teleport, which matters more on an account that cannot buy stacks of teleport tablets.
FAQ
What is the hardest part of Monkey Madness II?
Glough's third phase, because the fight resets completely on death and his melee knockback plus magic drag punish poor positioning. Kruk's Dungeon is more annoying than hard.
Do I really need two attack styles?
Yes, for the demonic gorillas. They use protection prayers that fully block one style and only switch after missing three hits in it, so a single style leaves you unable to damage them.
Can I skip Kruk's Dungeon's Agility maze?
There is a tanking route as an alternative, which trades Agility failures for webs, traps and a bit of mining. Neither route is skippable but you can choose which one suits your account.
Is there a deathbank?
No. The instanced fights use a grave outside the instance instead. Items left on the ground inside are lost.
Why can I not claim the two 50,000 XP lamps?
Duke's lamps require that you accepted Daero's training during Monkey Madness I. If you declined that dialogue, they are not available to you.
Is Monkey Madness II worth it just for demonic gorillas?
For most accounts, yes. Zenyte shards are the reason, and the heavy ballista plus 240,000 experience across four skills make the quest pay for itself even before the gorillas.
Related Guides
Bottom Line
Monkey Madness II rewards preparation over reflexes. Bring two attack styles for the gorillas, anti-poison for Ape Atoll, and enough supplies to finish Glough in one go, because there is no checkpoint.
Kruk's Dungeon looks worse than it is. The path is randomised, so read the failure messages and back out of routes the game tells you will fail rather than grinding against them.
If 69 Slayer or 70 Crafting is the blocker, our skill training is hand-trained, and the quest service can handle the quest itself.
Quest requirements and reward experience change with updates. Verify current details on the Old School RuneScape Wiki.
Need a trusted team? Bils Services
Enjoyed the guide?
Drop a like — it helps other Adventurers find the good stuff.
Community
Comments
Silence in the hall…
Be the first Adventurer to leave a mark.
Join the thread
Add a comment
Tips, drops, or “this carried my account” — keep it useful.
bilsservices · bils services · bilsservices.com

