


OSRS Monkey Madness I Guide: Requirements and Walkthrough
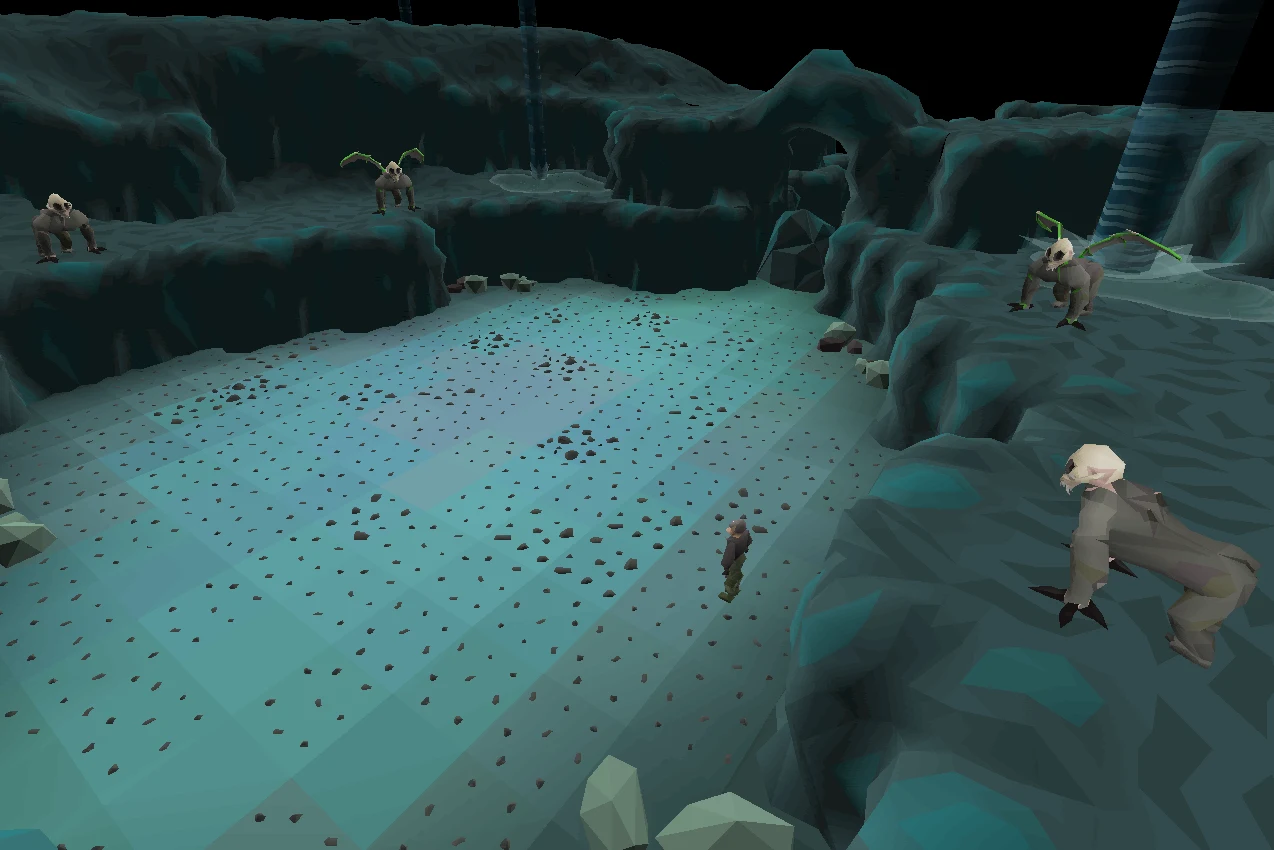
Monkey Madness I is the Master gnome quest that unlocks Ape Atoll and the dragon scimitar. Long, poison-heavy, and still a rite of passage before Monkey Madness II.
Overview
Monkey Madness I sends you to Ape Atoll for Narnode's missing 10th Squad. Master difficulty, Long length, and one of the most famous mid-game quest spikes in Old School.
The island is multicombat poison pressure with high-level monkeys. Prayer 43+, antipoison and a teleport plan matter as much as the final architecture of the fight.
Rewards include dragon scimitar access and the path into Monkey Madness II. Even accounts that hate the island eventually need the unlocks.
| Detail | Value |
|---|---|
| Difficulty | Master |
| Length | Long |
| Quest points | 3 |
| Quest number | 65 |
| Released | 6 December 2004 |
| Starting point | Talk to King Narnode Shareen in the Grand Tree. |
| Members | Yes (unless noted otherwise on the Wiki) |
| Updated / fact checked | 2026-08-04 |
- Detail
- Difficulty
- Value
- Master
- Detail
- Length
- Value
- Long
- Detail
- Quest points
- Value
- 3
- Detail
- Quest number
- Value
- 65
- Detail
- Released
- Value
- 6 December 2004
- Detail
- Starting point
- Value
- Talk to King Narnode Shareen in the Grand Tree.
- Detail
- Members
- Value
- Yes (unless noted otherwise on the Wiki)
- Detail
- Updated / fact checked
- Value
- 2026-08-04
Requirements and Prerequisites
Skill and quest gates below are taken from the OSRS Wiki quest-details block for this quest. Boostability notes follow the Wiki markers — if a level is unboostable, train it before you start.
| Skill | Level | Boostable? |
|---|---|---|
| None listed | — | — |
- Skill
- None listed
- Level
- —
- Boostable?
- —
Quest prerequisites (chains can be longer than this summary):
- The Grand Tree — verify chain on the Wiki
- Tree Gnome Village — verify chain on the Wiki
- The ability to defeat a level 195 Jungle Demon — verify chain on the Wiki
If the Wiki lists alternate item unlocks instead of a skill (for example a gas mask instead of Slayer), either option is valid.
Items to Bring
Pack required items before the first travel segment. Recommended gear is comfort, not a hard gate, unless a fight forces a specific style.
Required
- A gold bar
- Five empty inventory slots
- A ball of wool
- Monkey bones or corpse from Karamja (obtainable during quest)
- Five bananas (obtainable during quest)
Recommended
- Combat 65
- Prayer 43+ Prayer highly recommended, as the player will be attacked by numerous hard-hitting melee enemies in multicombat
- Poison cures such as antipoison or antidote++
- Energy-restoring items such as the explorer's ring along with energy and stamina potions
- Prayer potions
- A knife for free healing, as there are pineapple plants around Ape Atoll
- High healing food
- A lockpick
- Weight-reducing clothing
- Emergency teleport (a ring of life works as well)
- Ardougne cloak 1 or Ardougne teleports File:Ardougne teleport (tablet).png
- A ring of dueling to bank quickly (the Ardougne cloak could be used instead, although it's somewhat further from a bank; the Battlefield of Khazard has a spirit tree, and the Gnome Stronghold has a bank and glider service)
- 200,000 coins (if skipping the puzzle)
Ultimate Ironmen should split heavy deliveries across trips where the Wiki notes that is allowed.
Where to Start
Starting location: Talk to King Narnode Shareen in the Grand Tree.
Use the travel method that fits your unlocks — games necklace, fairy rings, spirit trees, carpets, or spellbook teleports — and keep a teleport out for deaths during combat sections.
Quest List blurb (paraphrased intent): The King of the northern Gnomes, Narnode Shareen, is once again in need of your help. He recently decided to send an envoy of his Royal Guard, the 10th squad, to oversee the decommissioning of the Gnome owned ship-building facilities on the eastern coast of Karamja. It has been q…
Walkthrough, Stage by Stage
Numbered steps follow the Wiki quick-guide order, rewritten for BILS readers. Dialogue choices that gate progress are called out inline. For puzzle tiles or randomised layouts, use the dedicated puzzles section and the Wiki map if a step still feels unclear.
- Starting out. Speak to King Narnode Shareen at the Grand Tree. (dialogue: Yes)
- Without an open inventory space, the gnome royal seal will be dropped on the ground.
- Climb up the tree and take the glider to Gandius.
- If you don't have the monkey bones yet, you can kill a monkey nearby for some. (If you have started Tai Bwo Wannai Trio, only a monkey corpse will drop. That will work as well)
- Enter the Shipyard gate to the north. Make sure you have the Royal Seal with you.
- Speak with G.L.O. Caranock in the building south of the gate.
- Return to King Narnode and speak to him. (Make sure you have 1 inventory space free as he will drop Narnode's orders to the floor otherwise).
- Speak with Daero in the bar on the (east side) of the Grand Tree. (dialogue: Talk about the journey... → Return to previous menu → Talk about the 1-th squad... → Return to previous menu → Talk about Caranock... → Return to previous menu → Leave... → Who is it?) Make sure to go through all of the Chat Options to be teleported to a new location.
- Talk (not "travel") to Daero again inside the hangar.
- Click the panel in the south-eastern region of the hangar and solve the sliding puzzle. (guide here)
- Alternatively, pay Glough (back in the Stronghold) to solve it for you.
- Watch the cutscene. Talk to Daero, then Waydar to fly to Crash Island. (dialogue: Yes)
- Speak with Lumdo.
- Talk (not "travel") to Waydar twice, who will convince Lumdo to follow orders. (dialogue: I cannot convince Lumdo to take us to the island.)
- Speak with Lumdo again to travel west to Ape Atoll.
- Ape Atoll. On the island, follow the red path on the map into the valley. You will be shot and arrested.
- Watch the guards' pattern, pick the lock on your cell door and escape the prison.
- Stay at least 2 squares away from the guards even while in the cell.
- Follow the green path and talk to Garkor (Complete dialogue or Zooknock will not give you the m'speak amulet).
- Obtaining amulet parts. Follow the blue path to the U-shaped building and enter through the southern door.
- Continue through the remaining mid-quest objectives in order (see the OSRS Wiki quick guide for the exact mid-section checklist if you get stuck).
- Head to the west coast of the island (orange path), then climb up the hill to the south.
- Climb the ladder, walk across the bridge, climb down, and talk to Kruk.
- Speak with Awowogei.
- Speak with Awowogei again. Then talk to the Elder Guard again to be let out.
- Speak with Garkor and watch the cutscene.
- Speak with Garkor again to get the 10th squad sigil.
- The final battle. Prepare for final battle.
- Equip the 10th squad sigil when you are ready to fight the Jungle Demon.
- Tip: Use Protect from Magic prayer and stay out of melee range to avoid taking damage.
- Defeat the Jungle Demon.
- Return to the Grand Tree and talk to King Narnode Shareen.
- Finish the closing dialogue — the quest is complete.
If a mid-quest fight sends you to your respawn, return with the same key items — several quests do not store progress for partially completed combat.
Puzzles and How They Work
Puzzle sections in modern quests are often randomised per account. The table below covers the puzzle types you should expect; exact tile solutions belong on the Wiki when they change per player.
| Puzzle | Type | How it works |
|---|---|---|
| Light / mirror / beam puzzles | Spatial | Rotate emitters until the beam hits the target; reset if you over-rotate |
| Agility / pathing sections | Movement | Fail-safe by banking food; some obstacles drain run energy only |
| Dialogue / logic gates | Conversation | Pick the options listed in the walkthrough — wrong branches usually loop safely |
| Combat puzzles | Fight | Correct prayer or attack style matters more than DPS |
- Puzzle
- Light / mirror / beam puzzles
- Type
- Spatial
- How it works
- Rotate emitters until the beam hits the target; reset if you over-rotate
- Puzzle
- Agility / pathing sections
- Type
- Movement
- How it works
- Fail-safe by banking food; some obstacles drain run energy only
- Puzzle
- Dialogue / logic gates
- Type
- Conversation
- How it works
- Pick the options listed in the walkthrough — wrong branches usually loop safely
- Puzzle
- Combat puzzles
- Type
- Fight
- How it works
- Correct prayer or attack style matters more than DPS
Skip this section emotionally if the quest is combat-only — still skim for any mid-quest door puzzles.
Boss Fights
Combat encounters listed on the Wiki quest-details block. Death usually means a run-back with lost unprotected items outside safe instances — check each fight before you commit expensive gear.
| Fight | Attacks with | Pray | What decides the fight |
|---|---|---|---|
| Jungle Demon | See fight notes | Match the attack style that works | Preparation and prayer switches |
- Fight
- Jungle Demon
- Attacks with
- See fight notes
- Pray
- Match the attack style that works
- What decides the fight
- Preparation and prayer switches
Item-loss risk: standard death rules apply unless the quest instance is a safe minigame-style fight. Do not bring items you cannot afford to lose into dangerous multi-combat areas.
Rewards and Unlocks
Rewards below summarise the Wiki reward scroll. Experience amounts and unlock text can change with updates — re-check before you plan a grind around them.
| Reward | Detail |
|---|---|
| Quest points | 3 |
| Difficulty | Master |
| Length | Long |
| Reward | 10,000 Coins |
| Reward | 3 Diamonds |
| Reward | Speaking to Daero after the quest gives the choice of either, 35,000 experience in Attack and Defence and 20,000 experience in Strength and Hitpoints OR 35,000 experience in Strength and Hitpoints and 20,000 experience in Attack and Defence. The skills you tell Daero you want to focus on will receive 35,000 XP each, and the others 20,000 each. |
| Reward | The ability to buy and wield the Dragon scimitar. |
| Reward | Full access to Ape Atoll, with the exception of the bank and javelin store, which are unlocked after Monkey Madness II. |
- Reward
- Quest points
- Detail
- 3
- Reward
- Difficulty
- Detail
- Master
- Reward
- Length
- Detail
- Long
- Reward
- Reward
- Detail
- 10,000 Coins
- Reward
- Reward
- Detail
- 3 Diamonds
- Reward
- Reward
- Detail
- Speaking to Daero after the quest gives the choice of either, 35,000 experience in Attack and Defence and 20,000 experience in Strength and Hitpoints OR 35,000 experience in Strength and Hitpoints and 20,000 experience in Attack and Defence. The skills you tell Daero you want to focus on will receive 35,000 XP each, and the others 20,000 each.
- Reward
- Reward
- Detail
- The ability to buy and wield the Dragon scimitar.
- Reward
- Reward
- Detail
- Full access to Ape Atoll, with the exception of the bank and javelin store, which are unlocked after Monkey Madness II.
What it opens up
- 10,000 Coins
- 3 Diamonds
- Speaking to Daero after the quest gives the choice of either, 35,000 experience in Attack and Defence and 20,000 experience in Strength and Hitpoints OR 35,000 experience in Strength and Hitpoints and 20,000 experience in Attack and Defence. The skills you tell Daero you want to focus on will receive 35,000 XP each, and the others 20,000 each.
- The ability to buy and wield the Dragon scimitar.
- Full access to Ape Atoll, with the exception of the bank and javelin store, which are unlocked after Monkey Madness II.
Fact checked 2026-08-04 against the OSRS Wiki quest page and quick guide.
Common Mistakes and Warnings
Ape Atoll punishes unprotected walks more than bad boss mechanics.
- Walking the island without Protect from Melee in multicombat packs.
- Skipping antipoison and dying to chip poison between fights.
- Forgetting a lockpick or knife QOL and banking through danger.
- Entering the finale under-geared because the early stealth/errand half felt manageable.
- Ignoring gnome series prerequisites and stalling before you ever see the atoll.
- Burning food on failed rooftop or stealth segments without a restock plan.
Ironman Notes
Gold bar routes exist via Digsite rewards, stalls or telegrab options if smithing is awkward.
Keep pineapple access in mind for emergency food on the island.
Dragon scimitar is the melee milestone — do not leave the quest half-finished after the hard parts.
FAQ
What does Monkey Madness I unlock?
Ape Atoll access and the dragon scimitar shop path, plus MM2 progression.
How scary is Ape Atoll?
Very, if you under-pray. Respectable with 43 Prayer and antipoison.
Do I need this for Monkey Madness II?
Yes.
Recommended combat?
Around 65 combat, with Prayer highly recommended.
Is the quest Longer than it looks?
Yes — island deaths and re-entries inflate time.
Related Guides
Bottom Line
Pray melee, pack antipoison, and treat Ape Atoll like a dangerous commute until the greegree life begins.
Dragon scimitar and MM2 both justify the Long Master badge.
Updated and fact checked 2026-08-04. Primary sources: OSRS Wiki — Monkey Madness I and its quick guide. Requirements and rewards change with game updates.
Need a trusted team? Bils Services
Enjoyed the guide?
Drop a like — it helps other Adventurers find the good stuff.
Community
Comments
Silence in the hall…
Be the first Adventurer to leave a mark.
Join the thread
Add a comment
Tips, drops, or “this carried my account” — keep it useful.
bilsservices · bils services · bilsservices.com
