


OSRS Tormented Demons Guide: Shield Mechanics, Gear & Synapse Drops
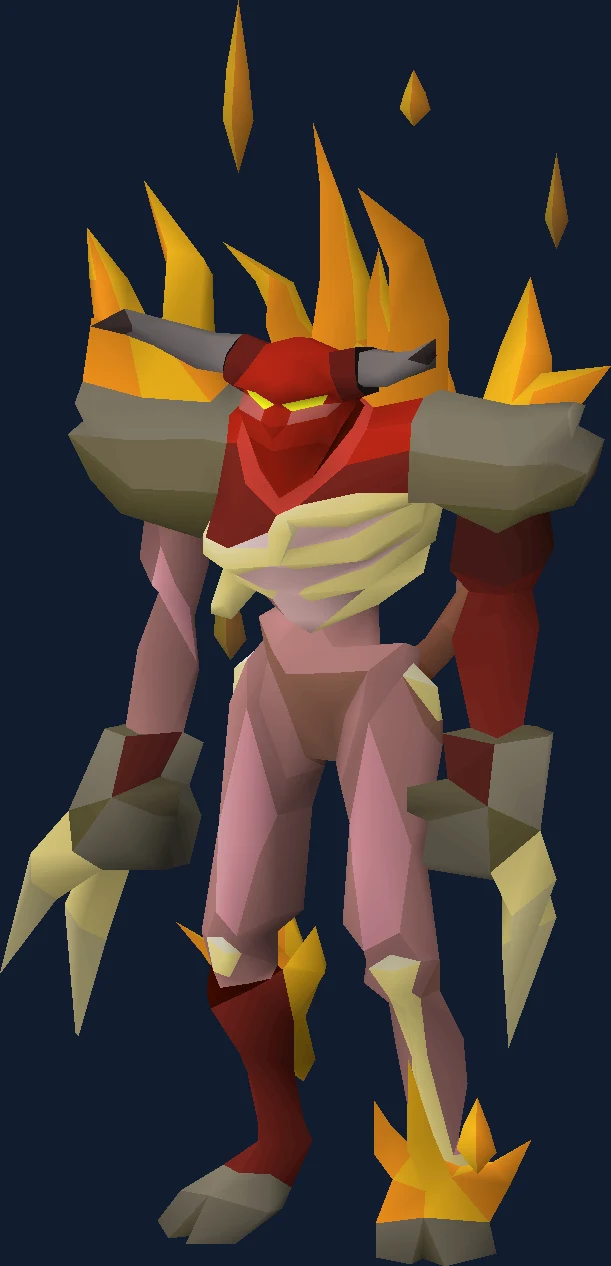
Tormented Demons guide for shield phases, gear, and synapse unique chase.
Why People Fight Tormented Demons
Tormented demons sit in the Ancient Guthixian Temple once While Guthix Sleeps is behind you, and they are the reason the modern demonbane weapon tier exists. They drop the tormented synapse that powerful demonbane weaponry is made from, and the burning claw that pairs into burning claws — which is a pleasing loop, because the weapons you build from their drops are the weapons that ignore the defence they use against you.
Mechanically they belong to the same family as demonic gorillas: protection prayers, multiple styles, and no way to camp one weapon. But they differ in a way that changes how much inventory you can carry. They hold each protection prayer for 150 hitpoints of damage rather than seventy, and they do not break your combat when they swap, so the switching pressure here is a fraction of what the gorillas apply. You can afford more gear switches, and the fight is built on the assumption that you will bring them.
The mechanic that defines the fight is the fire shield. Normally it reduces damage from anything that is not a demonbane or abyssal weapon by a fifth. It drops when you first attack the demon and again after every fire bomb, and stays down until you land one hit — which gives you a free window to change weapon. That one hit is not an ordinary hit. Its damage is increased by a figure derived from the weapon's attack speed, and the attack itself is forced to four ticks regardless of how slow the weapon is. So the strongest thing you can do here is put down your good weapon, pick up something ponderous, and swing it once.
Then there is the accuracy quirk on top. About thirty ticks into a fight the flames on the demon's back go out and every attack you make is guaranteed to hit until your first hit after the next fire bomb. That is when specials go out. Between the shield window, the defenceless window and the fire bomb that ends both, this is a fight with a rhythm rather than a rotation — and once you have the rhythm, the max hits stop being the interesting part.
In our index it sits in the elite monster group at difficulty 4 of 5, where kill times come down to shield phase breaking.
| Field | Detail |
|---|---|
| Classification | Elite monster (Elite Monster) |
| Group | elite monster |
| Difficulty | 4 / 5 |
| Solo or team | Solo or team |
| Access requirement | While Guthix Sleeps |
| Notable reward | Burning claws, synapse, tormented synapse |
| Signature mechanic | Shield phase breaking |
| Hitpoints | 600 |
| Released | 10 July 2024 |
- Field
- Classification
- Detail
- Elite monster (Elite Monster)
- Field
- Group
- Detail
- elite monster
- Field
- Difficulty
- Detail
- 4 / 5
- Field
- Solo or team
- Detail
- Solo or team
- Field
- Access requirement
- Detail
- While Guthix Sleeps
- Field
- Notable reward
- Detail
- Burning claws, synapse, tormented synapse
- Field
- Signature mechanic
- Detail
- Shield phase breaking
- Field
- Hitpoints
- Detail
- 600
- Field
- Released
- Detail
- 10 July 2024
Is Tormented Demons the Right Fight for You Yet?
The recommended stats are modest for the value of the drops, and that is not an accident: the gate is understanding rather than levels. A player who knows what a slow crush weapon does to a shieldless demon will out-damage a much better-geared player who does not.
You are ready for this fight if:
- While Guthix Sleeps is complete. That is the only requirement, and it is a substantial quest in its own right.
- You have two attacking styles kitted out, because their protection prayers mean one is not enough.
- You own something slow and heavy to punish with — a Dharok's greataxe on crush, a dragon two-handed sword, a Tzhaar-ket-om, or a heavy ballista set to accurate. This is the single highest-value item in your inventory here.
- You are willing to fight in open ground. The fire bombs only land on valid tiles, so standing against a wall reduces your escape options rather than protecting you.
Come back later if any of these are true:
- You have no demonbane or abyssal weapon at all. Every other weapon deals a fifth less damage to them, all fight, which is a large tax to pay while learning.
- You have not set your run to be togglable mid-fight. The fire bomb disables run and gives you two ticks to move; control-clicking is what recovers those tiles.
- You were planning to safespot them. They will switch randomly to magic or ranged if they cannot reach you and were previously using melee, and they can path around objects and stack on each other.
Access Requirements
Tormented Demons is gated behind While Guthix Sleeps.
While Guthix Sleeps also tends to sit alongside the other elite monster gates, so it is usually cheaper to clear them together than to come back for each one. The boss requirements checklist lists them by group.
Location and How to Get There
Tormented Demons is found in the Ancient Guthixian Temple.
The temple becomes available after While Guthix Sleeps, where the demons are first summoned. They are spread through the temple rather than kept in one arena, so pick a spot with room to move before you start.
The clean route is a Guthixian temple teleport scroll, and the demons drop those themselves, so the trip pays for its own transport once you are established. Check the current rate on the wiki rather than budgeting from a figure printed here.
Without a scroll the journey is longer and worth rehearsing once. A games necklace — worn, or pulled from a jewellery box at home — teleports you to Tears of Guthix. From there you need a lit sapphire lantern to attract a light creature and descend into the chasm, then follow the chasm along, climb the walls beside the centre skull, and enter the skull above to reach the temple's central chamber.
That lantern requirement is the part people forget, and it is the difference between a trip and a wasted teleport.
Recommended Stats and Gear at Three Budgets
| Skill or unlock | Suggested | What it is for |
|---|---|---|
| While Guthix Sleeps | Complete | The only hard requirement — it is what opens the Ancient Guthixian Temple. |
| Attack | 75+ | The melee half of your setup, which is the strongest of the three styles here. |
| Strength | 75+ | Both your ordinary damage and your punish hit, since the bonus damage is added before the multipliers apply. |
| Defence | 70+ | Against three attack styles plus a fire bomb that deals 40 or more if it catches you. |
| Ranged | 70+ | Your second style if you are not going magic, and the home of the heavy ballista punish. |
| Hitpoints | 75+ | Enough of a buffer that a mistimed fire bomb is a setback rather than a trip. |
| Prayer | 70 for Piety, 74 for Rigour, 77 for Augury | Whichever offensive prayer matches the style you are currently holding. |
| Magic | 82+ | Dark Demonbane, and magic defence. This is the one level worth going out of your way for. |
| Shadow of the Storm | Complete | Arclight, which is the accessible demonbane weapon and the reason most accounts can start here at all. |
| A Kingdom Divided | Complete | Dark Demonbane, the spell that makes a magic switch worth carrying. |
- Skill or unlock
- While Guthix Sleeps
- Suggested
- Complete
- What it is for
- The only hard requirement — it is what opens the Ancient Guthixian Temple.
- Skill or unlock
- Attack
- Suggested
- 75+
- What it is for
- The melee half of your setup, which is the strongest of the three styles here.
- Skill or unlock
- Strength
- Suggested
- 75+
- What it is for
- Both your ordinary damage and your punish hit, since the bonus damage is added before the multipliers apply.
- Skill or unlock
- Defence
- Suggested
- 70+
- What it is for
- Against three attack styles plus a fire bomb that deals 40 or more if it catches you.
- Skill or unlock
- Ranged
- Suggested
- 70+
- What it is for
- Your second style if you are not going magic, and the home of the heavy ballista punish.
- Skill or unlock
- Hitpoints
- Suggested
- 75+
- What it is for
- Enough of a buffer that a mistimed fire bomb is a setback rather than a trip.
- Skill or unlock
- Prayer
- Suggested
- 70 for Piety, 74 for Rigour, 77 for Augury
- What it is for
- Whichever offensive prayer matches the style you are currently holding.
- Skill or unlock
- Magic
- Suggested
- 82+
- What it is for
- Dark Demonbane, and magic defence. This is the one level worth going out of your way for.
- Skill or unlock
- Shadow of the Storm
- Suggested
- Complete
- What it is for
- Arclight, which is the accessible demonbane weapon and the reason most accounts can start here at all.
- Skill or unlock
- A Kingdom Divided
- Suggested
- Complete
- What it is for
- Dark Demonbane, the spell that makes a magic switch worth carrying.
The two quest unlocks matter more than the combat levels. Every weapon that is not demonbane or abyssal deals a fifth less damage here, so Arclight is not a nice upgrade — it is the difference between fighting them and grinding them down.
| Slot | Budget | Mid game | Best in slot |
|---|---|---|---|
| Melee weapon | Arclight on stab, or Darklight | Abyssal bludgeon, or Osmumten's fang and an abyssal tentacle | Emberlight on stab |
| Punish weapon (crush) | Dragon two-handed sword, or a granite maul | Tzhaar-ket-om with a berserker necklace | Dharok's greataxe with the full set, or a Tzhaar-ket-om and berserker necklace |
| Punish weapon (heavy ranged) | Rune crossbow on accurate | Dragon or Armadyl crossbow on accurate | Heavy ballista on accurate |
| Second style | Blue moon spear for demonbane spells, or an eclipse atlatl | Bow of faerdhinen, or a Kodai wand casting demonbane spells | Purging staff with demonbane spells, or a scorching bow |
| Armour | Blue moon or eclipse moon as a hybrid set, with a dragon defender | Bandos or blood moon, with Masori or elite void for the ranged half | Torva with an Avernic defender, plus ancestral or elite void as the switch |
| Head, neck, cape | Slayer helmet (i) on a greater demon task, amulet of fury, fire cape | Neitiznot faceguard, amulet of torture, fire cape | Torva helm or slayer helmet (i), amulet of rancour, infernal cape |
| Hands, feet, ring | Barrows gloves, dragon boots, berserker ring (i) | Barrows gloves, primordial or echo boots, berserker ring (i) | Ferocious gloves, Avernic treads, Ultor ring |
| Special attack weapon | Dragon dagger | Burning claws, or dragon claws | Burning claws, with a Saradomin godsword or eldritch nightmare staff if supplies are tight |
- Slot
- Melee weapon
- Budget
- Arclight on stab, or Darklight
- Mid game
- Abyssal bludgeon, or Osmumten's fang and an abyssal tentacle
- Best in slot
- Emberlight on stab
- Slot
- Punish weapon (crush)
- Budget
- Dragon two-handed sword, or a granite maul
- Mid game
- Tzhaar-ket-om with a berserker necklace
- Best in slot
- Dharok's greataxe with the full set, or a Tzhaar-ket-om and berserker necklace
- Slot
- Punish weapon (heavy ranged)
- Budget
- Rune crossbow on accurate
- Mid game
- Dragon or Armadyl crossbow on accurate
- Best in slot
- Heavy ballista on accurate
- Slot
- Second style
- Budget
- Blue moon spear for demonbane spells, or an eclipse atlatl
- Mid game
- Bow of faerdhinen, or a Kodai wand casting demonbane spells
- Best in slot
- Purging staff with demonbane spells, or a scorching bow
- Slot
- Armour
- Budget
- Blue moon or eclipse moon as a hybrid set, with a dragon defender
- Mid game
- Bandos or blood moon, with Masori or elite void for the ranged half
- Best in slot
- Torva with an Avernic defender, plus ancestral or elite void as the switch
- Slot
- Head, neck, cape
- Budget
- Slayer helmet (i) on a greater demon task, amulet of fury, fire cape
- Mid game
- Neitiznot faceguard, amulet of torture, fire cape
- Best in slot
- Torva helm or slayer helmet (i), amulet of rancour, infernal cape
- Slot
- Hands, feet, ring
- Budget
- Barrows gloves, dragon boots, berserker ring (i)
- Mid game
- Barrows gloves, primordial or echo boots, berserker ring (i)
- Best in slot
- Ferocious gloves, Avernic treads, Ultor ring
- Slot
- Special attack weapon
- Budget
- Dragon dagger
- Mid game
- Burning claws, or dragon claws
- Best in slot
- Burning claws, with a Saradomin godsword or eldritch nightmare staff if supplies are tight
The punish weapon row is the one to read twice, because the numbers are unintuitive. While the shield is down, damage from certain weapons is increased by the square of their attack speed minus sixteen, and the attack itself resolves in four ticks whatever the weapon is. A seven-tick weapon therefore gains 33 damage on that hit and swings at four ticks; a six-tick weapon gains 20; a five-tick weapon gains 9; anything four ticks or faster gains nothing at all. That is why a dragon two-handed sword outperforms an inquisitor's mace for exactly one attack per cycle, and why the strongest choices with no extra switches are a heavy ballista on accurate and a Dharok's greataxe on crush.
There are three hard conditions on that bonus and getting any of them wrong wastes the window. The weapon must be melee set to the crush attack style, a heavy ranged weapon — a crossbow or a ballista — or a spell that is not from a powered staff. Crush is checked as a style rather than as what it rolls against, which is why a godsword special still qualifies. Heavy ranged weapons should be set to accurate rather than rapid, because the speed penalty is ignored and the higher maximum hit is not. And if the weapon you use happens to match the style the demon is protecting, the bonus still applies but is divided by three and rounded down, which is how a seven-tick weapon ends up hitting exactly 11 through a prayer.
Two multipliers stack on top of the flat bonus and are the reason those particular weapons appear. Dharok's greataxe with the full set multiplies the damage after the roll and after the 33 has been added, based on how much health you are missing. A Tzhaar-ket-om with a berserker necklace multiplies by 1.2 after the bonus, which makes it better than a Dharok's greataxe used without the rest of the set.
For the ordinary attacks, melee is the strongest style, and abyssal weaponry outperforms weapons like an inquisitor's mace or Osmumten's fang here specifically because it is exempt from the 20% reduction and because a large part of the fight is spent at guaranteed accuracy. Demonbane spells with a purging staff are the second-best setup behind Emberlight — better than a comparable ranged setup if you lack a scorching or twisted bow, at the cost of runes and having to reapply Mark of Darkness.
The accuracy mechanic argues for a slightly odd ranged pairing: a fast weapon for the guaranteed-accuracy window and an accurate one for the rest, which in practice means a toxic blowpipe and a bow of faerdhinen. It also argues against switching into accuracy-only armour during that window, which is what makes a blowpipe viable inside full melee strength gear and saves you a set of switches.
| Check | Value |
|---|---|
| Its Defence level | 150 |
| Its Magic level | 255 |
| Its lowest defence bonus, per its infobox | magic |
| Elemental weakness | 30% to water spells |
| Monster attributes | demon |
- Check
- Its Defence level
- Value
- 150
- Check
- Its Magic level
- Value
- 255
- Check
- Its lowest defence bonus, per its infobox
- Value
- magic
- Check
- Elemental weakness
- Value
- 30% to water spells
- Check
- Monster attributes
- Value
- demon
- Tagged as a demon: demonbane weapons apply.
- 255 Magic level rewards magic-defence scaling weapons.
Inventory and Supplies
| What | Why it is there |
|---|---|
| A slow crush weapon or a heavy ballista | The punish hit. This is the item that produces your biggest single number in the fight, and it is the one most people leave at home. |
| A second attacking style, in full | They hold a protection prayer for 150 hitpoints and do not break your combat when they swap, so you have time to use a proper switch rather than a rushed one. |
| One or two divine super combat potions, and a ranging or magic equivalent | Both halves of your setup are live all fight, and the guaranteed-accuracy windows reward maximum hit rather than accuracy. |
| Six to eight super restores | Three protection prayers to cycle plus an offensive prayer underneath, over trips long enough to matter. |
| Four to six pieces of high-healing food | The fire bomb deals 40 or more when it catches you, and in a cramped spot it sometimes will regardless of how well you move. |
| Burning claws, or another special attack weapon | Saved for the moment the flames on its back go out, when every hit is guaranteed to land. |
| Book of the dead and a rune pouch | Mark of Darkness and Dark Demonbane if you are on magic, plus Demonic Offering, Death Charge and thralls. A thrall on the style you are not using keeps full uptime. |
| Guthixian temple teleports, and a bank teleport | The scrolls come from the demons themselves; a house teleport tablet is the return leg. |
| An explorer's ring 4, if you intend to alchemise | Death Charge occupies the slot that alchemy would otherwise use, so the ring is what lets you do both. |
- What
- A slow crush weapon or a heavy ballista
- Why it is there
- The punish hit. This is the item that produces your biggest single number in the fight, and it is the one most people leave at home.
- What
- A second attacking style, in full
- Why it is there
- They hold a protection prayer for 150 hitpoints and do not break your combat when they swap, so you have time to use a proper switch rather than a rushed one.
- What
- One or two divine super combat potions, and a ranging or magic equivalent
- Why it is there
- Both halves of your setup are live all fight, and the guaranteed-accuracy windows reward maximum hit rather than accuracy.
- What
- Six to eight super restores
- Why it is there
- Three protection prayers to cycle plus an offensive prayer underneath, over trips long enough to matter.
- What
- Four to six pieces of high-healing food
- Why it is there
- The fire bomb deals 40 or more when it catches you, and in a cramped spot it sometimes will regardless of how well you move.
- What
- Burning claws, or another special attack weapon
- Why it is there
- Saved for the moment the flames on its back go out, when every hit is guaranteed to land.
- What
- Book of the dead and a rune pouch
- Why it is there
- Mark of Darkness and Dark Demonbane if you are on magic, plus Demonic Offering, Death Charge and thralls. A thrall on the style you are not using keeps full uptime.
- What
- Guthixian temple teleports, and a bank teleport
- Why it is there
- The scrolls come from the demons themselves; a house teleport tablet is the return leg.
- What
- An explorer's ring 4, if you intend to alchemise
- Why it is there
- Death Charge occupies the slot that alchemy would otherwise use, so the ring is what lets you do both.
One inventory decision has a genuine trade-off rather than a right answer. A Lightbearer helps if you are running out of supplies, but it is a poor choice alongside Arclight or Emberlight, because those weapons scale heavily off strength bonus and the ring provides none. If specials are what is keeping your trips alive, take the ring; if your demonbane weapon is what is keeping your kill times down, do not.
Quantities above come straight from the wiki's own setups and hold up well, but the food number is the one that moves with how comfortably you handle fire bombs. Six pieces and no deaths beats twelve pieces and a habit of tanking the explosion.
Prayer and Spellbook
You are cycling protection prayers here in response to the demon's own style changes rather than on a timer, and the timing information comes from its feet. After every fire bomb it always changes style: if it walks towards you, melee is next; if it does not, it will use whichever of magic or ranged it did not use last time. Only when it was previously using melee are you genuinely guessing, and then you correct on the first hit.
The opening is worth praying carefully because it is nearly free damage prevention. The demon's first attack when combat begins deals roughly three quarters less damage if it is attacking with magic or ranged, you are praying against that style, and its shield is still down — which it will be, because you have not landed your first hit yet. Walking in with the wrong prayer up throws that away.
Underneath the protection prayer, run the offensive prayer that matches the style currently in your hands. Piety at 70, Rigour at 74, Augury at 77, and expect to be switching them alongside your gear, because a Piety left running while you shoot a bow is doing nothing.
If you are on the magic side of a two-style setup, remember that demonbane spells want Mark of Darkness applied occasionally, and that Dark Demonbane needs 82 Magic. That is a spell rotation as much as a prayer one, and it is the main reason a magic switch is more attention-hungry here than a ranged one.
Mechanics That Decide the Fight
| Mechanic | How you see it coming | What it does | Your answer |
|---|---|---|---|
| Fire shield | Flames descend from above the demon and then blow away — that animation means the shield is gone. | Reduces damage from any weapon that is not demonbane or abyssal by 20%. It drops when you first attack and after every fire bomb, and stays down until you land one hit. | Use the gap to switch to your punish weapon. Because the shield only comes back on your next hit, you get real time to change gear rather than a two-tick window. |
| The punish hit | It is the first attack you land after the shield drops. There is exactly one per cycle. | Adds damage equal to the weapon's attack speed squared minus sixteen, and forces the attack to four ticks. With two demons on you it becomes three ticks, with three it becomes two. | Swing something slow and heavy. Only crush melee, crossbows and ballistae, and non-powered-staff spells qualify, and heavy ranged weapons must be on accurate. |
| Fire bombs | You are briefly bound in place and your run is switched off. | Two bombs land roughly every sixty ticks — one on the tile you were standing on and one somewhere in a three-by-three area around you. You get two ticks to move or take 40 or more. | Control-click to move, because run is disabled. Stand in the open so there are enough valid tiles to move to, and remember the bombs still explode even if the demon dies mid-flight. |
| Protection prayer swap | It stops attacking for six ticks. | Every 150 health it loses since its last swap — about a quarter of its total — it switches to protecting against the last style you damaged it with. | Switch to your other style. Unlike some demons, it does not break your combat when it swaps, so the pressure is real but not frantic. A thrall on a third style can occasionally be used to steer this. |
| Defencelessness | The flames on the demon's back go out. | Around thirty ticks into the fight your accuracy against it becomes 100%, and stays there until your first hit after the next fire bomb. | Fire specials, and lean on maximum hit rather than accuracy. This is why extra damage gear is worth more here than accuracy gear, and why a fast weapon is a reasonable substitute for a precise one. |
| Routefinding and stacking | It walks around obstacles rather than getting stuck on them, and demons pile onto the same tiles. | Removes most safespots. If it cannot reach you and was previously using melee, it randomly switches to magic or ranged instead. | Fight it honestly in the open. Trying to trap it produces a demon that shoots you from where it stands. |
- Mechanic
- Fire shield
- How you see it coming
- Flames descend from above the demon and then blow away — that animation means the shield is gone.
- What it does
- Reduces damage from any weapon that is not demonbane or abyssal by 20%. It drops when you first attack and after every fire bomb, and stays down until you land one hit.
- Your answer
- Use the gap to switch to your punish weapon. Because the shield only comes back on your next hit, you get real time to change gear rather than a two-tick window.
- Mechanic
- The punish hit
- How you see it coming
- It is the first attack you land after the shield drops. There is exactly one per cycle.
- What it does
- Adds damage equal to the weapon's attack speed squared minus sixteen, and forces the attack to four ticks. With two demons on you it becomes three ticks, with three it becomes two.
- Your answer
- Swing something slow and heavy. Only crush melee, crossbows and ballistae, and non-powered-staff spells qualify, and heavy ranged weapons must be on accurate.
- Mechanic
- Fire bombs
- How you see it coming
- You are briefly bound in place and your run is switched off.
- What it does
- Two bombs land roughly every sixty ticks — one on the tile you were standing on and one somewhere in a three-by-three area around you. You get two ticks to move or take 40 or more.
- Your answer
- Control-click to move, because run is disabled. Stand in the open so there are enough valid tiles to move to, and remember the bombs still explode even if the demon dies mid-flight.
- Mechanic
- Protection prayer swap
- How you see it coming
- It stops attacking for six ticks.
- What it does
- Every 150 health it loses since its last swap — about a quarter of its total — it switches to protecting against the last style you damaged it with.
- Your answer
- Switch to your other style. Unlike some demons, it does not break your combat when it swaps, so the pressure is real but not frantic. A thrall on a third style can occasionally be used to steer this.
- Mechanic
- Defencelessness
- How you see it coming
- The flames on the demon's back go out.
- What it does
- Around thirty ticks into the fight your accuracy against it becomes 100%, and stays there until your first hit after the next fire bomb.
- Your answer
- Fire specials, and lean on maximum hit rather than accuracy. This is why extra damage gear is worth more here than accuracy gear, and why a fast weapon is a reasonable substitute for a precise one.
- Mechanic
- Routefinding and stacking
- How you see it coming
- It walks around obstacles rather than getting stuck on them, and demons pile onto the same tiles.
- What it does
- Removes most safespots. If it cannot reach you and was previously using melee, it randomly switches to magic or ranged instead.
- Your answer
- Fight it honestly in the open. Trying to trap it produces a demon that shoots you from where it stands.
The three windows are not independent, and understanding how they interact is what separates a clean cycle from a scrappy one. The fire bomb ends the guaranteed-accuracy window, drops the shield, and forces a style change, all at once. So the moment after the bombs land is the busiest point of the cycle: read its feet for the incoming style, set the protection prayer, put the punish weapon in your hand, swing once, and then swap back to whatever you are actually killing it with.
There is a trick available with the slow-weapon rule that is worth knowing even if you never use it. Because spells count for the bonus and the speed of the equipped weapon is what the calculation reads, manually casting a spell with a very slow weapon equipped works — a dark bow or an ogre bow set to accurate being the examples the wiki gives.
The Saradomin godsword's special is a special case here that reads like a bug. Used for the punish, its flat bonus damage does not heal you and does not restore prayer, so it is not a substitute for using it as a sustain tool. It is still worth firing for the guaranteed hit.
Because the punish speed scales with how many demons are attacking you, fighting more of them at once makes each individual punish faster rather than slower — which is the mechanical argument for the multi-demon method rather than just a damage-per-hour one.
| Property | Value |
|---|---|
| Combat level | 450 |
| Attack styles | All |
| Attack speed | 6 ticks |
| Attacks on sight | No |
| Poisons you | No |
| Size | 3 tiles |
| Immune to cannon | Yes |
| Immune to thralls | No |
- Property
- Combat level
- Value
- 450
- Property
- Attack styles
- Value
- All
- Property
- Attack speed
- Value
- 6 ticks
- Property
- Attacks on sight
- Value
- No
- Property
- Poisons you
- Value
- No
- Property
- Size
- Value
- 3 tiles
- Property
- Immune to cannon
- Value
- Yes
- Property
- Immune to thralls
- Value
- No
Where Tormented Demons Sits in Progression
Within the elite monster group, the fights below Tormented Demons are Ancient Wyverns. Nothing in the elite monster group is harder, which makes Tormented Demons the ceiling for this cluster.
Phase by Phase
The opening two hits
The first two attacks of a fight are the most efficient of the whole kill and most players spend them badly. The demon's shield is already down before you have touched it, so the punish window is available immediately — you can be using the weapon it is weakest to as early as your second hit of combat.
The demon's own first attack is also weakened if you meet it correctly: praying against magic or missiles while its shield is still down cuts that attack by roughly three quarters.
- Walk in with the protection prayer already set for magic or missiles.
- Land your first hit — this is the punish, so it should come from the slow weapon.
- Swap back to your main weapon for the second hit, at which point the shield is back up.
The defenceless window
About thirty ticks into the fight the flames on its back go out and your accuracy becomes guaranteed. The window lasts until your first hit after the next fire bomb, so it is generous rather than fleeting, and it closes on your action rather than on a timer.
Everything you have been saving goes out here. Specials land, damage gear beats accuracy gear, and a fast weapon such as a toxic blowpipe becomes reasonable even though it is inferior to demonbane weaponry in raw terms.
- Fire your special attack as soon as the flames go out rather than waiting for a health threshold.
- Do not bother switching into armour that only adds accuracy — you already have all of it.
- An abyssal dagger special is worth carrying specifically because it only makes sense while your attacks cannot miss.
The fire bomb reset
Roughly every thirty-six seconds the demon binds you, disables your run, and drops two bombs — one on the tile you were on and one nearby. Two ticks is not long, and without control-clicking you are moving at walking pace, which is often not far enough.
The bombs are also the pivot point of the cycle. Once they land, the shield is down again, the accuracy window is over, and the demon has changed style.
- Control-click a tile at least one step away as soon as the bind lands.
- Watch whether the demon approaches — approaching means melee, staying put means whichever of magic or ranged it did not just use.
- Set the protection prayer, then take your punish hit with the slow weapon.
- Switch back and rebuild towards the next defenceless window.
Two or three demons at once
The temple holds them in groups and you can take on up to three. This is not simply more damage taken — the pattern changes in a way that is arguably easier to handle than a single demon, if you can move.
With two attacking you, one always uses melee and the other uses magic or ranged, and they deliberately do not attack on the same tick, which means their attacks can be prayer flicked. Moving around can shift that cadence and make the flicking harder, which is the tension in the method: the third demon only ever throws fire bombs, and fire bombs demand movement.
- Each extra demon takes a tick off your punish attack speed, so three demons means a two-tick punish and the possibility of back-to-back heavy hits.
- The binding fire bomb attack is performed simultaneously by all of them, so the movement problem arrives all at once rather than staggered.
- Stand well clear of walls. With multiple demons and only three valid tiles nearby, you can be guaranteed to eat a bomb no matter how well you click.
Fight Strategy: Shield phase breaking
- Set your protection prayer for magic or missiles before you attack, so the demon's opening attack is the weakened version.
- Open with the punish weapon, since the shield is already down before your first hit.
- Switch back to your demonbane or abyssal weapon and settle into ordinary damage.
- When the flames on its back go out, fire your special attack and prioritise maximum hit over accuracy for the rest of the window.
- Watch for the bind. Control-click out of the fire bomb area, because your run has been turned off.
- Read its feet immediately after the bombs land: approaching means melee, standing still means whichever ranged or magic attack it did not just use.
- Take your punish hit with the slow weapon while the shield is down, then swap back.
- Every 150 damage it takes, expect the prayer swap and the six ticks of stillness that come with it — change to your other style and keep going, because your combat does not break.
- Repeat the cycle. The kill is that loop three or four times over, not a series of phases.
It is worth being blunt about the odd part of the loop, because it is the part that gets skipped: you are being asked to interrupt your best weapon in order to swing a worse one. That feels wrong, and it is correct anyway. A seven-tick weapon gains 33 flat damage on the punish and swings at four ticks instead of seven, which is a hit no fast weapon can approach — and with a full Dharok's set or a Tzhaar-ket-om and berserker necklace, that number is then multiplied. Two switches per cycle for one enormous hit is the trade the whole setup is built around.
The other thing worth internalising is that the fire bomb is not an interruption to the fight, it is the metronome of it. The bombs reset the shield, end the accuracy window and force a style change simultaneously, which means every cycle has the same busy beat in the same place. Once you expect that beat, the sequence stops being four things happening at once and becomes one thing you do in a fixed order.
Thralls slot into this more cleverly than they first appear. Put the thrall on the style you are not using, and it keeps attacking for its full duration without ever being the thing that provokes an unwanted prayer swap — and occasionally it is the thing that provokes a wanted one.
Positioning and Movement
Stand in the open, away from walls and obstacles. This is not a comfort preference: the fire bombs only land on valid tiles, and in a cramped corner there may be as few as three of them, at which point one bomb is going to hit you whatever you click.
Do not build a plan around safespotting. They path around objects, they stack on top of each other, and a demon that cannot reach you and was previously in melee will simply start attacking with magic or ranged instead.
If you are taking on two or three at once, the positioning problem inverts: you want to move as little as possible to keep their attack cadence flickable, but the third demon's fire bombs force you to move. Pick an open area large enough that your movement is short.
Beginner Plan, Then the Advanced One
Your first trips
- Fight one at a time until the cycle is automatic. The multi-demon method is faster and it is not a learning environment.
- Bring a dragon two-handed sword or a rune crossbow on accurate as your punish weapon even if that is the cheapest thing in your bank. The bonus depends on the weapon's speed, not its price.
- Turn on the setting that lets you control-click to run, and practise using it on the bind before you rely on it.
- Get Arclight first, and treat everything else in the gear table as later. Weapons outside the demonbane and abyssal families lose a fifth of their damage here, which is a bigger effect than most upgrades.
- Say the post-bomb sequence out loud for your first few kills — move, read its feet, set prayer, punish, swap back. It is four actions in a fixed order, and rushing it is where the damage comes from.
Once the kill is boring
- Move to three demons at once once the single-demon cycle is boring. Each additional demon shortens the punish attack from four ticks towards two, which means the punish stops being one hit per cycle and starts being a short burst.
- Carry two ranged weapons rather than one if you are on the ranged side: a fast one for the guaranteed-accuracy window and an accurate one for the rest of the fight.
- Use the slow-weapon-with-a-spell trick if you already carry a magic switch. Manually casting with a dark bow or ogre bow on accurate equipped gives you the slow-weapon bonus on a spell.
- Pair Death Charge with your special weapon and bring an explorer's ring 4 so you can still alchemise your drops. If supplies rather than damage are the limit, a Saradomin godsword or eldritch nightmare staff special extends trips — just never fire the godsword as the punish, because the flat bonus damage does not heal or restore prayer.
- Time thralls onto the style you are not using so they never eat their own uptime, and treat the occasional prayer swap they cause as a bonus rather than an accident.
Drops and What Tormented Demons Is Worth
The reward here is a weapon tier rather than an item. The tormented synapse is the material for powerful demonbane weaponry, which means the drop you are farming is the thing that removes the 20% damage reduction these demons apply to everyone who does not have one — including at every other piece of demon content in the game. The burning claw is the other half of the appeal, and two of them combine into burning claws.
Because they count as greater demons for Slayer purposes, a task and an imbued slayer helmet fold into the grind for free, which is worth planning around rather than discovering. The temple teleport scrolls they drop also make the trip self-supplying, so the running cost of the grind falls once you have a stack.
No rates, prices or profit figures on this page. They move with the Grand Exchange and with balance changes, and the live tables on the wiki are the only version worth quoting.
Drops worth the trip: Burning claws, synapse, tormented synapse. Whether that is worth your time depends on how many kills an hour you personally get, which is a function of shield phase breaking rather than of your gear list.
Combat Achievements
The restricted tasks here are mostly about doing the cycle cleanly rather than quickly, which makes them a reasonable way to check whether you have actually learned the fight or merely survived it. If you can complete a kill without eating a fire bomb, you have the movement half; if you can land every punish hit, you have the other half.
Tormented Demons has Combat Achievement tasks.
Task lists move with updates — read the current list in game.
Ironman Notes
Slayer masters who assign Tormented Demons: Chaeldar, Nieve, Kuradal. Each kill is 1065 Slayer XP.
Without a Grand Exchange, burning claws, synapse, tormented synapse has to be earned rather than bought, and this is the fastest table it sits on.
This is an excellent self-sufficient target for a specific structural reason: the drop is the weapon upgrade, and it is one you cannot buy your way past. Demonbane weaponry is what makes every future demon fight cheaper, and it comes from here.
The gear requirements are kinder than they look. Arclight is the accessible starting weapon, blue moon or eclipse moon armour works as a hybrid set so you carry fewer switches, and a dragon two-handed sword is a perfectly good punish weapon. Nothing in the best-in-slot column is required to make the fight work.
Supplies scale with how well you handle the fire bomb, and that is a skill rather than a purchase. The budget setups here run on ten to twelve pieces of ordinary high-healing food and four to six prayer potions, which is a manageable weekly cost if your movement is good and a punishing one if it is not.
The transport situation solves itself. The demons drop the temple teleport scrolls, so early trips are the expensive ones and later trips are effectively free — which makes it worth pushing through the awkward first stretch rather than rationing attempts.
Common Mistakes and Death Causes
| What happened | Why it happened | The fix |
|---|---|---|
| The fire bomb, at walking pace | The attack disables your run before it drops the bombs, so a normal click moves you one tile in the two ticks available and the explosion catches you for 40 or more. | Control-click. Enable the setting first and practise it, because the bind gives you no time to discover the option. |
| Fighting with your back to a wall | The bombs only land on valid tiles, and in a cramped spot there may be as few as three of them, at which point one is guaranteed to land on you. | Fight in the open. This is the one positional rule here that matters more than reach or line of sight. |
| Praying the wrong style after the bombs | The demon always changes style after a fire bomb, and a player still recovering from the explosion misses the movement tell that says which style it is. | Read its feet as the first thing you do once you have moved. Approaching means melee; standing still means whichever of magic and ranged it did not just use. |
| Killing it while bombs are in the air | The bombs still explode after the demon dies, so a player who relaxes on the death animation takes the full hit anyway. | Finish the movement before you look at the loot. The explosion does not care that the fight is over. |
| Grinding it down without a demonbane weapon | Anything that is not demonbane or abyssal loses a fifth of its damage against them while the shield is up, so trips run long and supplies run out before the kill count does. | Get Arclight before you commit to the grind. It changes the trip length more than any armour upgrade in the table. |
| Taking on three demons before the cycle is automatic | Three demons means one melee attacker, one caster and one throwing fire bombs simultaneously, and the movement that the bombs demand is the same movement that breaks the prayer flick. | Learn the loop on one demon. The multi-demon method is a speed upgrade, not a learning environment. |
- What happened
- The fire bomb, at walking pace
- Why it happened
- The attack disables your run before it drops the bombs, so a normal click moves you one tile in the two ticks available and the explosion catches you for 40 or more.
- The fix
- Control-click. Enable the setting first and practise it, because the bind gives you no time to discover the option.
- What happened
- Fighting with your back to a wall
- Why it happened
- The bombs only land on valid tiles, and in a cramped spot there may be as few as three of them, at which point one is guaranteed to land on you.
- The fix
- Fight in the open. This is the one positional rule here that matters more than reach or line of sight.
- What happened
- Praying the wrong style after the bombs
- Why it happened
- The demon always changes style after a fire bomb, and a player still recovering from the explosion misses the movement tell that says which style it is.
- The fix
- Read its feet as the first thing you do once you have moved. Approaching means melee; standing still means whichever of magic and ranged it did not just use.
- What happened
- Killing it while bombs are in the air
- Why it happened
- The bombs still explode after the demon dies, so a player who relaxes on the death animation takes the full hit anyway.
- The fix
- Finish the movement before you look at the loot. The explosion does not care that the fight is over.
- What happened
- Grinding it down without a demonbane weapon
- Why it happened
- Anything that is not demonbane or abyssal loses a fifth of its damage against them while the shield is up, so trips run long and supplies run out before the kill count does.
- The fix
- Get Arclight before you commit to the grind. It changes the trip length more than any armour upgrade in the table.
- What happened
- Taking on three demons before the cycle is automatic
- Why it happened
- Three demons means one melee attacker, one caster and one throwing fire bombs simultaneously, and the movement that the bombs demand is the same movement that breaks the prayer flick.
- The fix
- Learn the loop on one demon. The multi-demon method is a speed upgrade, not a learning environment.
Supplies rather than health are usually what ends a trip here, and two specials exist for exactly that: a Saradomin godsword or an eldritch nightmare staff, fired during the shieldless window where your accuracy is guaranteed. The important caveat is that the godsword must not be your punish hit, because used that way its flat bonus damage neither heals you nor restores prayer.
If your trips keep ending early, a Lightbearer is the blunt fix and it comes with a cost worth weighing: it provides no strength bonus, and Arclight and Emberlight lean heavily on strength. Take the ring if specials are keeping you alive, and leave it behind if your demonbane weapon is keeping your kills short.
Because the demons are spread through the temple in groups rather than kept in an arena, stepping away from one to reset is easy and costs you only the damage you had dealt. A cycle you have lost track of is better restarted from a clean opening, where the shield is down and your punish hit is available before the demon has even attacked.
FAQ
Why should I bring a slow weapon?
Because the one hit you land while the shield is down has its damage increased based on the weapon's attack speed, and the attack itself is forced to four ticks regardless. A seven-tick weapon gains 33 damage and swings at four ticks. Fast weapons gain nothing.
Which weapons actually get the bonus?
Only melee weapons set to crush, heavy ranged weapons — crossbows and ballistae — and spells that are not cast from a powered staff. Crush is checked as a style, so a godsword special still counts even though it rolls against something else.
When does the shield come down?
When you first attack the demon, and again after every fire bomb. It stays down until you land one hit, which is what gives you time to switch weapons rather than a two-tick scramble.
How do I know which style it will use next?
It always changes style after a fire bomb. If it walks towards you, melee is coming. If it does not, it will use whichever of magic and ranged it did not use last time. If it was previously using melee, you have to guess and correct.
Can I safespot them?
No. They path around obstacles and stack on each other, and a demon that cannot reach you and was previously using melee will switch randomly to magic or ranged instead. Trying to trap one just changes what it hits you with.
Is fighting three at once actually better?
It can be. With two attacking, one uses melee and the other uses magic or ranged, and they avoid attacking on the same tick so you can flick between prayers. A third only throws fire bombs. Each extra demon also takes a tick off your punish attack, down to two ticks with three of them — but you have to move constantly, which is what makes the flicking harder.
What does the flame going out on its back mean?
It has become defenceless — every attack you make is guaranteed to land until your first hit after the next fire bomb. That is when specials should go out, and it is the reason damage gear beats accuracy gear here.
Do I really lose damage without a demonbane weapon?
Yes. Every weapon that is not classified as demonbane or abyssal deals 20% less damage against them while the shield is up, which over a whole trip is a large tax. Arclight is the cheap fix.
Related Guides
Bottom Line
The fight is a four-beat loop: open on a weakened attack with the shield already down, punish with something slow, dump specials when the flames on its back go out, then move out of the fire bombs and start again. Everything expensive in the gear list makes that loop faster, and nothing in it replaces knowing where the punish hit goes. Learn the beat on one demon, then take on three and watch the punish get quicker rather than slower.
The one thing you cannot practise your way past is the temple door, and While Guthix Sleeps is a long quest to sit through purely to reach a grind — having the questline finished for you is the shortcut if the demons rather than the story are what you came for.
If Tormented Demons is blocking a Combat Achievement or an unlock you actually want, our PvM service is done by hand — no automation. Otherwise the bosses list has the full index.
Tormented Demons — Elite monster, difficulty 4/5. Combat values here — hitpoints, max hits, attack styles and speed, Defence and Magic levels, immunities and Slayer requirements — were read from the Old School RuneScape Wiki infobox for Tormented Demons on 2026-08-03. Kill rates, GP per hour and item prices are deliberately absent because they move with balance patches and the Grand Exchange. Mechanics, gear tiers and phase behaviour on this page were checked against Tormented Demon/Strategies on 4 August 2026.
Need a trusted team? Bils Services
Enjoyed the guide?
Drop a like — it helps other Adventurers find the good stuff.
Community
Comments
Silence in the hall…
Be the first Adventurer to leave a mark.
Join the thread
Add a comment
Tips, drops, or “this carried my account” — keep it useful.
bilsservices · bils services · bilsservices.com

