


OSRS Demonic Gorillas Guide: Gear Switching, Mechanics & Zenyte Drops
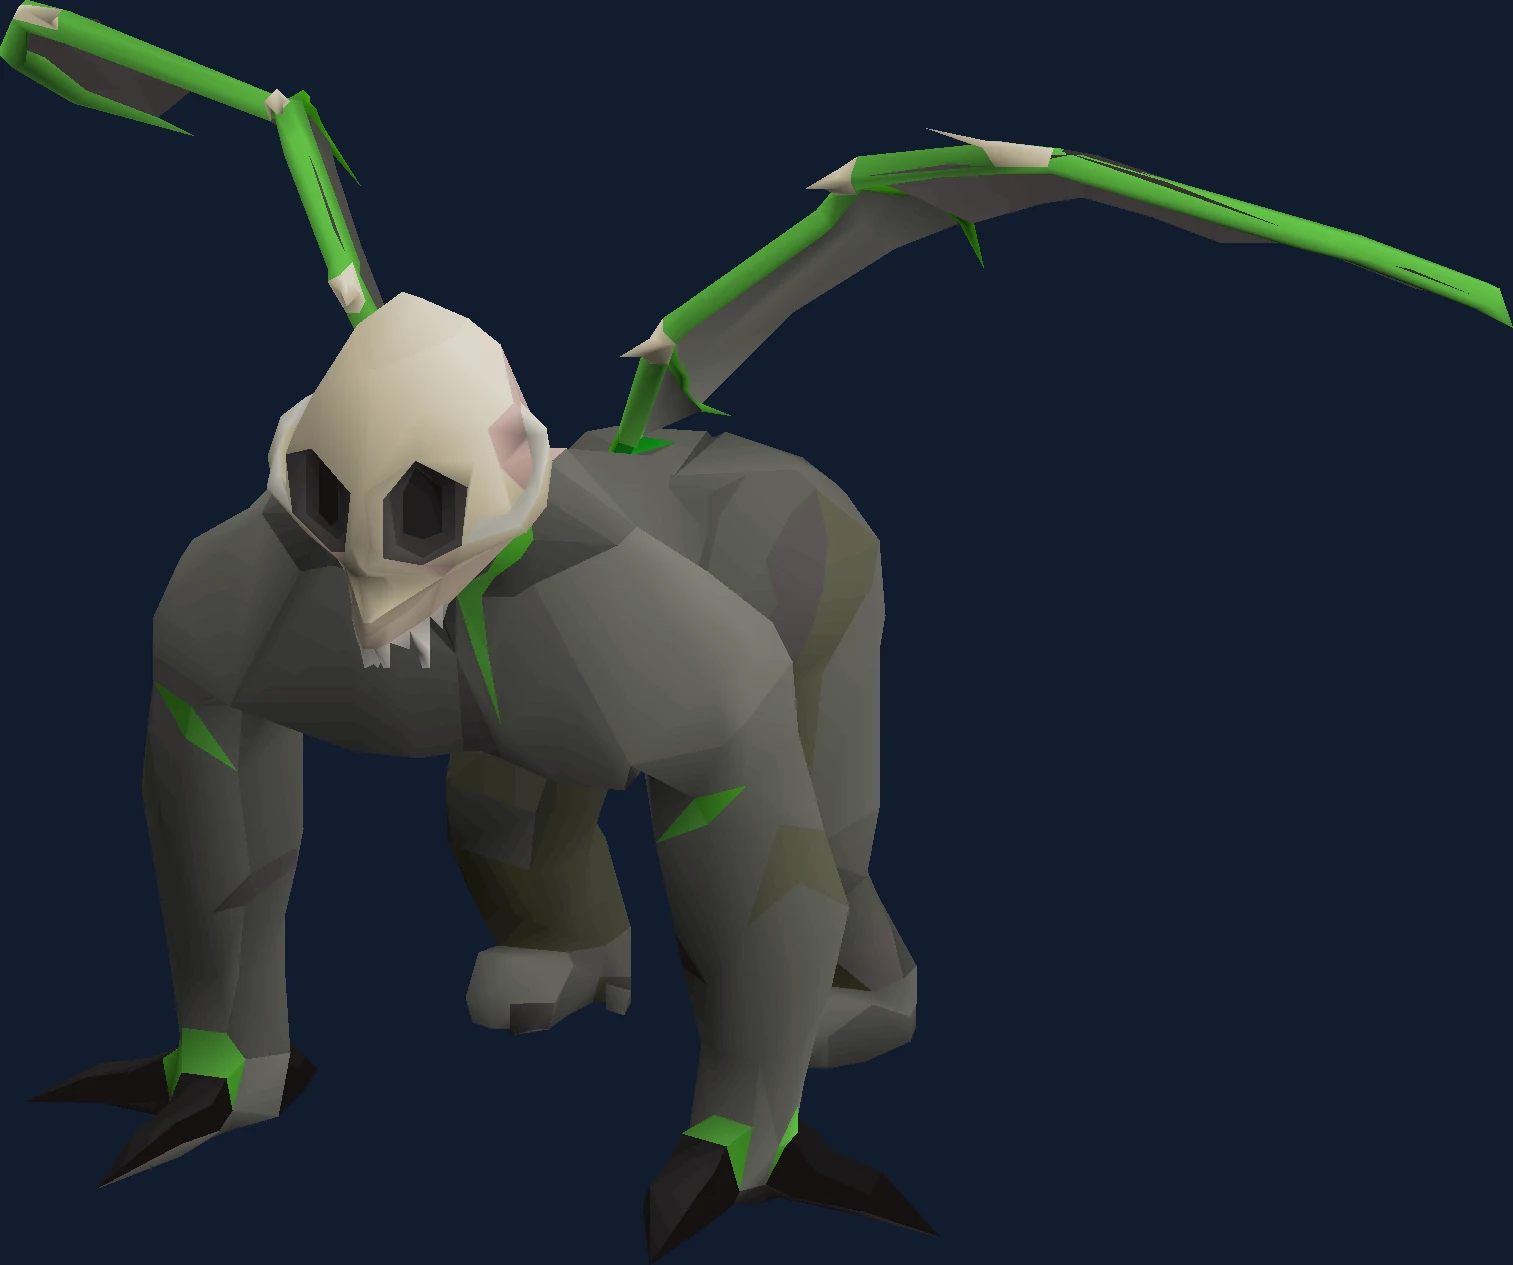
Demonic Gorillas guide for prayer/gear switches and zenyte shard grinding.
Why People Fight Demonic Gorillas
Demonic gorillas are the game's switching exam. They live in the Crash Site Cavern once Monkey Madness II is done, they drop zenyte shards, and there is no version of killing them that involves standing still and clicking once. They use protection prayers, so one attacking style is not enough to kill them at all — you need at least two, and the conventional pair is melee and ranged, because both are cheap and their Defence level is low enough to make magic's higher magic defence roll and rune bill a poor trade.
What makes this genuinely difficult, and what most explanations flatten into one sentence, is that two independent counters are running at the same time and neither one tells you about the other. The first counter is theirs: after three hits that deal you no damage, they change the style they are attacking with. The second counter is yours: after you have hit them at least four times and dealt seventy total damage in styles they are not protecting against, they change which style they are immune to. One counter decides what prayer you should be holding. The other decides which weapon should be in your hand. They fire at different moments, and every kill is a matter of servicing both.
The prayer counter has a nasty administrative detail attached. When a gorilla changes its protection prayer, your character stops attacking entirely — combat ends. So the moment you see the prayer flip is the moment you have to change gear and click the gorilla again, or you stand there doing nothing while its attack-style counter keeps ticking. That single behaviour is why keybinds for the prayer and inventory tabs are not a nicety here.
The rest of the fight is a boulder you have to walk away from, and one very useful piece of information: their attack style is predictable roughly five times out of six if you know how to ask. Move away from the gorilla and watch its feet. That is the whole trick, and it is what turns this from a guessing game into a fight.
Its own attacks are melee (crush), ranged and magic, so Protect from Melee, Missiles and Magic all have a job.
In our index it sits in the elite monster group at difficulty 4 of 5, where kill times come down to Triple-style switching.
| Field | Detail |
|---|---|
| Classification | Elite monster (Elite Monster) |
| Group | elite monster |
| Difficulty | 4 / 5 |
| Solo or team | Solo or team |
| Access requirement | Monkey Madness II |
| Notable reward | Zenyte shard, heavy ballista parts |
| Signature mechanic | Triple-style switching |
| Hitpoints | 380 |
| Max hits | 31 (normal), 40 (special attack) |
| Released | 6 May 2016 |
- Field
- Classification
- Detail
- Elite monster (Elite Monster)
- Field
- Group
- Detail
- elite monster
- Field
- Difficulty
- Detail
- 4 / 5
- Field
- Solo or team
- Detail
- Solo or team
- Field
- Access requirement
- Detail
- Monkey Madness II
- Field
- Notable reward
- Detail
- Zenyte shard, heavy ballista parts
- Field
- Signature mechanic
- Detail
- Triple-style switching
- Field
- Hitpoints
- Detail
- 380
- Field
- Max hits
- Detail
- 31 (normal), 40 (special attack)
- Field
- Released
- Detail
- 6 May 2016
Is Demonic Gorillas the Right Fight for You Yet?
The stat recommendations here are not high for the content's difficulty, because the difficulty is not in the numbers. A maxed account that cannot read the prayer flip will lose more supplies than a mid-level account that can. What the levels buy you is enough damage to reach the seventy-damage threshold quickly, which in turn means fewer attacks landing on you between swaps.
You are ready for this fight if:
- Monkey Madness II is finished. That is the only gate on the cavern.
- You own two attacking setups you can swap between in a couple of clicks, and you have decided which slots you are actually willing to switch — body, weapon and amulet is the usual answer.
- You have keybinds set for the prayer and inventory tabs. This is a fight where the interface is part of the mechanics.
- You can hear the game. The style change comes with a scream and a line of overhead text at the same moment, and using the audio cue is materially easier than watching for the text.
Come back later if any of these are true:
- You are planning to camp one style. It will not work — a single style is exactly what their protection prayers are designed to defeat.
- You want to bring a full switch for every slot. Their swap thresholds are low enough that gloves, boots and ring switches cannot be completed in time, and trying costs you more damage than the bonuses provide.
- You are solo and heading into the multi-combat parts of the cavern without meaning to. Some of it is multi-way, which is a very different fight than the one you planned.
Access Requirements
Demonic Gorillas is gated behind Monkey Madness II.
Monkey Madness II also tends to sit alongside the other elite monster gates, so it is usually cheaper to clear them together than to come back for each one. The boss requirements checklist lists them by group.
Location and How to Get There
Demonic Gorillas is found in the Crash Site Cavern.
The cavern opens up after Monkey Madness II, where you fight two of them as a quest step. Afterwards the full population is available, which makes the quest itself the only real gate.
The cavern entrance is north-west of the Grand Tree, through an opening in the fence; once you are through, run north-east to get in.
A royal seed pod is the fastest way to the Grand Tree and drops you at its base. A spirit tree to the Gnome Stronghold works too — run north, then north-west, to the gap in the fence. The gnome glider to Ta Quir Priw puts you on top of the tree instead, so you descend and then run north-west.
Before you commit to a spot, note that parts of the cavern are multi-combat. If you are solo and do not want a second gorilla joining in, that is worth checking rather than discovering.
Recommended Stats and Gear at Three Budgets
| Skill or unlock | Suggested | What it changes |
|---|---|---|
| Monkey Madness II | Complete | The only requirement. Everything else on this list is a recommendation. |
| Strength | 85+ | Reaching the seventy-damage prayer threshold in fewer hits, which is the real dial on this fight. |
| Attack | 80+ | Landing those hits in the first place against a demon you are trying to burst. |
| Ranged | 85+ | Your second style. It is the one you will be holding whenever they pray melee. |
| Defence | 80+ | Against three styles that each hit up to 30, plus a boulder that ignores all of it. |
| Hitpoints | 80+ | The boulder costs a third of your current health, so a bigger pool is a smaller absolute hit. |
| Prayer | 70+ | Piety and the protection prayers you will be cycling constantly. |
| Magic | 70+ | Magic defence, rather than for attacking — their magic defence roll makes magic the weakest of the three offensive options here. |
| Recipe for Disaster | Complete | Barrows gloves, which serve both of your setups. |
| Shadow of the Storm | Complete | Arclight, and the demonbane lane that makes melee the cheap answer here. |
| Dragon Slayer II | Complete | Ava's assembler. Animal Magnetism and an accumulator will do the same job less well. |
| Slayer helmet (i) or black mask (i) | Owned | A large accuracy and damage bonus on task, and they count as black demons or monkeys. |
- Skill or unlock
- Monkey Madness II
- Suggested
- Complete
- What it changes
- The only requirement. Everything else on this list is a recommendation.
- Skill or unlock
- Strength
- Suggested
- 85+
- What it changes
- Reaching the seventy-damage prayer threshold in fewer hits, which is the real dial on this fight.
- Skill or unlock
- Attack
- Suggested
- 80+
- What it changes
- Landing those hits in the first place against a demon you are trying to burst.
- Skill or unlock
- Ranged
- Suggested
- 85+
- What it changes
- Your second style. It is the one you will be holding whenever they pray melee.
- Skill or unlock
- Defence
- Suggested
- 80+
- What it changes
- Against three styles that each hit up to 30, plus a boulder that ignores all of it.
- Skill or unlock
- Hitpoints
- Suggested
- 80+
- What it changes
- The boulder costs a third of your current health, so a bigger pool is a smaller absolute hit.
- Skill or unlock
- Prayer
- Suggested
- 70+
- What it changes
- Piety and the protection prayers you will be cycling constantly.
- Skill or unlock
- Magic
- Suggested
- 70+
- What it changes
- Magic defence, rather than for attacking — their magic defence roll makes magic the weakest of the three offensive options here.
- Skill or unlock
- Recipe for Disaster
- Suggested
- Complete
- What it changes
- Barrows gloves, which serve both of your setups.
- Skill or unlock
- Shadow of the Storm
- Suggested
- Complete
- What it changes
- Arclight, and the demonbane lane that makes melee the cheap answer here.
- Skill or unlock
- Dragon Slayer II
- Suggested
- Complete
- What it changes
- Ava's assembler. Animal Magnetism and an accumulator will do the same job less well.
- Skill or unlock
- Slayer helmet (i) or black mask (i)
- Suggested
- Owned
- What it changes
- A large accuracy and damage bonus on task, and they count as black demons or monkeys.
Treat the quest list as more important than the level list. Arclight, Barrows gloves and an imbued black mask change this fight far more than five combat levels do, because they shorten the gap between prayer swaps.
| Slot | Budget | More affordable | Best in slot |
|---|---|---|---|
| Melee weapon | Arclight | Emberlight | Emberlight, with a soulreaper axe close behind in mid-tier armour |
| Ranged weapon | Eclipse atlatl, which needs the fewest switches of anything here | Toxic blowpipe | Twisted bow, scorching bow or toxic blowpipe — very close in output, and the slower ones are easier to switch around |
| Head | Slayer helmet (i) on task, otherwise a melee helm | Slayer helmet (i) | Slayer helmet (i), or Torva and Masori helms if you are off task |
| Body and legs | Mixed hide top and Verac's plateskirt | Mixed hide top and Verac's plateskirt | Torva platebody with Masori chaps (f), and a Masori body (f) as the switch |
| Neck | Amulet of glory | Amulet of fury | Amulet of rancour for melee, necklace of rupture for ranged |
| Cape | Fire cape | Fire cape, with an Ava's assembler in the inventory | Infernal cape, with a blessed Dizana's quiver as the ranged swap |
| Hands, feet, ring | Barrows gloves, dragon boots, berserker ring (i) | Barrows gloves, dragon boots, berserker ring (i) | Barrows gloves, Avernic treads, Ultor ring |
| Shield | Dragon defender | Dragon defender | Avernic defender |
| Special attack weapon | Burning claws | Burning claws | Saradomin godsword, or burning claws if your supplies are already comfortable |
- Slot
- Melee weapon
- Budget
- Arclight
- More affordable
- Emberlight
- Best in slot
- Emberlight, with a soulreaper axe close behind in mid-tier armour
- Slot
- Ranged weapon
- Budget
- Eclipse atlatl, which needs the fewest switches of anything here
- More affordable
- Toxic blowpipe
- Best in slot
- Twisted bow, scorching bow or toxic blowpipe — very close in output, and the slower ones are easier to switch around
- Slot
- Head
- Budget
- Slayer helmet (i) on task, otherwise a melee helm
- More affordable
- Slayer helmet (i)
- Best in slot
- Slayer helmet (i), or Torva and Masori helms if you are off task
- Slot
- Body and legs
- Budget
- Mixed hide top and Verac's plateskirt
- More affordable
- Mixed hide top and Verac's plateskirt
- Best in slot
- Torva platebody with Masori chaps (f), and a Masori body (f) as the switch
- Slot
- Neck
- Budget
- Amulet of glory
- More affordable
- Amulet of fury
- Best in slot
- Amulet of rancour for melee, necklace of rupture for ranged
- Slot
- Cape
- Budget
- Fire cape
- More affordable
- Fire cape, with an Ava's assembler in the inventory
- Best in slot
- Infernal cape, with a blessed Dizana's quiver as the ranged swap
- Slot
- Hands, feet, ring
- Budget
- Barrows gloves, dragon boots, berserker ring (i)
- More affordable
- Barrows gloves, dragon boots, berserker ring (i)
- Best in slot
- Barrows gloves, Avernic treads, Ultor ring
- Slot
- Shield
- Budget
- Dragon defender
- More affordable
- Dragon defender
- Best in slot
- Avernic defender
- Slot
- Special attack weapon
- Budget
- Burning claws
- More affordable
- Burning claws
- Best in slot
- Saradomin godsword, or burning claws if your supplies are already comfortable
Melee is the style to build first, and not because it hits hardest. It is cheap, it is easy to use, and Arclight arrives early on most accounts — which means the demonbane lane is open to you long before the rest of your gear catches up. If you are trying to cut switches down, camping the melee set and switching only the ranged pieces is the standard compromise.
The switch list should be shorter than instinct suggests. Body, weapon and amulet is the common three, and the wiki is explicit that gloves, boots and rings are not worth swapping: the thresholds arrive too quickly for you to finish those switches at the right moment, so you end up losing tempo to gain a small bonus. Hybrid pieces exist for exactly this reason — eclipse moon armour is effective on both styles, and an eclipse atlatl scales off melee strength gear, which is why it survives on a list that otherwise favours far more expensive weapons.
One ring choice deserves a note because it interacts with the demonbane weapons rather than with the fight. An Ultor ring, or a berserker ring (i) at a lower budget, boosts your maximum hit, and that boost is worth more than usual when paired with Arclight or Emberlight.
Multi-hit special attacks need timing rather than avoiding. Dragon claws, burning claws and even a dragon dagger can lose entire hitsplats, because prayer switching and damage land on different ticks and anything that arrives after the switch is nulled. Fire them immediately after the gorilla swaps away from Protect from Melee, when you have the longest clean window. Burn damage has the same problem in a different shape: a prayer change wipes it, which is worth knowing before you build a plan around burning claws or a scorching bow.
The scorching bow's special is unusually useful here anyway, because the binding effect buys you extra time to change prayers off ranged or magic and makes the step-back easier. Just be aware that if a gorilla is kept from reaching you with melee for too long, it will switch to ranged or magic instead as an anti-safespot response.
| Check | Value |
|---|---|
| Prayers for its own attacks | 3 — Protect from Melee, Missiles and Magic |
| Its Defence level | 200 |
| Its Magic level | 195 |
| Its lowest defence bonus, per its infobox | stab, slash, crush, light ammunition, standard ammunition, heavy ammunition |
| Elemental weakness | 35% to water spells |
| Monster attributes | demon |
- Check
- Prayers for its own attacks
- Value
- 3 — Protect from Melee, Missiles and Magic
- Check
- Its Defence level
- Value
- 200
- Check
- Its Magic level
- Value
- 195
- Check
- Its lowest defence bonus, per its infobox
- Value
- stab, slash, crush, light ammunition, standard ammunition, heavy ammunition
- Check
- Elemental weakness
- Value
- 35% to water spells
- Check
- Monster attributes
- Value
- demon
- Tagged as a demon: demonbane weapons apply.
Inventory and Supplies
| What | Why it is there |
|---|---|
| Your second style, and only three slots of it | Body, weapon and amulet. Every extra switch is a switch you will be halfway through when the next threshold fires. |
| A Saradomin godsword | The healing on its special is enough that experienced players in strong gear often bring no food at all, and it is better still with a Lightbearer. A toxic blowpipe special does the same job less efficiently. |
| Super restores | You are cycling three protection prayers and holding an offensive prayer underneath them. Prayer, not food, is what usually ends a trip here. |
| Divine super combat and divine ranging potions | Both setups are live all fight, so both need boosting. A stat drain on the style you are not currently holding still costs you when you swap back. |
| Food, in whatever quantity your gear says | The three attack styles each hit up to 30, and the boulder takes a third of your current health regardless of armour. |
| A full Guthan's set, if you are staying a long time | Genuine healing insurance for trips where you take more damage than planned or the godsword special underperforms. |
| Book of the dead, a rune pouch, and an explorer's ring | Demonic Offering restores prayer and gives more Prayer experience than an ash sanctifier or leaving the ashes on the floor. The pouch doubles as storage for law rune drops, and the ring alchemises what you pick up. |
| An ash sanctifier, if you are not offering the ashes | Scatters the malicious ashes automatically so you are not clicking the floor between kills. |
| A royal seed pod and a house teleport | The seed pod is the fastest way back in, and the first thing to drop if you need the inventory slot. |
- What
- Your second style, and only three slots of it
- Why it is there
- Body, weapon and amulet. Every extra switch is a switch you will be halfway through when the next threshold fires.
- What
- A Saradomin godsword
- Why it is there
- The healing on its special is enough that experienced players in strong gear often bring no food at all, and it is better still with a Lightbearer. A toxic blowpipe special does the same job less efficiently.
- What
- Super restores
- Why it is there
- You are cycling three protection prayers and holding an offensive prayer underneath them. Prayer, not food, is what usually ends a trip here.
- What
- Divine super combat and divine ranging potions
- Why it is there
- Both setups are live all fight, so both need boosting. A stat drain on the style you are not currently holding still costs you when you swap back.
- What
- Food, in whatever quantity your gear says
- Why it is there
- The three attack styles each hit up to 30, and the boulder takes a third of your current health regardless of armour.
- What
- A full Guthan's set, if you are staying a long time
- Why it is there
- Genuine healing insurance for trips where you take more damage than planned or the godsword special underperforms.
- What
- Book of the dead, a rune pouch, and an explorer's ring
- Why it is there
- Demonic Offering restores prayer and gives more Prayer experience than an ash sanctifier or leaving the ashes on the floor. The pouch doubles as storage for law rune drops, and the ring alchemises what you pick up.
- What
- An ash sanctifier, if you are not offering the ashes
- Why it is there
- Scatters the malicious ashes automatically so you are not clicking the floor between kills.
- What
- A royal seed pod and a house teleport
- Why it is there
- The seed pod is the fastest way back in, and the first thing to drop if you need the inventory slot.
The interesting supply decision here is whether you bring food at all. In strong gear with a Saradomin godsword and a Lightbearer, the special's healing can carry the whole trip, which frees a large block of inventory for the switches and potions that actually shorten kills. That is an endgame position rather than a starting one — build up to it by noticing how much food you are genuinely eating rather than by copying the setup.
Prayer and Spellbook
Prioritise Protect from Magic, then Protect from Missiles or Protect from Melee. The reason for that order is not that magic hurts more — all three styles hit up to 30 — but that magic is the attack you can do least about by moving, and the gorilla's own magic defence makes it the style you least want to be trading with.
The rule that catches everyone is that the third blocked hit has to actually be prayed against. Three hits that deal you no damage cause a style change, and a protection prayer counts as making them deal no damage — but if you have wandered off the correct prayer and taken a zero for some other reason, the change does not fire reliably. So the correct prayer matters even in the moments when it appears to be doing nothing, which is a strange thing to have to think about and is why people drift off it.
When you do get the third hit wrong, you are not out of information. If the hit that landed on you was ranged or magic, the next attack is either the same style again or melee — nothing else. Watch the gorilla's feet: if it starts walking towards you, melee is coming. That converts a coin flip into a read.
Demonic Offering deserves a mention as a prayer source rather than a spell. It restores prayer points from the ashes you are already producing, and it pays more Prayer experience than the alternatives, so on a long trip it is quietly doing two jobs.
Mechanics That Decide the Fight
| Mechanic | How you see it coming | What it does | Your answer |
|---|---|---|---|
| Attack style counter | A bone-chilling scream, with a line of overhead text at the same moment. Count blocked hits and you will see it coming before you hear it. | After three hits that deal you no damage, the gorilla changes the style it attacks with. The boulder toss does not count towards those three. | Count to three and have the next prayer ready. Use the audio cue rather than the text, because you will be looking at your inventory when it fires. |
| Protection prayer counter | It pounds its chest. It does this once shortly after spawning, too, to pick its first prayer. | After being hit at least four times and taking seventy total damage in styles it is not protecting against, it changes which style it is immune to. Only one protection prayer is ever active. | This is a gear cue, not a prayer cue. Change weapon and armour to the style it is no longer blocking, and re-click it, because the swap ends your combat. |
| Combat ending on the prayer swap | Your character simply stops attacking. | When the gorilla changes protection prayers, everyone attacking it drops out of combat. | Treat the chest-pound as a three-part action: switch gear, switch prayer if needed, re-click. Keybinds for the prayer and inventory tabs are what make that fast enough. |
| Boulder toss | It beats its chest and a shadow appears on the tile you were standing on. | A third of your current health if you are still there. The area of effect is a single tile, and only used while it is attacking with ranged or magic — never with melee. | Step one tile. That is all it needs. The boulder does not count towards the three-hit style counter, so do not let it corrupt your count. |
| Style prediction by movement | Move away from it and watch whether it follows. | If it was using magic and follows you, melee is next; if it stays put, ranged is next. If it was using ranged and follows you, melee is next; if it stays put, magic is next. | Use the read every time. The only genuinely blind case is coming off melee, where it can go to either magic or ranged — pray whichever of the two your defences are worse against. |
| Protection prayer immunity | Zeroes, or splashes, from the style it is guarding. | Complete immunity to attacks of the protected style. A dragon scimitar does not bypass it. | Change style. The one exception worth knowing is that Verac's set does bypass it, which is a curiosity for most players and a real option for a few. |
- Mechanic
- Attack style counter
- How you see it coming
- A bone-chilling scream, with a line of overhead text at the same moment. Count blocked hits and you will see it coming before you hear it.
- What it does
- After three hits that deal you no damage, the gorilla changes the style it attacks with. The boulder toss does not count towards those three.
- Your answer
- Count to three and have the next prayer ready. Use the audio cue rather than the text, because you will be looking at your inventory when it fires.
- Mechanic
- Protection prayer counter
- How you see it coming
- It pounds its chest. It does this once shortly after spawning, too, to pick its first prayer.
- What it does
- After being hit at least four times and taking seventy total damage in styles it is not protecting against, it changes which style it is immune to. Only one protection prayer is ever active.
- Your answer
- This is a gear cue, not a prayer cue. Change weapon and armour to the style it is no longer blocking, and re-click it, because the swap ends your combat.
- Mechanic
- Combat ending on the prayer swap
- How you see it coming
- Your character simply stops attacking.
- What it does
- When the gorilla changes protection prayers, everyone attacking it drops out of combat.
- Your answer
- Treat the chest-pound as a three-part action: switch gear, switch prayer if needed, re-click. Keybinds for the prayer and inventory tabs are what make that fast enough.
- Mechanic
- Boulder toss
- How you see it coming
- It beats its chest and a shadow appears on the tile you were standing on.
- What it does
- A third of your current health if you are still there. The area of effect is a single tile, and only used while it is attacking with ranged or magic — never with melee.
- Your answer
- Step one tile. That is all it needs. The boulder does not count towards the three-hit style counter, so do not let it corrupt your count.
- Mechanic
- Style prediction by movement
- How you see it coming
- Move away from it and watch whether it follows.
- What it does
- If it was using magic and follows you, melee is next; if it stays put, ranged is next. If it was using ranged and follows you, melee is next; if it stays put, magic is next.
- Your answer
- Use the read every time. The only genuinely blind case is coming off melee, where it can go to either magic or ranged — pray whichever of the two your defences are worse against.
- Mechanic
- Protection prayer immunity
- How you see it coming
- Zeroes, or splashes, from the style it is guarding.
- What it does
- Complete immunity to attacks of the protected style. A dragon scimitar does not bypass it.
- Your answer
- Change style. The one exception worth knowing is that Verac's set does bypass it, which is a curiosity for most players and a real option for a few.
The seventy-damage figure is a total across styles, not per style, and that has a practical consequence people misread as a bug. If you land 49 damage with melee and then 26 with ranged, it swaps immediately — the ranged hit finished a total your melee had already mostly built. In practice this only helps you when the gorilla is praying magic, since its Magic level and defensive bonuses make magic a bad style to be trading in anyway.
There is one interaction to avoid rather than exploit. An ancient godsword's blood sacrifice can push the gorilla over the threshold and cause a swap to Protect from Magic, and if you attack on the same tick as the sacrifice while that swap happens, your hit is nulled.
After three blocked hits that were not correctly prayed against, the gorilla does one of two things: it keeps the same style for the next three attacks, or it switches. That ambiguity is exactly why the movement read matters — it is the only way to tell those two outcomes apart before the attack lands.
| Property | Value |
|---|---|
| Combat level | 275 |
| Attack styles | Crush, Ranged, Magic |
| Attack speed | 5 ticks |
| Attacks on sight | Yes, unless the player has completed Monkey Madness II |
| Poisons you | No |
| Size | 2 tiles |
| Immune to cannon | Yes |
| Immune to thralls | No |
- Property
- Combat level
- Value
- 275
- Property
- Attack styles
- Value
- Crush, Ranged, Magic
- Property
- Attack speed
- Value
- 5 ticks
- Property
- Attacks on sight
- Value
- Yes, unless the player has completed Monkey Madness II
- Property
- Poisons you
- Value
- No
- Property
- Size
- Value
- 2 tiles
- Property
- Immune to cannon
- Value
- Yes
- Property
- Immune to thralls
- Value
- No
Where Demonic Gorillas Sits in Progression
Within the elite monster group, the fights below Demonic Gorillas are Ancient Wyverns. Nothing in the elite monster group is harder, which makes Demonic Gorillas the ceiling for this cluster.
Fight Strategy: Triple-style switching
- Open with Protect from Magic up and your melee set on, and let the gorilla pick its protection prayer — it pounds its chest shortly after spawning.
- Attack with whichever of your two styles it is not blocking, and start counting blocked hits from the first one it throws at you.
- At three blocked hits, expect the scream. Change prayer for the incoming style, using the movement read if you are coming off ranged or magic.
- Keep pushing damage towards seventy in the styles it is not protecting. Four hits is the minimum, so bursty weapons reach the threshold in fewer swings.
- When it pounds its chest again, stop thinking about prayer for a moment: switch gear to the style it is now leaving open, then re-click it, because your combat has ended.
- Step one tile off the boulder shadow whenever it appears, and do not let that dodge add itself to your blocked-hit count.
- If you carry a multi-hit special, fire it immediately after it swaps off Protect from Melee — the longest clean window in the fight.
- Repeat until it dies. Every cycle is the same two counters in a different order, and the order is what changes between kills.
The reason it helps to say the two counters out loud is that they demand opposite reactions and arrive from opposite directions. The style counter is theirs and it is filled by hits you did not take, so the better you are at praying, the faster it fires. The prayer counter is yours and it is filled by damage you dealt, so the better your gear, the faster that one fires. A player who upgrades their weapon and does not adjust will find themselves swapping gear far more often than they expected, and if they have brought five switches instead of three they will be mid-swap when the style change lands.
That is also the honest reason the wiki tells you to bring fewer switches as your gear improves. It is not a cost saving. At high damage output the gorilla is changing prayers so often that a long switch sequence never completes, and a slightly weaker setup you can put on in two clicks does more damage per kill than a stronger one you are always halfway into.
The last habit worth building is separating what your eyes and ears are doing. Your ears listen for the scream, because that is the style change and you will be looking at your inventory when it happens. Your eyes watch the gorilla's feet, because movement is what tells you whether melee is next. Anyone who tries to do both jobs visually will miss one of them.
Positioning and Movement
Stay at least one tile away as a default. It costs you nothing on ranged, it makes the movement read available at all, and it means the boulder shadow lands somewhere you are already leaving.
A weapon with extra reach changes the read without changing your position: a noxious halberd lets you see whether the gorilla is approaching while you are still attacking it, so you get the same information without stepping back.
Keep an eye on which part of the cavern you are in. The multi-combat sections are where a solo player quietly acquires a second gorilla, and two sets of counters at once is not the fight you have been practising.
Beginner Plan, Then the Advanced One
Your first trips
- Do your first kills with melee equipped and ranged in the bag, and swap only the three slots. Learning the two counters is the whole task; learning them while managing seven switches is not a fair test.
- Count blocked hits aloud for the first few kills. The scream tells you the change has already happened, whereas the count tells you it is about to.
- Practise the movement read deliberately, without attacking. Step away, watch whether it follows, and predict the style before it swings. Get that right consistently and the fight becomes far less punishing.
- Bring more food than the setups suggest and more restores than you think. Three styles at up to 30 each, plus a boulder for a third of your health, adds up quickly while your reactions are slow.
- Set your prayer and inventory keybinds before your first trip rather than after your first bad one. The interface is genuinely part of the mechanics here.
Once the kill is boring
- Time multi-hit specials to land straight after it swaps off Protect from Melee. Done properly this is a large chunk of the seventy-damage threshold in one action, and it can let you skip the step-back entirely by ending the melee phase before it starts.
- Move towards a no-food setup as your gear improves. With a Saradomin godsword and a Lightbearer, the special's healing can sustain the whole trip and turn a column of food into potions and switches.
- Use Demonic Offering rather than an ash sanctifier once your prayer bill is the limiting factor. The ashes are already dropping, and it converts them into both prayer points and Prayer experience.
- Consider the duo method if you have a second account. One player tanks while the other stands in full Dharok's at one hitpoint, which produces very high damage precisely because they never take a hit. It needs the tank to hold aggression reliably, Boost Potion Share from the Lunar spellbook, accept aid enabled on both, and attacks timed together so neither player wastes a hit into a fresh prayer swap. A full Guthan's set on the tank makes the healing self-sustaining.
- If you are the tank in that setup, keep your switch count even lower than usual. Two players filling the damage threshold means prayer swaps arrive roughly twice as often.
Drops and What Demonic Gorillas Is Worth
The zenyte shard is why this content is busy. It is the material for the top tier of jewellery in the game, and the gorillas are also where the parts for a ballista come from — two different upgrade paths from one grind, which is unusual and is part of why the cavern stays populated years after the quest that unlocks it.
Two smaller things change how a trip feels rather than what it pays. They drop law runes, which is why a rune pouch here doubles as storage rather than just carrying alchemy runes, and they leave malicious ashes, which are prayer points and Prayer experience if you offer them and clutter if you do not.
No rates, values or kills per hour on this page. Those move with the Grand Exchange and with balance changes, and the live tables on the wiki are the only figures worth trusting.
Drops worth the trip: Zenyte shard, heavy ballista parts. Whether that is worth your time depends on how many kills an hour you personally get, which is a function of Triple-style switching rather than of your gear list.
Combat Achievements
The tasks attached to these monsters reward exactly the thing the fight is teaching, which is why they are a better learning target than a kill count goal. A player who can hold the correct prayer through a full cycle without taking damage has already done most of what the restricted tasks ask for.
Demonic Gorillas has Combat Achievement tasks. A 40 max hit is survivable enough that the kill-time limits usually bite before the restricted-gear ones do.
Task lists move with updates — read the current list in game.
Ironman Notes
Slayer masters who assign Demonic Gorillas: Turael, Spria, Chaeldar, Steve, Duradel. Each kill is 408.5 Slayer XP.
Without a Grand Exchange, zenyte shard, heavy ballista parts has to be earned rather than bought, and this is the fastest table it sits on.
This is one of the better mid-game targets on a self-sufficient account, because the reward is jewellery you cannot otherwise obtain and the entry cost is a quest rather than a level grind.
The equipment advice bends in your favour. Arclight is the accessible demonbane weapon and it is genuinely strong here, an eclipse atlatl needs almost no switches and runs off the melee strength gear you already wear, and mixed hide with a Verac's plateskirt is a perfectly serviceable body-and-legs answer. None of the expensive lines in the gear table are load-bearing.
Supplies are the constraint, and there are two levers. A Saradomin godsword special heals, and a full Guthan's set heals indefinitely if you are prepared to spend the inventory space — which is a better trade on an Ironman than on an account that can simply buy more food. Demonic Offering turns the ashes you are already generating into prayer points.
Keep the switch count low for a reason that has nothing to do with cost: on a self-sufficient account, a trip that ends because you were mid-swap is a trip's worth of gathered supplies gone.
Common Mistakes and Death Causes
| What happened | Why it happened | The fix |
|---|---|---|
| Caught mid-switch when the style changed | The two counters fire independently, so a gear swap triggered by the seventy-damage threshold can land in the middle of a style change you also needed to react to. | Carry three switches, not six. A swap you can complete in two clicks is worth more than the bonuses on one you cannot. |
| Standing still after the prayer swap | The swap ends your combat, so a player who only changes prayer and gear stands there not attacking while the gorilla's own counter keeps running. | Make re-clicking the gorilla the last step of every swap, every time. Treat it as part of the same action rather than an afterthought. |
| Eating the boulder | It takes a third of your current health regardless of armour, and it lands on the tile you occupied when the animation began. | Step one tile as soon as you see the chest-beat and the shadow. One tile is genuinely enough — the area of effect is a single square. |
| Guessing wrong coming off a ranged or magic attack | Players treat the style change as random when it is only half random: after ranged or magic, the next attack is the same style again or melee, nothing else. | Watch its feet rather than guessing. Walking towards you means melee is next, and that read is available before the attack lands. |
| Drifting off the correct prayer because you were taking zeroes | The third blocked hit has to actually be prayed against for the style change to fire consistently, so a lapse in a moment that looks safe desynchronises your whole count. | Hold the correct prayer even when nothing is getting through. The prayer is doing bookkeeping as well as blocking. |
| Acquiring a second gorilla in the multi-combat area | Parts of the cavern are multi-way, and a solo player who wandered into one now has two sets of counters and two boulder timers to manage. | Know which part of the cavern you are standing in before you attack. If you want to fight more than one, do it deliberately with a partner and a plan. |
- What happened
- Caught mid-switch when the style changed
- Why it happened
- The two counters fire independently, so a gear swap triggered by the seventy-damage threshold can land in the middle of a style change you also needed to react to.
- The fix
- Carry three switches, not six. A swap you can complete in two clicks is worth more than the bonuses on one you cannot.
- What happened
- Standing still after the prayer swap
- Why it happened
- The swap ends your combat, so a player who only changes prayer and gear stands there not attacking while the gorilla's own counter keeps running.
- The fix
- Make re-clicking the gorilla the last step of every swap, every time. Treat it as part of the same action rather than an afterthought.
- What happened
- Eating the boulder
- Why it happened
- It takes a third of your current health regardless of armour, and it lands on the tile you occupied when the animation began.
- The fix
- Step one tile as soon as you see the chest-beat and the shadow. One tile is genuinely enough — the area of effect is a single square.
- What happened
- Guessing wrong coming off a ranged or magic attack
- Why it happened
- Players treat the style change as random when it is only half random: after ranged or magic, the next attack is the same style again or melee, nothing else.
- The fix
- Watch its feet rather than guessing. Walking towards you means melee is next, and that read is available before the attack lands.
- What happened
- Drifting off the correct prayer because you were taking zeroes
- Why it happened
- The third blocked hit has to actually be prayed against for the style change to fire consistently, so a lapse in a moment that looks safe desynchronises your whole count.
- The fix
- Hold the correct prayer even when nothing is getting through. The prayer is doing bookkeeping as well as blocking.
- What happened
- Acquiring a second gorilla in the multi-combat area
- Why it happened
- Parts of the cavern are multi-way, and a solo player who wandered into one now has two sets of counters and two boulder timers to manage.
- The fix
- Know which part of the cavern you are standing in before you attack. If you want to fight more than one, do it deliberately with a partner and a plan.
There is no penalty for walking away from a gorilla mid-fight beyond losing the damage you had put in, so a fight where you have lost track of both counters is better abandoned than salvaged. Reset, let it pick a fresh protection prayer from its chest-pound, and start counting from a known state.
If you are low on health and your special weapon is a Saradomin godsword, the special is your heal — that is a large part of why it appears on every recommended setup. A toxic blowpipe special does the same job less efficiently, and a Guthan's set does it indefinitely if you have the inventory space.
When your prayer rather than your health is the problem, Demonic Offering on the ashes already lying around is cheaper than a restore and pays Prayer experience on top. That is the one recovery option here that improves your account while it saves your trip.
FAQ
Can I kill one with a single combat style?
No. They cycle through all three protection prayers and each one gives complete immunity to that style, so at least two attacking setups are required. Melee and ranged is the usual pair because both are cheap and their Defence level is low.
How do I know which style it is about to attack with?
Move away and watch. Coming off magic, following you means melee and staying still means ranged. Coming off ranged, following you means melee and staying still means magic. Coming off melee you cannot tell, so pray whichever of magic or ranged your defences handle worse.
Why did my character stop attacking?
The gorilla changed its protection prayer, which ends combat for everyone attacking it. Switch your gear to the style it is no longer blocking and click it again.
Does the boulder count towards the three missed hits?
No, and that is worth remembering because it is easy to include it by accident and end up one hit off. It also only appears while the gorilla is using ranged or magic — it never throws one while using melee.
Is magic ever worth using as my second style?
Rarely. It is possible, but their magic defence roll is high and the rune cost is worse than the alternatives, so melee and ranged remains the standard pair. The one time their magic prayer helps you is that it opens both of the styles you actually want to use.
How many switches should I bring?
Fewer than you want to. Body, weapon and amulet is the practical set. Gloves, boots and rings cannot reliably be swapped inside their thresholds, and with strong weaponry the swaps come so frequently that a long sequence never finishes.
Can I bring a friend?
Yes, and there is a specific method for it, because part of the cavern is multi-combat. One player tanks while the other fights in full Dharok's at one hitpoint. It works, it is fast, and it requires the tank to hold aggression perfectly — a single gorilla turning on the Dharok's account ends that account's trip immediately.
Related Guides
Bottom Line
Everything about this fight resolves into two questions asked repeatedly: which style is it about to attack me with, and which style is it about to stop blocking. The first is answered by counting to three and watching its feet. The second is answered by tracking your own damage towards seventy and being ready to swap gear and re-click the moment it pounds its chest. Get those two habits separated in your head and the boulder, the max hits and the switch count all become manageable detail.
If the blocker is the Slayer level you need for the task bonus that makes this grind pay properly, that is a training job rather than a combat one — our Slayer training will get the level there while you keep practising the switches.
If Demonic Gorillas is blocking a Combat Achievement or an unlock you actually want, our PvM service is done by hand — no automation. Otherwise the bosses list has the full index.
Demonic Gorillas — Elite monster, difficulty 4/5. Combat values here — hitpoints, max hits, attack styles and speed, Defence and Magic levels, immunities and Slayer requirements — were read from the Old School RuneScape Wiki infobox for Demonic Gorillas on 2026-08-03. Kill rates, GP per hour and item prices are deliberately absent because they move with balance patches and the Grand Exchange. Mechanics, gear tiers and phase behaviour on this page were checked against Demonic gorilla/Strategies on 4 August 2026.
Need a trusted team? Bils Services
Enjoyed the guide?
Drop a like — it helps other Adventurers find the good stuff.
Community
Comments
Silence in the hall…
Be the first Adventurer to leave a mark.
Join the thread
Add a comment
Tips, drops, or “this carried my account” — keep it useful.
bilsservices · bils services · bilsservices.com

