


OSRS Barrows Guide: All Brothers, Gear, Puzzle & Chest Rewards
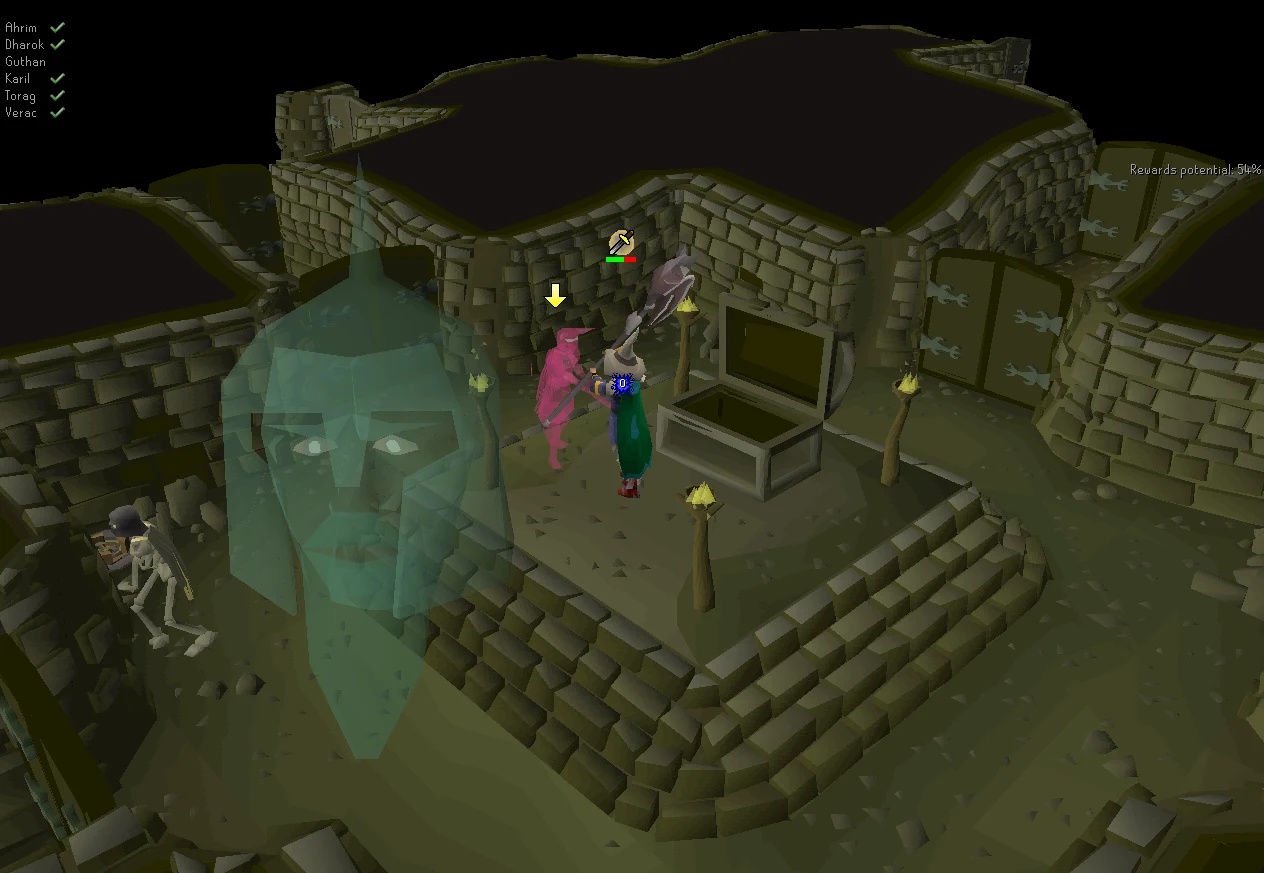
Barrows guide for brother order, prayer, tunnel puzzle, and chest EV.
Why People Fight Barrows brothers
Barrows does not have a boss in it. What it has is six burial mounds in southern Morytania, a wight in each one, a randomly placed tunnel underneath the crypts, a door with a pattern lock on it, and a chest whose contents you have already decided by the time you reach it. Everything that makes a run good or bad happens before you open the chest, which is why the players who are quickest here are not the ones with the best weapon — they are the ones who never walk further than they need to.
The six brothers are individually undemanding. Four of them attack with melee, Ahrim attacks with magic and Karil attacks with ranged, and each one is fully blocked by the matching protection prayer with a single exception: Verac has a one-in-four chance of hitting through it. All six share a 50% weakness to air, which is why wind spells and Iban Blast dominate the equipment advice at every budget, and which is the reason a set of mystic robes and a staff genuinely outperforms tanky armour here.
The pressure comes from somewhere else entirely. While you are underground anywhere in the Barrows, the brothers' faces appear on screen every eighteen seconds and take prayer points off you — eight to begin with, rising by one for each brother you have killed, so a maximum of fourteen once all six are dead. That drain is the clock the whole run is measured against. It is also why the advice here inverts the usual habits: you run offensive prayers rather than saving prayer, you use protection prayers so you can keep attacking instead of stopping to eat, and you drink and eat above ground where the drain cannot reach you.
Then there is the reward system, which is genuinely different from a drop table. The chance of Barrows equipment is set by how many brothers you killed, and you cannot receive a piece belonging to a brother you skipped. Everything else in the chest — mostly runes — is set by reward potential, which you accumulate by killing things, at a rate equal to each monster's combat level. So a Barrows run is two overlapping collection problems with a travel cost attached, and optimising it is closer to route planning than to combat.
| Field | Detail |
|---|---|
| Classification | Minigame-style chest (Boss) |
| Group | standalone boss |
| Difficulty | 2 / 5 |
| Solo or team | Solo |
| Access requirement | Priest in Peril |
| Notable reward | Barrows equipment (Dharok's, Ahrim's, Karil's…) |
| Signature mechanic | Brother order and chest puzzle |
- Field
- Classification
- Detail
- Minigame-style chest (Boss)
- Field
- Group
- Detail
- standalone boss
- Field
- Difficulty
- Detail
- 2 / 5
- Field
- Solo or team
- Detail
- Solo
- Field
- Access requirement
- Detail
- Priest in Peril
- Field
- Notable reward
- Detail
- Barrows equipment (Dharok's, Ahrim's, Karil's…)
- Field
- Signature mechanic
- Detail
- Brother order and chest puzzle
Is Barrows brothers the Right Fight for You Yet?
Barrows is unusual in being available very early and still worth doing much later, because the limiting factor is time per run rather than survivability. A level-fifty account can complete it; a much stronger account completes it in a fraction of the time, which is the entire difference.
You are ready for this fight if:
- Priest in Peril is done, so you can enter Morytania at all, and you have a spade in your inventory. There is no way into a crypt without one.
- You have 43 Prayer for all three protection prayers. Below that, one of the six brothers becomes a genuine problem rather than a formality.
- You have a wind spell or Iban Blast available. All six brothers are 50% weak to air, and that weakness does more for your kill times than a weapon upgrade would.
- You are prepared to learn a fixed digging order. The travel between mounds is a measurable part of every run and the only part you fully control.
Come back later if any of these are true:
- You are planning to fight Dharok without a protection prayer up. He is the most dangerous of the six precisely in that situation, and one mistake there is a whole run.
- You have no prayer restoration. The area drain is not optional damage you can play around — it happens on a timer whether you are fighting or walking.
- You want to open the chest after one brother. You can, and you will be locking yourself out of five sixths of the equipment table to save a couple of minutes.
Access Requirements
Barrows brothers is gated behind Priest in Peril.
Priest in Peril also tends to sit alongside the other standalone boss gates, so it is usually cheaper to clear them together than to come back for each one. The boss requirements checklist lists them by group.
Location and How to Get There
Barrows brothers is found in the Barrows crypts in southern Morytania.
A Barrows teleport puts you on the mounds directly; otherwise run south-east from Canifis. A spade is mandatory for digging into the crypts, and Priest in Peril gates Morytania access in the first place.
The fastest arrival is the Barrows Teleport from the Arceuus spellbook at 83 Magic, or a tablet of the same, both of which drop you beside the entrance. A Barrows portal in a portal chamber or portal nexus does the same job from home and needs 50 Construction.
Everything else arrives west of the mounds and involves crossing the bridge. In rough order of speed: a Mort'ton teleport scroll and then east; the Minigame Teleport to Shades of Mort'ton, which is free and takes no inventory space but has a twenty-minute cooldown; Morytania legs 3 or 4 to Burgh de Rott and north through Mort'ton; the BKR fairy ring, south-east to the swamp boaty and across to Mort'ton; a Kharyrll Teleport to Canifis, the Myreque Hideout shortcut and south over the rope bridge to the same boat; or the BIP fairy ring at 50 Agility, east and then south through Mort'ton.
Two small unlocks are worth more here than they sound. At 72 Agility a shortcut through the west wall near the bridge cuts the run to the northern entrance for every one of those approaches. And the BIP ring passes close to the Nature Grotto, which restores prayer — useful precisely because prayer is the resource this content taxes.
For the return leg, a ring of dueling to Ferox Enclave is the habit worth forming: you bank there and use the Pool of Refreshment to restore the stats Ahrim and Karil drained, in one stop.
Recommended Stats and Gear at Three Budgets
| Skill or unlock | Suggested | What it changes |
|---|---|---|
| Priest in Peril | Complete | Access to Morytania. The only requirement Barrows has. |
| Prayer | 43+ | All three protection prayers. This is the level that makes the six fights routine. |
| Attack, Strength, Defence | 50+ each | Killing the melee brothers, and taking their hits when you choose not to pray. |
| Magic | 50+ | Iban Blast and the higher wind spells, which exploit the shared 50% air weakness. |
| Ranged | 50+ | Only if you are shooting Ahrim, who is weakest to ranged of the six. |
| Agility | 50+, and 72 for the wall shortcut | Run energy across six mounds, and a materially shorter approach from the bridge. |
| Construction | 45+, or 50 for the portal | A home altar and restoration pool between runs; the portal removes the travel entirely. |
| Morytania Hard Diary | Complete | Unlimited Burgh de Rott teleports, and 50% more runes from every chest you open here. |
| Ghommal's hilt 2 or better | Medium Combat Achievements | Nullifies the area prayer drain outright, which is the single largest change available to a run. |
- Skill or unlock
- Priest in Peril
- Suggested
- Complete
- What it changes
- Access to Morytania. The only requirement Barrows has.
- Skill or unlock
- Prayer
- Suggested
- 43+
- What it changes
- All three protection prayers. This is the level that makes the six fights routine.
- Skill or unlock
- Attack, Strength, Defence
- Suggested
- 50+ each
- What it changes
- Killing the melee brothers, and taking their hits when you choose not to pray.
- Skill or unlock
- Magic
- Suggested
- 50+
- What it changes
- Iban Blast and the higher wind spells, which exploit the shared 50% air weakness.
- Skill or unlock
- Ranged
- Suggested
- 50+
- What it changes
- Only if you are shooting Ahrim, who is weakest to ranged of the six.
- Skill or unlock
- Agility
- Suggested
- 50+, and 72 for the wall shortcut
- What it changes
- Run energy across six mounds, and a materially shorter approach from the bridge.
- Skill or unlock
- Construction
- Suggested
- 45+, or 50 for the portal
- What it changes
- A home altar and restoration pool between runs; the portal removes the travel entirely.
- Skill or unlock
- Morytania Hard Diary
- Suggested
- Complete
- What it changes
- Unlimited Burgh de Rott teleports, and 50% more runes from every chest you open here.
- Skill or unlock
- Ghommal's hilt 2 or better
- Suggested
- Medium Combat Achievements
- What it changes
- Nullifies the area prayer drain outright, which is the single largest change available to a run.
The bottom two rows are the ones to chase. Fifty combat levels finish Barrows; a hilt that switches off the prayer drain and a diary that adds half again to the rune reward change what a run is worth and how long it takes. Note that the hilt only has to be held just before the drain fires, so a timer lets you wear a stronger off-hand the rest of the time.
| Slot | Low level | Mid game | Best in slot |
|---|---|---|---|
| Main weapon | Iban's staff casting Iban Blast, or a staff of air with the best wind spell you have | Smoke battlestaff on Wind Wave or better, or a trident of the seas or swamp | Eye of ayak, or a Tumeken's shadow; a harmonised nightmare staff on Wind Surge |
| Weapon for Ahrim | Magic shortbow (i), or a yew shortbow | Karil's crossbow with bolt racks, or a hunters' sunlight crossbow | Toxic blowpipe — or nothing, if you have air spells or a Shadow |
| Body and legs | Mystic robes; dragonhide if you would rather tank the crypt monsters | Ahrim's, Dagon'hai or Infinity; Masori or void for the Ahrim swap | Ancestral, with elite void or Masori (f) as the ranged switch |
| Head | Helm of neitiznot, or a Barrows helm you have already found | Ahrim's hood, or an Infinity hat | Ancestral hat, or a Virtus mask |
| Neck and cape | Amulet of power or a holy symbol, Guthix cloak | Amulet of glory or fury, god cape | Occult necklace, imbued god cape |
| Off-hand | Rune kiteshield, or a rune defender | Mage's book or a malediction ward, or Ghommal's hilt 2 | Elidinis' ward (f), swapped for Ghommal's hilt 2 as the drain fires |
| Hands and feet | Combat bracelet and climbing boots; chaos gauntlets if you are casting Wind Bolt | Barrows gloves, dragon boots | Confliction gauntlets, Avernic treads |
| Ring | Ring of dueling, for the Ferox bank and pool | Berserker ring (i), or a seers ring (i) | Magus ring, or a ring of shadows |
| Melee kit for reward potential | Abyssal whip and a dragon defender | Osmumten's fang, dragon claws for the brothers | Torva and an Osmumten's fang, with claws and a dragon battleaxe |
- Slot
- Main weapon
- Low level
- Iban's staff casting Iban Blast, or a staff of air with the best wind spell you have
- Mid game
- Smoke battlestaff on Wind Wave or better, or a trident of the seas or swamp
- Best in slot
- Eye of ayak, or a Tumeken's shadow; a harmonised nightmare staff on Wind Surge
- Slot
- Weapon for Ahrim
- Low level
- Magic shortbow (i), or a yew shortbow
- Mid game
- Karil's crossbow with bolt racks, or a hunters' sunlight crossbow
- Best in slot
- Toxic blowpipe — or nothing, if you have air spells or a Shadow
- Slot
- Body and legs
- Low level
- Mystic robes; dragonhide if you would rather tank the crypt monsters
- Mid game
- Ahrim's, Dagon'hai or Infinity; Masori or void for the Ahrim swap
- Best in slot
- Ancestral, with elite void or Masori (f) as the ranged switch
- Slot
- Head
- Low level
- Helm of neitiznot, or a Barrows helm you have already found
- Mid game
- Ahrim's hood, or an Infinity hat
- Best in slot
- Ancestral hat, or a Virtus mask
- Slot
- Neck and cape
- Low level
- Amulet of power or a holy symbol, Guthix cloak
- Mid game
- Amulet of glory or fury, god cape
- Best in slot
- Occult necklace, imbued god cape
- Slot
- Off-hand
- Low level
- Rune kiteshield, or a rune defender
- Mid game
- Mage's book or a malediction ward, or Ghommal's hilt 2
- Best in slot
- Elidinis' ward (f), swapped for Ghommal's hilt 2 as the drain fires
- Slot
- Hands and feet
- Low level
- Combat bracelet and climbing boots; chaos gauntlets if you are casting Wind Bolt
- Mid game
- Barrows gloves, dragon boots
- Best in slot
- Confliction gauntlets, Avernic treads
- Slot
- Ring
- Low level
- Ring of dueling, for the Ferox bank and pool
- Mid game
- Berserker ring (i), or a seers ring (i)
- Best in slot
- Magus ring, or a ring of shadows
- Slot
- Melee kit for reward potential
- Low level
- Abyssal whip and a dragon defender
- Mid game
- Osmumten's fang, dragon claws for the brothers
- Best in slot
- Torva and an Osmumten's fang, with claws and a dragon battleaxe
The reason the low-level column is robes rather than armour is worth stating plainly: all six brothers are 50% weak to air and their Magic levels are low, so very little gear is needed to kill them and even cheap magic robes beat tanky armour in practice. Some players prefer to armour up against the crypt monsters instead, and that is a reasonable preference rather than an optimisation.
At low Magic levels the spell choice has two crossover points worth remembering. Iban Blast is much stronger than Wind Blast until 59 Magic, at which point they are similar; and Iban Blast stays roughly level with Wind Wave until 65, after which Wind Wave pulls ahead. Below those thresholds Iban's staff is not a budget compromise, it is the better spell.
Ahrim is the exception to the magic-everything plan, because he is weakest to ranged. With air spells or a Tumeken's shadow you can skip the ranged switch entirely and save yourself a set of equipment slots; without either, bring a blowpipe, a magic shortbow or Karil's crossbow and use your special attacks on him, because the longer that fight runs the more of your other combat stats he drains.
Ghommal's hilt 2 occupies the off-hand slot and switching off the prayer drain is usually worth more than whatever the slot was doing. The exception is a one-handed staff plus a strong magic off-hand, and even then the wiki's own advice is to time the drain and swap the hilt in just before it fires — the effect only needs the hilt to be wielded at that moment.
A melee weapon earns its inventory space for a reason that has nothing to do with the brothers: the crypt monsters you kill for reward potential are quicker to remove with melee than with a spell you are paying runes for. At the top end that same melee kit becomes the fast route through Dharok and Ahrim via dragon claw specials.
One cheap curiosity from the wiki is worth knowing if you own neither a trident nor a blowpipe: a black salamander works as a hybrid weapon across all six brothers. It is weaker, but it covers every style from one slot. The catch is that you cannot safespot while using it.
Inventory and Supplies
| What | Why it is there |
|---|---|
| A spade | Non-negotiable. Digging on top of a mound is the only way into a crypt, and forgetting it is a wasted teleport. |
| Prayer potions, sized for the drain rather than the fights | Eight prayer points every eighteen seconds while you are underground, rising to fourteen once all six brothers are dead. This is the main consumable here. |
| A restore potion | Ahrim drains Strength and Karil drains Agility. Without a restore you carry those debuffs into the tunnels and the next run. |
| Super combat and ranging potions | Specifically to shorten Ahrim and Karil, the two fights that punish you for taking your time. |
| Food, mostly for Verac and the crypt monsters | The five other brothers are fully blocked by prayer. Verac's one-in-four hit through prayer, and whatever is in the tunnels, is what your food is for. |
| A special attack weapon | A dragon dagger at the bottom end, dragon claws at the top. Both exist to end Ahrim quickly before his stat drain accumulates. |
| Runes for air spells or Iban Blast | The 50% air weakness is shared by all six, so this is the ammunition for most of the run. A rune pouch also stores the mind, chaos, death and blood runes you are about to be rewarded with. |
| A ring of dueling, or a house teleport | Ferox Enclave for the bank and the Pool of Refreshment, or home for an altar and a restoration pool. Either resets you between runs. |
| A Barrows teleport tablet | The return trip. A Portal Nexus entry replaces it, and a Construction or max cape replaces the house tablet. |
| An ectoplasmator, or a strange old lockpick | Optional extras pulling in opposite directions: one converts your crypt kills into Prayer experience, the other skips doors at the cost of charges. |
- What
- A spade
- Why it is there
- Non-negotiable. Digging on top of a mound is the only way into a crypt, and forgetting it is a wasted teleport.
- What
- Prayer potions, sized for the drain rather than the fights
- Why it is there
- Eight prayer points every eighteen seconds while you are underground, rising to fourteen once all six brothers are dead. This is the main consumable here.
- What
- A restore potion
- Why it is there
- Ahrim drains Strength and Karil drains Agility. Without a restore you carry those debuffs into the tunnels and the next run.
- What
- Super combat and ranging potions
- Why it is there
- Specifically to shorten Ahrim and Karil, the two fights that punish you for taking your time.
- What
- Food, mostly for Verac and the crypt monsters
- Why it is there
- The five other brothers are fully blocked by prayer. Verac's one-in-four hit through prayer, and whatever is in the tunnels, is what your food is for.
- What
- A special attack weapon
- Why it is there
- A dragon dagger at the bottom end, dragon claws at the top. Both exist to end Ahrim quickly before his stat drain accumulates.
- What
- Runes for air spells or Iban Blast
- Why it is there
- The 50% air weakness is shared by all six, so this is the ammunition for most of the run. A rune pouch also stores the mind, chaos, death and blood runes you are about to be rewarded with.
- What
- A ring of dueling, or a house teleport
- Why it is there
- Ferox Enclave for the bank and the Pool of Refreshment, or home for an altar and a restoration pool. Either resets you between runs.
- What
- A Barrows teleport tablet
- Why it is there
- The return trip. A Portal Nexus entry replaces it, and a Construction or max cape replaces the house tablet.
- What
- An ectoplasmator, or a strange old lockpick
- Why it is there
- Optional extras pulling in opposite directions: one converts your crypt kills into Prayer experience, the other skips doors at the cost of charges.
The habit that saves the most supplies is not an item at all: drink your prayer potions and eat your food above ground. The drain only applies while you are underground, so anything you do at the surface is free, and anything you do in a crypt is paid for twice.
Bones to Peaches tablets are the neat trick for accounts that keep running out of food. Fill your empty inventory slots with bones while you are gathering reward potential, and convert them as needed rather than carrying a column of food you might not eat.
Prayer and Spellbook
The protection prayers are simple and worth memorising as a list rather than looking up each time: Protect from Magic against Ahrim, Protect from Missiles against Karil, and Protect from Melee against Dharok, Guthan, Torag and Verac. Five of the six are fully negated. Verac has a 25% chance to hit through, so against him the prayer is damage reduction rather than immunity, and food is part of the plan.
The counter-intuitive part is that you should be running offensive prayers here, not conserving prayer. Eagle Eye or Rigour against Ahrim when you are shooting him, and Chivalry, Piety or the Incredible Reflexes and Ultimate Strength pair against Karil when you are hitting him, will always speed those kills up — and the prayer they cost is less than the area drain you avoid by finishing sooner. The same logic is the reason to pray protection at all: it means you spend your time attacking rather than eating, which shortens the run, which reduces the total drain.
The drain itself scales as you progress, which changes the shape of a run. It starts at eight prayer points per tick of the effect and rises by one for every brother killed, topping out at fourteen once all six are down — so the tunnels, which you enter last, are the most expensive part of the run. That is an argument for gathering your reward potential efficiently rather than wandering.
If you have Ghommal's hilt 2 or better from the medium Combat Achievement rewards, the drain simply stops applying. Because it only needs to be wielded immediately before the effect fires, the optimised version is to keep a stronger off-hand equipped and swap the hilt in on a timer, which is a fiddly habit with a very large payoff.
Mechanics That Decide the Fight
| Mechanic | How you see it coming | What it does | Your answer |
|---|---|---|---|
| Ahrim the Blighted | The centre mound. He attacks with magic and drains your Strength as the fight goes on. | Magic attacks on a six-tick cycle, plus Confuse, Weaken and Curse. | Protect from Magic, and kill him fast — he is weakest to ranged and to melee, so this is where a bow or a special attack goes. Bring a restore potion for the Strength drain. |
| Dharok the Wretched | The north-east mound. The slowest attacker of the six at seven ticks, and the hardest hitting. | Melee, with a high maximum hit and high accuracy. He is the most dangerous of the six to fight without a protection prayer up. | Protect from Melee, always. He is weak to magic. Kill him first, while the prayer you arrived with is still full. |
| Guthan the Infested | The south-east mound. Five-tick melee attacks. | Melee, and often deals less damage than the others to a high-Defence player — but is harder than most to kill without a protection prayer. | Protect from Melee, and magic to damage him. A candidate for tanking rather than praying if your Defence is high and your prayer is low. |
| Karil the Tainted | The south mound. The fastest attacker of the six at four ticks, and he drains your Agility. | Ranged attacks, with high accuracy and a high maximum hit. | Protect from Missiles. He is weak to magic and to melee, so this is where offensive melee prayers are worth switching on. Restore the Agility afterwards. |
| Torag the Corrupted | The south-west mound. Five-tick melee. | Melee, and like Guthan tends to underperform against a high-Defence player. | Protect from Melee, magic to kill. Along with Verac, he is one of the two brothers you can kite from any side of his sarcophagus. |
| Verac the Defiled | The north-west mound. Five-tick melee, and the only brother your prayer does not fully stop. | Melee with a 25% chance to hit straight through a protection prayer. | Protect from Melee anyway — three quarters blocked is worth having — and keep food for the quarter that lands. Offensive prayers are still worth running against him. |
| The area prayer drain | The brothers' faces appearing on screen, every eighteen seconds while you are underground. | Removes eight prayer points, rising by one for each brother killed, to a maximum of fourteen once all six are dead. | Shorten the run rather than fighting the drain. Eat and drink above ground, and equip Ghommal's hilt 2 or better if you have it, which switches the effect off entirely. |
| Crypts and despawning | You searched a sarcophagus, a brother appeared, and you climbed the stairs anyway. | Leaving a crypt before killing the brother despawns him, and he returns at full health when you search that sarcophagus again. | Finish what you start. If you find the tunnel entrance before you have killed the other five, leave and come back — the tunnel does not despawn, but a wounded brother does. |
| Tunnel doors | Every door you open spawns something. | Roughly two chances in twenty-one that it is one of the remaining brothers, with a skeleton being much the most common outcome and bloodworms and crypt rats splitting the rest. A room already holding eleven or more enemies spawns nothing new. | Open doors deliberately, because each one is also reward potential. Not every door in the tunnels can be opened, so navigating is a matter of finding the route to the central room. |
| The pattern lock | The door to the central room will not simply open. | One of four simple pattern puzzles. Get it wrong and the doors and rooms rearrange, moving the exit ladder and changing which doors will open. | Learn all four patterns. The answers are always among the options shown, but not in the same order each time, so recognising the shape matters more than memorising a position. |
| The chest and the collapse | You open the chest and the brother whose crypt you came down through appears. | You do not have to kill him to loot. Once looted, the tunnels shake and deal occasional damage, the layout rearranges, and every door you open on the way out is guaranteed to summon a brother you did not kill. | Click the chest again to loot, then leave. Killing the brothers that spawn during the escape is wasted effort — they do not count towards your next run. |
- Mechanic
- Ahrim the Blighted
- How you see it coming
- The centre mound. He attacks with magic and drains your Strength as the fight goes on.
- What it does
- Magic attacks on a six-tick cycle, plus Confuse, Weaken and Curse.
- Your answer
- Protect from Magic, and kill him fast — he is weakest to ranged and to melee, so this is where a bow or a special attack goes. Bring a restore potion for the Strength drain.
- Mechanic
- Dharok the Wretched
- How you see it coming
- The north-east mound. The slowest attacker of the six at seven ticks, and the hardest hitting.
- What it does
- Melee, with a high maximum hit and high accuracy. He is the most dangerous of the six to fight without a protection prayer up.
- Your answer
- Protect from Melee, always. He is weak to magic. Kill him first, while the prayer you arrived with is still full.
- Mechanic
- Guthan the Infested
- How you see it coming
- The south-east mound. Five-tick melee attacks.
- What it does
- Melee, and often deals less damage than the others to a high-Defence player — but is harder than most to kill without a protection prayer.
- Your answer
- Protect from Melee, and magic to damage him. A candidate for tanking rather than praying if your Defence is high and your prayer is low.
- Mechanic
- Karil the Tainted
- How you see it coming
- The south mound. The fastest attacker of the six at four ticks, and he drains your Agility.
- What it does
- Ranged attacks, with high accuracy and a high maximum hit.
- Your answer
- Protect from Missiles. He is weak to magic and to melee, so this is where offensive melee prayers are worth switching on. Restore the Agility afterwards.
- Mechanic
- Torag the Corrupted
- How you see it coming
- The south-west mound. Five-tick melee.
- What it does
- Melee, and like Guthan tends to underperform against a high-Defence player.
- Your answer
- Protect from Melee, magic to kill. Along with Verac, he is one of the two brothers you can kite from any side of his sarcophagus.
- Mechanic
- Verac the Defiled
- How you see it coming
- The north-west mound. Five-tick melee, and the only brother your prayer does not fully stop.
- What it does
- Melee with a 25% chance to hit straight through a protection prayer.
- Your answer
- Protect from Melee anyway — three quarters blocked is worth having — and keep food for the quarter that lands. Offensive prayers are still worth running against him.
- Mechanic
- The area prayer drain
- How you see it coming
- The brothers' faces appearing on screen, every eighteen seconds while you are underground.
- What it does
- Removes eight prayer points, rising by one for each brother killed, to a maximum of fourteen once all six are dead.
- Your answer
- Shorten the run rather than fighting the drain. Eat and drink above ground, and equip Ghommal's hilt 2 or better if you have it, which switches the effect off entirely.
- Mechanic
- Crypts and despawning
- How you see it coming
- You searched a sarcophagus, a brother appeared, and you climbed the stairs anyway.
- What it does
- Leaving a crypt before killing the brother despawns him, and he returns at full health when you search that sarcophagus again.
- Your answer
- Finish what you start. If you find the tunnel entrance before you have killed the other five, leave and come back — the tunnel does not despawn, but a wounded brother does.
- Mechanic
- Tunnel doors
- How you see it coming
- Every door you open spawns something.
- What it does
- Roughly two chances in twenty-one that it is one of the remaining brothers, with a skeleton being much the most common outcome and bloodworms and crypt rats splitting the rest. A room already holding eleven or more enemies spawns nothing new.
- Your answer
- Open doors deliberately, because each one is also reward potential. Not every door in the tunnels can be opened, so navigating is a matter of finding the route to the central room.
- Mechanic
- The pattern lock
- How you see it coming
- The door to the central room will not simply open.
- What it does
- One of four simple pattern puzzles. Get it wrong and the doors and rooms rearrange, moving the exit ladder and changing which doors will open.
- Your answer
- Learn all four patterns. The answers are always among the options shown, but not in the same order each time, so recognising the shape matters more than memorising a position.
- Mechanic
- The chest and the collapse
- How you see it coming
- You open the chest and the brother whose crypt you came down through appears.
- What it does
- You do not have to kill him to loot. Once looted, the tunnels shake and deal occasional damage, the layout rearranges, and every door you open on the way out is guaranteed to summon a brother you did not kill.
- Your answer
- Click the chest again to loot, then leave. Killing the brothers that spawn during the escape is wasted effort — they do not count towards your next run.
Two of the brothers are far more forgiving than the other four and that is what makes a prayer budget possible. Dharok, Karil, Verac and Ahrim all have high accuracy and high maximum hits; Guthan and Torag frequently deal little damage to a player with high Defence. If you cannot reliably kill all six before your prayer runs out, the answer is not to rush — it is to save Verac, Guthan and Torag for last and tank their hits, which converts a prayer problem into a food problem.
The tunnel entrance is placed randomly among the six crypts each run, which means your digging order cannot be optimised around it. What you can control is that finding it early is not a reason to enter it early: unless you are deliberately farming one brother's equipment, the correct response is to climb back out and finish the other five.
Reward potential is a flat conversion, which makes it easy to plan. Every monster you kill adds its combat level to your total, capped at 1,000, plus two extra points per brother, for a hard maximum of 1,012. The crypt monsters and their levels are the entire menu: a crypt rat is 43, a bloodworm 52, a crypt spider 56, a giant crypt rat 76, a skeleton 77 and a giant crypt spider 79.
A strange old lockpick lets you ignore the tunnel layout and walk straight to the central room, spending a charge on each locked door. It is genuinely faster, and it works against you if you are trying to maximise the chest, because the doors you skip were also the monsters you needed to kill.
Where Barrows brothers Sits in Progression
Barrows brothers is the entry point for the standalone boss group, so there is nothing easier here to warm up on. Above it sit Vorkath and Zulrah.
Phase by Phase
The six mounds, in order
Dig on top of a mound with a spade and you land in a crypt. Ahrim is in the centre, Dharok north-east, Guthan south-east, Karil south, Torag south-west and Verac north-west. Search the sarcophagus and either a brother appears or you have found the tunnel entrance.
Which order you dig in is the largest decision in a run, because travel between mounds is time spent under the prayer drain. There is more than one defensible answer and they optimise for different things.
- Safest, if you are managing prayer tightly: Dharok, then Ahrim, Karil, Verac, Guthan, Torag. It puts the dangerous brothers early and leaves the tankable ones for the end.
- Safe with less walking: Dharok, Guthan, Karil, Ahrim, Verac, Torag.
- Fastest on average, measured across spawn tiles and tunnel positions: Dharok, Ahrim, Verac, Torag, Karil, Guthan — around 32 ticks of travel when running, against 66 walking. A simple clockwise circle of Dharok, Guthan, Karil, Torag, Verac, Ahrim ties it when running and is far easier to perform.
- Every one of those orders starts with Dharok, and for the same reason: he is the most dangerous brother to meet on an empty prayer bar, so he gets the prayer you arrived with.
- If you are using a toxic blowpipe on Ahrim, kill Verac before him and heal back with the blowpipe's special, since Verac is the one brother who gets through your prayer.
The tunnels and reward potential
One of the six crypts leads down instead of producing a brother, and the choice is re-randomised every run. Below is a maze of doors, most of which spawn something when opened, and a central room with the chest in it.
This is where reward potential is gathered, and where the prayer drain is at its worst because all six brothers are dead by now. The two facts together are the whole argument for knowing in advance exactly which monsters you want to kill instead of clearing the tunnels as you find them.
- Six brothers plus two skeletons and one bloodworm comes to 874 points; six brothers plus two skeletons and a crypt spider comes to 878; six plus a giant crypt spider, a skeleton and a crypt spider comes to 880.
- Capping at 880 rather than pushing towards the 1,012 maximum is the recognised optimisation: it maximises runes while ruling out bolt racks, half keys and dragon med helms, which raises the average value of the chest.
- The two-skeletons-and-a-bloodworm route is the practical favourite, because both of those spawn readily and will come to you as you navigate rather than needing to be hunted.
The pattern lock
The door into the central room carries one of four simple pattern puzzles, and you have to solve it to get through. The correct answer is always present among the choices, but the choices are not in a fixed order, so this is pattern recognition rather than memorising a click position.
Getting it wrong is not fatal but it is expensive: the doors and rooms shuffle, which moves the exit ladder and changes which doors will open, so you are back to exploring while the drain keeps running.
The chest, and getting out
Opening the chest summons the brother whose crypt you came down through, if he has not already appeared in the tunnels. You do not have to fight him — click the chest a second time to loot, and the reward interface appears. The contents go to your inventory when you close it, or onto the floor if your inventory is full, which is a mistake worth not making after a good run.
The moment it is looted the tunnels start collapsing, dealing occasional damage, and the layout rearranges again. Every door you open on the way out is guaranteed to summon one of the brothers you did not kill this run, and none of those kills count for anything, so the correct play is to leave rather than fight.
- Leaving the tunnels resets everything: brothers return to their crypts, and the tunnel location and door layout are randomised again.
- Progress is saved if you log out or leave the area before looting, so an interrupted run is paused rather than lost.
- Teleporting out from the chest room is usually quicker than walking, and avoids the guaranteed brother spawns entirely.
Fight Strategy: Brother order and chest puzzle
- Arrive with full prayer, a spade in your inventory, and Protect from Melee ready.
- Dig Dharok first and kill him behind the prayer you walked in with.
- Work through the remaining five in a fixed order, praying magic for Ahrim, missiles for Karil and melee for the rest, and running the offensive prayer that matches whatever you are hitting them with.
- Come up for air between mounds. Drinking prayer potions and eating above ground costs you nothing, because the drain only applies underground.
- If a sarcophagus reveals the tunnel before all six are dead, climb back out and finish the brothers first.
- Enter the tunnels last, and gather reward potential to a plan rather than by clearing rooms — two skeletons and a bloodworm alongside the six brothers is the easy target.
- Solve the pattern lock on the central door. A wrong answer reshuffles the tunnels and costs you drain, not health.
- Open the chest, ignore the brother it summons, and click the chest again to loot it. Check your inventory has space before you close the reward window.
- Leave immediately rather than fighting your way out — the collapse damages you and every door now guarantees a brother who counts for nothing.
- Bank and restore at Ferox Enclave or at home, then go straight back in. The whole thing has been re-randomised.
The reason to fix your digging order rather than improvising is that travel is the only cost in a run you can reduce without getting better at anything. The measured difference between the fastest rotation and a wandering one is on the order of half a minute of running per attempt, and every second of it is being spent under a prayer drain that gets worse as you go. A clockwise circle is nearly as fast as the theoretical optimum and much easier to execute reliably, which for most players makes it the better choice.
At the top end that logic extends into an adaptive route. With a Lightbearer, dragon claws and Death Charge, the plan branches on whether Dharok actually spawns: if he does, both claw specials go into him and you continue clockwise; if he does not, you switch to the Dharok, Ahrim, Verac, Torag, Karil, Guthan order and put the specials into Ahrim instead. Cast Death Charge immediately after the last kill of each attempt and it comes back around early in the next one. Run properly with strong melee stats, an Osmumten's fang, a dragon battleaxe and an imbued heart to defend against Ahrim's stat-lowering spells, that produces consistent completions a little over three minutes long including the time spent restoring stats, on a supply bill of a few runes.
Note what is absent from that description: almost no food, almost no prayer potions, and no gear upgrades. The expensive part of a fast Barrows run is knowledge of the route and the four door patterns.
Positioning and Movement
The tunnels have real safespots and they work on a quirk of pathing rather than on line of sight. Like all monsters, the brothers move east or west before they move north or south, which means an obstacle placed correctly traps them where they cannot reach you.
What can and cannot be shot through is specific. Fallen debris that looks like bricks cannot be shot through, and neither can the standing torches in the chest room or the chest itself. Anything else that blocks movement can be shot over, including skeletons, boulders, rocks, and the ladder — including the ladder squares in rooms other than the one you came down in, where the ladder is invisible to you but still functions as cover. Of the long corridors, the only one without a workable safespot for a melee brother is the northern corridor entered from the north-west room, where the nearest safe tile is far enough away that the brother despawns.
Above ground, kiting round a sarcophagus is the resource-free way to kill a melee brother, and it matters most to low and mid-level accounts. Run has to be on, because you move two tiles per tick; you use the spell on the brother with run off, and the instant the experience drop appears you hold control and click across to the other side. For most melee brothers only the north and south sides of the sarcophagus block them; Verac and Torag can be blocked from all four. It only works with a spell — a trident will not do — so Iban Blast, Magic Dart or Wind Bolt with chaos gauntlets are the tools, and stamina potions or graceful are close to required.
Do not kite Dharok. One mistake in that pattern is a single hit that ends the run, which is why every recommended order kills him first behind a prayer instead.
Binding spells are the simpler version of the same idea. Snare gives you three attacks on Verac before he moves again, Entangle or Ice Blitz gives you five, and Ice Barrage gives you six.
Beginner Plan, Then the Advanced One
Your first trips
- Learn one digging order and use it every single run, even when a different mound looks closer. The clockwise circle starting at Dharok is the easiest to remember and nearly the fastest.
- Kill Dharok first, every time, with Protect from Melee already on. This is the one safety rule here that is not negotiable.
- Bring mystic robes and Iban's staff rather than armour. It feels wrong and it is correct — the shared air weakness does more for you than defence does.
- Get into the habit of surfacing to eat and drink. Everything you consume in a crypt is paid for twice, because the drain is still running while you do it.
- Learn all four door patterns before you start caring about speed. A wrong answer reshuffles the tunnels and puts you back to exploring under the heaviest drain of the run.
- Kill all six brothers on your early runs even when it feels slow. Skipping brothers reduces your loot rolls and permanently removes their equipment from the chest for that run.
Once the kill is boring
- Move to the measured fastest rotation once the route is automatic: Dharok, Ahrim, Verac, Torag, Karil, Guthan, digging at the closest tiles between mounds.
- Cap reward potential at 880 rather than filling it. It maximises runes while excluding bolt racks, half keys and dragon med helms, which raises the average value of the chest.
- Time Ghommal's hilt 2 rather than wearing it. The effect only needs the hilt in your hand as the drain fires, so a timer lets you keep a real off-hand for the rest of the run.
- Run the adaptive claws-and-Death-Charge route, branching on whether Dharok spawns, and cast Death Charge immediately after the final kill of each attempt so it is available again early in the next one.
- Carry an imbued heart if you are running melee, specifically as defence against Ahrim's Confuse, Weaken and Curse — a run where your stats survive Ahrim is a run where you do not stop to drink.
- Use a strange old lockpick only on runs where you are chasing loots rather than value. Skipping doors skips the monsters that were going to be your reward potential.
Drops and What Barrows brothers Is Worth
The chest is worth explaining properly, because it does not behave like a drop table and most disappointment here comes from that misunderstanding. Two separate systems decide what you get. The chance of Barrows equipment — the armour and weapons — is set purely by how many brothers you killed before opening it, and you cannot receive a piece belonging to a brother you did not kill. The number of loot rolls rises with the brother count too, which is why killing all six is the first line of every optimisation list.
Everything else, which is mostly runes, is decided by reward potential. You accumulate it by killing things, at a rate equal to each monster's combat level, capped at 1,000, plus two per brother for a ceiling of 1,012. Higher potential means more valuable runes in larger quantities. The refinement that experienced players use is to stop at 880 rather than filling the bar, because that band maximises runes while excluding bolt racks, half keys and dragon med helms from the pool — a smaller number that produces a better average chest.
Two unlocks change the maths rather than your play. The Morytania Hard Diary adds 50% to the runes from every chest you open here, which is the single largest multiplier available. Ghommal's hilt 2 or better does not touch the reward at all, but it removes the prayer drain, and prayer potions are the main running cost of a Barrows session.
We do not print prices, rates or profit figures for any of this. Rune values and the market for Barrows equipment both move with the Grand Exchange, and the live tables on the wiki are the only figures worth working from.
Drops worth the trip: Barrows equipment (Dharok's, Ahrim's, Karil's…). Whether that is worth your time depends on how many kills an hour you personally get, which is a function of brother order and chest puzzle rather than of your gear list.
Combat Achievements
One Combat Achievement reward is load-bearing enough to be worth chasing on its own terms: Ghommal's hilt 2, from the medium tier, nullifies the area prayer drain here. That is not a convenience — the drain is the reason a Barrows session consumes prayer potions at all, so the hilt changes the running cost of the content rather than the difficulty of it.
Ironman Notes
Without a Grand Exchange, barrows equipment (Dharok's, Ahrim's, Karil's…) has to be earned rather than bought, and this is the fastest table it sits on.
Barrows is one of the best early targets on a self-sufficient account, and for once the reason is not the drop table. It is that a full set of Barrows equipment covers gaps in several slots at once, at a point in an account's life where the alternative is a long grind for each individual piece.
The kiting method deserves particular attention here, because it is written for exactly this situation: it kills the melee brothers using neither food nor protection prayers, at the cost of stamina and attention. For a low or mid-level Ironman that turns Barrows from a supply-limited activity into a time-limited one, which is a much better constraint to have.
The equipment requirements are almost nothing. Mystic robes and Iban's staff clear all six brothers because of the shared air weakness, and Iban Blast is actually the stronger spell below 59 Magic rather than a compromise. A black salamander covers all three styles from one slot if you have neither a trident nor a blowpipe.
Two supply tricks are worth adopting early. Bones to Peaches tablets let you fill empty slots with bones while gathering reward potential and convert them into food as needed, and an ectoplasmator turns the crypt monsters you are killing anyway into Prayer experience. Both spend inventory you have rather than resources you do not.
Common Mistakes and Death Causes
| What happened | Why it happened | The fix |
|---|---|---|
| Dharok, in one hit | He hits harder than any other brother and is the most dangerous of the six to fight without a protection prayer. Runs go wrong when players dig him late, on low prayer, or try to kite him. | Kill him first, with Protect from Melee already on, using the prayer you arrived with. Never kite him. |
| Verac hitting through your prayer | He has a 25% chance to ignore a protection prayer, so a player treating all four melee brothers as identical takes damage they did not budget for. | Keep food for Verac specifically, and consider killing him before Ahrim so you can heal back with a blowpipe special afterwards. |
| Running out of prayer in the tunnels | The drain is at its heaviest once all six brothers are dead — fourteen points every eighteen seconds — and the tunnels are where you spend the most time wandering. | Enter the tunnels with a plan for which monsters you need, and drink above ground before you go down. If your prayer will not last, tank Guthan and Torag instead of praying against them. |
| Being surrounded in a tunnel room | Every door you open spawns something, and rooms accumulate monsters until they hold eleven. | Open doors deliberately rather than exploring by clicking everything, and remember that a room already holding eleven enemies will not add another. |
| Dying on the way out with the loot | After the chest is looted the tunnels collapse and deal periodic damage, the layout has changed so the ladder is somewhere new, and every door guarantees a brother. | Teleport out from the chest room. Fighting your way out is entirely optional and the brothers you kill during the escape count for nothing. |
| Losing loot to a full inventory | The reward interface deposits into your inventory when you close it, and drops the overflow on the floor. | Check your free slots before you open the chest, not after. This is the one avoidable loss in the whole run. |
- What happened
- Dharok, in one hit
- Why it happened
- He hits harder than any other brother and is the most dangerous of the six to fight without a protection prayer. Runs go wrong when players dig him late, on low prayer, or try to kite him.
- The fix
- Kill him first, with Protect from Melee already on, using the prayer you arrived with. Never kite him.
- What happened
- Verac hitting through your prayer
- Why it happened
- He has a 25% chance to ignore a protection prayer, so a player treating all four melee brothers as identical takes damage they did not budget for.
- The fix
- Keep food for Verac specifically, and consider killing him before Ahrim so you can heal back with a blowpipe special afterwards.
- What happened
- Running out of prayer in the tunnels
- Why it happened
- The drain is at its heaviest once all six brothers are dead — fourteen points every eighteen seconds — and the tunnels are where you spend the most time wandering.
- The fix
- Enter the tunnels with a plan for which monsters you need, and drink above ground before you go down. If your prayer will not last, tank Guthan and Torag instead of praying against them.
- What happened
- Being surrounded in a tunnel room
- Why it happened
- Every door you open spawns something, and rooms accumulate monsters until they hold eleven.
- The fix
- Open doors deliberately rather than exploring by clicking everything, and remember that a room already holding eleven enemies will not add another.
- What happened
- Dying on the way out with the loot
- Why it happened
- After the chest is looted the tunnels collapse and deal periodic damage, the layout has changed so the ladder is somewhere new, and every door guarantees a brother.
- The fix
- Teleport out from the chest room. Fighting your way out is entirely optional and the brothers you kill during the escape count for nothing.
- What happened
- Losing loot to a full inventory
- Why it happened
- The reward interface deposits into your inventory when you close it, and drops the overflow on the floor.
- The fix
- Check your free slots before you open the chest, not after. This is the one avoidable loss in the whole run.
The forgiving thing about Barrows is that a failed run is rarely a total loss. Progress is saved if you log out or leave the area before looting the chest, so a run interrupted by low supplies can be resumed rather than restarted — and if you die before the chest, the brothers you killed are gone but so is nothing else of value, because you were not carrying anything expensive in the first place.
If you get the pattern lock wrong, treat it as a cost in prayer rather than a disaster. The tunnels reshuffle, the ladder moves, and you keep looking. The only real answer is to learn all four patterns so it stops happening.
Between runs, the efficient reset is a ring of dueling to Ferox Enclave, where the bank and the Pool of Refreshment are next to each other and the pool undoes the Strength and Agility drains from Ahrim and Karil in one click. A house with an altar and a restoration pool does the same job if you would rather not carry the ring.
FAQ
Do I have to kill all six brothers?
No, but you should. The number of loot rolls and the chance of Barrows equipment both rise with each brother killed, and you cannot receive a piece belonging to a brother you skipped. The only reason to kill fewer is if you are deliberately farming one specific brother's set.
What is reward potential and how much do I need?
It is a score you build by killing things, equal to each monster's combat level, capped at 1,000, plus two points per brother for a maximum of 1,012. It decides the quantity and value of the runes in the chest. Most players deliberately stop at 880, which maximises runes while excluding bolt racks, half keys and dragon med helms.
Which order should I kill them in?
Any order that starts with Dharok. The measured fastest is Dharok, Ahrim, Verac, Torag, Karil, Guthan; a clockwise circle from Dharok is essentially as quick when running and much easier to perform; and if prayer is tight, saving Verac, Guthan and Torag for last lets you tank them.
Why is my prayer draining when nothing is attacking me?
The brothers' faces appear every eighteen seconds while you are underground anywhere in the Barrows and remove prayer points — eight at first, rising to fourteen once all six are dead. Ghommal's hilt 2 or better switches it off, and eating or drinking above ground avoids paying for it twice.
What is the best weapon here?
Something that casts a wind spell. All six brothers have a 50% weakness to air, which is why cheap magic robes and a staff outperform expensive armour. The one exception is Ahrim, who is weakest to ranged — bring a bow or blowpipe for him unless you have air spells or a Tumeken's shadow.
Should I use a strange old lockpick?
Only if you want fast loots rather than good ones. It skips the tunnel layout and takes you straight to the central room, but the doors it skips are the monsters you needed for reward potential.
Do I need to kill the brother who appears when I open the chest?
No. Open the chest, ignore him, and click it again to loot. The same applies to the brothers that spawn while you are escaping afterwards — they do not count towards your next run, so fighting them is wasted time and supplies.
What happens if I log out mid-run?
Nothing is lost. Progress is saved if you log out or leave the area before looting the chest, so you can come back and continue. It is only once the chest is looted that the Barrows resets and re-randomises.
Related Guides
Bottom Line
Treat this as a route with six short fights in it rather than a boss with six phases. The fights themselves are solved by three protection prayers and a wind spell; the run is solved by digging in a fixed order, surfacing to eat and drink, entering the tunnels with a target for reward potential already in mind, and knowing all four door patterns before you need them. The two upgrades that change a session most are a diary and a Combat Achievement reward, not a weapon.
If your route is already tidy and what you actually want is the hours back, Barrows sits closer to a repeatable minigame than to a boss, and it is the kind of thing our minigame and grind services exist for.
If Barrows brothers is blocking a Combat Achievement or an unlock you actually want, our PvM service is done by hand — no automation. Otherwise the bosses list has the full index.
Barrows brothers — Minigame-style chest, difficulty 2/5. Game content changes with updates; verify current details on the Old School RuneScape Wiki. Mechanics, gear tiers and phase behaviour on this page were checked against Barrows/Strategies on 4 August 2026.
Need a trusted team? Bils Services
Enjoyed the guide?
Drop a like — it helps other Adventurers find the good stuff.
Community
Comments
Silence in the hall…
Be the first Adventurer to leave a mark.
Join the thread
Add a comment
Tips, drops, or “this carried my account” — keep it useful.
bilsservices · bils services · bilsservices.com

