


OSRS Fortis Colosseum Guide: Waves, Modifiers, Gear and Dizana's Quiver
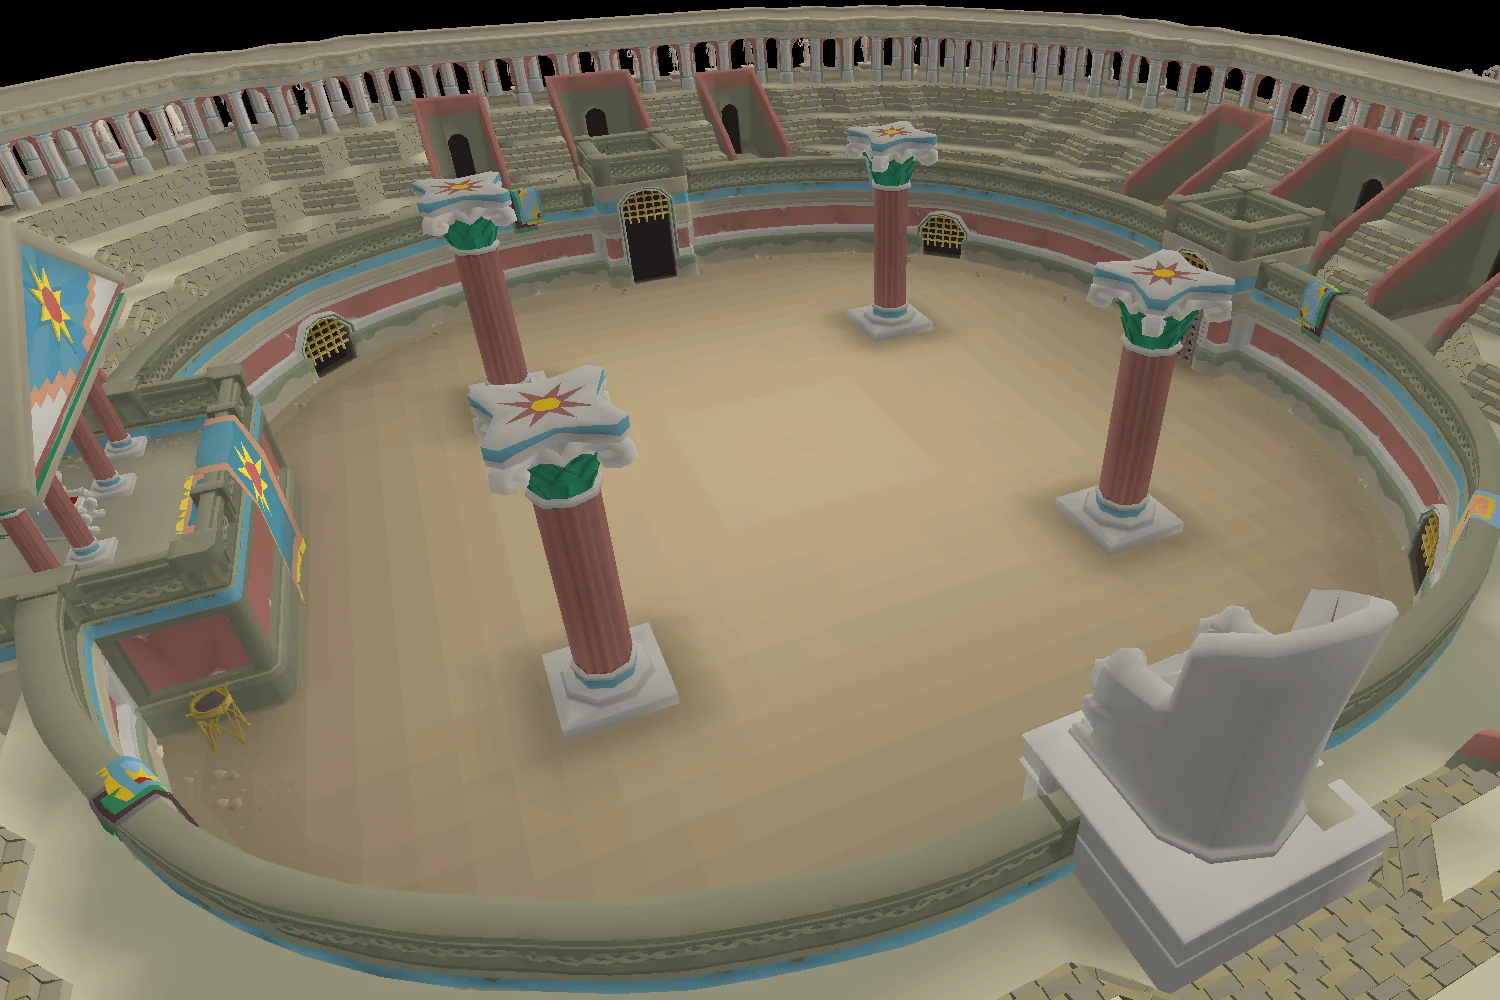
Fortis Colosseum explained: how the twelve waves and the modifier system work, gear and supply planning for a run with no bank, Sol Heredit's mechanics, and what Dizana's quiver actually requires.
Overview
The Fortis Colosseum is a twelve-wave solo challenge in Varlamore that ends with Sol Heredit. Its defining feature is the modifier system: after each wave you choose from a set of difficulty modifiers, which raise both the challenge and your reward.
That design makes the Colosseum unusually approachable compared to the Inferno. A low-modifier run is genuinely learnable, and you can scale the difficulty up as your confidence grows rather than facing a fixed wall.
This guide covers access, how the modifier system changes a run, the gear and supplies a no-bank challenge demands, Sol Heredit's mechanics, and what you need for Dizana's quiver.
| Detail | Value |
|---|---|
| Type | Solo wave challenge with player-chosen difficulty |
| Location | Fortis Colosseum, Varlamore |
| Hard requirement | Varlamore access (Children of the Sun) |
| Waves | 12, with Sol Heredit as the final wave |
| Solo or team | Solo only |
| Reward | Dizana's quiver, sunfire fanatic armour, echo crystal, tonalztics of ralos |
| Defining mechanic | Modifiers chosen between waves scale difficulty and rewards |
- Detail
- Type
- Value
- Solo wave challenge with player-chosen difficulty
- Detail
- Location
- Value
- Fortis Colosseum, Varlamore
- Detail
- Hard requirement
- Value
- Varlamore access (Children of the Sun)
- Detail
- Waves
- Value
- 12, with Sol Heredit as the final wave
- Detail
- Solo or team
- Value
- Solo only
- Detail
- Reward
- Value
- Dizana's quiver, sunfire fanatic armour, echo crystal, tonalztics of ralos
- Detail
- Defining mechanic
- Value
- Modifiers chosen between waves scale difficulty and rewards
Requirements and Access
The Colosseum's only hard gate is reaching Varlamore. Everything else is a soft requirement that determines whether your run is a learning experience or a waste of supplies.
| Requirement | Detail |
|---|---|
| Varlamore access | Complete Children of the Sun to reach Fortis and the Colosseum. |
| 43 Prayer minimum | Protection prayers are essential; 74+ for Rigour is a large practical upgrade. |
| A strong ranged setup | Ranged is the standard approach for most of the waves. |
| No banking | Supplies must last twelve waves plus Sol Heredit. |
| Comfortable prayer switching | Sol Heredit's stances demand correct prayers under time pressure. |
- Requirement
- Varlamore access
- Detail
- Complete Children of the Sun to reach Fortis and the Colosseum.
- Requirement
- 43 Prayer minimum
- Detail
- Protection prayers are essential; 74+ for Rigour is a large practical upgrade.
- Requirement
- A strong ranged setup
- Detail
- Ranged is the standard approach for most of the waves.
- Requirement
- No banking
- Detail
- Supplies must last twelve waves plus Sol Heredit.
- Requirement
- Comfortable prayer switching
- Detail
- Sol Heredit's stances demand correct prayers under time pressure.
Because you choose your own modifiers, the Colosseum is the rare wave challenge where you can deliberately start easy. Use that — do not turn on high modifiers to chase rewards before you can clear a basic run.
Getting There
The Colosseum sits in Fortis, the main city of Varlamore.
- Complete Children of the Sun to unlock Varlamore travel.
- Travel to Fortis using the quetzal transport network or your usual Varlamore teleport.
- Enter the Colosseum and choose your starting modifiers before wave one.
Set your teleport out before entering. As with every no-bank challenge, the logistics around the run matter as much as the run.
Recommended Stats
Sol Heredit is the real stat check. The early waves are forgiving, but the final fight is not.
| Stat | Comfortable | Why |
|---|---|---|
| Ranged | 85+ | Carries most of the wave clearing and a lot of the Sol Heredit fight. |
| Hitpoints | 85+ | Sol Heredit's damage is high enough that low HP removes your margin for error. |
| Prayer | 74+ | Rigour plus enough prayer points for twelve waves and a long boss fight. |
| Defence | 75+ | Reduces incidental damage while you reposition. |
| Magic | 75+ | For utility and any freeze usage in your route. |
- Stat
- Ranged
- Comfortable
- 85+
- Why
- Carries most of the wave clearing and a lot of the Sol Heredit fight.
- Stat
- Hitpoints
- Comfortable
- 85+
- Why
- Sol Heredit's damage is high enough that low HP removes your margin for error.
- Stat
- Prayer
- Comfortable
- 74+
- Why
- Rigour plus enough prayer points for twelve waves and a long boss fight.
- Stat
- Defence
- Comfortable
- 75+
- Why
- Reduces incidental damage while you reposition.
- Stat
- Magic
- Comfortable
- 75+
- Why
- For utility and any freeze usage in your route.
Gear Setups: Budget, Mid and Best in Slot
Ranged is the default. Because the difficulty is partly your own choice, you can start a run with a mid-tier setup and low modifiers rather than waiting for best-in-slot gear.
| Slot | Budget | Mid | Best in slot |
|---|---|---|---|
| Main weapon | Toxic blowpipe (rune darts) | Toxic blowpipe (amethyst darts) | Toxic blowpipe (dragon darts) |
| Secondary | Rune crossbow | Zaryte crossbow | Twisted bow |
| Head | Karil's coif | Armadyl helmet | Masori mask (f) |
| Body | Karil's leathertop | Armadyl chestplate | Masori body (f) |
| Legs | Karil's leatherskirt | Armadyl chainskirt | Masori chaps (f) |
| Cape | Ava's accumulator | Ava's assembler | Ava's assembler |
| Amulet | Amulet of fury | Necklace of anguish | Necklace of anguish |
| Ring | Archers ring | Archers ring (i) | Venator ring |
| Gloves | Barrows gloves | Barrows gloves | Zaryte vambraces |
| Boots | Ranger boots | Pegasian boots | Pegasian boots |
- Slot
- Main weapon
- Budget
- Toxic blowpipe (rune darts)
- Mid
- Toxic blowpipe (amethyst darts)
- Best in slot
- Toxic blowpipe (dragon darts)
- Slot
- Secondary
- Budget
- Rune crossbow
- Mid
- Zaryte crossbow
- Best in slot
- Twisted bow
- Slot
- Head
- Budget
- Karil's coif
- Mid
- Armadyl helmet
- Best in slot
- Masori mask (f)
- Slot
- Body
- Budget
- Karil's leathertop
- Mid
- Armadyl chestplate
- Best in slot
- Masori body (f)
- Slot
- Legs
- Budget
- Karil's leatherskirt
- Mid
- Armadyl chainskirt
- Best in slot
- Masori chaps (f)
- Slot
- Cape
- Budget
- Ava's accumulator
- Mid
- Ava's assembler
- Best in slot
- Ava's assembler
- Slot
- Amulet
- Budget
- Amulet of fury
- Mid
- Necklace of anguish
- Best in slot
- Necklace of anguish
- Slot
- Ring
- Budget
- Archers ring
- Mid
- Archers ring (i)
- Best in slot
- Venator ring
- Slot
- Gloves
- Budget
- Barrows gloves
- Mid
- Barrows gloves
- Best in slot
- Zaryte vambraces
- Slot
- Boots
- Budget
- Ranger boots
- Mid
- Pegasian boots
- Best in slot
- Pegasian boots
Sunfire fanatic armour from the Colosseum itself is a strong melee set, which makes the Colosseum partly self-funding once you can clear it reliably.
Inventory and Supplies
Twelve waves plus a long boss fight with no restock. Plan your supplies against the modifiers you have chosen, not against a generic loadout.
- Saradomin brews and super restores as your main sustain.
- Ranging potions or divine ranging potions.
- Spare ammunition — enough for a slow run, not a perfect one.
- A defensive or melee switch if your route uses one for specific waves.
- An escape teleport.
Higher modifiers mean more incoming damage, so scale your supply plan with them. Choosing aggressive modifiers with a light inventory is the most common self-inflicted failure here.
Mechanics You Have to Respect
The Colosseum's waves throw mixed groups of Fremennik-style warriors, archers and mages at you, and the modifiers you pick change how those groups behave. Sol Heredit at wave twelve is a distinct fight with its own stance-based mechanics.
| Mechanic | What it does | Correct response |
|---|---|---|
| Mixed-style wave groups | Each wave contains enemies using different combat styles simultaneously. | Position so you face as few styles at once as possible, and prioritise the ranged and magic attackers. |
| Modifiers | Chosen between waves; each raises difficulty in a specific way and increases your reward. | Pick modifiers you understand. Read what each one does before stacking them. |
| Sol Heredit — stance changes | Sol Heredit changes stance to telegraph which attack style is coming. | Read the stance and switch protection prayer to match before the attack lands. |
| Sol Heredit — grapple | A close-range grab that deals heavy damage if it connects. | Move out of range when it is telegraphed rather than trying to tank it. |
| Sol Heredit — shield mechanic | A defensive phase that changes how and when you can deal damage. | Stop forcing damage during it and reposition instead; attacking through it wastes supplies. |
- Mechanic
- Mixed-style wave groups
- What it does
- Each wave contains enemies using different combat styles simultaneously.
- Correct response
- Position so you face as few styles at once as possible, and prioritise the ranged and magic attackers.
- Mechanic
- Modifiers
- What it does
- Chosen between waves; each raises difficulty in a specific way and increases your reward.
- Correct response
- Pick modifiers you understand. Read what each one does before stacking them.
- Mechanic
- Sol Heredit — stance changes
- What it does
- Sol Heredit changes stance to telegraph which attack style is coming.
- Correct response
- Read the stance and switch protection prayer to match before the attack lands.
- Mechanic
- Sol Heredit — grapple
- What it does
- A close-range grab that deals heavy damage if it connects.
- Correct response
- Move out of range when it is telegraphed rather than trying to tank it.
- Mechanic
- Sol Heredit — shield mechanic
- What it does
- A defensive phase that changes how and when you can deal damage.
- Correct response
- Stop forcing damage during it and reposition instead; attacking through it wastes supplies.
Exact modifier effects and Sol Heredit's attack timings are the kind of detail that gets tuned, so check the OSRS Wiki Fortis Colosseum page before a serious attempt.
Run Plan: Waves 1 to 12
The Colosseum rewards a staged approach. Your first goal is a clean low-modifier clear, not a high-reward run.
- Choose low or no modifiers on your first attempts. Learning the wave layouts matters more than the reward.
- In each wave, identify the ranged and magic attackers first — they do the most damage from a distance.
- Position so you are never taking two attack styles at once when you can avoid it.
- Add one modifier at a time across runs, so you always know what changed.
- Track your supply usage per wave. If you are burning through brews by wave six, lower your modifiers next run.
- Before wave twelve, restore fully. Sol Heredit is a long fight.
- On Sol Heredit, read each stance change and switch prayer to match before attacking.
- Move out of the grapple's range whenever it is telegraphed.
- During the shield phase, prioritise positioning over damage.
Because you choose the difficulty, a failed run is informative rather than random. Note which modifier combination broke you and drop that one.
Solo Versus Team
The Colosseum is solo only. Difficulty scaling comes from modifiers you choose rather than team size.
This makes it the friendliest of the three big solo challenges to learn, because you can genuinely tune the difficulty down. The Fight Caves and Inferno have fixed difficulty and no such option.
If you want a boss-only version of Sol Heredit's mechanics, the Sol Heredit guide focuses on the final fight.
Common Mistakes and What Actually Kills You
Most Colosseum failures come from choosing difficulty badly rather than executing badly.
- Stacking modifiers you have not read, then dying to a mechanic you did not know was active.
- Chasing high-reward runs before you can clear a basic one.
- Bringing an Inferno-sized ego with a Fight-Caves-sized inventory.
- Facing multiple attack styles at once instead of repositioning.
- Attacking through Sol Heredit's shield phase and wasting supplies.
- Trying to tank the grapple instead of moving out of range.
- Praying on a rhythm instead of reading Sol Heredit's stance.
- Not tracking supply usage per wave, so wave twelve arrives with nothing left.
Drops Worth Knowing
The Colosseum's rewards are unusually good for a solo challenge, and several of them are best in slot or close to it.
| Drop | Why it matters |
|---|---|
| Dizana's quiver | A best-in-slot ranged cape slot item; the main reason most players run the Colosseum. |
| Sunfire fanatic armour | A strong melee set obtained directly from Colosseum rewards. |
| Tonalztics of ralos | A distinctive ranged weapon from the reward table. |
| Echo crystal | Used to upgrade Colosseum reward items. |
| Sunfire splinters | Currency and consumable material tied to Varlamore content. |
| Smol heredit | The pet. |
- Drop
- Dizana's quiver
- Why it matters
- A best-in-slot ranged cape slot item; the main reason most players run the Colosseum.
- Drop
- Sunfire fanatic armour
- Why it matters
- A strong melee set obtained directly from Colosseum rewards.
- Drop
- Tonalztics of ralos
- Why it matters
- A distinctive ranged weapon from the reward table.
- Drop
- Echo crystal
- Why it matters
- Used to upgrade Colosseum reward items.
- Drop
- Sunfire splinters
- Why it matters
- Currency and consumable material tied to Varlamore content.
- Drop
- Smol heredit
- Why it matters
- The pet.
Combat Achievements
Colosseum Combat Achievements are built around the modifier system: completing runs at higher modifier totals, and clearing Sol Heredit without taking damage from specific mechanics.
Because you choose difficulty, these tasks are unusually plannable. Clear a basic run first, then target one task at a time with the specific modifiers it needs.
Ironman Notes
The Colosseum is excellent for Ironmen because its rewards are untradeable-by-nature progress: Dizana's quiver and sunfire fanatic armour come straight from the content rather than from the Grand Exchange.
Supplies are the constraint, as with every no-bank challenge. Low-modifier runs cost far less, so an iron can farm the content sustainably instead of gambling stockpiles on hard runs.
Fit it into your wider plan with the Ironman equipment progression guide.
FAQ
What do I need to enter the Fortis Colosseum?
Varlamore access via Children of the Sun. There is no combat or Slayer gate, and no quest beyond reaching Varlamore.
How do modifiers work?
Between waves you choose from offered modifiers. Each makes the run harder in a specific way and increases your reward. You control your own difficulty.
Is the Colosseum easier than the Inferno?
For a basic clear, yes — it is shorter and you can lower the difficulty. High-modifier runs are a serious challenge in their own right.
What is Dizana's quiver for?
It is a best-in-slot cape-slot option for ranged, which is why most players target the Colosseum at all.
How do I fight Sol Heredit?
Read his stance to know which style is coming and pray accordingly, move away from the grapple when telegraphed, and reposition rather than forcing damage during the shield phase.
Should I do the Colosseum before the Inferno?
Usually yes. It is shorter, tunable, and the quiver is immediately useful for the ranged setups the Inferno wants.
Related Guides
- Sol Heredit guide — the wave twelve fight in detail.
- Inferno guide — the harder solo challenge.
- Fire cape guide — the entry-level wave challenge.
- Boss gear progression — building toward these setups.
- Combat Achievements progression — planning Colosseum tasks.
- OSRS bosses index — every boss with its requirement.
Bottom Line
The Colosseum is the most learnable of the three solo wave challenges because you set the difficulty. Clear a low-modifier run first, then add one modifier at a time.
Sol Heredit is a stance-reading fight, not a DPS race. Pray off his stance, move out of the grapple, and stop attacking during the shield phase.
If Dizana's quiver is the goal and the waves are the blocker, our PvM team can run it hand-done.
Mechanics and drop rates change with updates. Verify current details on the Old School RuneScape Wiki.
Need a trusted team? Bils Services
Enjoyed the guide?
Drop a like — it helps other Adventurers find the good stuff.
Community
Comments
Silence in the hall…
Be the first Adventurer to leave a mark.
Join the thread
Add a comment
Tips, drops, or “this carried my account” — keep it useful.
bilsservices · bils services · bilsservices.com

