


OSRS Sol Heredit Guide: Fortis Colosseum Mechanics, Gear & Strategy
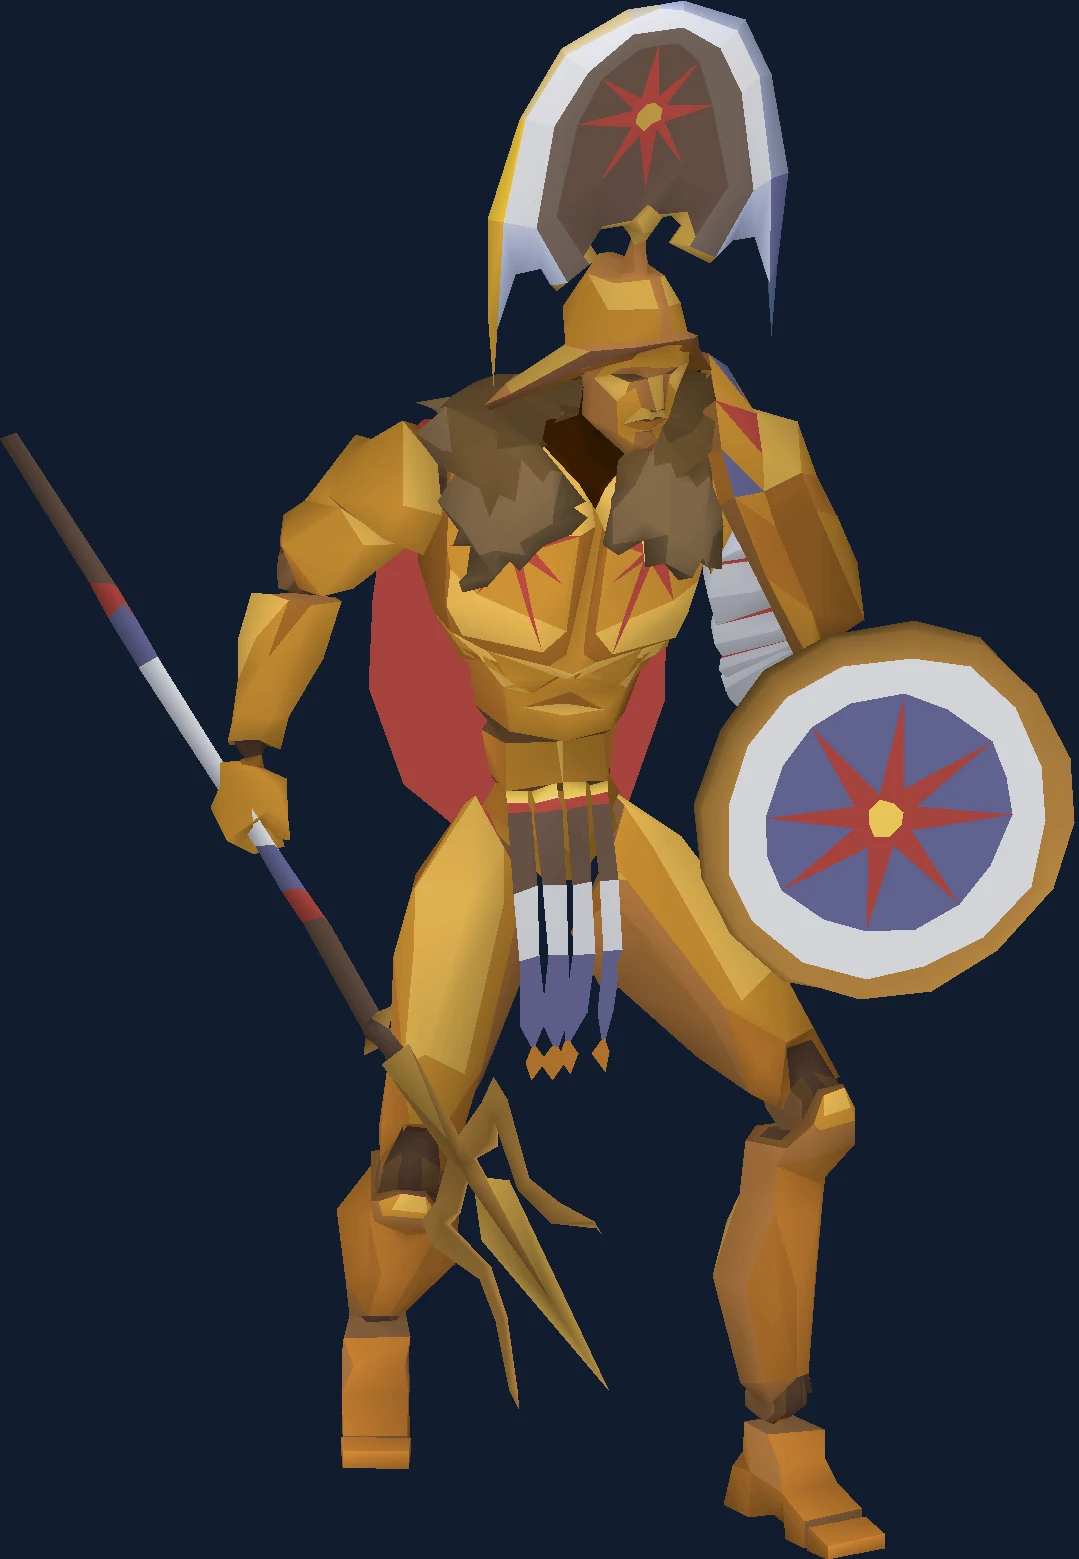
Sol Heredit guide for the Colosseum final fight, gear, and quiver-oriented goals.
Why People Fight Sol Heredit (Fortis Colosseum)
Sol Heredit is the only boss in the game who opens by telling you what the test is. His first line before phase one is that he is starting by testing your footwork, and that is not flavour — it is an accurate description of the next several minutes. His primary attacks are area attacks dealing up to 45 typeless melee damage, and every single one of them can be avoided completely by standing in the right place. The wiki is explicit that you should not camp Protect from Melee against them, because the prayer does not reduce that damage at all and having it active at the start of his triple attack stops you blocking the first hit.
That inverts the normal shape of an endgame fight. There is no prayer to hold, no rotation to out-damage, and very little you can tank through. There are four attack patterns — two spear, two shield — each with a defined safe tile, and a rule that tells you which one is coming: if he uses two of the same type in a row, the second uses the other pattern, and mixing a spear and a shield resets him to the first. After every phase transition he always opens with a spear attack, and if his last attack was Spear 1 the next will be Spear 2. The fight is knowable to a degree almost nothing else at this level is.
What makes it hard is everything layered on top. Each phase transition drops six more permanent pools of molten sand into a nine-by-nine square centred on you, one of which always lands on your own tile, so the arena you are dancing in shrinks every time you make progress. Each phase adds another light beam, and a beam that targets your position gives you three ticks to move before it hits for 70 or more. From phase two there is a triple attack that has to be prayed tick-perfectly, and from phase three a grapple that shouts which armour slot you have to defend.
And you arrive at all of this having already fought eleven waves. The Fortis Colosseum is a solo challenge, the wiki calls it the spiritual successor of the Inferno, and the modifiers you accepted on the way — how much prayer Blasphemy drains, how much health Frailty took, where Reentry left permanent molten sand — are still live when the gladiators barricade the centre of the arena and the duel starts. Sol is a fight about the state you turn up in as much as it is about the fight itself.
In our index it sits in the wave and challenge group at difficulty 5 of 5, where kill times come down to Sol Heredit finale.
| Field | Detail |
|---|---|
| Classification | Wave challenge (Boss) |
| Group | wave and challenge |
| Difficulty | 5 / 5 |
| Solo or team | Solo |
| Access requirement | Fortis Colosseum access |
| Notable reward | Dizana's quiver, sunfire fanatic armour |
| Signature mechanic | Sol Heredit finale |
| Hitpoints | 1500 |
| Max hits | 44 (Typeless AOE), 44 (Grapple), 15-25-35 (Triple Parry 1), 15-30-45 (Triple Parry 2) |
| Released | 20 March 2024 |
- Field
- Classification
- Detail
- Wave challenge (Boss)
- Field
- Group
- Detail
- wave and challenge
- Field
- Difficulty
- Detail
- 5 / 5
- Field
- Solo or team
- Detail
- Solo
- Field
- Access requirement
- Detail
- Fortis Colosseum access
- Field
- Notable reward
- Detail
- Dizana's quiver, sunfire fanatic armour
- Field
- Signature mechanic
- Detail
- Sol Heredit finale
- Field
- Hitpoints
- Detail
- 1500
- Field
- Max hits
- Detail
- 44 (Typeless AOE), 44 (Grapple), 15-25-35 (Triple Parry 1), 15-30-45 (Triple Parry 2)
- Field
- Released
- Detail
- 20 March 2024
Is Sol Heredit (Fortis Colosseum) the Right Fight for You Yet?
The wiki's own framing is worth repeating because it sets expectations correctly: completions are possible with inexpensive gear, but you should not expect to complete it in your first few attempts, and you should be mentally prepared to fail a lot and learn from it. Nothing about that is discouragement. It is a description of how the content is designed.
You are ready for this fight if:
- You have a strong slashing melee weapon. Sol's ranged and magic defences are enormous — a Magic level of 300 with +750 magic and +825 ranged defence bonuses — so an abyssal tentacle or better is described as essential.
- You also have a ranged option for the waves. The wiki is blunt that not bringing one will make your first quiver much harder, and that dealing with south spawns from the north-west pillar is difficult without it.
- You can prayer flick under pressure. Pillar stacks are solved by offticking, and the triple attack has to be prayed on the exact tick each hit lands.
- You are willing to learn wave procedure rather than improvise. The wiki's position is that learning wave solving, becoming comfortable with pillar-stack flicking and recovering quickly from mistakes all matter more than any gear optimisation.
Come back later if any of these are true:
- You are planning a melee-only first quiver. Even with a scythe of vitur the wiki calls this extremely difficult, because south spawns and north-west pillar stacks are close to impossible to solve without a ranged option.
- You have not obtained a bow of Faerdhinen setup. It is described as strongly recommended for a first quiver, and the fallback of a scorching bow with Masori is explicitly the next-best rather than an equal.
- You intend to run a noxious halberd without Myopia. Its reach makes controlling the Sol fight significantly harder, because you have to path manually to stay at a distance you can dodge from.
- You are treating the modifiers as flavour. Frailty III takes a 99 Hitpoints account to 60, at which point the wiki notes a light beam is a guaranteed death and a missed triple attack combo can finish you outright.
Access Requirements
Sol Heredit (Fortis Colosseum) is gated behind Fortis Colosseum access.
Fortis Colosseum access also tends to sit alongside the other wave and challenge gates, so it is usually cheaper to clear them together than to come back for each one. The boss requirements checklist lists them by group.
Location and How to Get There
Sol Heredit (Fortis Colosseum) is fought in the end of the Fortis Colosseum.
Sol Heredit is the Colosseum's final fight and, at combat level 1,563, the strongest monster in the game. You reach him by surviving the waves before him, so his difficulty compounds everything you already spent.
There are twelve waves and Sol is the twelfth. Waves one to eleven are made of Fremennik warband members plus a rotating cast of serpent shamans, jaguar warriors, javelin colossi, manticores, shockwave colossi and minotaurs, with reinforcements arriving forty seconds into every wave. Realistically only waves one, two and four can be cleared before reinforcements spawn at all. The waves the wiki names as hardest are six, eight, ten and eleven, purely because of how many enemies are on the floor at once.
The recommended procedure is fixed enough to be worth following exactly. Start each wave on the marked start tile, praying Protect from Magic on waves one, four, seven, eight and eleven and Protect from Missiles on all the others. On the fifth game tick after the modifier menu disappears, click towards tile A or tile B on the north-west pillar — that timing is what stops enemies spawning in the western area. Look south as you move to see what spawned there and pray accordingly. Kill the Fremennik warband in the order melee, mage, ranger. Deal with south spawns. Deal with reinforcements. Solve the pillar stack. Return to the start tile before the next wave begins.
The north-west pillar is recommended for a first quiver for concrete reasons rather than tradition. It gives roughly a one-in-six chance of a double south spawn on waves eight, ten and eleven, where the south-west pillar gives nearly a two-in-three chance of a double north. It lets you safespot the melee reinforcements while handling south spawns on the west side. And clicking towards the pillar on the fifth tick prevents western spawns entirely.
One habit matters more than it sounds. You must return near the start tile immediately after killing the last enemy of a wave, because after wave one you cannot move while the modifier menu is open — being caught out of position when the next wave spawns is a common death that has nothing to do with mechanical skill.
Then comes wave twelve. Groups of gladiators barricade the centre of the arena, limiting you to the area within the four pillars — roughly sixteen tiles by fifteen — and Sol Heredit, who has been sitting above the north gate the whole time, comes down.
Recommended Stats and Gear at Three Budgets
| Skill | Suggested minimum | What the extra levels buy |
|---|---|---|
| Attack | 95+ | Landing your slash weapon on Sol, who is weak to slash and resistant to everything else. |
| Strength | 95+ | Wave clear speed, which is what stops reinforcements arriving on top of an unsolved wave. |
| Defence | 95+ | Surviving the waves. Colosseum enemies are extremely accurate, and Relentless makes attacks bypass a third of your Defence at tier one. |
| Ranged | 95+, with 97+ very helpful | 97 or above lets a venator bow with dragon arrows and Rigour one-shot the Fremennik warband seer, which removes a whole problem from every wave opening. |
| Magic | 94+, with 99 very helpful | At 99, a Tumeken's shadow with an occult necklace, tormented bracelet and one piece of Ancestral robes one-shots the melee Fremennik — the single most valuable quality-of-life switch in the waves. |
| Prayer | 85+ | Rigour, Piety and Augury, and enough points to survive Blasphemy draining 20 to 60 per cent of damage taken. |
| Hitpoints | 95+ | Headroom for the hits you will take. Frailty reduces base Hitpoints by 10, 20 or 40 per cent, and tier three is the one the wiki says to avoid at all costs. |
- Skill
- Attack
- Suggested minimum
- 95+
- What the extra levels buy
- Landing your slash weapon on Sol, who is weak to slash and resistant to everything else.
- Skill
- Strength
- Suggested minimum
- 95+
- What the extra levels buy
- Wave clear speed, which is what stops reinforcements arriving on top of an unsolved wave.
- Skill
- Defence
- Suggested minimum
- 95+
- What the extra levels buy
- Surviving the waves. Colosseum enemies are extremely accurate, and Relentless makes attacks bypass a third of your Defence at tier one.
- Skill
- Ranged
- Suggested minimum
- 95+, with 97+ very helpful
- What the extra levels buy
- 97 or above lets a venator bow with dragon arrows and Rigour one-shot the Fremennik warband seer, which removes a whole problem from every wave opening.
- Skill
- Magic
- Suggested minimum
- 94+, with 99 very helpful
- What the extra levels buy
- At 99, a Tumeken's shadow with an occult necklace, tormented bracelet and one piece of Ancestral robes one-shots the melee Fremennik — the single most valuable quality-of-life switch in the waves.
- Skill
- Prayer
- Suggested minimum
- 85+
- What the extra levels buy
- Rigour, Piety and Augury, and enough points to survive Blasphemy draining 20 to 60 per cent of damage taken.
- Skill
- Hitpoints
- Suggested minimum
- 95+
- What the extra levels buy
- Headroom for the hits you will take. Frailty reduces base Hitpoints by 10, 20 or 40 per cent, and tier three is the one the wiki says to avoid at all costs.
These are the wiki's suggested minimums for a first completion rather than hard gates, and it says plainly that higher stats help most with bad double-south spawns, where you are under pressure to kill at least one enemy before reinforcements arrive.
Two of those rows are really about specific one-shots rather than general power. The venator bow at 97 Ranged and the shadow at 99 Magic each delete one of the three Fremennik from the start of every wave, and the wave opening is where the Colosseum kills people.
| Slot | Budget | Strong ranged setup | Best in slot |
|---|---|---|---|
| Wave weapon | Bow of Faerdhinen with crystal armour, plus Osmumten's fang | Twisted bow — the strongest ranged option for waves — or Tumeken's shadow | Scythe of vitur plus Tumeken's shadow plus twisted bow plus venator bow |
| Weapon for Sol himself | Abyssal tentacle. A noxious halberd outdamages it but its reach makes the fight much harder without Myopia | Blade of Saeldor or soulreaper axe | Scythe of vitur — he is weak to slash |
| Head | Serpentine helm plus crystal helm | Neitiznot faceguard, or serpentine helm plus crystal helm | Torva full helm plus Masori mask (f). Torva's defence beats Oathplate's offence on a first quiver |
| Body | Fighter torso or blood moon chestplate, plus crystal body | Bandos chestplate plus Masori body | Torva platebody or Oathplate chest, plus Masori body (f) |
| Legs | Crystal legs | Bandos or blood moon tassets plus Masori chaps | Torva platelegs or Oathplate legs, plus Masori chaps (f) |
| Neck | Amulet of blood fury plus necklace of anguish | Amulet of torture plus necklace of anguish | Amulet of rancour, amulet of blood fury and necklace of rupture |
| Cape | Fire cape | Fire cape plus Ava's assembler | Infernal cape plus Dizana's quiver |
| Hands | Barrows gloves | Barrows gloves | Ferocious gloves plus Zaryte vambraces |
| Feet | Echo, aranea or dragon boots | Primordial boots | Avernic treads (max) |
| Ring | Berserker ring (i), or a Lightbearer if using a Voidwaker | Bellator ring | Ultor ring |
| Ammunition | Dragon arrows, or Rada's blessing 4 with a blowpipe | Dragon arrows | Seeking dragon arrows |
| Special attacks | Saradomin godsword plus dragon claws | Saradomin godsword plus dragon claws, with a Voidwaker for the melee Fremennik | Dragon or burning claws, plus an elder maul or dragon warhammer |
- Slot
- Wave weapon
- Budget
- Bow of Faerdhinen with crystal armour, plus Osmumten's fang
- Strong ranged setup
- Twisted bow — the strongest ranged option for waves — or Tumeken's shadow
- Best in slot
- Scythe of vitur plus Tumeken's shadow plus twisted bow plus venator bow
- Slot
- Weapon for Sol himself
- Budget
- Abyssal tentacle. A noxious halberd outdamages it but its reach makes the fight much harder without Myopia
- Strong ranged setup
- Blade of Saeldor or soulreaper axe
- Best in slot
- Scythe of vitur — he is weak to slash
- Slot
- Head
- Budget
- Serpentine helm plus crystal helm
- Strong ranged setup
- Neitiznot faceguard, or serpentine helm plus crystal helm
- Best in slot
- Torva full helm plus Masori mask (f). Torva's defence beats Oathplate's offence on a first quiver
- Slot
- Body
- Budget
- Fighter torso or blood moon chestplate, plus crystal body
- Strong ranged setup
- Bandos chestplate plus Masori body
- Best in slot
- Torva platebody or Oathplate chest, plus Masori body (f)
- Slot
- Legs
- Budget
- Crystal legs
- Strong ranged setup
- Bandos or blood moon tassets plus Masori chaps
- Best in slot
- Torva platelegs or Oathplate legs, plus Masori chaps (f)
- Slot
- Neck
- Budget
- Amulet of blood fury plus necklace of anguish
- Strong ranged setup
- Amulet of torture plus necklace of anguish
- Best in slot
- Amulet of rancour, amulet of blood fury and necklace of rupture
- Slot
- Cape
- Budget
- Fire cape
- Strong ranged setup
- Fire cape plus Ava's assembler
- Best in slot
- Infernal cape plus Dizana's quiver
- Slot
- Hands
- Budget
- Barrows gloves
- Strong ranged setup
- Barrows gloves
- Best in slot
- Ferocious gloves plus Zaryte vambraces
- Slot
- Feet
- Budget
- Echo, aranea or dragon boots
- Strong ranged setup
- Primordial boots
- Best in slot
- Avernic treads (max)
- Slot
- Ring
- Budget
- Berserker ring (i), or a Lightbearer if using a Voidwaker
- Strong ranged setup
- Bellator ring
- Best in slot
- Ultor ring
- Slot
- Ammunition
- Budget
- Dragon arrows, or Rada's blessing 4 with a blowpipe
- Strong ranged setup
- Dragon arrows
- Best in slot
- Seeking dragon arrows
- Slot
- Special attacks
- Budget
- Saradomin godsword plus dragon claws
- Strong ranged setup
- Saradomin godsword plus dragon claws, with a Voidwaker for the melee Fremennik
- Best in slot
- Dragon or burning claws, plus an elder maul or dragon warhammer
The one non-negotiable item on that table is a strong slashing melee weapon, and the reason is arithmetic rather than preference. Sol Heredit has a Magic level of 300 and defensive bonuses of +750 against magic and +825 against ranged, so magic and ranged setups that carried you through eleven waves become close to useless the moment the duel starts. An abyssal tentacle is described as the floor; a scythe of vitur is the ceiling.
The opposite is true of the waves, and this is the trade that catches people out. A twisted bow is the strongest ranged option for wave clearing and loses only to a scythe overall, while a Tumeken's shadow buys convenience by one-shotting the melee Fremennik but falls off against the other enemies and offers almost no defence. Meanwhile a melee-only setup is called extremely difficult for a first quiver even with a scythe, because you cannot solve south spawns and north-west pillar stacks without reach.
Special attack weapons earn their inventory slots for very specific jobs. A Saradomin godsword one-shots the ranged Fremennik with minimal switches and its special restores a large amount of health and prayer, which is how you stabilise a wave that has started badly. Dragon claws finish enemies before reinforcements arrive and are the standard way to end the Sol fight once he drops below 10 per cent. For a first quiver, dragon claws are easier to use than burning claws because the damage arrives in one burst.
The stat-reduction weapons are a genuine option against Sol and a genuine trap on a first attempt. He is not immune to stat reduction, so a dragon warhammer or elder maul makes him easier to hit — but the wiki's judgement is that for a first quiver, claws or a similar burst weapon that ends the fight quickly below 10 per cent are much more valuable.
One item choice interacts with a modifier rather than with a boss. A noxious halberd is fun and effective in the waves, but reaching Sol with one when you were never offered Myopia during the waves results in a significantly harder fight, because the halberd's reach keeps dragging you into range when you are trying to stand two tiles away. Many players carrying a halberd bring an abyssal tentacle purely for wave twelve.
| Check | Value |
|---|---|
| Its Defence level | 200 |
| Its Magic level | 300 |
| Its lowest defence bonus, per its infobox | slash |
- Check
- Its Defence level
- Value
- 200
- Check
- Its Magic level
- Value
- 300
- Check
- Its lowest defence bonus, per its infobox
- Value
- slash
- 300 Magic level rewards magic-defence scaling weapons.
Inventory and Supplies
| What | Why it is there |
|---|---|
| Saradomin brews and super restores | The bulk of the inventory. The wiki refuses to give a number and it is right to: the split depends entirely on how much you prayer flick, and a lazy flicker and a disciplined one need very different amounts. |
| Sanfew serums | Venom removal for the Mantimayhem II modifier, which makes manticore attacks envenom you on any unprayed hit. A noxious halberd special attack does the same job if you are carrying one. |
| A divine super combat potion, and a divine ranging or bastion potion | Your melee boost for Sol and your ranged boost for the waves. With a super combat active your Defence is already boosted, which is why the higher-end setups drop the divine bastion. |
| A divine rune pouch with blood, soul and death runes | Death Charge, and thralls if you have the spellbook for them. Because so few magic switches are brought, these runes are far more useful than Ancient Magicks runes. |
| A Saradomin godsword | One-shotting the ranged Fremennik with minimal switches, and a guaranteed large health and prayer restore during the hardest part of a wave. |
| Dragon claws or burning claws | Killing enemies before reinforcements spawn, and ending the Sol fight below 10 per cent before the arena fills with molten sand. |
| A venator bow with dragon arrows, or a blowpipe with dragon darts | The mage Fremennik. If you are already running a twisted bow, the venator can be swapped for an extra brew or a piece of melee armour. |
| A one-way magic switch | Two-shotting the melee Fremennik. A sanguinesti staff, trident of the swamp or eye of ayak is enough for a first quiver, and costs far less inventory space than a four-way shadow switch. |
| An abyssal tentacle, if your main weapon is a halberd | Wave twelve. Being offered Myopia is not guaranteed, and reaching Sol with only a halberd is a much harder fight. |
- What
- Saradomin brews and super restores
- Why it is there
- The bulk of the inventory. The wiki refuses to give a number and it is right to: the split depends entirely on how much you prayer flick, and a lazy flicker and a disciplined one need very different amounts.
- What
- Sanfew serums
- Why it is there
- Venom removal for the Mantimayhem II modifier, which makes manticore attacks envenom you on any unprayed hit. A noxious halberd special attack does the same job if you are carrying one.
- What
- A divine super combat potion, and a divine ranging or bastion potion
- Why it is there
- Your melee boost for Sol and your ranged boost for the waves. With a super combat active your Defence is already boosted, which is why the higher-end setups drop the divine bastion.
- What
- A divine rune pouch with blood, soul and death runes
- Why it is there
- Death Charge, and thralls if you have the spellbook for them. Because so few magic switches are brought, these runes are far more useful than Ancient Magicks runes.
- What
- A Saradomin godsword
- Why it is there
- One-shotting the ranged Fremennik with minimal switches, and a guaranteed large health and prayer restore during the hardest part of a wave.
- What
- Dragon claws or burning claws
- Why it is there
- Killing enemies before reinforcements spawn, and ending the Sol fight below 10 per cent before the arena fills with molten sand.
- What
- A venator bow with dragon arrows, or a blowpipe with dragon darts
- Why it is there
- The mage Fremennik. If you are already running a twisted bow, the venator can be swapped for an extra brew or a piece of melee armour.
- What
- A one-way magic switch
- Why it is there
- Two-shotting the melee Fremennik. A sanguinesti staff, trident of the swamp or eye of ayak is enough for a first quiver, and costs far less inventory space than a four-way shadow switch.
- What
- An abyssal tentacle, if your main weapon is a halberd
- Why it is there
- Wave twelve. Being offered Myopia is not guaranteed, and reaching Sol with only a halberd is a much harder fight.
The wiki gives full 28-slot inventories for five different setups and every one of them says the same thing about brews and restores: the quantity differs from person to person depending on how much you prayer flick. Take that seriously rather than copying a screenshot — the number of restores you need is a measurement of your own habits, not a constant.
Space is the real constraint, not money. Every switch you bring for a one-shot is a supply you are not bringing, which is why the recommendation for a first quiver is consistently to cut melee switches to a minimum until you can clear waves semi-consistently.
Prayer and Spellbook
The counterintuitive rule comes first: do not camp Protect from Melee against Sol. His area attacks deal typeless melee damage that the prayer does not reduce, and having it active when his triple attack begins prevents you from blocking the first hit. A prayer that feels safe is actively costing you here.
The triple attack is the one place Protect from Melee is not just useful but mandatory, and it has to be tick-perfect. The first hit lands three ticks after the charging animation starts, the second three ticks later, and the third after another three — delayed to four from phase four onwards, specifically to catch you out. Activating any protection prayer too early disables it and forces you to take the damage, so this is a fight where early is as wrong as late. Unblocked, the three hits deal 15, 25 and 35 in phases one to three, rising to 15, 30 and 45 from phase four.
Offensive prayers are where your prayer points actually go. Rigour is what makes a venator bow with dragon arrows one-shot the seer, Piety is what makes a Saradomin godsword special one-shot the archer, and Augury is part of the requirement if you are freezing the warband with Ice Barrage. Flicking those through the waves is the single largest saving available on super restores.
Blasphemy turns all of this into a resource question. At its three tiers it drains 20, 40 or 60 per cent of the damage you take as prayer points, and the wiki's assessment is that it requires no conscious effort to handle and only kills players who habitually camp low prayer. The way it actually kills you at Sol is indirect: a light beam smites your prayer, and with no prayer you cannot block the triple attack.
Mechanics That Decide the Fight
| Mechanic | How you see it coming | What it does | Your answer |
|---|---|---|---|
| Spear 1 | He always opens the fight with this one, and always leads with a spear attack after a phase transition. | A five-by-six area under him and in front, plus two four-tile lines pushed towards your direction. Up to 45 typeless damage. | Step back one tile from his centre tile, or onto one of his corner tiles. If his previous attack was Spear 1, the next one will be Spear 2. |
| Spear 2 | It follows a Spear 1 that was not interrupted by a shield attack. | A five-by-five area under him, plus three four-tile lines towards you. | Step back one tile diagonally, on either side of his centre tile. The off-centre tiles are what make this pattern different from the first. |
| Shield 1 | A shield slam rather than a spear stab, on a six-tick attack speed rather than seven. | A fifteen-by-fifteen area attack with a safe line at nine-by-nine. | Step back one tile from his melee range. This is the one attack the L method cannot dodge for you, so it is the one you have to react to if you use that method. |
| Shield 2 | It follows a Shield 1 that was not interrupted by a spear attack. | A fifteen-by-fifteen area attack with the safe line pushed out to eleven-by-eleven. | Step back two tiles rather than one. This is why the wiki recommends always keeping enough room to move two tiles away from him. |
| Triple Attack | A charging animation, from phase two onwards. | Three strikes, three ticks apart. Unblocked they deal 15, 25 and 35 in phases one to three, and 15, 30 and 45 from phase four, where the final hit is also delayed by one tick. | Protect from Melee, activated tick-perfectly with each hit landing. Turning any protection prayer on too early disables it and you eat the damage anyway. |
| Light Beam | A crystal spawning outside the arena, moving a random distance, then projecting a beam. | Fires a ball of light for 70 or more damage. One extra beam is added at the start of each phase, to a maximum of four from phase five. | Move. You have three ticks from the moment your position is targeted, and only two in the enrage phase. The wiki calls this by far the most dangerous hazard in the fight. |
| Molten Sand | Six pillars of light during each phase transition. | Leaves permanent puddles dealing roughly 6 to 8 damage per tick, and adding Doom stacks if Doom is active. One of the six always lands on your tile. | Control where it spawns. It only appears in a nine-by-nine square centred on you, so where you stand at a phase transition decides which part of the arena you lose. |
| Grapple | He shouts, and the message names a body part above his model and in the chatbox. | Up to 45 damage if you fail to defend the matching armour slot, or click the wrong one. He uses it even when the slot is empty, in which case you cannot defend at all. | Body means platebody, back means cape, hands means gloves, legs means platelegs, feet means boots. Countering within three ticks blocks it; countering on the last possible tick perfectly parries it and empowers your next attack within five ticks into a max hit. |
| The attack delay | Nothing visible — this is a rule rather than an attack. | Sol cannot move for four ticks from the tick he uses an area attack, and he must be next to you at the start of a tick to begin one at all. | Walk away from him before his attack cooldown finishes and you delay his next attack entirely. It works on everything except phase transitions, which he begins regardless of where you are. |
| The enrage sand | Below 10 per cent health, at 150 hitpoints. | Five molten sand pools immediately, then one more every three ticks on a random unaffected tile, again in a nine-by-nine grid around you. | End it. This is what special attack weapons are saved for, and the wiki's warning is that the arena fills quickly once this starts. |
- Mechanic
- Spear 1
- How you see it coming
- He always opens the fight with this one, and always leads with a spear attack after a phase transition.
- What it does
- A five-by-six area under him and in front, plus two four-tile lines pushed towards your direction. Up to 45 typeless damage.
- Your answer
- Step back one tile from his centre tile, or onto one of his corner tiles. If his previous attack was Spear 1, the next one will be Spear 2.
- Mechanic
- Spear 2
- How you see it coming
- It follows a Spear 1 that was not interrupted by a shield attack.
- What it does
- A five-by-five area under him, plus three four-tile lines towards you.
- Your answer
- Step back one tile diagonally, on either side of his centre tile. The off-centre tiles are what make this pattern different from the first.
- Mechanic
- Shield 1
- How you see it coming
- A shield slam rather than a spear stab, on a six-tick attack speed rather than seven.
- What it does
- A fifteen-by-fifteen area attack with a safe line at nine-by-nine.
- Your answer
- Step back one tile from his melee range. This is the one attack the L method cannot dodge for you, so it is the one you have to react to if you use that method.
- Mechanic
- Shield 2
- How you see it coming
- It follows a Shield 1 that was not interrupted by a spear attack.
- What it does
- A fifteen-by-fifteen area attack with the safe line pushed out to eleven-by-eleven.
- Your answer
- Step back two tiles rather than one. This is why the wiki recommends always keeping enough room to move two tiles away from him.
- Mechanic
- Triple Attack
- How you see it coming
- A charging animation, from phase two onwards.
- What it does
- Three strikes, three ticks apart. Unblocked they deal 15, 25 and 35 in phases one to three, and 15, 30 and 45 from phase four, where the final hit is also delayed by one tick.
- Your answer
- Protect from Melee, activated tick-perfectly with each hit landing. Turning any protection prayer on too early disables it and you eat the damage anyway.
- Mechanic
- Light Beam
- How you see it coming
- A crystal spawning outside the arena, moving a random distance, then projecting a beam.
- What it does
- Fires a ball of light for 70 or more damage. One extra beam is added at the start of each phase, to a maximum of four from phase five.
- Your answer
- Move. You have three ticks from the moment your position is targeted, and only two in the enrage phase. The wiki calls this by far the most dangerous hazard in the fight.
- Mechanic
- Molten Sand
- How you see it coming
- Six pillars of light during each phase transition.
- What it does
- Leaves permanent puddles dealing roughly 6 to 8 damage per tick, and adding Doom stacks if Doom is active. One of the six always lands on your tile.
- Your answer
- Control where it spawns. It only appears in a nine-by-nine square centred on you, so where you stand at a phase transition decides which part of the arena you lose.
- Mechanic
- Grapple
- How you see it coming
- He shouts, and the message names a body part above his model and in the chatbox.
- What it does
- Up to 45 damage if you fail to defend the matching armour slot, or click the wrong one. He uses it even when the slot is empty, in which case you cannot defend at all.
- Your answer
- Body means platebody, back means cape, hands means gloves, legs means platelegs, feet means boots. Countering within three ticks blocks it; countering on the last possible tick perfectly parries it and empowers your next attack within five ticks into a max hit.
- Mechanic
- The attack delay
- How you see it coming
- Nothing visible — this is a rule rather than an attack.
- What it does
- Sol cannot move for four ticks from the tick he uses an area attack, and he must be next to you at the start of a tick to begin one at all.
- Your answer
- Walk away from him before his attack cooldown finishes and you delay his next attack entirely. It works on everything except phase transitions, which he begins regardless of where you are.
- Mechanic
- The enrage sand
- How you see it coming
- Below 10 per cent health, at 150 hitpoints.
- What it does
- Five molten sand pools immediately, then one more every three ticks on a random unaffected tile, again in a nine-by-nine grid around you.
- Your answer
- End it. This is what special attack weapons are saved for, and the wiki's warning is that the arena fills quickly once this starts.
The pattern rule is the reason this fight is learnable at all, so it is worth stating precisely. If Sol uses two attacks of the same type in a row — two spears or two shields — the second one uses the other pattern. Using a spear then a shield, or a shield then a spear, resets him back to the first pattern of that type. He remembers his previous attack through a phase transition, but that memory resets if he used a special attack, either the grapple or the triple combo. And he always opens with a spear attack after a transition.
There are two ways to play that, and the wiki is clear about which is better. The hover method uses a lookup: after any special, hover one tile back at the sides or the middle; after Shield 1, two tiles back; after Shield 2, one tile back; after Spear 1, one tile back on the off-centre tiles; after Spear 2, one tile back at the sides or the middle. It lets you pre-empt every regular attack and gives you the most freedom to manoeuvre around molten sand. The L method — moving in an L shape from his corner — automatically dodges Spear 1, Spear 2 and Shield 2, and is always safe straight out of a phase transition, but forces you to react to Shield 1, which takes your attention away from beams and specials.
His attack speeds are tied to the attack he last used: spear stabs are seven ticks, shield slams six. Both speed up by one tick each after he drops below 75 per cent health and completes that phase transition.
Modifiers change wave twelve in ways worth planning for. Reentry II or III means the permanent molten sand you left in the middle of the arena during the waves is still there for the duel, which can severely limit your dodging space. Quartet spawns a Fremennik warband member at the start of the fight, which you have to kill while dodging — a common death, because red-clicking it while switching weapons gets you hit. Bees keep spawning in a small arena. Solarflare orbs rotate in a fixed five-by-five pattern by the corners, with the areas inside and between the boxes safe. And Totemic starts spawning totems at 50 per cent that heal him 75 hitpoints every 4.2 seconds until destroyed — one manually cast spell removes one, and it takes two minutes to come back.
| Property | Value |
|---|---|
| Combat level | 1563 |
| Attack styles | Various |
| Attack speed | null ticks |
| Attacks on sight | Yes |
| Poisons you | No |
| Size | 5 tiles |
| Immune to thralls | Yes |
- Property
- Combat level
- Value
- 1563
- Property
- Attack styles
- Value
- Various
- Property
- Attack speed
- Value
- null ticks
- Property
- Attacks on sight
- Value
- Yes
- Property
- Poisons you
- Value
- No
- Property
- Size
- Value
- 5 tiles
- Property
- Immune to thralls
- Value
- Yes
Where Sol Heredit (Fortis Colosseum) Sits in Progression
Within the wave and challenge group, the fights below Sol Heredit (Fortis Colosseum) are TzTok-Jad (Fight Caves). Nothing in the wave and challenge group is rated harder — Sol Heredit (Fortis Colosseum) shares the top band with Triple Jads (Inferno wave 69) and TzKal-Zuk (Inferno) and others at the same rating.
Phase by Phase
Phase 1 — 100 per cent, 1,500 hitpoints
He opens with the line about testing your footwork, and with Spear 1. For this entire phase there is nothing to do except dodge: four area patterns, up to 45 typeless damage each, all of them avoidable by standing in the right place. No hazards, no specials, no beams.
Use it to establish the habit that carries the rest of the fight. Keep at least two tiles of room behind you, because while both spear patterns and the first shield slam can be dodged by moving one tile, the second shield slam needs two. And keep Protect from Melee off, because it does nothing against these attacks and will cost you the first hit of the triple attack later.
Phase 2 — 90 per cent, 1,350 hitpoints
The first transition is where the fight acquires its furniture. Six tiles are marked with pillars of light and become permanent molten sand, one of them always on the tile you are standing on, and all of them inside a nine-by-nine square centred on you. Standing on molten sand costs roughly 6 to 8 damage per tick and adds Doom stacks if you took Doom.
The triple attack arrives here. It has to be prayed with Protect from Melee on the exact tick each hit lands, three ticks apart, and any protection prayer turned on too early is switched off and the damage goes through. Unblocked in this phase the three hits deal 15, 25 and 35.
So does the first light beam. A crystal spawns outside the arena, travels, stops and projects a beam, and a few seconds later fires a ball of light for 70 or more. If it targets your position you have three ticks to move.
Phase 3 — 75 per cent, 1,125 hitpoints
Another light beam, another six molten sands, and his area attacks speed up by a tick — spear stabs to six, shield slams to five. That speed change is the point in the fight where dodging stops being comfortable and starts being work.
The grapple special also starts here. He announces one of five armour slots, above his model and in the chatbox, and you have to defend that slot. Body means your platebody, back means your cape, hands means gloves, legs means platelegs, feet means boots. Getting it right within three ticks blocks up to 45 damage; getting it right on the last possible tick gives you a perfect parry, which empowers your next attack within five ticks into a guaranteed max hit.
One detail worth knowing before it happens: he will call a slot even when you have nothing equipped in it, and in that case there is nothing you can do about it.
Phase 4 — 50 per cent, 750 hitpoints
Another beam, another six pools of sand, and one small change that has ended a great many attempts. The final hit of the triple attack is delayed by an extra tick, from three to four, specifically to break the rhythm you have just spent two phases learning. Unblocked, that final hit now deals 45 rather than 35, and the middle hit rises from 25 to 30.
By this point the arena has eighteen permanent sand tiles in it, all placed in nine-by-nine squares around wherever you happened to be standing at each transition. Where you stand at a transition is the only control you have over that, and it is worth thinking about a few seconds before each one.
Phase 5 — 25 per cent, 375 hitpoints
Mechanically identical to phase four, with one more light beam and one more set of six molten sands. This is the last beam he adds: four in total from here on.
There is nothing new to learn in this phase, which makes it a strange one to fight. It is purely a test of whether the habits from the previous four have held up while the floor has been getting smaller.
Enrage — 10 per cent, 150 hitpoints
The final stretch changes tempo rather than mechanics. Five molten sand pools land immediately and then another arrives every three ticks on a random unaffected tile, still in a nine-by-nine square around you, so the arena is being consumed in real time. The light beams fire roughly every seven seconds and you now have only two ticks to react from the moment one targets you.
The wiki's priority order for this phase is unambiguous: dodging light beams comes above everything else, because a beam hit smites your prayer and without prayer you cannot block the triple attack. This is what dragon claws and burning claws are for — a burst that ends the fight before the floor runs out.
One last warning that costs people entire runs. Doom stacks keep accruing after Sol dies and will still kill you at maximum stacks, and Volatility makes his corpse explode. If either finishes you off after the kill, you lose everything in the chest, including the quiver.
Fight Strategy: Sol Heredit finale
- Before wave twelve starts, tag Sol with NPC highlights while he is still sitting above the north gate, turn up both game sounds and area sounds — his attack sounds are area sounds — and zoom out far enough to see the cue that appears above his head.
- He opens with Spear 1. Step back one tile from his centre tile, or onto a corner tile.
- Track his last attack rather than his animation. Two of the same type in a row means the second uses the other pattern; a spear followed by a shield, or the reverse, resets him to the first pattern.
- Keep two tiles of space behind you at all times, because Shield 2 is the only pattern that needs two rather than one.
- Leave Protect from Melee off between triple attacks. It does not reduce his area damage and it will cost you the first hit of the combo.
- When he charges the triple attack, pray Protect from Melee on the tick each hit lands — three ticks apart, and four for the final hit from phase four onwards.
- Choose where you are standing at every phase transition. The six new molten sand pools spawn in a nine-by-nine square around you, and one of them will always be your tile.
- Answer the grapple by slot: body, back, hands, legs, feet. If you can afford the risk, counter on the last tick for the perfect parry and the free max hit.
- Move for every light beam that targets you — three ticks in the ordinary phases, two in enrage.
- Below 10 per cent, dump your special attacks and finish it before the sand takes the arena.
There is one trick in this fight that changes the pace of it entirely and almost nobody uses at first. Sol cannot move for four ticks starting from the tick he uses an area attack, and he has to be next to you at the start of a tick to begin one. That means walking away before his cooldown finishes delays his next attack outright — you are not just dodging, you are stealing time to heal, reposition around sand, or reset your rhythm after a mistake. It works on everything except phase transitions, which he begins regardless of where you are.
The other habit that separates completions from near-misses is deciding in advance which hazard wins when two arrive together. The wiki's ordering for the enrage phase applies to the whole fight: the light beam is the highest priority, because it deals 70 or more and smites your prayer, and losing your prayer is what turns a survivable triple attack into a death. Take a sand tick, take an area attack, take the grapple — but move for the beam.
Positioning and Movement
The arena you fight him in is not the arena you fought the waves in. Gladiators barricade the centre when wave twelve begins, restricting you to the space within the four pillars, roughly sixteen tiles by fifteen. Everything about spacing has to be planned inside that box.
Two tiles of clearance is the number to hold. Both spear patterns and Shield 1 can be dodged with a single step, but Shield 2 needs two, so a position that only offers one tile of retreat is a position where one of his four patterns kills you.
Your standing tile at each phase transition is a decision, not an accident. Six pools of molten sand spawn in a nine-by-nine square centred on you and one always lands on your tile, so transitioning near an edge concentrates the damage into ground you were already avoiding — and the wiki notes that if you are at an edge or corner, all six will still spawn inside the arena where space allows.
If you took Reentry II or III during the waves, the molten sand you left in the centre of the arena is permanent and still there for the duel. The advice to avoid splattering the middle is not aesthetic — it is about not fighting Sol in a room you already ruined.
Solarflare orbs, if active, circle a fixed five-by-five pattern by the corners. The areas inside the boxes and between them are safe, which makes them a positioning constraint rather than a reaction test once you know the paths.
Beginner Plan, Then the Advanced One
Your first trips
- Get a bow of Faerdhinen setup before you seriously attempt this. The wiki is unusually direct that it is highly recommended for a first quiver, and that the alternatives — a scorching bow with Masori, or a hunters' sunlight crossbow — are worse rather than equivalent.
- Install the tile marker pack. It includes the wave start tiles for both pillars, the A and B tiles for offticking double south spawns, the deadzones you cannot walk into, the solarflare paths for the Sol fight, and the jaguar trap tiles. That is a lot of memorisation removed for free.
- Run the north-west pillar and follow the wave procedure exactly: start tile, correct prayer for the wave, click towards A or B on the fifth tick, kill the Fremennik in the order melee, mage, ranger, then south spawns, then reinforcements, then the pillar stack, then back to the start tile.
- Stand still and take Fremennik damage rather than walking to avoid it. This is the trap the wiki flags most strongly — learners internalise walking early, then keep doing it late in waves and die to mage-first reinforcements because their Fremennik were still alive at fourteen seconds.
- Pick the boring modifiers early. Relentless, Blasphemy and Frailty are all rated as safe picks and taking manageable tier ones as soon as possible reduces the chance of being forced into something genuinely bad later. Bees, Red Flag and Totemic are the ones to refuse.
- For the Sol fight itself, use the L method as a fallback and the hover method as the goal. The L shape from his corner dodges Spear 1, Spear 2 and Shield 2 automatically and is always safe out of a phase transition — you only have to react to Shield 1.
- Expect to fail. The wiki's own framing is that you should not expect to complete it in your first few attempts and should be prepared to learn from a lot of failures. Treating early attempts as practice rather than as runs is the correct mindset.
Once the kill is boring
- Learn the hover method properly. Knowing that Shield 1 means hovering two tiles back, Shield 2 and Spear 2 mean one tile back at the sides or middle, and Spear 1 means one tile back off-centre lets you pre-empt every regular attack, which is what frees your attention for the beams and specials.
- Use the attack delay deliberately. Walking away from Sol before his four-tick cooldown finishes pushes his next attack back, and it works on every attack except a phase transition. It is the closest thing the fight has to a pause button.
- Practise the perfect parry. Countering the grapple on the last possible tick rather than immediately gives you the perfect parry message and empowers your next attack within five game ticks with a max hit — a free maximum hit every grapple, which adds up over six phases.
- Take Volatility at wave twelve if it is offered. It only deals damage after Sol is already dead, which makes it one of the easiest picks available at that point — provided you remember it can still kill you at low health, and that dying after the kill loses the chest.
- Learn the solarflare skip. At tiers one and two the flare moves every two ticks and only the second tick is damaging, so you can wait until its true tile overlaps yours and click away. At tier three it moves every tick, and clicking on its true tile as it moves puts you where it has already left.
- Use the venator bow's ricochets where triple bounces are available — mainly waves one to six and ten to eleven — where it beats even a scythe with Masori equipped. That is a speed optimisation rather than a first-quiver one.
Drops and What Sol Heredit (Fortis Colosseum) Is Worth
The Colosseum has one reward that matters and everybody attempting it knows what it is: Dizana's quiver, given for a successful completion. Sol Heredit is the last obstacle in front of it rather than a drop source you farm.
There is a way to lose it after winning, and it is worth spelling out because it is so avoidable. Doom stacks continue accruing after Sol dies and will still kill you if they reach maximum, and Volatility makes his corpse explode. If either finishes you off after the kill, you lose all the loot in the chest — quiver included.
No values, completion rates or timings are printed here. The Colosseum's rewards and the market around them move, so check the live tables on the wiki rather than trusting a number written into a guide.
Drops worth the trip: Dizana's quiver, sunfire fanatic armour. Whether that is worth your time depends on how many kills an hour you personally get, which is a function of Sol Heredit finale rather than of your gear list.
Combat Achievements
Two of the Colosseum's Combat Achievements deliberately invert the modifier advice on this page. One-off and Reinforcements both require you to pick bad modifiers, which is exactly what the wiki's recommendations exist to stop you doing on a first quiver. Do them as a separate project once you have completions in the bank, not as an attempt to get value out of one run.
Sol Heredit (Fortis Colosseum) has Combat Achievement tasks. At a 45 max hit, a capped-gear restriction is the awkward kind: you lose damage without losing anything it throws at you.
Task lists move with updates — read the current list in game.
Ironman Notes
Without a Grand Exchange, dizana's quiver, sunfire fanatic armour has to be earned rather than bought, and this is the fastest table it sits on.
The budget setup is written with self-sufficient accounts in mind more than it looks. A trident of the swamp is called out specifically as the most affordable magic switch and the easiest to obtain for Ironmen, and it does the same job as a sanguinesti staff for two-shotting the melee Fremennik.
If you own a sanguinesti staff and cannot spare the slots, there is a neat trick in the budget notes: uncharge it for blood runes and bring a book of the dead in your offhand, which gets you both thralls and Death Charge out of one inventory decision.
Do not skip the bow. Everything else on the budget list is flexible, but the wiki's judgement is that a bow of Faerdhinen setup is what makes a first quiver realistic, and that the alternatives underperform rather than substitute.
Common Mistakes and Death Causes
| What happened | Why it happened | The fix |
|---|---|---|
| Camping Protect from Melee | It does not reduce his area attack damage at all, and having it active at the start of the triple attack stops you blocking the first hit — so the prayer that feels protective is the one causing the damage. | Leave it off between combos and put it on tick-perfectly for each of the three hits. |
| Praying the triple attack early | Activating any protection prayer too early disables it, and the timing changes in phase four when the final hit is delayed by a tick specifically to break your rhythm. | Time to the hit landing, not to the charge animation, and re-learn the third hit's timing at the 50 per cent transition. |
| A light beam in the enrage phase | You have only two ticks to react rather than three, they fire roughly every seven seconds, and a hit deals 70 or more and smites your prayer — which then loses you the triple attack as well. | Make the beam the top priority above every other hazard from 10 per cent onwards, and accept sand ticks and area hits to move for it. |
| Nowhere left to stand | Six permanent molten sand pools land at every phase transition, always in a nine-by-nine square around you and always including your tile, so a player who transitions in the same corner five times has destroyed that corner. | Choose your transition position deliberately, and if you have Reentry II or III active, keep the centre of the arena clear during the waves. |
| Mage-first reinforcements in the waves | A serpent shaman arriving while south spawns are still alive is one of the most common learner deaths, and it is usually caused by Fremennik still being alive too late into the wave. | Kill the Fremennik as fast as possible, standing still and taking damage if necessary. If they are alive past twelve to fourteen seconds, that is the problem to fix. |
| Panic-running pillars | The wiki calls it a flimsy survival strategy that usually covers for not learning wave procedure — you can still die to unlucky hits, and you will typically be out of position when reinforcements land. | Learn the double-south solves instead. Running pillars is for genuinely complicated stacks of three or four enemies, not for two. |
| Dying after Sol is already dead | Doom keeps stacking after the kill and Volatility makes his corpse explode, and either can finish a player who is at low health when he goes down. | Watch your Doom count and your health through the last few hits. Losing the chest at this point costs you the quiver. |
- What happened
- Camping Protect from Melee
- Why it happened
- It does not reduce his area attack damage at all, and having it active at the start of the triple attack stops you blocking the first hit — so the prayer that feels protective is the one causing the damage.
- The fix
- Leave it off between combos and put it on tick-perfectly for each of the three hits.
- What happened
- Praying the triple attack early
- Why it happened
- Activating any protection prayer too early disables it, and the timing changes in phase four when the final hit is delayed by a tick specifically to break your rhythm.
- The fix
- Time to the hit landing, not to the charge animation, and re-learn the third hit's timing at the 50 per cent transition.
- What happened
- A light beam in the enrage phase
- Why it happened
- You have only two ticks to react rather than three, they fire roughly every seven seconds, and a hit deals 70 or more and smites your prayer — which then loses you the triple attack as well.
- The fix
- Make the beam the top priority above every other hazard from 10 per cent onwards, and accept sand ticks and area hits to move for it.
- What happened
- Nowhere left to stand
- Why it happened
- Six permanent molten sand pools land at every phase transition, always in a nine-by-nine square around you and always including your tile, so a player who transitions in the same corner five times has destroyed that corner.
- The fix
- Choose your transition position deliberately, and if you have Reentry II or III active, keep the centre of the arena clear during the waves.
- What happened
- Mage-first reinforcements in the waves
- Why it happened
- A serpent shaman arriving while south spawns are still alive is one of the most common learner deaths, and it is usually caused by Fremennik still being alive too late into the wave.
- The fix
- Kill the Fremennik as fast as possible, standing still and taking damage if necessary. If they are alive past twelve to fourteen seconds, that is the problem to fix.
- What happened
- Panic-running pillars
- Why it happened
- The wiki calls it a flimsy survival strategy that usually covers for not learning wave procedure — you can still die to unlucky hits, and you will typically be out of position when reinforcements land.
- The fix
- Learn the double-south solves instead. Running pillars is for genuinely complicated stacks of three or four enemies, not for two.
- What happened
- Dying after Sol is already dead
- Why it happened
- Doom keeps stacking after the kill and Volatility makes his corpse explode, and either can finish a player who is at low health when he goes down.
- The fix
- Watch your Doom count and your health through the last few hits. Losing the chest at this point costs you the quiver.
The stabilising tool in the waves is a Saradomin godsword special attack. It one-shots the ranged Fremennik and restores a large amount of health and prayer at the same time, which is exactly what you need after a rough wave start — and the only exception to the melee, mage, ranger kill order is killing the ranger first with it when you are critically low.
In the Sol fight, recovery is a movement problem rather than a supply one. Walking away from him before his four-tick cooldown finishes delays his next attack, which buys you the ticks to brew, restore prayer or move out of sand. A player who knows that rule can survive a botched triple attack; a player who does not has to eat the next area attack while healing.
FAQ
Can I do the Colosseum with a melee-only setup?
You can, but the wiki strongly discourages it for a first quiver even with a scythe of vitur, because south spawns and north-west pillar stacks are nearly impossible to solve without reach. Meleeing also increases modifier difficulty by making solarflares, sky javelins, Reentry pools and Volatility explosions harder to manage.
Why is my ranged setup useless against Sol himself?
Because his defences against it are enormous — a Magic level of 300 with +750 magic and +825 ranged defence bonuses. He is weak to slash instead, which is why a strong slashing melee weapon is described as essential and an abyssal tentacle is the practical floor.
Which modifiers should I take?
Relentless, Blasphemy and Frailty at the lower tiers are all rated as safe, and taking manageable tier ones early reduces the chance of being forced into something worse later. Bees, Red Flag, Totemic and Quartet are the ones to refuse, and Frailty III, Doom III and Mantimayhem III should be avoided outright.
How do I know which attack pattern is coming?
By what he just did. Two attacks of the same type in a row means the second uses the other pattern, and mixing a spear and a shield resets him to the first. After every phase transition he opens with a spear attack, and if his previous attack was Spear 1 the next will be Spear 2.
What is the grapple asking me to do?
Defend the armour slot he names. Body is your platebody, back is your cape, hands is gloves, legs is platelegs, feet is boots. Countering within three ticks blocks up to 45 damage; countering on the last possible tick gives a perfect parry that empowers your next attack within five ticks into a max hit.
Should I bring a dragon warhammer or an elder maul for Sol?
He is not immune to stat reduction, so they do work. For a first quiver, though, dragon claws or a similar burst weapon are considered much more valuable, because ending the fight quickly once he drops below 10 per cent is worth more than accuracy across the whole duel.
Why do I keep dying at the start of waves?
Almost always because the Fremennik warband is still alive too long. They route-find, chase you at running speed and hit hard, and failing to kill them quickly spirals. If yours are alive past twelve to fourteen seconds, that is the fix — not more supplies.
Related Guides
Bottom Line
Sol Heredit rewards a very specific kind of preparation. Not a bigger bank — a slash weapon, a ranged option for the waves, tile markers, sound turned on, and the pattern rule memorised so that his four area attacks become appointments instead of reactions. Everything else he does, from the tick-perfect triple attack to the grapple to the beams, sits on top of footwork you either have or do not, which is exactly what he tells you before phase one.
It is also a lot of evenings. If the quiver is the goal and the eleven waves in front of it are the reason you keep stopping, we can put a quiver run through by hand instead — no automation, and the same account you left it in.
If Sol Heredit (Fortis Colosseum) is blocking a Combat Achievement or an unlock you actually want, our PvM service is done by hand — no automation. Otherwise the bosses list has the full index.
Sol Heredit (Fortis Colosseum) — Wave challenge, difficulty 5/5. Combat values here — hitpoints, max hits, attack styles and speed, Defence and Magic levels, immunities and Slayer requirements — were read from the Old School RuneScape Wiki infobox for Sol Heredit (Fortis Colosseum) on 2026-08-03. Kill rates, GP per hour and item prices are deliberately absent because they move with balance patches and the Grand Exchange. Mechanics, gear tiers and phase behaviour on this page were checked against Sol Heredit/Strategies on 4 August 2026.
Need a trusted team? Bils Services
Enjoyed the guide?
Drop a like — it helps other Adventurers find the good stuff.
Community
Comments
Silence in the hall…
Be the first Adventurer to leave a mark.
Join the thread
Add a comment
Tips, drops, or “this carried my account” — keep it useful.
bilsservices · bils services · bilsservices.com

