


OSRS Verzik Vitur Guide: All Phases, Gear, Roles & Mechanics
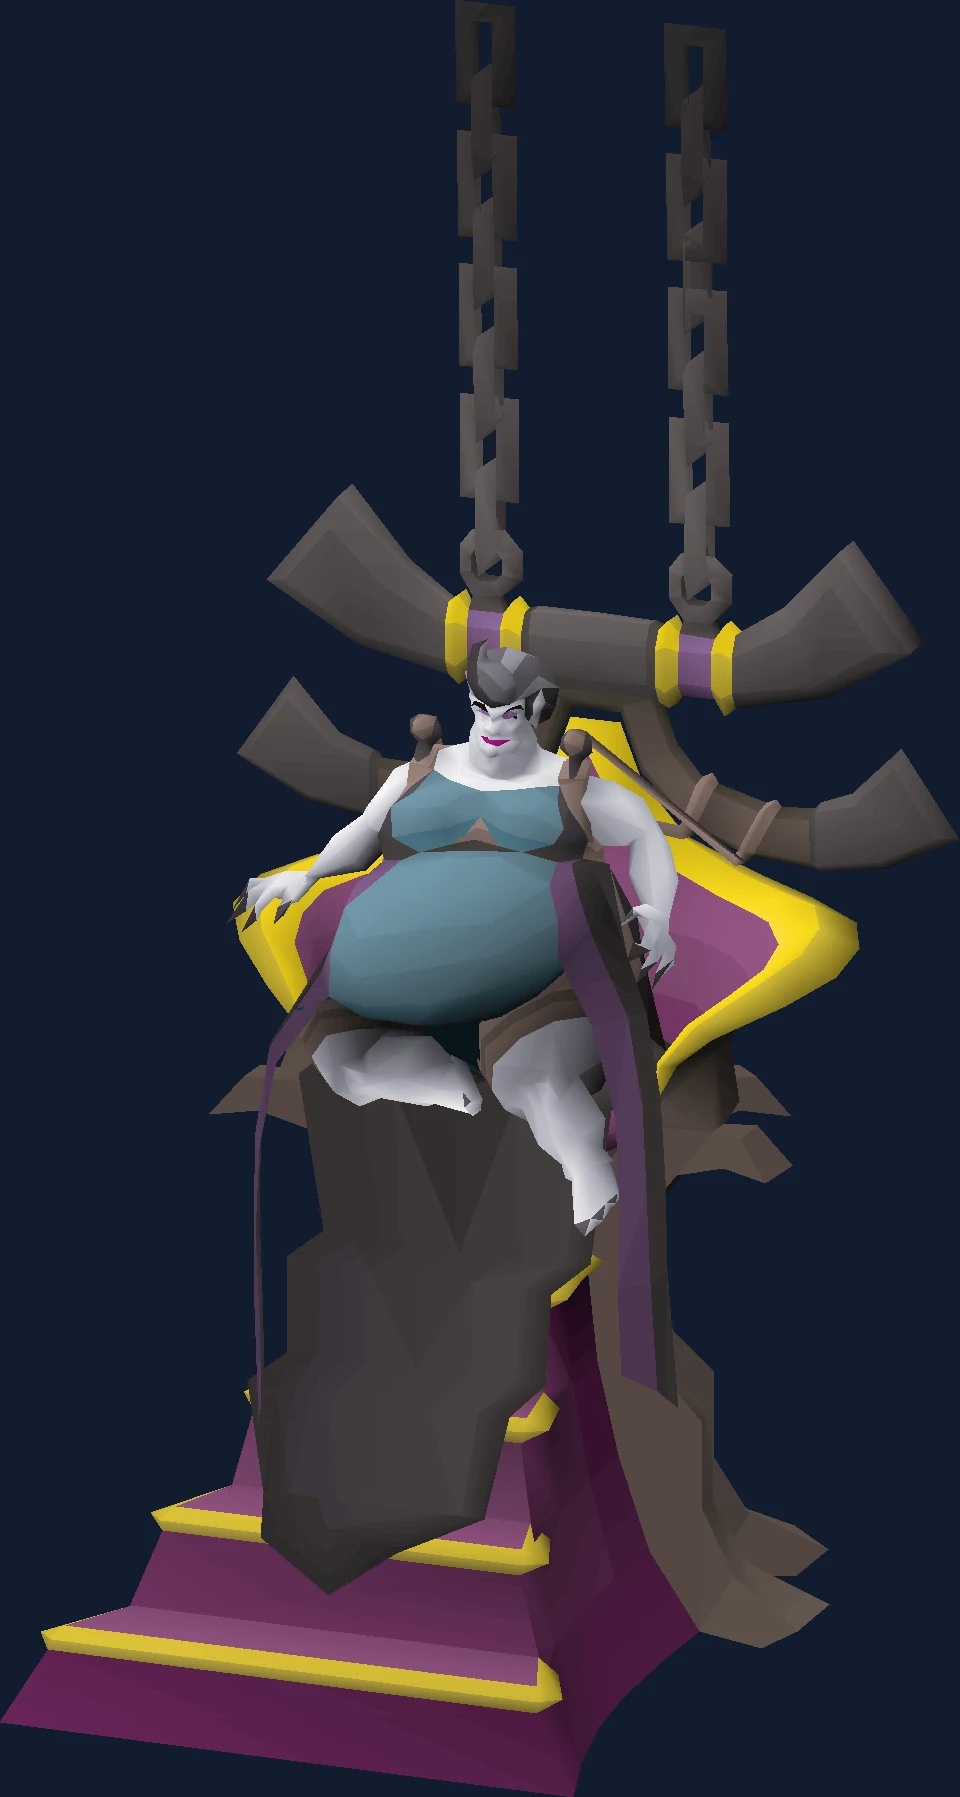
Verzik guide covering P1–P3, roles, gear, and purple-night discipline.
Why People Fight Verzik Vitur
Verzik is the only boss in the Theatre of Blood that makes you put your own weapon away. In her first phase the raid takes it in turns to use the Dawnbringer's special attack, because anything else you swing at her is both far less accurate and hard-capped: ranged and magic hitsplats are limited to 3, melee to 10. Whatever your account is worth, phase one is a scripted sequence with a borrowed weapon, and the only real decision in it is whether you are behind a pillar when she fires.
Then she leaves the throne, collapses every pillar still standing, and the fight becomes something else entirely. The flying stage is a crowd problem — urnbombs landing on your feet, a lightning ball chaining through the team, nylocas walking at you to explode, and a purple projectile that turns into a healer if you ignore it. Her attack speed drops from 14 ticks to 4, which is the number that tells you how much less thinking time you now have.
Her true form is the one people actually practise. She becomes half spider and half vampyre, mobile for the first time, and starts running four special attacks in a fixed order with four ordinary attacks between each. Nylocas, then webs, then safespots, then the green projectile. The order does not vary, which makes it learnable in a way the previous stretch is not — and makes it unforgiving, because every raid that fails here failed a step it knew was coming.
Two structural facts are worth carrying into all three. Her Defence cannot be lowered, so the special attacks your team leans on elsewhere in the Theatre are dead weight in this room. And her magic defence is calculated from her Defence level rather than her Magic level, in every phase, which is why her defensive sheet does not behave the way you would predict from her Magic stat.
Its own attack is magic, so Protect from Magic is the prayer it asks for.
In our index it sits in the raid group at difficulty 5 of 5, where kill times come down to three-phase final boss.
| Field | Detail |
|---|---|
| Classification | ToB final boss (Boss) |
| Group | raid |
| Difficulty | 5 / 5 |
| Solo or team | Team |
| Access requirement | Theatre of Blood |
| Notable reward | Scythe of vitur, ghrazi rapier, avernic defender hilt |
| Signature mechanic | Three-phase final boss |
| Hitpoints | 1200 |
| Max hits | 60 |
| Released | 3 June 2021 |
- Field
- Classification
- Detail
- ToB final boss (Boss)
- Field
- Group
- Detail
- raid
- Field
- Difficulty
- Detail
- 5 / 5
- Field
- Solo or team
- Detail
- Team
- Field
- Access requirement
- Detail
- Theatre of Blood
- Field
- Notable reward
- Detail
- Scythe of vitur, ghrazi rapier, avernic defender hilt
- Field
- Signature mechanic
- Detail
- Three-phase final boss
- Field
- Hitpoints
- Detail
- 1200
- Field
- Max hits
- Detail
- 60
- Field
- Released
- Detail
- 3 June 2021
Is Verzik Vitur the Right Fight for You Yet?
By the time you are standing in Verzik's room you have already cleared five encounters, so the question is not whether you can fight — it is whether you have practised the specific handful of things this room asks for that nothing earlier in the Theatre does.
You are ready for this fight if:
- You can hold Protect from Magic through phase one and stay behind cover. Her unprayed max hit is 137 and it halves to 68 through the prayer, and neither number can be tick-eaten.
- You know the difference between an attack that checks your prayer when it lands and one that checks during the animation. Urnbombs are the first; her blood spells are the second, and mixing them up is a phase-two death.
- Your team has a bounce order for the green projectile and everybody knows their position in it.
- Someone has been told they are the tank, and they know that standing under her is what stops the melee attack rather than an accident of positioning.
Come back later if any of these are true:
- You are relying on defence-reducing specials. Hers cannot be lowered at all, which makes a warhammer or a godsword spec a wasted inventory slot in this room.
- You have not looked at the tornado phase. At 20 per cent health she spawns one purple tornado per player, each hit takes half your current health, and she heals for three times what it deals.
- Nobody in the team is carrying a poisoned weapon. It is the only answer to the Nylocas Athanatos, which otherwise sits there healing her.
- You are learning on Hard Mode. The green projectile there instantly kills if more than two players are present and it has not yet been bounced, which is not a mechanic to meet for the first time at full health.
Access Requirements
Verzik Vitur is gated behind Theatre of Blood.
Theatre of Blood also tends to sit alongside the other raid gates, so it is usually cheaper to clear them together than to come back for each one. The boss requirements checklist lists them by group.
Location and How to Get There
Verzik Vitur is fought in the final encounter of the Theatre of Blood.
Verzik rules Ver Sinhaza and hosts the Theatre, and she is the last thing standing between your team and the chest. You arrive with whatever the previous five rooms left you.
Verzik's chamber is the sixth and final room of the Theatre of Blood, and it does not have travel directions of its own — you arrive through Maiden, Bloat, Nylocas, Sotetseg and Xarpus. What it does have is a starting condition most rooms do not: the fight has to be initiated by talking to Verzik. She is a hostess before she is a boss, and the raid waits until somebody speaks to her.
The room's furniture is the important part. Phase one is fought entirely around the pillars, and hiding behind one is not a tactic but a requirement — failing to do so can be fatal at up to 137 damage. The pillars are consumable: they collapse after taking several of her attacks, and anyone standing next to one when it falls takes up to 70 damage, or 50 in Entry Mode. When she moves on, she flies to the middle of the room and collapses whatever is left of them, and the arena becomes open ground for the rest of the fight.
Since October 2025 there has been a quick-start option for players with at least one prior completion, which removes the conversation for teams that have been here before.
Recommended Stats, and Gear for Each Phase
| Skill | What the fight asks of it | The mechanic behind it |
|---|---|---|
| Hitpoints | A buffer for the hits that cannot be reduced or dodged. Phase one hits 137 through no prayer and 68 through Protect from Magic, and neither can be tick-eaten. | Phase one's magic attack, and the collapsing pillars at up to 70. |
| Prayer | All three overheads across the fight, with several switches per cycle in phase three, plus enough restoration to survive her prayer-draining ranged attacks below 35 per cent health. | Phase-two blood spells and prayer drain; phase three's magic, ranged and melee rotation. |
| Melee (Attack, Strength, Defence) | Most of your damage once the throne is behind you. Her slash defence is 60 while she is airborne and 30 in her true form, against 250 and 230 for every ranged type. | Her per-phase defensive sheet. |
| Magic | A real option rather than a filler. Her magic defence sits at 70 while she is airborne, and her third form carries a 50 per cent elemental weakness to fire spells. | Phase defences, and the elemental weakness added in June 2025. |
| Ranged | Very little against Verzik herself. Her light, standard and heavy ranged defences are 250 while she is airborne and 230 in her true form — the highest numbers on her sheet by a distance. | Her ranged defence bonuses across all three phases. |
| Everything that lowers Defence | Nothing at all. Her Defence cannot be lowered, and her magic defence is worked out from her Defence level rather than her Magic level in every phase. | The mechanics note on her defence calculation. |
- Skill
- Hitpoints
- What the fight asks of it
- A buffer for the hits that cannot be reduced or dodged. Phase one hits 137 through no prayer and 68 through Protect from Magic, and neither can be tick-eaten.
- The mechanic behind it
- Phase one's magic attack, and the collapsing pillars at up to 70.
- Skill
- Prayer
- What the fight asks of it
- All three overheads across the fight, with several switches per cycle in phase three, plus enough restoration to survive her prayer-draining ranged attacks below 35 per cent health.
- The mechanic behind it
- Phase-two blood spells and prayer drain; phase three's magic, ranged and melee rotation.
- Skill
- Melee (Attack, Strength, Defence)
- What the fight asks of it
- Most of your damage once the throne is behind you. Her slash defence is 60 while she is airborne and 30 in her true form, against 250 and 230 for every ranged type.
- The mechanic behind it
- Her per-phase defensive sheet.
- Skill
- Magic
- What the fight asks of it
- A real option rather than a filler. Her magic defence sits at 70 while she is airborne, and her third form carries a 50 per cent elemental weakness to fire spells.
- The mechanic behind it
- Phase defences, and the elemental weakness added in June 2025.
- Skill
- Ranged
- What the fight asks of it
- Very little against Verzik herself. Her light, standard and heavy ranged defences are 250 while she is airborne and 230 in her true form — the highest numbers on her sheet by a distance.
- The mechanic behind it
- Her ranged defence bonuses across all three phases.
- Skill
- Everything that lowers Defence
- What the fight asks of it
- Nothing at all. Her Defence cannot be lowered, and her magic defence is worked out from her Defence level rather than her Magic level in every phase.
- The mechanic behind it
- The mechanics note on her defence calculation.
Verzik's wiki article publishes no suggested-levels list, because the Theatre of Blood gates entry rather than the boss doing it. The table above is written from her own defensive numbers instead, and the honest summary is that this is a melee room with a magic option and almost no ranged one.
Entry Mode exists precisely so those numbers can be met with a smaller account: the throne hits 60 rather than 137, the flying form 16 rather than 47, and the spider 36 from melee rather than 63. The mechanics are identical, which makes it the right place to learn the green ball and the tornadoes.
| What you are choosing | Phase 1 (throne) | Phase 2 (flying) | Phase 3 (spider form) |
|---|---|---|---|
| The weapon that actually matters | The Dawnbringer, taken in turns. Nothing else in your inventory is relevant. | Slash at 60 and magic at 70 are her softest defences here. | Slash drops to 30 — the lowest number anywhere on her sheet — and fire spells get a 50 per cent elemental weakness. |
| What is being wasted | Everything. Ranged and magic hitsplats are capped at 3, melee at 10, and other weapons are far less accurate besides. | Ranged, at 250 across light, standard and heavy. | Ranged again, at 230, and any special attack meant to lower her Defence. |
| The overhead you default to | Protect from Magic, which halves her max hit from 137 to 68. | Protect from Missiles as the urnbombs land, then Protect from Magic once she begins using blood spells below 35 per cent. | Whichever of the three she is using. Her magic and ranged attacks are reduced by 50 per cent with the matching prayer. |
| What she can hit you for | 137 unprayed, 68 prayed, neither tick-eatable. A collapsing pillar deals up to 70 to anyone beside it. | 47 on a standard attack, 50 on the body slam, and roughly 80 if she slams you after you have stood underneath her. | 63 from melee to everyone adjacent, and 33 each from magic and ranged. |
| Her health | 2,000 | 3,500 | 3,500 |
| Her attack speed | 14 ticks — slow enough to think | 4 ticks | 7 ticks, rising to 5 once she reaches 20 per cent health |
- What you are choosing
- The weapon that actually matters
- Phase 1 (throne)
- The Dawnbringer, taken in turns. Nothing else in your inventory is relevant.
- Phase 2 (flying)
- Slash at 60 and magic at 70 are her softest defences here.
- Phase 3 (spider form)
- Slash drops to 30 — the lowest number anywhere on her sheet — and fire spells get a 50 per cent elemental weakness.
- What you are choosing
- What is being wasted
- Phase 1 (throne)
- Everything. Ranged and magic hitsplats are capped at 3, melee at 10, and other weapons are far less accurate besides.
- Phase 2 (flying)
- Ranged, at 250 across light, standard and heavy.
- Phase 3 (spider form)
- Ranged again, at 230, and any special attack meant to lower her Defence.
- What you are choosing
- The overhead you default to
- Phase 1 (throne)
- Protect from Magic, which halves her max hit from 137 to 68.
- Phase 2 (flying)
- Protect from Missiles as the urnbombs land, then Protect from Magic once she begins using blood spells below 35 per cent.
- Phase 3 (spider form)
- Whichever of the three she is using. Her magic and ranged attacks are reduced by 50 per cent with the matching prayer.
- What you are choosing
- What she can hit you for
- Phase 1 (throne)
- 137 unprayed, 68 prayed, neither tick-eatable. A collapsing pillar deals up to 70 to anyone beside it.
- Phase 2 (flying)
- 47 on a standard attack, 50 on the body slam, and roughly 80 if she slams you after you have stood underneath her.
- Phase 3 (spider form)
- 63 from melee to everyone adjacent, and 33 each from magic and ranged.
- What you are choosing
- Her health
- Phase 1 (throne)
- 2,000
- Phase 2 (flying)
- 3,500
- Phase 3 (spider form)
- 3,500
- What you are choosing
- Her attack speed
- Phase 1 (throne)
- 14 ticks — slow enough to think
- Phase 2 (flying)
- 4 ticks
- Phase 3 (spider form)
- 7 ticks, rising to 5 once she reaches 20 per cent health
The single most useful thing to know before you pack is that her Defence cannot be lowered. A dragon warhammer, a Bandos godsword or an elder maul all do exactly nothing to make the rest of the room hit her more often, so the inventory slot is better spent on anything else. Her magic defence being derived from her Defence level rather than her Magic level compounds this: the number you would normally reason about is not the number the game uses.
One weapon is genuinely mandatory rather than optimal, and it is not one you buy. A poisoned weapon is the answer to the Nylocas Athanatos while she is airborne: attack one once with poison and it takes a heavy poison hit off Verzik and despawns before it can heal her. A team with nobody carrying poison is a team letting her heal on a timer.
The other required weapon is handed to you inside the Theatre. The throne is not a DPS check that the Dawnbringer happens to be good at — it is a stretch of the fight where every other weapon is damage-capped, so the sequence is the raid queuing its special attacks in order.
Verzik's article does not carry a recommended-equipment list, so the table above is derived from her per-phase defensive bonuses and max hits rather than from a wiki gear tier. The pattern it shows is consistent: slash is her weakest defence in both of the phases you can meaningfully damage, and every ranged type is her strongest.
| Check | Value |
|---|---|
| Prayers for its own attacks | Protect from Magic |
| Its Defence level | 10 |
| Its Magic level | 180 |
| Its lowest defence bonus, per its infobox | stab, slash, crush, light ammunition, standard ammunition, heavy ammunition, magic |
- Check
- Prayers for its own attacks
- Value
- Protect from Magic
- Check
- Its Defence level
- Value
- 10
- Check
- Its Magic level
- Value
- 180
- Check
- Its lowest defence bonus, per its infobox
- Value
- stab, slash, crush, light ammunition, standard ammunition, heavy ammunition, magic
Inventory and Supplies
| What | Which mechanic it is for |
|---|---|
| The Dawnbringer | The throne, and only the throne. The raid takes it in turns to use its special attack because everything else is capped at 3 damage for ranged and magic and 10 for melee. |
| A poisoned weapon | The Nylocas Athanatos, while she is airborne. One poisoned hit inflicts a heavy poison hit on Verzik and removes the healer before it does its job. |
| Prayer restoration, more than the room looks like it needs | Below 35 per cent health her ranged attacks drain your prayer when you pray against them, and her true form cycles all three overheads with four autos between each special. |
| Food you can eat without tick-eating | Neither the 137 nor the halved 68 on the throne can be tick-eaten, so the buffer has to already be there rather than arriving late. |
| Something you can hit a web with | The webs in her true form have 10 health. Freeing a trapped teammate is a hitsplat or two; leaving them costs them heavy damage when the bind times out. |
| Fire spells, if you are the magic damage | Her third form has carried a 50 per cent elemental weakness to fire since June 2025, which is the only place in the room where magic beats a slash weapon on paper. |
- What
- The Dawnbringer
- Which mechanic it is for
- The throne, and only the throne. The raid takes it in turns to use its special attack because everything else is capped at 3 damage for ranged and magic and 10 for melee.
- What
- A poisoned weapon
- Which mechanic it is for
- The Nylocas Athanatos, while she is airborne. One poisoned hit inflicts a heavy poison hit on Verzik and removes the healer before it does its job.
- What
- Prayer restoration, more than the room looks like it needs
- Which mechanic it is for
- Below 35 per cent health her ranged attacks drain your prayer when you pray against them, and her true form cycles all three overheads with four autos between each special.
- What
- Food you can eat without tick-eating
- Which mechanic it is for
- Neither the 137 nor the halved 68 on the throne can be tick-eaten, so the buffer has to already be there rather than arriving late.
- What
- Something you can hit a web with
- Which mechanic it is for
- The webs in her true form have 10 health. Freeing a trapped teammate is a hitsplat or two; leaving them costs them heavy damage when the bind times out.
- What
- Fire spells, if you are the magic damage
- Which mechanic it is for
- Her third form has carried a 50 per cent elemental weakness to fire since June 2025, which is the only place in the room where magic beats a slash weapon on paper.
Quantities are left off on purpose. What you carry depends on the mode you are running, the size of your team, how much of the raid your account has already spent, and whether you are the tank. A five-man Entry Mode learner run and a three-man Hard Mode are the same encounter with completely different supply bills.
Prayer and Spellbook
The throne is a single decision held for a long time. Protect from Magic halves her attack from 137 to 68, and because neither figure can be tick-eaten there is no clever recovery available — the prayer either is up or the damage lands in full. Combine that with staying behind a pillar and it is survivable for any account that has reached this room.
Once she is airborne you meet the timing distinction that most raid deaths in this room turn on. Urnbombs are checked when they land, so Protect from Missiles has to be up at the moment of impact to halve them. Her blood spells, which she starts using below 35 per cent health, are checked during her attack animation instead, and Protect from Magic negates them completely. Two attacks, two prayers, two different moments — and a team that treats them as one rule eats one of them every time.
Her ranged attacks in that same window drain your prayer if you pray against them, which is a genuinely awkward trade: you can block the damage or keep the points, not both. This is where prayer restoration gets consumed, so plan the doses around it rather than around her true form.
In her true form the prayer job becomes rhythmic. She is using all three styles, her magic and ranged attacks are reduced by half with the matching overhead, and there are four ordinary attacks between each special. Her melee is different in kind: it hits everyone adjacent for up to 63, but only if the target is actually in melee range, and she will not melee at all if the target is out of range or standing underneath her.
Mechanics That Decide the Fight
| Mechanic | How you see it coming | What it does | Your answer |
|---|---|---|---|
| The Dawnbringer requirement | Phase one, from the moment the fight is initiated. | Any weapon other than the Dawnbringer is far less accurate and damage-capped: 3 per hitsplat for ranged and magic, 10 for melee. | Take it in turns to use the Dawnbringer's special attack. There is no gear answer to this and no way to out-damage the cap. |
| Pillars | The pillars in the room, and the visible damage they take from her magic attacks. | Hiding behind one is mandatory in phase one — being caught out can be fatal at up to 137. Pillars collapse after several attacks and deal up to 70 damage to anyone beside them, or 50 in Entry Mode. | Move to a fresh pillar before the one you are on is spent, and stand clear of it as it falls rather than reacting to the collapse. |
| Body slam | Standing next to or underneath her in phase two. | Slams you away, stunning you and dealing heavy damage — up to 50, or roughly 80 if you had been standing underneath her. | The tank accepts this as part of the job; everybody else stays out of that space. |
| Urnbombs | Bombs tossed at the players' current positions. | Up to 44 damage if not avoided. Praying Protect from Missiles at the moment they land halves the damage. | Move off your own tile, and if you cannot, have Missiles up on impact rather than on the throw. In Hard Mode they also leave a poison pool dealing up to 10. |
| Lightning ball | A ball of lightning leaving her and chaining through the team in a random sequence. | Small damage per link, but the fourth player chained takes 48 or more, and so does anyone hit while too far from teammates. If Verzik is between two players it tries to chain to, she absorbs it and takes 15 to 20 damage herself. | Stay in loose formation rather than scattering, and take the free damage when the geometry lets her intercept it. |
| Nylocas and the purple projectile | A wave of nylocas, accompanied by a slow purple projectile. | The projectile can be walked away from but deals up to 78 if it lands on your tile, and it becomes a Nylocas Athanatos that heals her. The common nylocas chase a player and explode for up to 63 on contact, or after a set time. | Step off the projectile's tile, then hit the Athanatos once with a poisoned weapon — that inflicts a heavy poison hit on Verzik and removes it. |
| Blood spells and Matomenos | Below 35 per cent of her phase-two health. | She heals herself with blood spells and summons two Nylocas Matomenos — one if only a single player is left alive — then kills them off if they survive too long, healing for whatever health they had. | Protect from Magic negates the blood spells outright. Do not touch her for the first three seconds after she summons the Matomenos: any damage in that window heals her instead. |
| Charged attack and safespots | Phase three, in the fixed special order, after the webs. | She charges a powerful attack and creates safespot tiles that protect the player standing on them. Each tile only works for one person. | Everybody claims their own tile. Two players on one tile means one of them is not protected, and in Hard Mode the shot hits three times per player with three tiles created. |
| Webs | She moves to the centre of the room and flings webs across the chamber. | Binds any player caught on one. A trapped player is released either by a teammate destroying the web, which has 10 health, or by waiting it out and taking heavy damage. | Free each other. It costs a hitsplat or two and it is always cheaper than the timeout. |
| Green projectile | A green ball launched at one player, last in the special order. | It must be bounced between every player in the team. If it is not, the targeted player takes up to 74 per cent of their Hitpoints level as damage. Bouncing it back to someone who has already had it hits both the sender and the intended recipient for that same amount. | Agree a bounce order before the raid and stick to it. In Hard Mode an unbounced ball is an instant kill when more than two players are present. |
| Tornadoes | She reaches 20 per cent of her phase-three health. | Her attack speed increases to 5 ticks and she summons one purple magical tornado per player, each permanently following its target. A hit takes 50 per cent of your current health, with a minimum of 5, and heals her for three times that amount. | Keep moving and keep ahead of it. This is the point where a death is worse than a mistake, because a tornado also heals her when a player dies to something else. |
- Mechanic
- The Dawnbringer requirement
- How you see it coming
- Phase one, from the moment the fight is initiated.
- What it does
- Any weapon other than the Dawnbringer is far less accurate and damage-capped: 3 per hitsplat for ranged and magic, 10 for melee.
- Your answer
- Take it in turns to use the Dawnbringer's special attack. There is no gear answer to this and no way to out-damage the cap.
- Mechanic
- Pillars
- How you see it coming
- The pillars in the room, and the visible damage they take from her magic attacks.
- What it does
- Hiding behind one is mandatory in phase one — being caught out can be fatal at up to 137. Pillars collapse after several attacks and deal up to 70 damage to anyone beside them, or 50 in Entry Mode.
- Your answer
- Move to a fresh pillar before the one you are on is spent, and stand clear of it as it falls rather than reacting to the collapse.
- Mechanic
- Body slam
- How you see it coming
- Standing next to or underneath her in phase two.
- What it does
- Slams you away, stunning you and dealing heavy damage — up to 50, or roughly 80 if you had been standing underneath her.
- Your answer
- The tank accepts this as part of the job; everybody else stays out of that space.
- Mechanic
- Urnbombs
- How you see it coming
- Bombs tossed at the players' current positions.
- What it does
- Up to 44 damage if not avoided. Praying Protect from Missiles at the moment they land halves the damage.
- Your answer
- Move off your own tile, and if you cannot, have Missiles up on impact rather than on the throw. In Hard Mode they also leave a poison pool dealing up to 10.
- Mechanic
- Lightning ball
- How you see it coming
- A ball of lightning leaving her and chaining through the team in a random sequence.
- What it does
- Small damage per link, but the fourth player chained takes 48 or more, and so does anyone hit while too far from teammates. If Verzik is between two players it tries to chain to, she absorbs it and takes 15 to 20 damage herself.
- Your answer
- Stay in loose formation rather than scattering, and take the free damage when the geometry lets her intercept it.
- Mechanic
- Nylocas and the purple projectile
- How you see it coming
- A wave of nylocas, accompanied by a slow purple projectile.
- What it does
- The projectile can be walked away from but deals up to 78 if it lands on your tile, and it becomes a Nylocas Athanatos that heals her. The common nylocas chase a player and explode for up to 63 on contact, or after a set time.
- Your answer
- Step off the projectile's tile, then hit the Athanatos once with a poisoned weapon — that inflicts a heavy poison hit on Verzik and removes it.
- Mechanic
- Blood spells and Matomenos
- How you see it coming
- Below 35 per cent of her phase-two health.
- What it does
- She heals herself with blood spells and summons two Nylocas Matomenos — one if only a single player is left alive — then kills them off if they survive too long, healing for whatever health they had.
- Your answer
- Protect from Magic negates the blood spells outright. Do not touch her for the first three seconds after she summons the Matomenos: any damage in that window heals her instead.
- Mechanic
- Charged attack and safespots
- How you see it coming
- Phase three, in the fixed special order, after the webs.
- What it does
- She charges a powerful attack and creates safespot tiles that protect the player standing on them. Each tile only works for one person.
- Your answer
- Everybody claims their own tile. Two players on one tile means one of them is not protected, and in Hard Mode the shot hits three times per player with three tiles created.
- Mechanic
- Webs
- How you see it coming
- She moves to the centre of the room and flings webs across the chamber.
- What it does
- Binds any player caught on one. A trapped player is released either by a teammate destroying the web, which has 10 health, or by waiting it out and taking heavy damage.
- Your answer
- Free each other. It costs a hitsplat or two and it is always cheaper than the timeout.
- Mechanic
- Green projectile
- How you see it coming
- A green ball launched at one player, last in the special order.
- What it does
- It must be bounced between every player in the team. If it is not, the targeted player takes up to 74 per cent of their Hitpoints level as damage. Bouncing it back to someone who has already had it hits both the sender and the intended recipient for that same amount.
- Your answer
- Agree a bounce order before the raid and stick to it. In Hard Mode an unbounced ball is an instant kill when more than two players are present.
- Mechanic
- Tornadoes
- How you see it coming
- She reaches 20 per cent of her phase-three health.
- What it does
- Her attack speed increases to 5 ticks and she summons one purple magical tornado per player, each permanently following its target. A hit takes 50 per cent of your current health, with a minimum of 5, and heals her for three times that amount.
- Your answer
- Keep moving and keep ahead of it. This is the point where a death is worse than a mistake, because a tornado also heals her when a player dies to something else.
Phase three's specials arrive in a set order, which is the single most useful fact about the fight and the reason it can be practised at all. The first round is nylocas, then webs, then safespots, then the green projectile — with four ordinary attacks between each special. If you know which one you just survived, you know which one is next.
Hard Mode does not add new mechanics so much as sharpen the ones you know. In phase one her magic attack knocks three sets of debris off the pillars in a three-tile radius, dealing up to 35 and briefly stunning. In phase two the bombs hit around 20 per cent harder and leave poison pools, the nylocas persist until killed while cycling green to blue to grey, and absorbing the Matomenos damages nearby players based on their health. In phase three she can retarget every special, the charged shot triples, the green ball becomes a guaranteed kill if unbounced with more than two players present, and she performs a one-time recovery of 30 per cent of her health the first time she drops to 5 per cent or lower.
Verzik held the title of strongest monster in the game for 2,113 days before Sol Heredit took it. That is worth knowing mostly as calibration: this is the room the Theatre was built around, and it is meant to be the hardest thing in it.
| Property | Value |
|---|---|
| Combat level | 425 |
| Attack styles | Magic |
| Attack speed | 14 ticks |
| Poisons you | No |
- Property
- Combat level
- Value
- 425
- Property
- Attack styles
- Value
- Magic
- Property
- Attack speed
- Value
- 14 ticks
- Property
- Poisons you
- Value
- No
Where Verzik Vitur Sits in Progression
Within the raid group, the fights below Verzik Vitur are Kephri and Zebak. Nothing in the raid group is rated harder — Verzik Vitur shares the top band with Great Olm and Tumeken's and Elidinis' Warden.
Phase by Phase
Phase one: the borrowed weapon
The fight starts when somebody talks to her, and then the raid does something it does nowhere else — it puts its own gear away. The Dawnbringer's special attack is the only way to meaningfully harm her here, with everything else both less accurate and capped at 3 damage per hitsplat for ranged and magic, and 10 for melee. The raid rotates the weapon between players and works through 2,000 health.
The threat is not her damage output but its size. She attacks once every 14 ticks, which is slow, and each attack hits for up to 137 if it finds you in the open. Protect from Magic halves that to 68, and neither number can be tick-eaten, so the answer is cover rather than reaction. Hiding behind a pillar is not an optimisation here — being caught outside one can end the raid on a single hit.
The pillars are also a resource with a lifespan. They collapse after taking several of her attacks and deal up to 70 damage to anyone next to them when they go, or 50 in Entry Mode. In Hard Mode her magic attack additionally showers debris in a three-tile radius for up to 35 damage and a brief stun each time it strikes a pillar.
Phase two: she leaves the throne
She flies to the middle of the room and collapses every pillar still standing, which removes the phase-one solution entirely. Her attack speed goes from 14 ticks to 4, her health pool goes from 2,000 to 3,500, and the fight stops being about one big hit and starts being about four things happening at once.
The four things are urnbombs at your feet for up to 44, halved by Protect from Missiles as they land; a lightning ball chaining through the team, where the fourth link and any isolated player take 48 or more; waves of nylocas that explode on contact for up to 63; and a slow purple projectile that deals up to 78 if it lands on you and then becomes a healer. Standing next to or under her adds a body slam that stuns and hits for up to 50, or around 80 if you had been underneath.
Below 35 per cent of her health the phase changes character again. She starts casting blood spells to heal herself — fully negated by Protect from Magic, checked during her animation rather than on impact — and her ranged attacks begin draining your prayer when you pray against them. She also summons two Nylocas Matomenos, or one if a single player is left alive, and absorbs them for their remaining health if they live too long. For the first three seconds after that summon, any damage you deal heals her.
Phase three: the true form
She transforms into a half-spider, half-vampyre form, becomes mobile, and starts using all three combat styles: barbs for ranged, a single blue projectile for magic, and a melee attack. The ranged and magic attacks reach up to 34 and are reduced by half with the matching overhead. The melee attack hits up to 63 and strikes everyone adjacent to her — but only if the target is genuinely in melee range, and she will not use it at all if the target is out of range or standing underneath her.
This phase is a rotation rather than a scramble. Four special attacks run in a fixed order — nylocas, webs, safespots, green projectile — with four ordinary attacks between each. Webs bind whoever they catch until a teammate breaks them, at 10 health each, or until the bind times out for heavy damage. The safespot tiles protect exactly one player each. The green projectile has to be bounced through the whole team, and cannot go back to the same player twice without hitting both people involved for up to 74 per cent of their Hitpoints level.
At 20 per cent she speeds up to 5 ticks and summons one tornado per player. Each hit takes half your current health and heals her for three times what it deals, and a player dying to anything else still feeds her tornado. This is where a raid that has been slightly sloppy for four minutes stops getting away with it.
Fight Strategy: Three-phase final boss
- Talk to Verzik to begin. Pillars first: take a position behind one, put Protect from Magic up, and leave it up.
- Rotate the Dawnbringer special through the team. Your own weapon is capped and inaccurate, so there is nothing to gain by using it instead.
- Watch the pillar you are behind. Move to a new one before it collapses, and be off the adjacent tiles when it does.
- As she flies to the middle, reset your expectations. She is now attacking every 4 ticks and the pillars are gone.
- In phase two, move off urnbombs first and pray Protect from Missiles for the ones you cannot avoid — the prayer is checked when they land, not when they are thrown.
- Poison the Athanatos as soon as it forms. One hit removes it and hits her hard in the process.
- Below 35 per cent, switch your default to Protect from Magic for the blood spells and hold damage for three seconds after each Matomenos summon.
- In phase three, count the specials rather than reacting to them: nylocas, webs, safespots, green ball, four autos between each.
- Claim your own safespot tile, free anybody webbed, and run the bounce order for the green projectile exactly as agreed.
- At 20 per cent, keep moving. The tornado is the only thing in the room that both damages you and heals her, and it does not stop.
The habit that carries a team through this room is treating each phase transition as a full reset of the rules rather than a change of scenery. The things that keep you alive in phase one — standing still behind cover, holding one prayer, using a borrowed weapon — are all actively wrong in phase two. The things that work in phase two, particularly reacting to what you see, are too slow for a phase-three rotation you are supposed to be predicting.
The other one is knowing which mechanics heal her, because those are the ones where doing nothing is correct. Damage in the three seconds after a Matomenos summon heals her. An Athanatos left alive heals her. A tornado hit heals her for triple. A player who dies feeds her tornado. Verzik is unusual in the Theatre in that a slow, careful raid can genuinely beat a fast, sloppy one on total damage.
Positioning and Movement
The throne is pillar geometry and nothing else. You want cover between you and her at all times, an idea of which pillar you are moving to next, and enough separation from a spent pillar that its collapse does not catch you for 70.
Once she is airborne the room opens up and spacing becomes a team decision. The lightning ball punishes both extremes: the fourth player it chains to takes 48 or more, and so does anyone hit while too far from teammates. Loose formation, not a stack and not a scatter, is what the mechanic is asking for. If she happens to be standing between two players it wants to chain between, she absorbs the ball and takes 15 to 20 for it.
The tank's position in her true form is a specific tile rather than a general area. Her melee hits everyone adjacent to her for up to 63, but she will not use it if the target is out of range or standing underneath her, so the tank goes underneath and the rest of the team stays out of the ring around her.
Safespot tiles are individually owned. Each one protects a single player, so two people converging on the same tile means one of them is standing in the open when the charged shot resolves.
Beginner Plan, Then the Advanced One
Your first trips
- Run your first Verziks in Entry Mode if the team will allow it. The mechanics are identical and the numbers are not: the throne hits 60 rather than 137, the flying form 16 rather than 47, the spider 36 from melee rather than 63. Learning the green ball and the tornadoes at those numbers is far cheaper than learning them at full price.
- On the throne, do one thing and do it well: stay behind a pillar with Protect from Magic up. Almost every death there is a positioning error rather than a damage race lost.
- Ask which position you are in the green ball bounce order before the raid starts, not while the ball is in the air.
- Carry a poisoned weapon even if you are not the person expected to use it. The Athanatos only needs one hit, and being the person who happens to be closest is a good enough reason to have the answer.
- Learn the two prayer timings as a pair: urnbombs are checked on impact, blood spells during her animation. Saying that to yourself once before the raid saves a phase-two death.
- When the Matomenos appear, count three seconds before you attack anything. Free damage that heals the boss is worse than no damage at all.
Once the kill is boring
- Play phase three off the special counter rather than off your eyes. The order is fixed — nylocas, webs, safespots, green projectile — with four autos between each, so your prayer switches and your positioning can be set up before the animation starts.
- Stop bringing defence reduction into this room. Her Defence cannot be lowered at all, and her magic defence is derived from her Defence level rather than her Magic level, so the usual reasoning about softening her simply does not apply.
- Use her body as a lightning conductor when the geometry offers it. If she is between two players the ball wants to chain between, she absorbs it and takes 15 to 20 damage, which is free progress on a 3,500 health pool.
- If you are running Hard Mode, treat the 5 per cent threshold as a real phase. The first time she drops to 5 per cent or lower she recovers 30 per cent of her health, so a team that dumps everything at 8 per cent has dumped it into a health bar that is about to refill.
- Fire spells are the one place magic beats a slash weapon on her sheet, thanks to the 50 per cent elemental weakness on her third form. Slash is still the lowest defensive number she has there, at 30, so this is a question of what your team already brought rather than a rebuild.
Team Roles
| Role | The job | Gets it wrong by |
|---|---|---|
| Tank | Hold her attention and take the melee. In phase three that means standing underneath her, because she will not use the melee attack at all if the target is under her or out of range — and it hits everyone adjacent for up to 63 when it does land. | Standing beside her instead of under her, which turns a mechanic that should hit nobody into one that hits the whole melee group. |
| Dawnbringer rotation | Work the Dawnbringer's special attack through the team in phase one. Every other weapon is capped at 3 damage for ranged and magic and 10 for melee, so this is the phase's entire damage output. | Someone hitting her with their own weapon to feel useful, and being outside pillar cover to do it. |
| Poison and add control | Kill the Nylocas Athanatos with a single poisoned hit before it heals her, and keep the common nylocas from reaching people — they explode on contact for up to 63, and after a set time regardless. | Leaving the Athanatos alive because the raid is focused on Verzik's health bar, which is the bar it is refilling. |
| Green ball order | Own a fixed position in the bounce order and pass to the next person every time. The ball must go through every player, and it can never return to someone who has already had it. | Improvising. A ball bounced back to a previous holder hits both the sender and the recipient for up to 74 per cent of their Hitpoints level. |
| Webs and safespots | Break teammates out of webs — 10 health each — and make sure every player claims their own safespot tile when the charged attack comes. | Two people converging on one safespot tile, or leaving a webbed teammate to time out into heavy damage. |
- Role
- Tank
- The job
- Hold her attention and take the melee. In phase three that means standing underneath her, because she will not use the melee attack at all if the target is under her or out of range — and it hits everyone adjacent for up to 63 when it does land.
- Gets it wrong by
- Standing beside her instead of under her, which turns a mechanic that should hit nobody into one that hits the whole melee group.
- Role
- Dawnbringer rotation
- The job
- Work the Dawnbringer's special attack through the team in phase one. Every other weapon is capped at 3 damage for ranged and magic and 10 for melee, so this is the phase's entire damage output.
- Gets it wrong by
- Someone hitting her with their own weapon to feel useful, and being outside pillar cover to do it.
- Role
- Poison and add control
- The job
- Kill the Nylocas Athanatos with a single poisoned hit before it heals her, and keep the common nylocas from reaching people — they explode on contact for up to 63, and after a set time regardless.
- Gets it wrong by
- Leaving the Athanatos alive because the raid is focused on Verzik's health bar, which is the bar it is refilling.
- Role
- Green ball order
- The job
- Own a fixed position in the bounce order and pass to the next person every time. The ball must go through every player, and it can never return to someone who has already had it.
- Gets it wrong by
- Improvising. A ball bounced back to a previous holder hits both the sender and the recipient for up to 74 per cent of their Hitpoints level.
- Role
- Webs and safespots
- The job
- Break teammates out of webs — 10 health each — and make sure every player claims their own safespot tile when the charged attack comes.
- Gets it wrong by
- Two people converging on one safespot tile, or leaving a webbed teammate to time out into heavy damage.
Several of Verzik's mechanics are explicitly written around headcount, which is why the same fight feels different at different scales. The lightning ball punishes the fourth player it chains to. The green projectile has to pass through every player present, and in Hard Mode instantly kills if there is more than one other player and it has not been bounced. The tornado phase spawns one tornado per player. And she summons two Matomenos normally but only one when a single player is left alive.
That last detail matters for a team that is losing people. Deaths do not just remove damage — each dead player's tornado keeps healing her, and the raid's ability to bounce the green ball changes shape mid-fight. A phase-three wipe is very often a phase-three death that nobody adjusted for.
Drops and What Verzik Vitur Is Worth
Verzik personally drops one thing, and it is a book: the patient record written about her by the doctor Vulcan Orvoros, which stops dropping once you have read it. Everything the Theatre is actually run for comes out of the chest rather than off her body.
The lore is unusually specific about why those items are there, and it is worth a minute if you have ever wondered why one boss guards this particular collection. The Scythe of Vitur was an heirloom of her house's founder. The Ghrazi rapier came from her father, who took it from a warlord who challenged him and did not survive. Her Avernic defender is a relic of her service in the Zarosian empire. Lowerniel Drakan crafted the Sanguinesti staff himself and gave it to her for her help against the Seven Priestly Warriors. And the Justiciar armour was stripped from Saradominist soldiers and kept in her treasury.
No prices, drop chances or purple odds are printed here. Those move with the Grand Exchange and with every rebalance, and a number frozen into this page would mislead you within weeks. Check them live on the wiki.
Drops worth the trip: Scythe of vitur, ghrazi rapier, avernic defender hilt. Whether that is worth your time depends on how many kills an hour you personally get, which is a function of three-phase final boss rather than of your gear list.
Combat Achievements
Verzik Vitur has Combat Achievement tasks, and a 60 max hit is the number to plan them around: any task that restricts your supplies or your gear is a materially different fight at that damage.
Task lists move with updates — read the current list in game.
Ironman Notes
Without a Grand Exchange, scythe of vitur, ghrazi rapier, avernic defender hilt has to be earned rather than bought, and this is the fastest table it sits on.
The one thing worth owning before you come here that an Ironman can actually make is a poisoned weapon. It is the answer to the Athanatos, it costs almost nothing, and there is no substitute in the room.
Do not build a Verzik setup around defence reduction. Her Defence cannot be lowered, so the special attack weapons that carry an Ironman through the rest of the Theatre are inventory space in this room and nothing more.
Entry Mode is the honest place to learn her on a self-sufficient account. The mechanics are identical and the damage is roughly a third, which means the same number of practice attempts costs a fraction of the supplies.
Common Mistakes and Death Causes
| What happened | Why it happened | The fix |
|---|---|---|
| Caught in the open in phase one | Her magic attack hits for up to 137 with no prayer and 68 through Protect from Magic, and neither figure can be tick-eaten, so there is no recovery available once it is on the way. | Treat pillar cover as mandatory rather than good practice, and move to the next pillar before the current one is spent. |
| Standing beside a collapsing pillar | Pillars collapse after taking several attacks and hit anyone adjacent for up to 70, or 50 in Entry Mode. It usually happens while a player is watching Verzik rather than the pillar. | Watch the pillar's condition as well as hers, and step off the adjacent tiles pre-emptively. |
| Wrong prayer, right idea, on urnbombs | Urnbombs are checked when they land, not when they are thrown, and it is Protect from Missiles that halves them. Players holding Protect from Magic for the blood spells eat them in full. | Learn the two as a pair. Missiles on impact for bombs, Magic during her animation for blood spells. |
| Healing her by attacking too early after a Matomenos summon | Any damage dealt in the first three seconds after she summons them heals her instead, and the instinct when adds appear is to hit something. | Count it out. Three seconds of nothing is cheaper than three seconds of feeding her. |
| The green ball bounced to the wrong person | It cannot go back to a player who has already held it. When it does, both the sender and the intended recipient take up to 74 per cent of their Hitpoints level when it lands. | Fix the order before the raid and call your own name when you pass. In Hard Mode an unbounced ball with more than two players present is an outright kill. |
| Caught by a tornado below 20 per cent | Each hit removes half your current health, has a minimum of 5, and heals her for three times what it dealt. A player already low from the phase can be finished by a single brush. | Keep moving from the moment she speeds up to 5 ticks, and treat topping up as the priority over damage in that window. |
| Two players on one safespot tile | Each tile only protects one player, and under pressure two people will converge on the nearest one. | Spread out before the charged attack rather than during it, and remember Hard Mode creates three tiles per player because the shot hits three times. |
- What happened
- Caught in the open in phase one
- Why it happened
- Her magic attack hits for up to 137 with no prayer and 68 through Protect from Magic, and neither figure can be tick-eaten, so there is no recovery available once it is on the way.
- The fix
- Treat pillar cover as mandatory rather than good practice, and move to the next pillar before the current one is spent.
- What happened
- Standing beside a collapsing pillar
- Why it happened
- Pillars collapse after taking several attacks and hit anyone adjacent for up to 70, or 50 in Entry Mode. It usually happens while a player is watching Verzik rather than the pillar.
- The fix
- Watch the pillar's condition as well as hers, and step off the adjacent tiles pre-emptively.
- What happened
- Wrong prayer, right idea, on urnbombs
- Why it happened
- Urnbombs are checked when they land, not when they are thrown, and it is Protect from Missiles that halves them. Players holding Protect from Magic for the blood spells eat them in full.
- The fix
- Learn the two as a pair. Missiles on impact for bombs, Magic during her animation for blood spells.
- What happened
- Healing her by attacking too early after a Matomenos summon
- Why it happened
- Any damage dealt in the first three seconds after she summons them heals her instead, and the instinct when adds appear is to hit something.
- The fix
- Count it out. Three seconds of nothing is cheaper than three seconds of feeding her.
- What happened
- The green ball bounced to the wrong person
- Why it happened
- It cannot go back to a player who has already held it. When it does, both the sender and the intended recipient take up to 74 per cent of their Hitpoints level when it lands.
- The fix
- Fix the order before the raid and call your own name when you pass. In Hard Mode an unbounced ball with more than two players present is an outright kill.
- What happened
- Caught by a tornado below 20 per cent
- Why it happened
- Each hit removes half your current health, has a minimum of 5, and heals her for three times what it dealt. A player already low from the phase can be finished by a single brush.
- The fix
- Keep moving from the moment she speeds up to 5 ticks, and treat topping up as the priority over damage in that window.
- What happened
- Two players on one safespot tile
- Why it happened
- Each tile only protects one player, and under pressure two people will converge on the nearest one.
- The fix
- Spread out before the charged attack rather than during it, and remember Hard Mode creates three tiles per player because the shot hits three times.
The recovery play in this room is almost always to stop doing damage. If the Athanatos is alive, kill it before you touch her. If the Matomenos have just landed, wait. If the tornadoes are out and you are low, put distance and food ahead of your damage rotation. Verzik has more ways to convert your mistakes into her health than any other boss in the Theatre, and the fastest way out of a bad phase is to stop feeding it.
If a teammate goes down in phase three, the raid has to re-plan two things immediately: the green ball order now has a gap in it, and the dead player's tornado will keep healing her. Neither is fatal on its own, and both are fatal if nobody says anything.
FAQ
Why can I barely damage her in phase one?
Because you are meant to be using the Dawnbringer. Any other weapon has a much lower chance of hitting her and is hard-capped at 3 damage per hitsplat for ranged and magic, and 10 for melee. The raid takes it in turns with the Dawnbringer's special attack instead.
Do dragon warhammer or godsword specials work on her?
No. Her Defence cannot be lowered in any phase. Her magic defence is also calculated from her Defence level rather than her Magic level, so the usual mental model for softening a boss does not apply here at all.
Which prayer do I hold in phase two?
It changes with the attack rather than the phase. Protect from Missiles halves the urnbombs, and it is checked at the moment they land. Once she is below 35 per cent and casting blood spells, Protect from Magic negates those completely, and that one is checked during her attack animation.
What is the purple projectile that turns into a nylocas?
It is a slow projectile you can walk away from, dealing up to 78 if it lands on your tile. It becomes a Nylocas Athanatos, which heals her. Hitting it once with a poisoned weapon inflicts a heavy poison hit on Verzik and removes it before it can do anything.
How do the tornadoes work?
At 20 per cent of her phase-three health she speeds up to 5 ticks and summons one purple tornado per player, which follows its target for the rest of the fight. A hit takes 50 per cent of your current health, with a minimum of 5, and heals her for three times that. A tornado also heals her if its owner dies to something else.
Is the tank role real or just a habit?
Real, and specific. Her phase-three melee attack hits everyone adjacent to her for up to 63, but she will not use it if the target is out of range or standing underneath her. Someone standing under her is what makes the mechanic stop happening, which is exactly what a tank is for here.
How much harder is Hard Mode?
It sharpens every phase rather than adding new ones. Pillar debris and stuns in phase one, harder bombs with poison pools and persistent nylocas in phase two, and in phase three a triple charged shot, retargeting specials, an instant-kill unbounced green ball with more than two players present, and a one-time 30 per cent heal the first time she reaches 5 per cent health.
Related Guides
Bottom Line
Verzik is best understood as three fights that happen to share a health bar. Phase one is a cover-and-cooperation test with a weapon you did not bring. Phase two is a crowd problem where the prayer timings differ between two attacks that look alike. Phase three is a fixed rotation you should be able to recite before it starts. The teams that struggle are the ones carrying the previous phase's habits forward, and the teams that clear are the ones that stop dealing damage whenever dealing damage would heal her.
If you have the roles sorted and just want the completion on the board, it is worth reading what other Theatre teams made of working with us before you book anything — our raid runs are played manually, and the record of them is public.
If Verzik Vitur is blocking a Combat Achievement or an unlock you actually want, our PvM service is done by hand — no automation. Otherwise the bosses list has the full index.
Verzik Vitur — ToB final boss, difficulty 5/5. Combat values here — hitpoints, max hits, attack styles and speed, Defence and Magic levels, immunities and Slayer requirements — were read from the Old School RuneScape Wiki infobox for Verzik Vitur on 2026-08-03. Kill rates, GP per hour and item prices are deliberately absent because they move with balance patches and the Grand Exchange. Mechanics, gear tiers and phase behaviour on this page were checked against Verzik Vitur on 4 August 2026.
Need a trusted team? Bils Services
Enjoyed the guide?
Drop a like — it helps other Adventurers find the good stuff.
Community
Comments
Silence in the hall…
Be the first Adventurer to leave a mark.
Join the thread
Add a comment
Tips, drops, or “this carried my account” — keep it useful.
bilsservices · bils services · bilsservices.com

