


OSRS Great Olm Guide: Head Phase, Hands, Roles & Mechanics
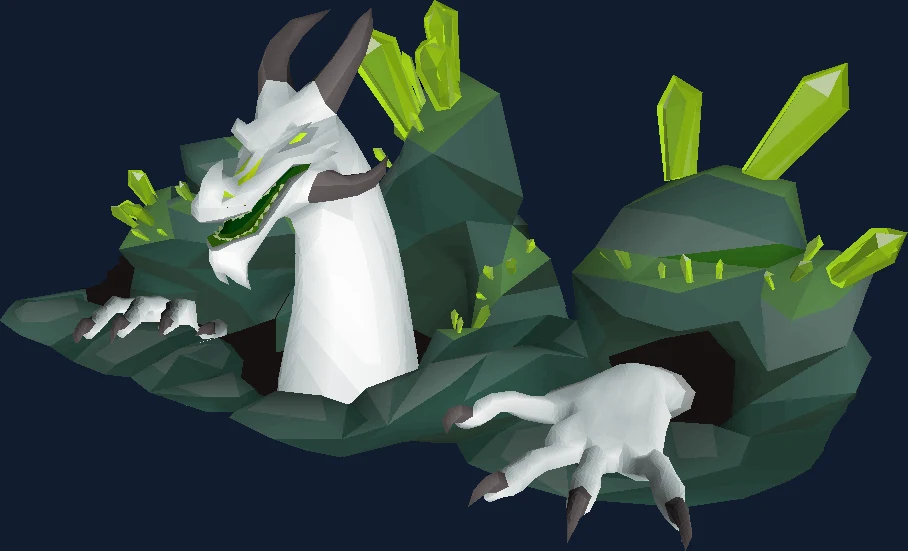
Great Olm guide for hand phases, head phase, roles, and learner callouts.
Why People Fight Great Olm
Every other room in the Chambers of Xeric ends when you decide it ends. Olm does not. The moment your team walks through the mystical barrier the room is sealed and the encounter becomes a fight to the death, which means the raid you have spent the last half hour building is now sitting on one encounter that cannot be abandoned. That single rule shapes everything else about how the fight is taught: there is no version of Olm where you retreat, regroup and come back in, so the preparation has to happen before the barrier rather than after it.
The structure is unusual enough that it is worth stating plainly before any tactics. Olm is not one monster with phases in the way Zulrah or Vorkath are. He is a head and two claws, each with its own health pool, its own defensive sheet and its own damage mitigation rule. The left claw takes 66 per cent less damage from anything that is not melee. The right claw takes 66 per cent less from anything that is not magic. The head takes 66 per cent less from anything that is not ranged, and outside the final phase it heals back whatever you manage to land on it anyway. A team that has not divided those three jobs before the barrier is a team doing a third of its damage.
Progress is measured in hands rather than in health. Both claws have to be disabled before Olm retreats underground, shakes the room with falling crystals and comes back up on the other side carrying a new set of powers — acid, flame or crystal, one set at a time. He has at least four phases, and a raid gains another one for every eight players in it. His stats reset when each new phase starts, which is why a dragon warhammer landed in phase two buys you nothing in phase three, and why the fight feels like several short fights stacked rather than one long attrition.
The two phases that actually end raids are the last two. In the penultimate phase his head glows, every power he owns becomes available at once, and the left hand gains a state where damage heals it instead of hurting it, marked by an infinity symbol above the claw. Both hands have to come down inside a time window there or he recovers to full. Then he stops moving entirely, makes his final stand with crystals falling continuously from above, and for the first and only time the damage you put into his head stays there.
Its own attacks are magic and ranged, so Protect from Missiles and Magic both have a job.
In our index it sits in the raid group at difficulty 5 of 5, where kill times come down to head and hand phases.
| Field | Detail |
|---|---|
| Classification | CoX final boss (Boss) |
| Group | raid |
| Difficulty | 5 / 5 |
| Solo or team | Solo or team |
| Access requirement | Chambers of Xeric |
| Notable reward | Twisted bow, elder maul, kodai insignia, dragon claws |
| Signature mechanic | Head and hand phases |
| Hitpoints | 800 |
| Max hits | 27 28 29 (phase 4) |
- Field
- Classification
- Detail
- CoX final boss (Boss)
- Field
- Group
- Detail
- raid
- Field
- Difficulty
- Detail
- 5 / 5
- Field
- Solo or team
- Detail
- Solo or team
- Field
- Access requirement
- Detail
- Chambers of Xeric
- Field
- Notable reward
- Detail
- Twisted bow, elder maul, kodai insignia, dragon claws
- Field
- Signature mechanic
- Detail
- Head and hand phases
- Field
- Hitpoints
- Detail
- 800
- Field
- Max hits
- Detail
- 27 28 29 (phase 4)
Is Great Olm the Right Fight for You Yet?
Olm is not a fight you learn in isolation, because you cannot reach him without the rest of the raid. What you can do is arrive at the barrier knowing which of the three targets you are pointed at, and knowing that the answer changes between phases rather than staying fixed for the encounter.
You are ready for this fight if:
- You can hold a protection prayer while reading a projectile. His standard magic attack is a large green orb and his ranged attack is a smaller chunk of crystal, and the head has a one-in-five chance of switching between them every time it attacks.
- You can name a sphere by colour under pressure. Red wants Protect from Melee, green wants Protect from Missiles, purple wants Protect from Magic, and the punishment for guessing is severe in a way the standard attacks are not.
- You have a setup for whichever of the three targets your team has given you, rather than one weapon you intend to use on all of them.
- Your team has agreed who calls the left hand's icons. The crystal, the lightning bolt and the swirl that appear briefly above the melee hand are the only warning any of the three timed specials gives you.
Come back later if any of these are true:
- You are treating the head as the boss. Every hitpoint you take off it before the final phase is healed back within a few ticks, and the raid does not progress until both claws are down.
- You have not looked at the fire wall answer. Being trapped between two walls of fire costs 50 to 65 damage over five seconds, and the counter is a water source rather than movement.
- You are relying on poison or venom for chip damage. Olm is fully resistant to both.
- Your team has not decided what happens if a phase goes badly. There is no leaving, so the plan has to be a recovery plan rather than an exit.
Access Requirements
Great Olm is gated behind Chambers of Xeric.
Chambers of Xeric also tends to sit alongside the other raid gates, so it is usually cheaper to clear them together than to come back for each one. The boss requirements checklist lists them by group.
Location and How to Get There
Great Olm is fought in the final chamber of the Chambers of Xeric.
Olm is where the raid ends. You reach him by clearing the rooms before him, so his difficulty is measured in supplies remaining rather than in travel.
There is no travel section for Olm in the ordinary sense — you arrive at him by completing the Chambers of Xeric, and the last thing you see before the fight is the mystical barrier that seals the room behind you. What is worth understanding instead is the shape of the chamber, because Olm reads it constantly.
The room is divided into three attack zones: left, middle and right. The head chooses which zone to attack based on where the players are, and it prioritises whichever zone holds the most of them. If the zone he has picked turns out to be empty, he swerves his head and skips an attack in his rotation. If a player is standing in the zone and he swerves anyway, nothing is skipped.
That swerve is worth more than it looks, and it is the one piece of geometry that experienced teams actively play with. Olm carries a catch-up mechanic for standard attacks: if one gets skipped, he fires a standard attack on the following step in addition to whatever that step was already going to do. But he never catches up a special attack. Crystal Burst, Lightning and the teleport are gone for that cycle if the skip lands on them, which makes a deliberate, well-timed empty zone the closest thing this fight has to a free rotation.
The catch-up only reaches back one step. Skipping two attack steps in a row does not stack into two catch-up attacks, so there is no way to bank the effect.
Recommended Stats, and Gear for Each of the Three Targets
| Skill | What it is buying you | The mechanic behind it |
|---|---|---|
| Ranged | Your entire contribution to the head. Everything that is not a ranged attack loses 66 per cent of its damage against it, and the head is the target that ends the raid. | Damage mitigation: the head has 66 per cent mitigation from all non-ranged attacks. |
| Magic | The right claw, which resists everything that is not magic by the same 66 per cent. Earth spells also carry a 50 per cent elemental weakness against Olm. | Damage mitigation on the mage hand, plus the elemental weakness added in June 2025. |
| Attack and Strength | The left claw. Its stab, slash and crush defences sit at 50 where its magic and ranged defences sit at 200, and it is the only part of Olm melee is not wasted on. | Damage mitigation on the melee hand, and the left claw's defensive sheet. |
| Prayer | All three overheads, used constantly. Protection prayers cut his standard attacks by roughly 75 to 80 per cent rather than blocking them, and the spheres demand a specific one. | Standard attacks and the three sphere colours. |
| Hitpoints and Defence | Survival through the attacks you cannot pray away. The head's max hit is listed at 27, then 28, then 29 in phase four; Challenge Mode raises that to 38 in the first two phases, 39, and 41 in phase four. | The head's infobox on normal and Challenge Mode. |
| Everything else | Nothing directly. Olm scales his combat stats and max hit to the players in the raid, so a stronger team meets a stronger Olm. | The scaling note on his stats: they vary with the raid's players and reset at the start of each phase. |
- Skill
- Ranged
- What it is buying you
- Your entire contribution to the head. Everything that is not a ranged attack loses 66 per cent of its damage against it, and the head is the target that ends the raid.
- The mechanic behind it
- Damage mitigation: the head has 66 per cent mitigation from all non-ranged attacks.
- Skill
- Magic
- What it is buying you
- The right claw, which resists everything that is not magic by the same 66 per cent. Earth spells also carry a 50 per cent elemental weakness against Olm.
- The mechanic behind it
- Damage mitigation on the mage hand, plus the elemental weakness added in June 2025.
- Skill
- Attack and Strength
- What it is buying you
- The left claw. Its stab, slash and crush defences sit at 50 where its magic and ranged defences sit at 200, and it is the only part of Olm melee is not wasted on.
- The mechanic behind it
- Damage mitigation on the melee hand, and the left claw's defensive sheet.
- Skill
- Prayer
- What it is buying you
- All three overheads, used constantly. Protection prayers cut his standard attacks by roughly 75 to 80 per cent rather than blocking them, and the spheres demand a specific one.
- The mechanic behind it
- Standard attacks and the three sphere colours.
- Skill
- Hitpoints and Defence
- What it is buying you
- Survival through the attacks you cannot pray away. The head's max hit is listed at 27, then 28, then 29 in phase four; Challenge Mode raises that to 38 in the first two phases, 39, and 41 in phase four.
- The mechanic behind it
- The head's infobox on normal and Challenge Mode.
- Skill
- Everything else
- What it is buying you
- Nothing directly. Olm scales his combat stats and max hit to the players in the raid, so a stronger team meets a stronger Olm.
- The mechanic behind it
- The scaling note on his stats: they vary with the raid's players and reset at the start of each phase.
Olm's wiki article carries no suggested-levels list, and no level unlocks him — the raid lets anybody through the barrier. What the table above is really saying is that he asks for three separate damage setups at once. A large team splits that across bodies; a duo or a trio has to carry all three, which is why small-scale Olm is a gear problem long before it is a mechanics problem.
In most small teams his combat stats and max hit land in roughly the same territory as a God Wars Dungeon boss. If you want the exact numbers for the raid you are actually in, Monster Examine can be cast on him mid-fight.
| What you are choosing | Left claw (melee hand) | Right claw (mage hand) | Head |
|---|---|---|---|
| The style that is not cut by 66 per cent | Melee | Magic | Ranged |
| Its defensive sheet | 50 against stab, slash and crush; 200 against magic and every ranged type. | 50 against magic; 200 against stab, slash, crush and every ranged type. | 200 against stab, slash, crush and magic; 50 against light, standard and heavy ranged. |
| What happens if you point the wrong style at it | Anything that is not melee loses two thirds of its damage. | Anything that is not magic loses two thirds of its damage. | Anything that is not ranged loses two thirds, and outside the final phase the rest is healed back regardless. |
| Health it carries | 600, scaled to the raid | 600, scaled to the raid | 800, scaled to the raid |
| The wrinkle | In the penultimate phase it gains a state where damage heals it instead, shown by an infinity symbol above the claw. | Its magic defence bonus is 50 where every other style faces 200, which is where the nickname comes from. | It is the only part of Olm that keeps the damage you deal, and only during his final stand. |
| What it does to you | It carries no attack of its own — a max hit of zero and no attack style. Its icons are the tell for the timed specials. | Also unarmed. Both claws are targets rather than threats. | Every attack in the fight comes from here: magic, ranged, spheres, powers and the specials. |
- What you are choosing
- The style that is not cut by 66 per cent
- Left claw (melee hand)
- Melee
- Right claw (mage hand)
- Magic
- Head
- Ranged
- What you are choosing
- Its defensive sheet
- Left claw (melee hand)
- 50 against stab, slash and crush; 200 against magic and every ranged type.
- Right claw (mage hand)
- 50 against magic; 200 against stab, slash, crush and every ranged type.
- Head
- 200 against stab, slash, crush and magic; 50 against light, standard and heavy ranged.
- What you are choosing
- What happens if you point the wrong style at it
- Left claw (melee hand)
- Anything that is not melee loses two thirds of its damage.
- Right claw (mage hand)
- Anything that is not magic loses two thirds of its damage.
- Head
- Anything that is not ranged loses two thirds, and outside the final phase the rest is healed back regardless.
- What you are choosing
- Health it carries
- Left claw (melee hand)
- 600, scaled to the raid
- Right claw (mage hand)
- 600, scaled to the raid
- Head
- 800, scaled to the raid
- What you are choosing
- The wrinkle
- Left claw (melee hand)
- In the penultimate phase it gains a state where damage heals it instead, shown by an infinity symbol above the claw.
- Right claw (mage hand)
- Its magic defence bonus is 50 where every other style faces 200, which is where the nickname comes from.
- Head
- It is the only part of Olm that keeps the damage you deal, and only during his final stand.
- What you are choosing
- What it does to you
- Left claw (melee hand)
- It carries no attack of its own — a max hit of zero and no attack style. Its icons are the tell for the timed specials.
- Right claw (mage hand)
- Also unarmed. Both claws are targets rather than threats.
- Head
- Every attack in the fight comes from here: magic, ranged, spheres, powers and the specials.
Two universal weapon notes are worth pulling out of the table because they apply wherever you are standing. Olm carries the dragon attribute and is vulnerable to dragonbane weapons — his magic attack shares its visuals with dragonfire and was seemingly the inspiration for the dragon hunter crossbow. And since June 2025 he has had a 50 per cent elemental weakness to earth spells, which is the single largest free upgrade available to anyone on the mage hand who has not thought about which spell they are casting.
Two things that look like upgrades are not. Poison and venom are both fully resisted, so a weapon you brought for its poison is a weapon doing nothing here. And a dragon warhammer special only drains the part of Olm it actually hits — hitting the left claw does nothing for the right one — while every stat resets when a new phase begins, so a drain landed late in a phase is wasted effort.
One recent change is worth knowing if you are on the melee hand: since January 2026 the burning claws special attack applies burn to Olm's melee hand. The left hand also clenches when it takes a single hit worth at least a twentieth of its base health, so the melee seat rewards large individual hits rather than steady chip damage.
The fire wall counter belongs in your gear plan rather than your reflexes. Any water will douse a segment: a water spell, an ice spell, Humidify, or a filled watering can. Whoever is carrying that answer should be told they are carrying it before the barrier.
The wiki's Great Olm article does not publish a recommended-equipment list, so the table above is read directly off his defensive sheet and his mitigation rules rather than off a wiki gear tier. That is deliberate: at Olm the target you are assigned decides your setup far more than your bank does.
| Check | Value |
|---|---|
| Prayers for its own attacks | 2 — Protect from Missiles and Magic |
| Its Defence level | 150 |
| Its Magic level | 250 |
| Its lowest defence bonus, per its infobox | light ammunition, standard ammunition, heavy ammunition |
| Elemental weakness | 50% to earth spells |
| Monster attributes | dragon,xerician |
- Check
- Prayers for its own attacks
- Value
- 2 — Protect from Missiles and Magic
- Check
- Its Defence level
- Value
- 150
- Check
- Its Magic level
- Value
- 250
- Check
- Its lowest defence bonus, per its infobox
- Value
- light ammunition, standard ammunition, heavy ammunition
- Check
- Elemental weakness
- Value
- 50% to earth spells
- Check
- Monster attributes
- Value
- dragon,xerician
- Tagged as a dragon: dragonbane weapons and dragonfire protection apply.
- 250 Magic level rewards magic-defence scaling weapons.
Inventory and Supplies
| What | Which mechanic it is for |
|---|---|
| A water source you can reach quickly | The fire wall. A water spell, an ice spell, Humidify or a filled watering can each douse a segment, and anyone left between the walls takes 50 to 65 damage over five seconds. |
| Prayer restoration, planned around the spheres | A sphere that catches the wrong overhead switches it off and halves your prayer points. Lightning does the same to your overheads and binds you on top of it. |
| Food, sized for the attacks you cannot pray | Crystal bombs start at 15 and add 15 for every tile you are closer. Falling crystals deal 16 to 25 under the shadow. A missed sphere takes about half your current hitpoints. |
| Antipoison | Acid pools deal 3 to 6 damage per tick and inflict poison starting at 2. Olm himself is poisonous, so this is a real slot rather than a courtesy. |
| A way to put drained stats back | Deep Burn hits its target for 5 damage every few ticks over six hits and drops your stats by 2 each time, and it spreads to anyone nearby. |
| Runes for Monster Examine, if you want them | It can be cast on Olm, and it is the only way to see what his scaled stats and max hit actually are in the raid you are currently in. |
- What
- A water source you can reach quickly
- Which mechanic it is for
- The fire wall. A water spell, an ice spell, Humidify or a filled watering can each douse a segment, and anyone left between the walls takes 50 to 65 damage over five seconds.
- What
- Prayer restoration, planned around the spheres
- Which mechanic it is for
- A sphere that catches the wrong overhead switches it off and halves your prayer points. Lightning does the same to your overheads and binds you on top of it.
- What
- Food, sized for the attacks you cannot pray
- Which mechanic it is for
- Crystal bombs start at 15 and add 15 for every tile you are closer. Falling crystals deal 16 to 25 under the shadow. A missed sphere takes about half your current hitpoints.
- What
- Antipoison
- Which mechanic it is for
- Acid pools deal 3 to 6 damage per tick and inflict poison starting at 2. Olm himself is poisonous, so this is a real slot rather than a courtesy.
- What
- A way to put drained stats back
- Which mechanic it is for
- Deep Burn hits its target for 5 damage every few ticks over six hits and drops your stats by 2 each time, and it spreads to anyone nearby.
- What
- Runes for Monster Examine, if you want them
- Which mechanic it is for
- It can be cast on Olm, and it is the only way to see what his scaled stats and max hit actually are in the raid you are currently in.
No quantities here, and not out of caution. What you carry into the barrier depends on your scale, on which of the three targets you have been given, on how many phases your raid size adds, and on how much of the run you have already spent. A solo brings a different inventory to the same fight than the fifth player in a five-man does.
Prayer and Spellbook
Protection prayers at Olm reduce rather than remove. His standard magic and ranged attacks are cut by roughly 75 to 80 per cent by the matching overhead, which means you take chip damage through the whole encounter even when you are playing it perfectly. Budget for that rather than treating a missed heal as a mistake.
Reading which attack is coming is a matter of watching the projectile: the magic attack is a large green orb, the ranged attack is a smaller chunk of crystal, and both deal the same damage. The head has a one-in-five chance of switching style each time it attacks, so there is no rotation to memorise here — only a projectile to look at.
The spheres are the exception, and they are the reason prayer matters so much more at Olm than the standard attacks suggest. Red is the sphere of aggression and wants Protect from Melee. Green is the sphere of accuracy and dexterity and wants Protect from Missiles. Purple is the sphere of magical power and wants Protect from Magic. Match the colour and the damage is prevented entirely. Have the wrong overhead up when it launches and the sphere switches your prayer off and takes half your prayer points. Have nothing up at all and it takes roughly half your current hitpoints.
Lightning is the other prayer problem and it does not care what you have selected. A bolt disables your overhead prayers outright, deals moderate damage and binds you in place. Being bound with no overhead up while a standard attack is on the way is the sequence that turns a survivable phase into a death, which is why the lines matter more than the damage.
Mechanics That Decide the Fight
| Mechanic | How you see it coming | What it does | Your answer |
|---|---|---|---|
| Standard magic and ranged | A large green orb is the magic attack; a smaller chunk of crystal is the ranged one. | Both deal the same damage. The head has a one-in-five chance of switching between them each time it attacks. | Watch the projectile rather than assuming a pattern, and accept that the matching overhead removes roughly 75 to 80 per cent of the damage rather than all of it. |
| Spheres | A coloured sphere leaves the head and travels to one player: red, green or purple. | Unblocked it takes about half your current hitpoints. If the wrong overhead was up when it launched, it switches that prayer off and halves your prayer points instead. | Red is Protect from Melee, green is Protect from Missiles, purple is Protect from Magic. Matching the colour prevents the damage completely. |
| Crystal Burst | The left hand briefly shows a crystal icon. | A crystal seedling is planted under every player in the chamber. Seconds later it bursts, shoving anyone still standing on it to a nearby tile for heavy damage. | Step off your own seedling. It is a positional attack with no prayer answer, and it arrives at a fixed point in his rotation. |
| Lightning | The left hand briefly shows a lightning bolt. | Lightning runs north and/or south of the chamber. A bolt disables your overheads, deals moderate damage and binds you in place. | Be out of the lines before it fires. Getting caught is rarely fatal on its own — it is what lands while you are bound with no prayer up that kills. |
| Teleport | The left hand briefly shows a swirl. | You are moved, and the damage scales with how far you were from the target. Alone, Olm picks a random tile anywhere in the chamber; with more players he distributes the teleports evenly, and with an odd number inside, some players are left out. | There is nothing to dodge. This is the attack you keep a health buffer for, and the reason a low-health player should not be the one furthest from the middle. |
| Falling crystals (transitions and final stand) | Shadows appear on the floor. | Each crystal damages a 3x3 area — 16 to 25 directly under the shadow, 10 to 16 one tile out. One is always aimed at a random player. | Watch the floor during every phase transition. In the final phase they never stop falling, so this becomes a background cost rather than an event. |
| Falling crystals (crystal power) | Olm cries out and one player is marked with a red aura. | Eleven spiked crystals fall, dealing up to 15 to 20 damage to anyone on the targeted tile. | The marked player moves and nobody follows them. This is the friendlier half of the crystal power. |
| Crystal bombs | Bombs are deployed into the room — up to three, and only two in smaller groups. | Each explodes after several seconds over a four-tile radius. The minimum is 15 damage, rising by another 15 for every tile closer you are. | Distance is the whole mechanic. One extra tile of separation is worth fifteen hitpoints, so move early and move far rather than precisely. |
| Acid spray and acid drip | Pools appear across the chamber, or one player is coated and starts trailing pools behind them. | Standing on a pool deals 3 to 6 damage per tick and inflicts poison starting at 2. The coated player takes damage by standing still and creates more pools by moving. | Do not fight from a pool, and do not solve acid drip by sprinting laps. It is a minor problem in small groups and a room-shaping one in large ones. |
| Deep Burn | A green fireball, and the target calls out that you should burn with them. | 5 damage every few ticks over six hits, dropping your stats by 2 each time. If it spreads the timer resets, and newly infected players answer that they will burn with you. | Separate from the team. Spreading it restarts the clock for everybody, which is far worse than one player eating the whole thing alone. |
| Fire wall | Two walls of fire thrown out to box a player in. | Being on a tile the wall wants costs 8 to 10 damage as you leap clear. Anyone left between the walls takes 50 to 65 damage over five seconds. | Douse a segment with water — a water spell, an ice spell, Humidify or a filled watering can. If the room is too cramped for him to deploy it, the attack fails outright and he continues his rotation with no catch-up. |
| Life Siphon | Two blue projectiles land and raise shields where they hit. | Several ticks later, everyone not standing on a shielded tile takes moderate damage — and Olm heals himself for five times the total he dealt to the team. | Get onto a tile. This is the only attack in the fight that undoes your damage rather than your health, and it only appears in the last phase. |
| Autoheal | Damage on the head that quietly disappears, or an infinity symbol above the left claw. | Outside the final phase the head recovers everything you land on it after a few ticks. In the penultimate phase the left hand gains its own version, where any damage that lands heals it instead. | Hit hands rather than head until the final stand, and stop hitting the left claw the moment the infinity symbol appears. |
- Mechanic
- Standard magic and ranged
- How you see it coming
- A large green orb is the magic attack; a smaller chunk of crystal is the ranged one.
- What it does
- Both deal the same damage. The head has a one-in-five chance of switching between them each time it attacks.
- Your answer
- Watch the projectile rather than assuming a pattern, and accept that the matching overhead removes roughly 75 to 80 per cent of the damage rather than all of it.
- Mechanic
- Spheres
- How you see it coming
- A coloured sphere leaves the head and travels to one player: red, green or purple.
- What it does
- Unblocked it takes about half your current hitpoints. If the wrong overhead was up when it launched, it switches that prayer off and halves your prayer points instead.
- Your answer
- Red is Protect from Melee, green is Protect from Missiles, purple is Protect from Magic. Matching the colour prevents the damage completely.
- Mechanic
- Crystal Burst
- How you see it coming
- The left hand briefly shows a crystal icon.
- What it does
- A crystal seedling is planted under every player in the chamber. Seconds later it bursts, shoving anyone still standing on it to a nearby tile for heavy damage.
- Your answer
- Step off your own seedling. It is a positional attack with no prayer answer, and it arrives at a fixed point in his rotation.
- Mechanic
- Lightning
- How you see it coming
- The left hand briefly shows a lightning bolt.
- What it does
- Lightning runs north and/or south of the chamber. A bolt disables your overheads, deals moderate damage and binds you in place.
- Your answer
- Be out of the lines before it fires. Getting caught is rarely fatal on its own — it is what lands while you are bound with no prayer up that kills.
- Mechanic
- Teleport
- How you see it coming
- The left hand briefly shows a swirl.
- What it does
- You are moved, and the damage scales with how far you were from the target. Alone, Olm picks a random tile anywhere in the chamber; with more players he distributes the teleports evenly, and with an odd number inside, some players are left out.
- Your answer
- There is nothing to dodge. This is the attack you keep a health buffer for, and the reason a low-health player should not be the one furthest from the middle.
- Mechanic
- Falling crystals (transitions and final stand)
- How you see it coming
- Shadows appear on the floor.
- What it does
- Each crystal damages a 3x3 area — 16 to 25 directly under the shadow, 10 to 16 one tile out. One is always aimed at a random player.
- Your answer
- Watch the floor during every phase transition. In the final phase they never stop falling, so this becomes a background cost rather than an event.
- Mechanic
- Falling crystals (crystal power)
- How you see it coming
- Olm cries out and one player is marked with a red aura.
- What it does
- Eleven spiked crystals fall, dealing up to 15 to 20 damage to anyone on the targeted tile.
- Your answer
- The marked player moves and nobody follows them. This is the friendlier half of the crystal power.
- Mechanic
- Crystal bombs
- How you see it coming
- Bombs are deployed into the room — up to three, and only two in smaller groups.
- What it does
- Each explodes after several seconds over a four-tile radius. The minimum is 15 damage, rising by another 15 for every tile closer you are.
- Your answer
- Distance is the whole mechanic. One extra tile of separation is worth fifteen hitpoints, so move early and move far rather than precisely.
- Mechanic
- Acid spray and acid drip
- How you see it coming
- Pools appear across the chamber, or one player is coated and starts trailing pools behind them.
- What it does
- Standing on a pool deals 3 to 6 damage per tick and inflicts poison starting at 2. The coated player takes damage by standing still and creates more pools by moving.
- Your answer
- Do not fight from a pool, and do not solve acid drip by sprinting laps. It is a minor problem in small groups and a room-shaping one in large ones.
- Mechanic
- Deep Burn
- How you see it coming
- A green fireball, and the target calls out that you should burn with them.
- What it does
- 5 damage every few ticks over six hits, dropping your stats by 2 each time. If it spreads the timer resets, and newly infected players answer that they will burn with you.
- Your answer
- Separate from the team. Spreading it restarts the clock for everybody, which is far worse than one player eating the whole thing alone.
- Mechanic
- Fire wall
- How you see it coming
- Two walls of fire thrown out to box a player in.
- What it does
- Being on a tile the wall wants costs 8 to 10 damage as you leap clear. Anyone left between the walls takes 50 to 65 damage over five seconds.
- Your answer
- Douse a segment with water — a water spell, an ice spell, Humidify or a filled watering can. If the room is too cramped for him to deploy it, the attack fails outright and he continues his rotation with no catch-up.
- Mechanic
- Life Siphon
- How you see it coming
- Two blue projectiles land and raise shields where they hit.
- What it does
- Several ticks later, everyone not standing on a shielded tile takes moderate damage — and Olm heals himself for five times the total he dealt to the team.
- Your answer
- Get onto a tile. This is the only attack in the fight that undoes your damage rather than your health, and it only appears in the last phase.
- Mechanic
- Autoheal
- How you see it coming
- Damage on the head that quietly disappears, or an infinity symbol above the left claw.
- What it does
- Outside the final phase the head recovers everything you land on it after a few ticks. In the penultimate phase the left hand gains its own version, where any damage that lands heals it instead.
- Your answer
- Hit hands rather than head until the final stand, and stop hitting the left claw the moment the infinity symbol appears.
The powers are not on a timer you can count, but the odds are published. There is a one-in-three chance that Olm uses a phase-specific attack instead of a standard one, rising to one in two during his final phase. When that roll succeeds he tries to avoid picking a power he has already used in the same phase — though he does repeat himself, so treating that as a guarantee is how teams get surprised by a second fire wall.
The specials, by contrast, run on a fixed twelve-step rotation that does not vary: standard attack, empty step, standard attack, Crystal Burst, standard attack, empty step, standard attack, Lightning, standard attack, empty step, standard attack, teleport, and then it loops. Every attack you have seen since entering the barrier occupies a slot in that list, which is why a team that can count knows exactly when the seedlings are coming.
The catch-up rule is the piece most players never learn. If a standard attack gets skipped — usually because nobody was standing in the zone Olm picked — he fires a standard attack on the following step in addition to whatever that step was already doing, so a special and a standard can land together. He only ever reaches back one step, and he never catches up a special attack. That last detail is the exploit: a skip timed onto Crystal Burst, Lightning or the teleport deletes it from the fight entirely.
| Property | Value |
|---|---|
| Combat level | 1043 |
| Attack styles | Magic, Ranged |
| Attack speed | 4 ticks |
| Attacks on sight | Yes |
| Poisons you | Yes |
| Size | 5 tiles |
- Property
- Combat level
- Value
- 1043
- Property
- Attack styles
- Value
- Magic, Ranged
- Property
- Attack speed
- Value
- 4 ticks
- Property
- Attacks on sight
- Value
- Yes
- Property
- Poisons you
- Value
- Yes
- Property
- Size
- Value
- 5 tiles
Where Great Olm Sits in Progression
Within the raid group, the fights below Great Olm are Kephri and Zebak. Nothing in the raid group is rated harder — Great Olm shares the top band with Verzik Vitur and Tumeken's and Elidinis' Warden.
Phase by Phase
The power phases
Olm has at least four phases, and the raid gains another one for every eight players in it. In every phase except the last two he focuses on a single set of abilities, called powers: acid, flame or crystal. Which set he is holding tells you exactly which two phase-specific attacks you are going to see, and that is the whole of the phase's identity.
Progress here is not measured in his health. Both claws have to be disabled before anything happens, and the head can be attacked at any point but recovers the damage within a few ticks. When both hands are down he retreats underground, shakes the chamber with area-of-effect falling crystals, and resurfaces on the other side of the room carrying the next power.
His stats reset when the new phase starts. Every drain you landed, every point of accuracy you bought with a special attack, is gone. Plan the drains for the phase you are in rather than the phase you hope to reach.
- Acid gives you Acid Spray and Acid Drip: pools at 3 to 6 damage per tick with poison, and one player trailing pools behind them.
- Flame gives you Deep Burn and the fire wall: a six-hit stat drain that spreads, and 50 to 65 damage for anyone caught between two walls.
- Crystal gives you falling crystals and crystal bombs: a red-aura target taking 15 to 20, and bombs that add 15 damage for every tile you failed to move.
The penultimate phase, where the rules change
You will know this phase by the head glowing. That glow means every power Olm owns is available to him at once, so the comfortable certainty of the earlier phases — you know which two specials are possible — disappears at exactly the point the fight gets harder.
The left hand also changes. It gains a damage-to-health ability, marked with an infinity symbol above the claw, and while that is up every hit you land on it heals it. The melee seat has to actually stop attacking, which is a harder instruction to follow than it sounds when the rest of the team is pushing damage.
And this is the only phase with a clock. Both hands must be disabled inside a specific time frame or Olm recovers them back to full health. A team that kills one claw quickly and then wanders through the second one does not lose a little progress here — it loses the phase and has to do it again with fewer supplies.
The final stand
Once both hands are down for the last time, Olm does not retreat. He remains on the spot and makes his final stand, with every power available to him and falling crystals dropping continuously from above until he is dead. There is no more phasing and no more waiting.
This is also the phase the head finally matters in. The autoheal is gone, so damage on the head stays, and the 66 per cent mitigation on everything that is not ranged is now the single most important number in the room. The odds of him using a power in place of a standard attack also rise from one in three to one in two.
Life Siphon is the attack that appears here and nowhere else. Two blue projectiles land and raise shields; several ticks later everyone not standing on those tiles takes moderate damage, and Olm heals for five times the total he dealt to the team. In a large group, four players standing in the wrong place is a meaningful chunk of the phase handed back to him.
Fight Strategy: Head and hand phases
- Agree the three seats before the barrier: melee on the left claw, magic on the right claw, ranged on the head. That conversation does not happen after the room seals.
- Enter and identify the power. Acid, flame or crystal decides which two phase-specific attacks can appear, and it is the only thing about the phase that is worth predicting.
- Put damage into the hands and leave the head alone. Anything you land on the head is healed back within a few ticks until his final stand.
- Hold the rotation in your head rather than reacting: standard, empty, standard, Crystal Burst, standard, empty, standard, Lightning, standard, empty, standard, teleport. Step off your seedling, be out of the lightning lines, and have a health buffer for the teleport.
- Read every sphere by colour and match the overhead. Red is melee, green is missiles, purple is magic, and being on the wrong one costs you the prayer as well as the block.
- Bring both hands down together rather than one at a time. In the penultimate phase this is not a preference — there is a time limit, and a split kill loses the whole phase.
- When the infinity symbol appears above the left claw, stop hitting it. Every point of damage while that is up is healing.
- On the final stand, put everything ranged into the head, take the falling crystals as a cost of doing business, and get onto a shielded tile when Life Siphon lands.
The thing that separates a team that kills Olm from a team that survives him is what they do with the empty steps. Two of the twelve steps in his rotation do nothing at all, and a third can be made to do nothing: if the zone Olm picks is empty he swerves his head and skips a standard attack. His catch-up mechanic will fire that standard attack on the next step, but it will never catch up a special. Timed onto Crystal Burst, Lightning or the teleport, a deliberate skip removes that special from the fight altogether.
The other habit worth building is treating the two claws as a single deadline rather than two tasks. Because the phase does not advance until both are down, a raid where the melee hand dies in fifteen seconds and the mage hand takes ninety has spent seventy-five seconds eating spheres, lightning and powers for no progress at all. Balancing the two kill times is worth more than raising either one.
Positioning and Movement
The chamber's three zones — left, middle and right — are not decoration. Olm attacks the zone holding the most players, so where your team stands determines who is being shot at, and a team that drifts into one column has volunteered to share every standard attack.
Distance is the answer to the crystal bombs and nothing else is. The minimum hit is 15 and it climbs by 15 for every tile closer you are, over a four-tile radius, which means the difference between a scratch and a serious hit is two or three steps taken early rather than perfectly.
Space matters in the opposite direction for the fire wall. Olm needs a certain amount of room to deploy it, and if players are standing in the wrong spots the attack fails outright — he does nothing, proceeds through his rotation as though it had worked, and gets no catch-up attack for it. That is a real, if situational, way to skip a mechanic.
In the last phase the floor becomes the constraint. Falling crystals never stop, acid pools from an earlier power may still be shaping the room, and Life Siphon demands you be on one of two specific tiles at a moment's notice. Know where your clear ground is before you need to stand on it.
Beginner Plan, Then the Advanced One
Your first trips
- Ask for the ranged seat on the head in your first raids if the team will give it to you. It is the seat with the fewest decisions: you are shooting one target with one style, and the mitigation rules make your job unambiguous.
- Learn the three sphere colours to the point of reflex before anything else. It is the only mechanic in the fight where the wrong answer costs you your prayer as well as your health, and it appears in every phase.
- Watch the left claw, not the head. The crystal icon, the lightning bolt and the swirl are the only warning the three timed specials give, and they all appear in the same place.
- Do not attack the head in the early phases just because it is a big target. The autoheal will take it all back, and the time you spent on it was time the hands were not taking damage.
- When the infinity symbol appears above the melee hand, take your hands off the keyboard rather than switching targets in a panic. Doing nothing for a few seconds is strictly better than healing it.
- Accept the falling crystals and the teleport as damage you are going to take. Trying to dodge things that cannot be dodged is how learners end up out of position for the things that can.
Once the kill is boring
- Use the zone skip deliberately. Emptying the zone Olm has picked skips a standard attack, and because he never catches up specials, landing that skip on Crystal Burst, Lightning or the teleport deletes it. This is the highest-value trick in the fight and almost nobody uses it on purpose.
- Time your defence drains to the phase rather than the encounter. A dragon warhammer special only affects the part of Olm it actually lands on, and all of his stats reset when a phase begins — so a drain landed on the mage hand at the end of a phase has bought you nothing.
- If you are on the mage hand, cast earth spells. The 50 per cent elemental weakness is free damage that costs a rune switch, and it has been live since June 2025.
- On the melee hand, build for individual hit size rather than sustained output. The left claw clenches when a single hit removes at least a twentieth of its base health, and since January 2026 the burning claws special applies burn to it.
- Balance the two claw kills to land together. The penultimate phase enforces this with a timer, but every earlier phase rewards it too, because the phase clock does not start counting down until both hands are disabled.
Team Roles
| Role | The job | Gets it wrong by |
|---|---|---|
| Melee hand (left claw) | Bring the left claw down. It is the only part of Olm where melee is not reduced by two thirds, its stab, slash and crush defences sit at 50 against 200 for everything else, and it clenches when one hit removes at least a twentieth of its base health. | Continuing to attack it in the penultimate phase after the infinity symbol appears, which heals it instead. |
| Mage hand (right claw) | Bring the right claw down, ideally at the same moment the melee hand falls. Magic is the only style it does not resist by 66 per cent, and earth spells carry an additional 50 per cent elemental weakness. | Casting whatever is already on the spellbook rather than switching to earth, and finishing a long way behind the melee seat. |
| Head and ranged damage | Hold ranged for the head, which resists all non-ranged damage by 66 per cent and heals back everything you land on it in every phase but the last. Your damage only counts during the final stand — before that, help the hands. | Shooting the head through the early phases and mistaking a refilling health bar for bad luck. |
| Caller | Call the sphere colours, the lightning lines, and the icons above the left claw — crystal, bolt and swirl — so that the people looking at their own target are not also trying to read the room. | Calling a sphere after it has launched. The colour has to be named while it is still travelling to be useful. |
| Zone discipline | Keep the team spread across the left, middle and right zones on purpose, and empty the targeted zone when the team wants a special skipped. Olm attacks the zone with the most players and skips an attack if the chosen zone is empty. | Letting the whole team drift into one column, so every standard attack lands on the same group. |
- Role
- Melee hand (left claw)
- The job
- Bring the left claw down. It is the only part of Olm where melee is not reduced by two thirds, its stab, slash and crush defences sit at 50 against 200 for everything else, and it clenches when one hit removes at least a twentieth of its base health.
- Gets it wrong by
- Continuing to attack it in the penultimate phase after the infinity symbol appears, which heals it instead.
- Role
- Mage hand (right claw)
- The job
- Bring the right claw down, ideally at the same moment the melee hand falls. Magic is the only style it does not resist by 66 per cent, and earth spells carry an additional 50 per cent elemental weakness.
- Gets it wrong by
- Casting whatever is already on the spellbook rather than switching to earth, and finishing a long way behind the melee seat.
- Role
- Head and ranged damage
- The job
- Hold ranged for the head, which resists all non-ranged damage by 66 per cent and heals back everything you land on it in every phase but the last. Your damage only counts during the final stand — before that, help the hands.
- Gets it wrong by
- Shooting the head through the early phases and mistaking a refilling health bar for bad luck.
- Role
- Caller
- The job
- Call the sphere colours, the lightning lines, and the icons above the left claw — crystal, bolt and swirl — so that the people looking at their own target are not also trying to read the room.
- Gets it wrong by
- Calling a sphere after it has launched. The colour has to be named while it is still travelling to be useful.
- Role
- Zone discipline
- The job
- Keep the team spread across the left, middle and right zones on purpose, and empty the targeted zone when the team wants a special skipped. Olm attacks the zone with the most players and skips an attack if the chosen zone is empty.
- Gets it wrong by
- Letting the whole team drift into one column, so every standard attack lands on the same group.
Scale changes this fight more than gear does. Olm's combat stats, max hit and health all scale to the players in the raid, and the encounter gains an entire extra phase for every eight players. That is why a mass raid is a longer fight rather than an easier one, and why the same team that clears Olm in a five-man can find a solo genuinely hard.
Some mechanics soften in small teams and some sharpen. Crystal bombs cap at three normally but only two for smaller groups, and acid drip barely matters when there is nobody nearby to trail pools into. The teleport goes the other way: alone, Olm picks any tile in the chamber, while in a group he distributes teleports evenly and, with an odd number of players inside, some are skipped entirely.
Stat drains do not pool across the team's targets either. A dragon warhammer special only affects the part of Olm it landed on, so three people draining three different targets is three separate, phase-length effects rather than one shared one.
Drops and What Great Olm Is Worth
Olm himself does not hand you anything. What the raid is for is the Ancient chest at the end, and the lore the wiki attaches to it is unusually literal about what that chest contains: after Xeric's party defeated the Guardian in the Deep, he sealed away the weapons and armour they had developed during the expedition, in what his own journal calls a place of safety. That sealed store is the unique table.
We do not print unique chances, point thresholds or item prices on this page. Those numbers depend on your raid's points, your scale and the current Grand Exchange, and any figure fixed here would be wrong within a few weeks of a rebalance. Check them live on the wiki when you need them.
Drops worth the trip: Twisted bow, elder maul, kodai insignia, dragon claws. Whether that is worth your time depends on how many kills an hour you personally get, which is a function of head and hand phases rather than of your gear list.
Combat Achievements
Olm's tasks are unusual in that the hard ones are not a different fight — they are this fight with Challenge Mode's numbers written over the top. Challenge Mode takes the head's max hit from 27, 28 and 29 up to 38, 39 and 41, and raises his Attack, Strength, Magic and Ranged from 250 to 375 and his Defence from 150 to 225. Nothing about the twelve-step rotation, the sphere colours or the powers changes.
That makes the preparation identical and the margin much thinner. If a task is asking you to do something on Challenge Mode, the work is not learning new mechanics — it is being able to execute the ones you already know while the head is capable of taking 41 hitpoints off you at a time.
Great Olm has Combat Achievement tasks. With a 29 max hit the restrictions are mostly about execution rather than survival.
Task lists move with updates — read the current list in game.
Ironman Notes
Without a Grand Exchange, twisted bow, elder maul, kodai insignia, dragon claws has to be earned rather than bought, and this is the fastest table it sits on.
It poisons, so your answer to poison — antidote doses, or food that cures as it heals — is part of planning the trip length.
Olm is an unusual Ironman target because none of the answers to him are purchasable. The two largest free upgrades are a spellbook decision and a weapon you probably already own: earth spells for the 50 per cent elemental weakness on the mage hand, and a dragonbane weapon for the dragon attribute he carries.
The fire wall counter is the cheapest slot in the raid to fill. A filled watering can douses a segment just as well as a water spell or Humidify does, so an account with no water runes has no excuse for eating 50 to 65 damage between two walls.
Do not spend an inventory slot on poison. Olm's poison and venom resistances are both total, which makes a poisoned weapon a strictly worse weapon here.
Common Mistakes and Death Causes
| What happened | Why it happened | The fix |
|---|---|---|
| A sphere caught you on the wrong overhead | The colours arrive without a rotation, and the punishment is not just damage — the wrong prayer is switched off and half your prayer points go with it. | Name the colour out loud while it is in the air. Red is melee, green is missiles, purple is magic, and matching it prevents the damage entirely. |
| Bound by lightning, then killed by something ordinary | A lightning bolt disables your overheads, deals moderate damage and binds you. The bolt rarely kills; the standard attack or sphere that lands while you are stuck with no prayer up does. | Treat lightning as a positioning problem with a fixed slot in the rotation. It is the eighth step, every cycle, and the left hand shows a bolt before it fires. |
| Standing next to a crystal bomb | The damage starts at 15 and adds 15 for every tile closer you are, over a four-tile radius, so the difference between a scratch and a large hit is two or three tiles. | Move as soon as one deploys, and move further than feels necessary. Precision buys nothing here; distance buys everything. |
| Trapped between two fire walls | Anyone left between them takes 50 to 65 damage over five seconds, and leaping clear of an occupied tile already costs 8 to 10 on the way out. | Have a water answer assigned before the raid. A water spell, an ice spell, Humidify or a filled watering can each remove a segment. |
| Standing in acid while dealing with something else | Pools deal 3 to 6 damage every tick and poison on top, which turns a manageable moment into a spiral while you are busy reading a sphere or a seedling. | Move off the pool first and solve the other mechanic second. That order is almost always correct at Olm. |
| The penultimate phase timer ran out | Both hands have to be disabled inside a specific window in that phase or Olm recovers them to full, and teams routinely kill one claw fast and the other slowly. | Balance the two claw kill times all raid, not just in that phase. If one seat is clearly outpacing the other, move damage across. |
| Off the tiles during Life Siphon | Everyone not standing on a shielded tile takes moderate damage, and Olm heals for five times the total dealt to the team. In a group that adds up quickly. | Get on a tile the moment the blue projectiles land. This is a damage problem before it is a health problem. |
- What happened
- A sphere caught you on the wrong overhead
- Why it happened
- The colours arrive without a rotation, and the punishment is not just damage — the wrong prayer is switched off and half your prayer points go with it.
- The fix
- Name the colour out loud while it is in the air. Red is melee, green is missiles, purple is magic, and matching it prevents the damage entirely.
- What happened
- Bound by lightning, then killed by something ordinary
- Why it happened
- A lightning bolt disables your overheads, deals moderate damage and binds you. The bolt rarely kills; the standard attack or sphere that lands while you are stuck with no prayer up does.
- The fix
- Treat lightning as a positioning problem with a fixed slot in the rotation. It is the eighth step, every cycle, and the left hand shows a bolt before it fires.
- What happened
- Standing next to a crystal bomb
- Why it happened
- The damage starts at 15 and adds 15 for every tile closer you are, over a four-tile radius, so the difference between a scratch and a large hit is two or three tiles.
- The fix
- Move as soon as one deploys, and move further than feels necessary. Precision buys nothing here; distance buys everything.
- What happened
- Trapped between two fire walls
- Why it happened
- Anyone left between them takes 50 to 65 damage over five seconds, and leaping clear of an occupied tile already costs 8 to 10 on the way out.
- The fix
- Have a water answer assigned before the raid. A water spell, an ice spell, Humidify or a filled watering can each remove a segment.
- What happened
- Standing in acid while dealing with something else
- Why it happened
- Pools deal 3 to 6 damage every tick and poison on top, which turns a manageable moment into a spiral while you are busy reading a sphere or a seedling.
- The fix
- Move off the pool first and solve the other mechanic second. That order is almost always correct at Olm.
- What happened
- The penultimate phase timer ran out
- Why it happened
- Both hands have to be disabled inside a specific window in that phase or Olm recovers them to full, and teams routinely kill one claw fast and the other slowly.
- The fix
- Balance the two claw kill times all raid, not just in that phase. If one seat is clearly outpacing the other, move damage across.
- What happened
- Off the tiles during Life Siphon
- Why it happened
- Everyone not standing on a shielded tile takes moderate damage, and Olm heals for five times the total dealt to the team. In a group that adds up quickly.
- The fix
- Get on a tile the moment the blue projectiles land. This is a damage problem before it is a health problem.
There is no recovery in the usual sense, and that is the defining fact about Olm rather than a footnote. Once the team passes through the mystical barrier the chamber is sealed and it is a fight to the death, so every plan has to be a plan for continuing rather than a plan for leaving.
What that leaves you is triage. If a phase has gone badly, the correct instinct is to stop pushing damage into whatever is healing — the head outside the final stand, or the left claw once its infinity symbol is up — and spend the time restoring prayer and health instead. Olm's stats reset at the start of each phase anyway, so a slow, intact phase transition is worth more than a fast, broken one.
FAQ
Which hand should we kill first?
Neither, really — you should aim to kill them together. The phase does not advance until both claws are disabled, so a large gap between the two kill times is a stretch of the fight where you are taking every attack Olm has for no progress. In the penultimate phase this stops being a preference: there is a time limit, and missing it restores both hands to full.
Why does my damage on the head keep disappearing?
Because it is being healed. Outside his final phase, any damage aimed at the head is completely recovered after several ticks, which is exactly what it looks like. The head only holds damage during his final stand, and even then everything that is not a ranged attack loses 66 per cent of its damage against it.
Can we leave if the raid is going badly?
No. Unlike the other rooms in the Chambers, once you enter the chamber through the barrier it is a fight to the death. That is why the seat assignments and the supply check belong before the barrier rather than after it.
Does a dragon warhammer special work on Olm?
Yes, with two conditions worth knowing. Stat-draining attacks only affect the part of him that was hit, so draining the left claw does nothing for the right claw or the head. And all of his stats reset when a new phase starts, so a drain landed near the end of a phase is wasted.
What does Challenge Mode actually change about Olm?
The numbers, sharply. On normal his head's max hit is listed at 27, then 28, then 29 in phase four; in Challenge Mode it is 38 in the first two phases, 39, and 41 in phase four. His Attack, Strength, Magic and Ranged levels go from 250 to 375, and his Defence from 150 to 225. The mechanics themselves are the same fight.
Is Olm harder with more people?
Different rather than uniformly harder. His stats and health scale to the raid, and you gain an entire extra phase for every eight players, so a mass is a longer encounter. Some mechanics get worse with numbers — acid drip and the crystal bomb count — while the teleport actually skips players when there is an odd number inside.
What is the single most useful thing to learn first?
The twelve-step rotation. Standard, empty, standard, Crystal Burst, standard, empty, standard, Lightning, standard, empty, standard, teleport. Every timed special in the fight sits in that list, and knowing where you are in it turns three reaction tests into three appointments.
Related Guides
Bottom Line
Olm punishes teams that treat him as a single boss. He is a melee target, a magic target and a ranged target that heals, and the raid does not move until two of those three are dead at roughly the same moment. Sort the seats before the barrier, learn the twelve-step rotation so the seedlings and the lightning stop being surprises, and remember that the head is scenery until his final stand.
The barrier is also the honest dividing line for whether this is worth your evening: everything before it is a raid you can pace, and everything after it is a fight you cannot walk out of. If you want the completion without spending a month of learner raids getting there, our Chambers of Xeric completions are played by hand from the first room to the final stand.
If Great Olm is blocking a Combat Achievement or an unlock you actually want, our PvM service is done by hand — no automation. Otherwise the bosses list has the full index.
Great Olm — CoX final boss, difficulty 5/5. Combat values here — hitpoints, max hits, attack styles and speed, Defence and Magic levels, immunities and Slayer requirements — were read from the Old School RuneScape Wiki infobox for Great Olm on 2026-08-03. Kill rates, GP per hour and item prices are deliberately absent because they move with balance patches and the Grand Exchange. Mechanics, gear tiers and phase behaviour on this page were checked against Great Olm on 4 August 2026.
Need a trusted team? Bils Services
Enjoyed the guide?
Drop a like — it helps other Adventurers find the good stuff.
Community
Comments
Silence in the hall…
Be the first Adventurer to leave a mark.
Join the thread
Add a comment
Tips, drops, or “this carried my account” — keep it useful.
bilsservices · bils services · bilsservices.com

