


OSRS K’ril Tsutsaroth Guide: Solo Methods, Gear & Zamorak Drops
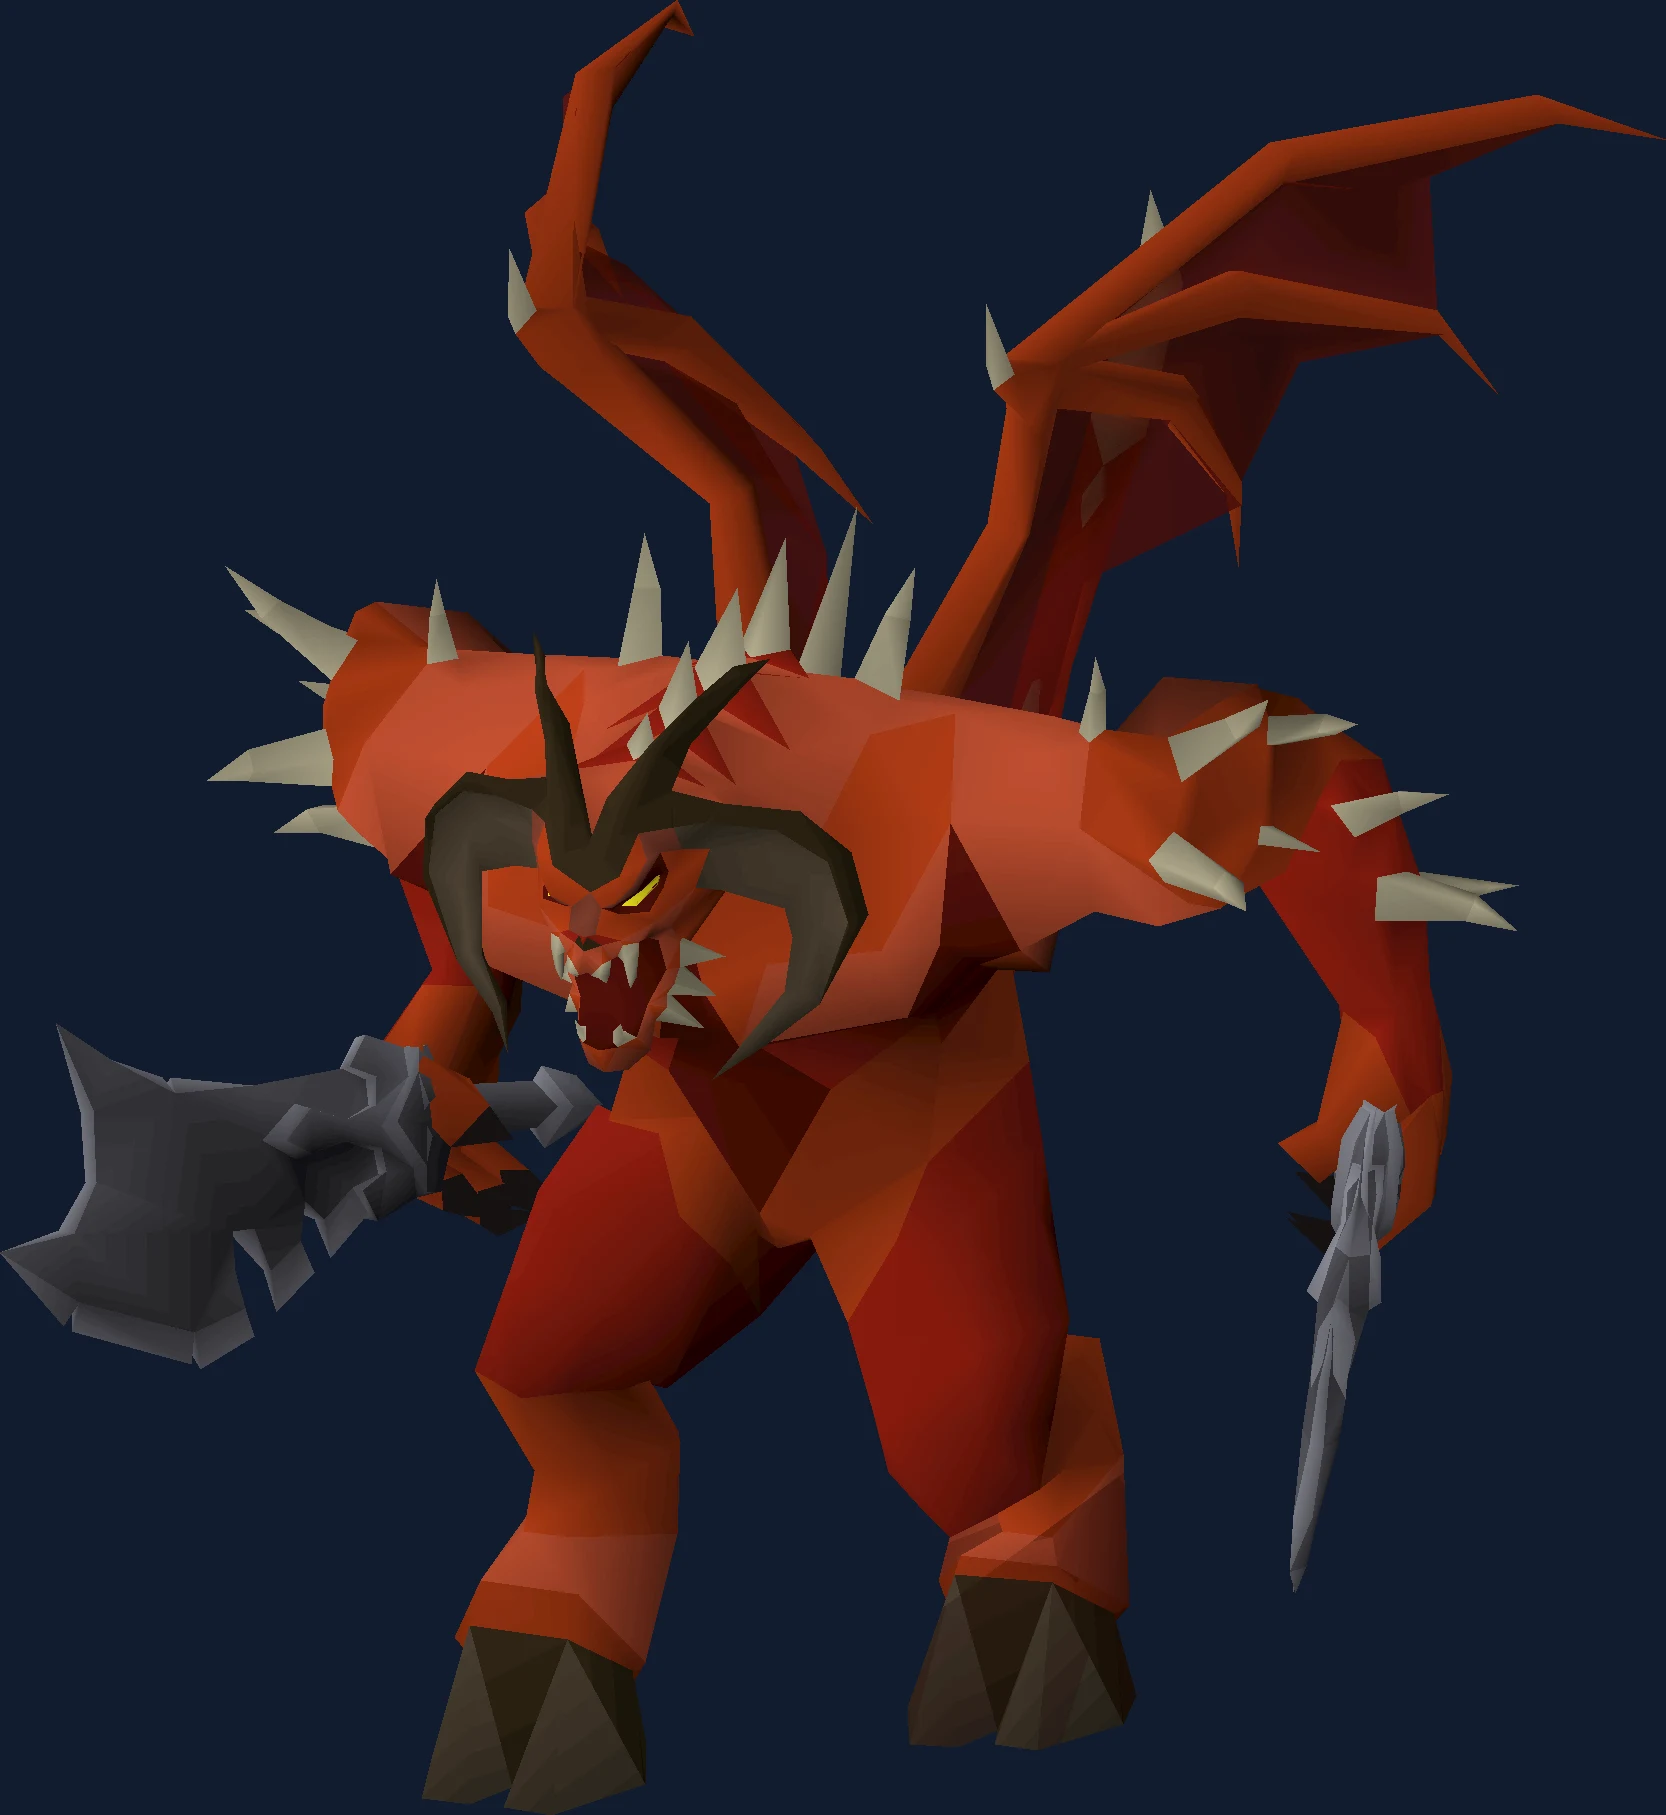
K’ril guide for solo methods, prayer flicks, and Zamorak unique chase.
Why People Fight K'ril Tsutsaroth
Every guide to K'ril Tsutsaroth has to explain the same awkward joke. His melee attack takes up to 46, so you pray Protect from Melee. Praying Protect from Melee is what allows his prayer smash, which always deals between 35 and 49 and halves the prayer points you have left. You are not choosing between a safe option and a risky one. You are choosing which of his attacks you would rather be hit by.
That is the fight, and it is a genuinely different problem to the one the other Zamorakian-adjacent bosses set. His poison ignores your prayer entirely — the melee swipe can apply it through Protect from Melee, starting at 16 damage — and neither he nor his bodyguards drop bones, which means bones to peaches, the healing crutch that makes Bandos trips comfortable, simply does not exist here. Ashes do not become peaches. You brought what you brought.
People come for the Zamorakian spear, the staff of the dead and the zamorak hilt, and the middle of those is the interesting one. The staff of the dead is not a boss-killer you retire into a bank tab; it is a magic defence and damage-reduction item with an afterlife in half a dozen other setups. His entrance is also the softest of the four generals at 70 Hitpoints, and that is boostable, so K'ril is often the general a lower-levelled account can technically reach long before it can survive him.
The modern solo answer is a scorching bow and a Lightbearer. Its special attack binds him in place, and a player who reapplies the bind on schedule takes no damage from him at all. That turns a fight defined by two bad options into a fight with no options in it, which is why the trip lengths people quote for it sound implausible until you watch one.
Its own attacks are melee (slash) and magic, so Protect from Melee and Magic both have a job.
In our index it sits in the God Wars Dungeon group at difficulty 3 of 5, where kill times come down to Solo Zamorak prayer management.
| Field | Detail |
|---|---|
| Classification | GWD general (Zamorak) (Boss) |
| Group | God Wars Dungeon |
| Difficulty | 3 / 5 |
| Solo or team | Solo or team |
| Access requirement | 70 Hitpoints + 40 kill count |
| Notable reward | Zamorakian spear, staff of the dead, zamorak hilt |
| Signature mechanic | Solo Zamorak prayer management |
| Hitpoints | 255 |
| Max hits | 30 (magic), 46 (melee), 49 (special attack) |
| Released | 17 October 2013 |
- Field
- Classification
- Detail
- GWD general (Zamorak) (Boss)
- Field
- Group
- Detail
- God Wars Dungeon
- Field
- Difficulty
- Detail
- 3 / 5
- Field
- Solo or team
- Detail
- Solo or team
- Field
- Access requirement
- Detail
- 70 Hitpoints + 40 kill count
- Field
- Notable reward
- Detail
- Zamorakian spear, staff of the dead, zamorak hilt
- Field
- Signature mechanic
- Detail
- Solo Zamorak prayer management
- Field
- Hitpoints
- Detail
- 255
- Field
- Max hits
- Detail
- 30 (magic), 46 (melee), 49 (special attack)
- Field
- Released
- Detail
- 17 October 2013
Access Requirements
K'ril Tsutsaroth is gated behind 70 Hitpoints + 40 kill count.
70 Hitpoints + 40 kill count also tends to sit alongside the other God Wars Dungeon gates, so it is usually cheaper to clear them together than to come back for each one. The boss requirements checklist lists them by group.
Location and How to Get There
K'ril Tsutsaroth is found in the Zamorak Fortress inside the God Wars Dungeon.
God Wars Dungeon, then the Zamorak section, which needs 70 Hitpoints and kill count. The Zamorak door area is cramped, so plan where you will stand before the minions reach you.
Getting in is the same Trollheim trip as the rest of the dungeon: Death Plateau and enough of Troll Stronghold to have beaten Dad, or Ghommal's hilt if you would rather skip both, plus one rope for your first descent. Zamorak's Fortress itself asks for 70 Hitpoints, and unlike Graardor's Strength door this one can be boosted.
Killcount is where a Zamorakian trip actually loses its time. Forty followers is the base figure, dropping to 35, 30, 25 and 15 with hard, elite, master and grandmaster Combat Achievements respectively, and the wiki is candid that it takes longer than the Bandos equivalent even though it is not difficult. Two places make it bearable. North and east of the rope in the main room, Zamorakian followers are already fighting Bandosians and Saradominists, and there are two imps sitting there alongside bloodvelds, goraks, werewolves and icefiends. Inside the fortress there are four imp spawns.
The fastest routine is unglamorous: shoot the fortress imps, hop world, shoot them again. It is worth setting up properly, because the killcount is the part of a K'ril trip you repeat forever while the fight itself becomes automatic.
One item that is easy to forget: the chamber and the corridor down to it are almost pitch dark. It is purely cosmetic and changes nothing about the fight, but a Saradomin's light removes it if the gloom bothers you.
Recommended Stats and Gear at Three Budgets
| Skill | Tank | Attacker | Why the two columns differ |
|---|---|---|---|
| Hitpoints | 90+ | 80+ | 70 is the boostable requirement to enter the fortress at all. The tank number is high because the prayer smash is a fixed 35 to 49 rather than a roll. |
| Defence | 90+ | 80+ | The tank is the only player K'ril attacks, and the attackers are only dodging bodyguards. |
| Magic | 85+ | 75+ | Magic level drives magic defence, which is what a Protect from Melee tank is relying on against his shockwave and against Balfrug. |
| Attack and Strength | 85+ | 85+ | Or Ranged 85+ if you are using a bow. The requirement is the same for both jobs because damage shortens the tank's exposure. |
| Prayer | 70+ | 70+ | Piety or Rigour, and enough of a pool that losing half of it to a smash is survivable rather than fatal. |
- Skill
- Hitpoints
- Tank
- 90+
- Attacker
- 80+
- Why the two columns differ
- 70 is the boostable requirement to enter the fortress at all. The tank number is high because the prayer smash is a fixed 35 to 49 rather than a roll.
- Skill
- Defence
- Tank
- 90+
- Attacker
- 80+
- Why the two columns differ
- The tank is the only player K'ril attacks, and the attackers are only dodging bodyguards.
- Skill
- Magic
- Tank
- 85+
- Attacker
- 75+
- Why the two columns differ
- Magic level drives magic defence, which is what a Protect from Melee tank is relying on against his shockwave and against Balfrug.
- Skill
- Attack and Strength
- Tank
- 85+
- Attacker
- 85+
- Why the two columns differ
- Or Ranged 85+ if you are using a bow. The requirement is the same for both jobs because damage shortens the tank's exposure.
- Skill
- Prayer
- Tank
- 70+
- Attacker
- 70+
- Why the two columns differ
- Piety or Rigour, and enough of a pool that losing half of it to a smash is survivable rather than fatal.
Note what is absent from that list: there is no skill here that gates the encounter the way Agility gates Zilyana or Strength gates Graardor. K'ril's difficulty is not a level check, which is precisely why players arrive underprepared.
Soloing him is generally only worth it on a Slayer task, so the Slayer level that unlocks greater demons matters more to your kills per trip than any of the numbers above.
| Slot | Solo melee (Protect from Melee) | Justiciar tank (Protect from Magic) | Scorching bow solo |
|---|---|---|---|
| Weapon | Emberlight, then Osmumten's fang, then Arclight | Emberlight or Arclight, with a Zamorakian hasta, Ghrazi rapier or scythe of vitur below them | Scorching bow, with a twisted bow or bow of Faerdhinen as the fallbacks |
| Body and legs | Masori (f), then blood moon or Karil's — you are buying magic defence, not melee stats | Justiciar chestguard and legguards; the set is close to a requirement for this approach | Masori (f), Armadyl, or crystal with the bow of Faerdhinen |
| Shield | Avernic defender for damage, or a spectral spirit shield to blunt the prayer drain | Elysian spirit shield or dragonfire shield, stacking with justiciar's damage reduction | Not applicable — the bow is two-handed |
| Head | Slayer helmet (i) on task, otherwise Torva or a serpentine helm | Justiciar faceguard with the full set; slayer helmet if the task bonus matters more | Slayer helmet (i) on task, otherwise Masori mask (f) |
| Hands, feet, neck | Barrows or ferocious gloves, primordial or echo boots, amulet of blood fury | Accuracy in the glove and amulet slots, since the armour is doing the defending | Zaryte vambraces, pegasian or echo boots, necklace of rupture |
| Ring and special | Lightbearer or bellator; Saradomin godsword, voidwaker or dragon claws for the special | Ring of suffering, with a voidwaker or elder maul for the special | Lightbearer, which is the entire reason the bind method works |
- Slot
- Weapon
- Solo melee (Protect from Melee)
- Emberlight, then Osmumten's fang, then Arclight
- Justiciar tank (Protect from Magic)
- Emberlight or Arclight, with a Zamorakian hasta, Ghrazi rapier or scythe of vitur below them
- Scorching bow solo
- Scorching bow, with a twisted bow or bow of Faerdhinen as the fallbacks
- Slot
- Body and legs
- Solo melee (Protect from Melee)
- Masori (f), then blood moon or Karil's — you are buying magic defence, not melee stats
- Justiciar tank (Protect from Magic)
- Justiciar chestguard and legguards; the set is close to a requirement for this approach
- Scorching bow solo
- Masori (f), Armadyl, or crystal with the bow of Faerdhinen
- Slot
- Shield
- Solo melee (Protect from Melee)
- Avernic defender for damage, or a spectral spirit shield to blunt the prayer drain
- Justiciar tank (Protect from Magic)
- Elysian spirit shield or dragonfire shield, stacking with justiciar's damage reduction
- Scorching bow solo
- Not applicable — the bow is two-handed
- Slot
- Head
- Solo melee (Protect from Melee)
- Slayer helmet (i) on task, otherwise Torva or a serpentine helm
- Justiciar tank (Protect from Magic)
- Justiciar faceguard with the full set; slayer helmet if the task bonus matters more
- Scorching bow solo
- Slayer helmet (i) on task, otherwise Masori mask (f)
- Slot
- Hands, feet, neck
- Solo melee (Protect from Melee)
- Barrows or ferocious gloves, primordial or echo boots, amulet of blood fury
- Justiciar tank (Protect from Magic)
- Accuracy in the glove and amulet slots, since the armour is doing the defending
- Scorching bow solo
- Zaryte vambraces, pegasian or echo boots, necklace of rupture
- Slot
- Ring and special
- Solo melee (Protect from Melee)
- Lightbearer or bellator; Saradomin godsword, voidwaker or dragon claws for the special
- Justiciar tank (Protect from Magic)
- Ring of suffering, with a voidwaker or elder maul for the special
- Scorching bow solo
- Lightbearer, which is the entire reason the bind method works
The weapon order in those tables is the tell for what this encounter is. Emberlight and Arclight sit above Osmumten's fang and the rapier, an ordering they do not get at the other generals, and K'ril's three bodyguards are a black demon, a greater demon and a lesser demon. Bring the demonbane weapon you own; it is doing more work than its raw stats suggest.
The two tank approaches are opposites rather than variations, and mixing them is how people die. Protect from Melee with magic defence is the efficient default and it accepts the prayer smash as a cost of doing business — the danger is the narrow case where a smash, Balfrug and Zakl'n all land on the same or adjacent ticks. Protect from Magic with maximum melee defence removes the smash entirely, makes Balfrug completely harmless, and leaves Tstanon and Zakl'n struggling to connect, at the price of eating his more accurate, harder-hitting melee attack. That second version is not recommended without justiciar, because his melee is slash-based and you need real slash defence to make it work.
Magic is a Tumeken's shadow proposition or nothing. The strategy page says outright that mage is not recommended with any weapon weaker than a shadow, and the method it is paired with is the 5:0 pattern, which avoids all damage from K'ril and exists because magic armour cannot survive being hit. A purging staff is a listed alternative, but it obliges you to bring a separate healing plan such as a sanguinesti staff.
In a team, ranged attackers can use Armadyl armour specifically for its magic defence. Solo, ranged is only competitive with the scorching bow — the demonbane damage-per-second of an Arclight against the Armadyl crossbow is not a close comparison.
| Check | Value |
|---|---|
| Prayers for its own attacks | 2 — Protect from Melee and Magic |
| Its Defence level | 270 |
| Its Magic level | 200 |
| Its lowest defence bonus, per its infobox | stab |
| Elemental weakness | 30% to water spells |
| Monster attributes | demon |
- Check
- Prayers for its own attacks
- Value
- 2 — Protect from Melee and Magic
- Check
- Its Defence level
- Value
- 270
- Check
- Its Magic level
- Value
- 200
- Check
- Its lowest defence bonus, per its infobox
- Value
- stab
- Check
- Elemental weakness
- Value
- 30% to water spells
- Check
- Monster attributes
- Value
- demon
- Tagged as a demon: demonbane weapons apply.
- 200 Magic level rewards magic-defence scaling weapons.
Inventory and Supplies
| Item | What it is solving |
|---|---|
| Sanfew serums, or super restores plus an antidote++ | Two problems in one slot. Poison that lands through your prayer, and a prayer pool that gets halved without warning. Sanfew serums cover both, which is why they crowd out plain restores in most listed setups. |
| An extended anti-venom+ if you are tanking | The tank takes every melee swipe in the fight, so the tank is the player poison actually threatens. A serpentine helm covers the same ground if you are wearing one. |
| High-healing food: anglerfish, marlin or manta rays | There are no peaches here. K'ril and all three bodyguards drop ashes rather than bones, so every hitpoint you regain came out of your inventory or out of Blood Barrage. |
| A rune pouch with Blood Barrage runes, and water runes if you want them | Blood Barrage off the stacked bodyguards is the solo healing plan. Ice Barrage on Tstanon Karlak freezes him in place so you are not flicking between missiles and melee while you heal. |
| A Guthan's set, for teams | The group alternative to barraging. Teams are also where Boost Potion Share and Stat Restore Pot Share earn their runes, precisely because the free healing that Bandos gets from bones is unavailable. |
| A saturated or imbued heart | Boosts your Magic level, which raises your magic defence. On a Protect from Melee setup that is a defensive item disguised as an offensive one. |
| A Construction cape or house tablet | The escape. Worth more here than at most bosses because the deaths that happen are sudden rather than gradual. |
- Item
- Sanfew serums, or super restores plus an antidote++
- What it is solving
- Two problems in one slot. Poison that lands through your prayer, and a prayer pool that gets halved without warning. Sanfew serums cover both, which is why they crowd out plain restores in most listed setups.
- Item
- An extended anti-venom+ if you are tanking
- What it is solving
- The tank takes every melee swipe in the fight, so the tank is the player poison actually threatens. A serpentine helm covers the same ground if you are wearing one.
- Item
- High-healing food: anglerfish, marlin or manta rays
- What it is solving
- There are no peaches here. K'ril and all three bodyguards drop ashes rather than bones, so every hitpoint you regain came out of your inventory or out of Blood Barrage.
- Item
- A rune pouch with Blood Barrage runes, and water runes if you want them
- What it is solving
- Blood Barrage off the stacked bodyguards is the solo healing plan. Ice Barrage on Tstanon Karlak freezes him in place so you are not flicking between missiles and melee while you heal.
- Item
- A Guthan's set, for teams
- What it is solving
- The group alternative to barraging. Teams are also where Boost Potion Share and Stat Restore Pot Share earn their runes, precisely because the free healing that Bandos gets from bones is unavailable.
- Item
- A saturated or imbued heart
- What it is solving
- Boosts your Magic level, which raises your magic defence. On a Protect from Melee setup that is a defensive item disguised as an offensive one.
- Item
- A Construction cape or house tablet
- What it is solving
- The escape. Worth more here than at most bosses because the deaths that happen are sudden rather than gradual.
The single most common inventory mistake at K'ril is bringing a Bandos loadout. Drop the bones to peaches tablets, add poison cover, and shift the balance from brews towards restores and serums, because the resource under pressure is prayer rather than health.
Attackers should carry a spare antidote++ even though they are unlikely to need it. If the tank runs out, they have almost no inventory space to have planned for it, and if K'ril switches to an attacker for a moment that attacker is suddenly the one being poisoned.
Prayer and Spellbook
Start from the numbers rather than the convention. His melee is two attacks in three and reaches 46. His magic is one in three, deals between 10 and 30, and can only be used against a player in melee range. Both are single-target, so in a team only the tank is under any of this.
Protect from Melee is the default because it removes the bigger and more frequent attack, and the cost is a one-in-nine chance per attack that he shouts and uses the prayer smash instead. That attack is not a roll you can get lucky on: it always lands for 35 to 49 and it always takes half your remaining prayer, rounded down. A spectral spirit shield reduces the drain to a quarter, which is the difference between a smash being an inconvenience and a smash being the end of your prayer potions.
Protect from Magic is the other legitimate answer and it is a completely different trip. He cannot use the prayer smash against a target who is not praying melee, so the attack disappears from the fight, and Balfrug Kreeyath becomes harmless at the same time. What you accept in exchange is his melee, which is more accurate and harder-hitting than the magic attack you just blocked. The wiki's framing is worth keeping: this results in a much longer trip, so it is a choice about trip length rather than about safety.
Attackers pray by weapon, not by boss. Melee attackers use Protect from Magic against Balfrug; ranged attackers use Protect from Missiles against Zakl'n Gritch. If K'ril unexpectedly turns on you, invert it — melee attackers stay on Protect from Magic, ranged attackers switch to Protect from Melee — and understand that your gear is bad at tanking him and you are buying time, not settling in.
If you are not on the Lunar spellbook for the potion shares, Arceuus has two things worth having: Ward of Arceuus to cut incoming damage, and Death Charge to keep special attack energy flowing.
Mechanics That Decide the Fight
| Mechanic | How you see it coming | What it does | Your answer |
|---|---|---|---|
| Scimitar swipe | The default. Two attacks in three are this one. | Up to 46 damage, and it can inflict poison starting at 16 even through Protect from Melee. | Protect from Melee and magic defence, or Protect from Magic and heavy slash defence. Poison cover regardless of which you choose, because the prayer does not stop it. |
| Overhead slam | He raises both scimitars before bringing them down; a magical shockwave travels to his target. | Between 10 and 30 damage. One attack in three, single-target, and only usable against a player standing in melee range. | Protect from Magic if you are tanking that way. If you are kiting or binding him, distance removes it entirely. |
| Prayer smash | He yells. There is no subtlety to the warning and no time to react to it. | Replaces a melee hit one time in nine when his target is praying Protect from Melee. Always 35 to 49 damage, and always halves your current prayer points, rounded down. | Keep your health high enough that a smash plus a bodyguard hit cannot finish you, and carry a spectral spirit shield if you own one to quarter rather than halve the drain. To remove it outright, tank on Protect from Magic instead. |
| Balfrug Kreeyath | Fire spells from the black demon. | Up to 16 damage on the player he has picked. | He is the bodyguard who becomes completely irrelevant if the tank prays magic, and the first one to kill after K'ril dies in most orders. |
| Zakl'n Gritch and Tstanon Karlak | Snowballs from the lesser demon, claws from the greater demon. | Zakl'n reaches 21, Tstanon only 15, so the ranged demon is the one that matters. | Zakl'n is the one worth praying against while you fight. Tstanon is the one worth freezing, so the pair can be stacked and barraged without you flicking prayers between them. |
| The handover on death | K'ril falls and all three bodyguards pick a target. | Each bodyguard focuses a random player, and the killing blow has nothing to do with it. | Call out who has what, pray against whichever style is hitting you, and prioritise the bodyguards that have all landed on the same person. This randomness is the opposite of the Bandos rule and catches out players who learned that one first. |
| Ashes, not bones | Look at the floor after a clear. | K'ril and his bodyguards drop ashes, so bones to peaches cannot be cast. | Blood Barrage solo, Guthan's in a group, and a genuine acceptance that your food is finite here in a way it is not at Bandos. |
- Mechanic
- Scimitar swipe
- How you see it coming
- The default. Two attacks in three are this one.
- What it does
- Up to 46 damage, and it can inflict poison starting at 16 even through Protect from Melee.
- Your answer
- Protect from Melee and magic defence, or Protect from Magic and heavy slash defence. Poison cover regardless of which you choose, because the prayer does not stop it.
- Mechanic
- Overhead slam
- How you see it coming
- He raises both scimitars before bringing them down; a magical shockwave travels to his target.
- What it does
- Between 10 and 30 damage. One attack in three, single-target, and only usable against a player standing in melee range.
- Your answer
- Protect from Magic if you are tanking that way. If you are kiting or binding him, distance removes it entirely.
- Mechanic
- Prayer smash
- How you see it coming
- He yells. There is no subtlety to the warning and no time to react to it.
- What it does
- Replaces a melee hit one time in nine when his target is praying Protect from Melee. Always 35 to 49 damage, and always halves your current prayer points, rounded down.
- Your answer
- Keep your health high enough that a smash plus a bodyguard hit cannot finish you, and carry a spectral spirit shield if you own one to quarter rather than halve the drain. To remove it outright, tank on Protect from Magic instead.
- Mechanic
- Balfrug Kreeyath
- How you see it coming
- Fire spells from the black demon.
- What it does
- Up to 16 damage on the player he has picked.
- Your answer
- He is the bodyguard who becomes completely irrelevant if the tank prays magic, and the first one to kill after K'ril dies in most orders.
- Mechanic
- Zakl'n Gritch and Tstanon Karlak
- How you see it coming
- Snowballs from the lesser demon, claws from the greater demon.
- What it does
- Zakl'n reaches 21, Tstanon only 15, so the ranged demon is the one that matters.
- Your answer
- Zakl'n is the one worth praying against while you fight. Tstanon is the one worth freezing, so the pair can be stacked and barraged without you flicking prayers between them.
- Mechanic
- The handover on death
- How you see it coming
- K'ril falls and all three bodyguards pick a target.
- What it does
- Each bodyguard focuses a random player, and the killing blow has nothing to do with it.
- Your answer
- Call out who has what, pray against whichever style is hitting you, and prioritise the bodyguards that have all landed on the same person. This randomness is the opposite of the Bandos rule and catches out players who learned that one first.
- Mechanic
- Ashes, not bones
- How you see it coming
- Look at the floor after a clear.
- What it does
- K'ril and his bodyguards drop ashes, so bones to peaches cannot be cast.
- Your answer
- Blood Barrage solo, Guthan's in a group, and a genuine acceptance that your food is finite here in a way it is not at Bandos.
The two-for-one rhythm applies here as it does at Graardor, and the timings are specific: hit him twice for every hit he lands, which means a melee player takes damage every 8 game ticks and a player using an Armadyl crossbow takes damage every 10. Vengeance from the Lunar spellbook fits neatly into that pattern for a tank, reflecting a meaningful chunk of a big hit back at him.
The rare death everybody should know about is not the prayer smash on its own. It is the prayer smash arriving on the same tick, or nearly the same tick, as hits from both Balfrug and Zakl'n. That is why the health floor for a Protect from Melee tank is set by what three things can total rather than by what one of them can.
| Property | Value |
|---|---|
| Combat level | 650 |
| Attack styles | Slash, Magic |
| Attack speed | 6 ticks |
| Attacks on sight | Yes |
| Poisons you | Yes (16) |
| Size | 5 tiles |
| Immune to cannon | No |
| Immune to thralls | No |
- Property
- Combat level
- Value
- 650
- Property
- Attack styles
- Value
- Slash, Magic
- Property
- Attack speed
- Value
- 6 ticks
- Property
- Attacks on sight
- Value
- Yes
- Property
- Poisons you
- Value
- Yes (16)
- Property
- Size
- Value
- 5 tiles
- Property
- Immune to cannon
- Value
- No
- Property
- Immune to thralls
- Value
- No
Where K'ril Tsutsaroth Sits in Progression
K'ril Tsutsaroth is the entry point for the God Wars Dungeon group, so there is nothing easier here to warm up on. Above it sit Commander Zilyana and Kree'arra.
Fight Strategy: Solo Zamorak prayer management
- Decide before you enter which tank you are: Protect from Melee with magic defence, or Protect from Magic with justiciar. Do not change your mind mid-kill.
- Attackers take a corner near the altar. It is the furthest point from his spawn and it gives you the last few seconds before the respawn to top prayer back up.
- The tank hits him first. Attackers wait for that hit to land, and wait longer if the tank is using ranged, because the projectile takes time to arrive.
- Hold the two-for-one rhythm and keep your health above what a prayer smash plus a bodyguard hit can total.
- Deal with poison the moment it applies rather than when it becomes annoying. It ticks through the prayer that is otherwise keeping you alive.
- When K'ril dies, look at who each bodyguard has chosen — it is random — and kill Balfrug first.
- Stack Tstanon on top of Zakl'n, freeze Tstanon if you brought water runes, and Blood Barrage the pair back up to full before the respawn.
The scorching bow solo is worth describing as its own loop because it does not resemble the above. Pray Protect from Missiles for Zakl'n, start each kill in the north-west corner because that is the furthest point from where Tstanon spawns, and open with the bow's special attack to bind K'ril. One special holds the bind for six attacks, so the seventh is when you reapply it, and between reapplications you move anticlockwise around the chamber to kite both K'ril and Tstanon. With reasonable stats and gear, and especially while on a Slayer task, special attack energy keeps up with the cycle indefinitely. Trips in the range of twenty to forty kills are what the method is built for.
Without a Lightbearer, Death Charge covers the special attack energy instead, but it puts you on the Arceuus spellbook, and that costs you Blood Barrage. You then need Guthan's or a much heavier brew load, and the trips get shorter accordingly. That trade-off — spellbook against healing — is the real constraint on soloing K'ril, not his damage.
The 5:0 method with a Tumeken's shadow is the high-ceiling version: much higher damage than any other solo approach, and if executed correctly it avoids his attacks entirely, which in a private instance where supply drops do not despawn means trips that end when you decide they do. It also asks for tick-perfect movement and precise clicking for hours, which is a different kind of difficulty to the one this boss usually presents.
Beginner Plan, Then the Advanced One
Your first trips
- Go as an attacker in a team for your first trips. K'ril only attacks his current target, so an attacker in decent gear takes very little damage and gets to watch the whole fight from a safe distance.
- Learn the corner. Standing near the altar before the spawn is not superstition — it is the furthest point from where he appears and it buys you the seconds you need to finish restoring prayer.
- Never open on him before the tank. At most bosses that is etiquette; here it means becoming the target of a boss whose melee reaches 46 while wearing damage gear.
- Get comfortable with the yell. The first few prayer smashes feel like something has gone wrong. They have not — it is a scheduled cost of the prayer you chose, and the correct response is to top up and continue rather than to panic-switch prayers.
- Bring poison cover even if you are not tanking. It is a single inventory slot and it is the one consumable this fight can force on you regardless of how well you are playing.
Once the kill is boring
- Own the bind timing rather than watching the bar. With a scorching bow the special holds for six attacks and you reapply on the seventh; counting attacks is far more reliable than reacting to K'ril starting to move.
- If you can hold the 5:0 pattern with a Tumeken's shadow, do it in a private instance. The reason is not the boss — it is that dropped supplies stop despawning, which is what converts a very high damage method into an open-ended trip.
- Freeze Tstanon Karlak on top of Zakl'n Gritch as a habit, not a rescue. A frozen melee bodyguard is one fewer prayer to flick while you are healing, and the stack is what makes each Blood Barrage worth casting.
- A blood ancient sceptre or another ancient autocast staff is worth the switch for the healing phase alone, and the eldritch nightmare staff variant of that idea restores prayer on a bodyguard rather than health.
- For a tank running Protect from Melee, a spectral spirit shield changes the arithmetic of the whole trip: quartering the smash drain rather than halving it means the number of restores you carry is a choice rather than a constraint.
Team Roles
| Role | The job | Gets it wrong by |
|---|---|---|
| Tank on Protect from Melee | Takes every attack in the fight in gear built for magic defence, accepts the prayer smash as a running cost, and keeps health high enough to survive a smash landing alongside two bodyguard hits. | Treating the smash as bad luck rather than as a scheduled event, and letting health drift into the range where three things can total a death. |
| Tank on Protect from Magic | Full justiciar with an elysian or dragonfire shield, removing the prayer smash from the fight entirely and neutralising Balfrug at the same time. | Attempting this without justiciar. His melee is slash-based, accurate and harder-hitting, and ordinary melee armour is not enough slash defence to make the trade pay. |
| Melee attacker | Maximum damage in max-DPS gear, praying Protect from Magic against Balfrug. Melee gear already carries good melee and ranged defence, so no compromise is needed. | Attacking before the tank's hit lands, or forgetting that if K'ril turns on them their gear is genuinely poor at tanking him. |
| Ranged attacker | Damage from distance, praying Protect from Missiles against Zakl'n, with Armadyl armour if magic defence is a concern. | Switching to the wrong prayer when K'ril shifts target — a ranged attacker who inherits him needs Protect from Melee, not more missile cover. |
| Whoever carries the shares | Boost Potion Share and Stat Restore Pot Share from the Lunar spellbook, which is how a duo or trio extends a trip in a room where bones to peaches does not work. | Bringing the runes and never casting them, which is common and quietly costs the team a third of its trip length. |
- Role
- Tank on Protect from Melee
- The job
- Takes every attack in the fight in gear built for magic defence, accepts the prayer smash as a running cost, and keeps health high enough to survive a smash landing alongside two bodyguard hits.
- Gets it wrong by
- Treating the smash as bad luck rather than as a scheduled event, and letting health drift into the range where three things can total a death.
- Role
- Tank on Protect from Magic
- The job
- Full justiciar with an elysian or dragonfire shield, removing the prayer smash from the fight entirely and neutralising Balfrug at the same time.
- Gets it wrong by
- Attempting this without justiciar. His melee is slash-based, accurate and harder-hitting, and ordinary melee armour is not enough slash defence to make the trade pay.
- Role
- Melee attacker
- The job
- Maximum damage in max-DPS gear, praying Protect from Magic against Balfrug. Melee gear already carries good melee and ranged defence, so no compromise is needed.
- Gets it wrong by
- Attacking before the tank's hit lands, or forgetting that if K'ril turns on them their gear is genuinely poor at tanking him.
- Role
- Ranged attacker
- The job
- Damage from distance, praying Protect from Missiles against Zakl'n, with Armadyl armour if magic defence is a concern.
- Gets it wrong by
- Switching to the wrong prayer when K'ril shifts target — a ranged attacker who inherits him needs Protect from Melee, not more missile cover.
- Role
- Whoever carries the shares
- The job
- Boost Potion Share and Stat Restore Pot Share from the Lunar spellbook, which is how a duo or trio extends a trip in a room where bones to peaches does not work.
- Gets it wrong by
- Bringing the runes and never casting them, which is common and quietly costs the team a third of its trip length.
It helps, though it is not required, for at least one player in a team to be on a Slayer task. And it is worth agreeing the post-kill split before the first spawn, because the bodyguards choose their targets at random — a team that improvises this every time spends longer healing than fighting.
Drops and What K'ril Tsutsaroth Is Worth
The zamorak hilt is the headline and the staff of the dead is the item that actually changes your account. It is a weapon with a genuine second career: magic defence, damage reduction while wielded, and a place in setups that have nothing to do with this dungeon. The Zamorakian spear rounds out the list and is the piece that has been a stepping stone for melee accounts for two decades.
What you will not find on the floor here is bones, and that is a drop-table fact with real consequences. Ashes cannot be turned into peaches, so unlike at Bandos there is no free healing built into the clear. Every trip at K'ril is exactly as long as the supplies you carried plus whatever Blood Barrage or Guthan's gives back.
Prices are deliberately absent from this page. The staff of the dead in particular has moved a long way as new magic options arrived, so check the Grand Exchange rather than any figure written in an article.
Drops worth the trip: Zamorakian spear, staff of the dead, zamorak hilt. Whether that is worth your time depends on how many kills an hour you personally get, which is a function of Solo Zamorak prayer management rather than of your gear list.
Combat Achievements
The most useful thing Combat Achievements do here is shorten the part of the trip you dislike. Hard, elite, master and grandmaster tiers reduce the Zamorakian killcount from 40 to 35, 30, 25 and 15 respectively, and given that Zamorakian killcount takes longer than the Bandos equivalent, that reduction compounds across every trip you ever take.
K'ril Tsutsaroth has Combat Achievement tasks. At a 49 max hit, a capped-gear restriction is the awkward kind: you lose damage without losing anything it throws at you.
Task lists move with updates — read the current list in game.
Ironman Notes
Slayer masters who assign K'ril Tsutsaroth: Chaeldar, Konar, Nieve, Duradel. Each kill is 350.5 Slayer XP.
Without a Grand Exchange, zamorakian spear, staff of the dead, zamorak hilt has to be earned rather than bought, and this is the fastest table it sits on.
K'ril is a harder Ironman project than Graardor for one structural reason: there is no free healing in the room. No bones means no peaches, so the supply cost of a trip is entirely on you, and the bodyguards do not hand you food the way the Bandos sergeants do.
That makes Blood Barrage the load-bearing unlock rather than a nice extra. If you are not on the Ancient spellbook, plan on Guthan's and a heavier brew load, and expect shorter trips as the honest price of that. Sanfew serums are also worth farming rather than buying, since they solve poison and prayer in one slot and this fight demands both.
On the equipment side, an Arclight is the realistic Ironman answer at the front of the weapon list, and the demonbane bonus means it competes well above its slot. Do not plan a magic approach unless a Tumeken's shadow is genuinely on your account; the strategy page rules out weaker staves outright.
Common Mistakes and Death Causes
| What happened | Why it happened | The fix |
|---|---|---|
| A prayer smash landing alongside two bodyguard hits | Health was in the range where one big fixed hit plus incidental damage adds to more than you had. The smash is not random damage — it is always 35 to 49. | Set your health floor by what three sources can total rather than by what the boss can hit for, and top up on the tick after a smash rather than after the next one. |
| Running out of prayer without warning | The smash halves your current prayer points every time it lands, so a full pool becomes a half, then a quarter, faster than a prayer drain feels like it should. | Restore on a schedule instead of at a threshold, and carry a spectral spirit shield if you own one to cut the drain to a quarter. |
| Poison ticking through Protect from Melee | His melee swipe applies poison regardless of your prayer, and it starts at 16 damage. | Bring an antidote++, an extended anti-venom+ or a serpentine helm, and cure it immediately rather than out-healing it. |
| An attacker inheriting the boss | They opened on K'ril before the tank's hit landed, or K'ril shifted target for a moment. Attacker gear is genuinely poor at absorbing him. | Wait for the tank, and know your emergency prayer in advance — Protect from Magic if you are melee, Protect from Melee if you are ranged. |
| Getting picked apart after the killing blow | The bodyguards choose targets at random when K'ril dies, so a player who learned Bandos expects to be safe if they did not land the last hit. | Reassess prayers on his death animation every time. Kill Balfrug first, and focus whichever bodyguards have all chosen the same person. |
| Tanking on Protect from Magic without justiciar | You removed the prayer smash and signed up for his slash melee instead, which is more accurate and hits harder, without the slash defence that makes the trade work. | Use this setup only with the full justiciar set. Otherwise stay on Protect from Melee and manage the smash. |
- What happened
- A prayer smash landing alongside two bodyguard hits
- Why it happened
- Health was in the range where one big fixed hit plus incidental damage adds to more than you had. The smash is not random damage — it is always 35 to 49.
- The fix
- Set your health floor by what three sources can total rather than by what the boss can hit for, and top up on the tick after a smash rather than after the next one.
- What happened
- Running out of prayer without warning
- Why it happened
- The smash halves your current prayer points every time it lands, so a full pool becomes a half, then a quarter, faster than a prayer drain feels like it should.
- The fix
- Restore on a schedule instead of at a threshold, and carry a spectral spirit shield if you own one to cut the drain to a quarter.
- What happened
- Poison ticking through Protect from Melee
- Why it happened
- His melee swipe applies poison regardless of your prayer, and it starts at 16 damage.
- The fix
- Bring an antidote++, an extended anti-venom+ or a serpentine helm, and cure it immediately rather than out-healing it.
- What happened
- An attacker inheriting the boss
- Why it happened
- They opened on K'ril before the tank's hit landed, or K'ril shifted target for a moment. Attacker gear is genuinely poor at absorbing him.
- The fix
- Wait for the tank, and know your emergency prayer in advance — Protect from Magic if you are melee, Protect from Melee if you are ranged.
- What happened
- Getting picked apart after the killing blow
- Why it happened
- The bodyguards choose targets at random when K'ril dies, so a player who learned Bandos expects to be safe if they did not land the last hit.
- The fix
- Reassess prayers on his death animation every time. Kill Balfrug first, and focus whichever bodyguards have all chosen the same person.
- What happened
- Tanking on Protect from Magic without justiciar
- Why it happened
- You removed the prayer smash and signed up for his slash melee instead, which is more accurate and hits harder, without the slash defence that makes the trade work.
- The fix
- Use this setup only with the full justiciar set. Otherwise stay on Protect from Melee and manage the smash.
The correct response to a trip going wrong at K'ril is usually to leave rather than to stabilise, and the reason is the supply structure: you cannot heal for free in this room, so a trip you rescue at low supplies is a trip that ends two kills later anyway. A Construction cape or a house tablet is one click and costs you nothing but the walk back.
If you are staying, fix things in this order: cure the poison, restore prayer, then heal. Healing first while poisoned and low on prayer is how a recoverable kill becomes a death two attacks later.
FAQ
Should I pray melee or magic against him?
Protect from Melee is the efficient default and it accepts the prayer smash. Protect from Magic removes the smash and turns Balfrug harmless, but it hands you his more accurate, harder-hitting melee, and it is not recommended without a full justiciar set. Choose based on whether you own justiciar, not on which attack scares you more.
Why did I get poisoned through my protection prayer?
Because that is how his melee works. The swipe can apply poison even through Protect from Melee, starting at 16 damage. There is no prayer answer to it — only an antidote++, an extended anti-venom+ or a serpentine helm.
Can I use bones to peaches like I do at Bandos?
No. K'ril and all three bodyguards drop ashes rather than bones, so the tablets do nothing here. Solo, Blood Barrage off the stacked bodyguards is the replacement; in a team, Guthan's is.
Is he worth soloing?
Generally only on a Slayer task, unless you are running one of the specialist methods. A scorching bow with a Lightbearer avoids his damage entirely and supports long trips, and a Tumeken's shadow on the 5:0 pattern does the same with higher damage and far more concentration required.
What does a spectral spirit shield actually save me?
It reduces the prayer smash drain from half your current prayer to a quarter. Since the smash is what empties your prayer pool, that translates directly into fewer restores per kill and a longer trip.
Why is his chamber so dark?
Purely for atmosphere. The Zamorakian encampment gets darker the deeper you go and is nearly pitch black at his door, with no gameplay effect whatsoever. A Saradomin's light removes the effect if you find it distracting.
Related Guides
Bottom Line
K'ril is a resource-management fight dressed as a damage fight. His melee number is what people quote, but the thing that ends trips is prayer disappearing in halves and poison that ignores the prayer you were relying on, in a room where no bones drop and therefore nothing heals you for free. Pick one tanking philosophy, carry poison cover whether or not you expect to need it, and treat the post-kill barrage stack as part of the kill rather than as cleanup.
If the forty Zamorakian followers are the part of this you have no interest in repeating, that is exactly the kind of errand worth handing over — our PvM team can take the killcount and the kills while you keep the loot.
If K'ril Tsutsaroth is blocking a Combat Achievement or an unlock you actually want, our PvM service is done by hand — no automation. Otherwise the bosses list has the full index.
K'ril Tsutsaroth — GWD general (Zamorak), difficulty 3/5. Combat values here — hitpoints, max hits, attack styles and speed, Defence and Magic levels, immunities and Slayer requirements — were read from the Old School RuneScape Wiki infobox for K'ril Tsutsaroth on 2026-08-03. Kill rates, GP per hour and item prices are deliberately absent because they move with balance patches and the Grand Exchange. Mechanics, gear tiers and phase behaviour on this page were checked against K'ril Tsutsaroth/Strategies on 4 August 2026.
Need a trusted team? Bils Services
Enjoyed the guide?
Drop a like — it helps other Adventurers find the good stuff.
Community
Comments
Silence in the hall…
Be the first Adventurer to leave a mark.
Join the thread
Add a comment
Tips, drops, or “this carried my account” — keep it useful.
bilsservices · bils services · bilsservices.com

