


OSRS Commander Zilyana Guide: Kiting, Gear & Saradomin Drops
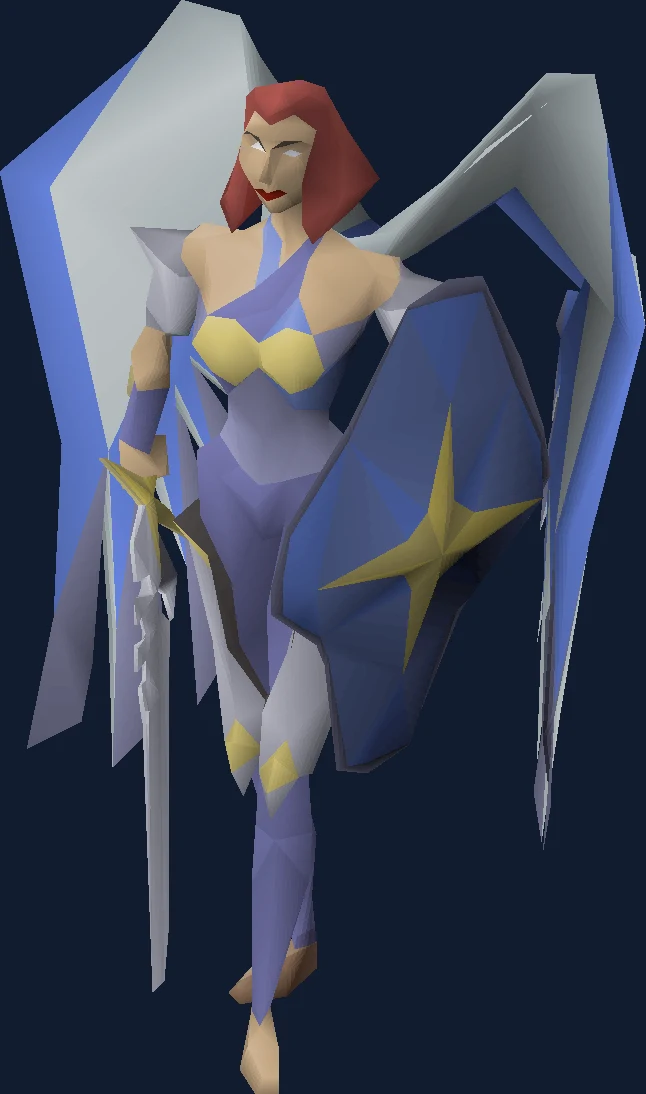
Zilyana guide focused on kiting, magic setups, and Saradomin unique chase.
Why People Fight Commander Zilyana
Commander Zilyana hits for less than any other God Wars general and kills more careless players than most of them. Her melee reaches 27 and her magic sits between 10 and 20, which sounds almost gentle next to a 60-damage punch or a 46-damage scimitar. The catch is her attack speed of 2 — one attack every 1.2 seconds — paired with accuracy the wiki describes as tremendous. Standing in melee range of her is not a risk you manage. It is a countdown.
That single statistic reorganises everything else. Every other general in this dungeon is a prayer discipline test where you stand still and hold a button. Zilyana is a footwork test in a deliberately large chamber, and the reason her strategy page reads like a dance notation, complete with numbered tiles and colour-coded steps, is that the accepted way to fight her is to never let her reach you at all. Neither she nor Starlight can touch a player who keeps moving.
The rewards are the reason players learn the choreography. The saradomin sword and the hilt are hers, and so is the Armadyl crossbow — which is one of the odder facts about this dungeon, since the crossbow named after one god drops from the general of another. Her bodyguards are also the weakest set of the four, so the loot phase after a kill is genuinely relaxed in a way it is not at Bandos or the Zamorakian encampment.
She has the strictest door of the four generals, and it is not a combat requirement. Saradomin's Encampment needs 70 Agility, it cannot be boosted, and getting into it the first time costs you two ropes on top of the one the dungeon already took. If your Agility is in the sixties, this boss is not on the table yet regardless of your combat stats.
Its own attacks are melee (crush) and magic, so Protect from Melee and Magic both have a job.
In our index it sits in the God Wars Dungeon group at difficulty 4 of 5, where kill times come down to kiting paths.
| Field | Detail |
|---|---|
| Classification | GWD general (Saradomin) (Boss) |
| Group | God Wars Dungeon |
| Difficulty | 4 / 5 |
| Solo or team | Solo or team |
| Access requirement | 70 Agility + 40 kill count |
| Notable reward | Armadyl crossbow, saradomin sword and hilt |
| Signature mechanic | Kiting paths |
| Hitpoints | 255 |
| Max hits | 27 (melee), 20 (magic) |
| Released | 17 October 2013 |
- Field
- Classification
- Detail
- GWD general (Saradomin) (Boss)
- Field
- Group
- Detail
- God Wars Dungeon
- Field
- Difficulty
- Detail
- 4 / 5
- Field
- Solo or team
- Detail
- Solo or team
- Field
- Access requirement
- Detail
- 70 Agility + 40 kill count
- Field
- Notable reward
- Detail
- Armadyl crossbow, saradomin sword and hilt
- Field
- Signature mechanic
- Detail
- Kiting paths
- Field
- Hitpoints
- Detail
- 255
- Field
- Max hits
- Detail
- 27 (melee), 20 (magic)
- Field
- Released
- Detail
- 17 October 2013
Is Commander Zilyana the Right Fight for You Yet?
Zilyana is the general where gear matters less than habit. A player with a rune crossbow who kites cleanly has a better time than a player with a twisted bow who stops to eat in the wrong place, because the entire damage budget of the fight comes from the one bodyguard you are not praying against. What she asks for is 70 Agility, a run energy plan, and the willingness to keep clicking.
You are ready for this fight if:
- You have 70 Agility. It gates Saradomin's Encampment, it cannot be boosted, and there is no alternative route in.
- You have 37 Prayer at minimum for Protect from Magic, which is the prayer the standard ranged approach is built on, and ideally 74 for Rigour.
- You have three ropes on your first visit: one for the God Wars Dungeon and two more for navigating her encampment.
- You can hold a hit-and-run pattern for a whole kill without drifting to a stop. Every time you stand still, she and Starlight get to reach you.
- You own a ranged setup you are happy with. Magic is impractical here unless it is specifically a Tumeken's shadow.
Come back later if any of these are true:
- You expect to melee her because your melee gear is your best gear. Melee is a team option that depends on someone else holding her attention, not a solo plan.
- You have no way to manage run energy. Stamina potions, the no-stamina tile pattern or an Explorer's ring are all valid, but going in with none of them means the kite fails halfway through the kill.
- Your magic gear is good rather than maxed. A single downgrade from an ancestral robe top to an Ahrim's robetop dramatically changes kill times with a Tumeken's shadow, and missing best in slot in two or more places means ranging is simply better.
Access Requirements
Commander Zilyana is gated behind 70 Agility + 40 kill count.
70 Agility + 40 kill count also tends to sit alongside the other God Wars Dungeon gates, so it is usually cheaper to clear them together than to come back for each one. The boss requirements checklist lists them by group.
Location and How to Get There
Commander Zilyana is found in the Saradomin Encampment inside the God Wars Dungeon.
God Wars Dungeon, then the Saradomin section — which requires 70 Agility to enter alongside the usual kill count. That Agility requirement, not the fight, is what blocks most accounts.
The approach is the usual Trollheim one — Death Plateau and Troll Stronghold to the point where you have beaten Dad, or Ghommal's hilt in place of both — but the encampment adds its own toll. Budget three ropes for a first visit: one to get into the God Wars Dungeon, two more to navigate Saradomin's Encampment.
The 70 Agility requirement is the hard one and it deserves emphasis because players assume every God Wars door is a combat door. It is not boostable, so no summer pie or agility potion will open it.
Killcount here has a reputation for being quick that is only half-earned. Saradominist spiritual warriors and mages are aggressive towards Zamorakian followers, so they come to you rather than the other way round — but you need 83 Slayer to attack them. Without that, the remaining Saradominist followers are passive and will only fight back in self-defence, which makes the count considerably slower than the reputation suggests. This is why an ecumenical key is the common answer rather than an optimisation.
Recommended Stats and Gear at Three Budgets
| Skill | Recommended | What it actually controls |
|---|---|---|
| Agility | 70, required and unboostable | Entry to Saradomin's Encampment, and how much run energy a kiting lap costs you once you are inside. |
| Combat level | 100+ | A general readiness figure rather than a gate. Below it, the bodyguard chip damage outpaces what you can heal through. |
| Ranged | 80+ | Your damage. Ranged is the practical style here for everyone who does not own a Tumeken's shadow. |
| Defence | 80+, 90+ recommended | How often Bree lands, which is the only damage a clean kite takes at all. |
| Hitpoints | 70+ | Headroom for the moments when the pattern breaks and Zilyana gets a couple of attacks in at 1.2 seconds each. |
| Prayer | 44+, 74 for Rigour | 37 is the strict minimum for Protect from Magic. Rigour is where the ranged setups in the gear table assume you are. |
- Skill
- Agility
- Recommended
- 70, required and unboostable
- What it actually controls
- Entry to Saradomin's Encampment, and how much run energy a kiting lap costs you once you are inside.
- Skill
- Combat level
- Recommended
- 100+
- What it actually controls
- A general readiness figure rather than a gate. Below it, the bodyguard chip damage outpaces what you can heal through.
- Skill
- Ranged
- Recommended
- 80+
- What it actually controls
- Your damage. Ranged is the practical style here for everyone who does not own a Tumeken's shadow.
- Skill
- Defence
- Recommended
- 80+, 90+ recommended
- What it actually controls
- How often Bree lands, which is the only damage a clean kite takes at all.
- Skill
- Hitpoints
- Recommended
- 70+
- What it actually controls
- Headroom for the moments when the pattern breaks and Zilyana gets a couple of attacks in at 1.2 seconds each.
- Skill
- Prayer
- Recommended
- 44+, 74 for Rigour
- What it actually controls
- 37 is the strict minimum for Protect from Magic. Rigour is where the ranged setups in the gear table assume you are.
She has no weakness to exploit — resistance is equal across all attack styles — so no stat on this list is buying you a damage multiplier. They are buying you survivability while you execute a movement pattern, which is a different kind of readiness to the one the other generals ask for.
| Slot | Crossbow tier | Crystal and bow of Faerdhinen | Twisted bow, or a shadow |
|---|---|---|---|
| Weapon | Armadyl crossbow, then dragon hunter, dragon or rune crossbow, with enchanted diamond bolts | Bow of Faerdhinen, used only with the full crystal set | Twisted bow with seeking dragon arrows; Tumeken's shadow if you are maging |
| Body and legs | Saradomin or Zamorak d'hide, Karil's, or black d'hide at the bottom | Crystal body and legs | Masori (f) body and chaps; ancestral robes for the shadow |
| Head | Verac's helm, Saradomin coif or a helm of neitiznot | Crystal helm, or a slayer helmet (i) if you are on task | Masori mask (f), or an ancestral hat with the shadow |
| Shield | Odium ward or a crystal shield | Crystal shield, or a twisted buckler if you prefer the offensive option | Twisted buckler or dragonfire ward; Elidinis' ward (f) for magic |
| Neck and cape | Amulet of fury with Ava's assembler | Necklace of anguish with Ava's assembler | Necklace of rupture with Dizana's quiver; occult necklace and imbued Saradomin cape for magic |
| Hands, feet, ring | Saradomin or Zamorak bracers, matching d'hide boots, ring of the gods (i) or an Explorer's ring | Barrows gloves, pegasian boots, ring of suffering (ri) | Zaryte vambraces, pegasian boots, ring of suffering or a Lightbearer if you lean on specials |
- Slot
- Weapon
- Crossbow tier
- Armadyl crossbow, then dragon hunter, dragon or rune crossbow, with enchanted diamond bolts
- Crystal and bow of Faerdhinen
- Bow of Faerdhinen, used only with the full crystal set
- Twisted bow, or a shadow
- Twisted bow with seeking dragon arrows; Tumeken's shadow if you are maging
- Slot
- Body and legs
- Crossbow tier
- Saradomin or Zamorak d'hide, Karil's, or black d'hide at the bottom
- Crystal and bow of Faerdhinen
- Crystal body and legs
- Twisted bow, or a shadow
- Masori (f) body and chaps; ancestral robes for the shadow
- Slot
- Head
- Crossbow tier
- Verac's helm, Saradomin coif or a helm of neitiznot
- Crystal and bow of Faerdhinen
- Crystal helm, or a slayer helmet (i) if you are on task
- Twisted bow, or a shadow
- Masori mask (f), or an ancestral hat with the shadow
- Slot
- Shield
- Crossbow tier
- Odium ward or a crystal shield
- Crystal and bow of Faerdhinen
- Crystal shield, or a twisted buckler if you prefer the offensive option
- Twisted bow, or a shadow
- Twisted buckler or dragonfire ward; Elidinis' ward (f) for magic
- Slot
- Neck and cape
- Crossbow tier
- Amulet of fury with Ava's assembler
- Crystal and bow of Faerdhinen
- Necklace of anguish with Ava's assembler
- Twisted bow, or a shadow
- Necklace of rupture with Dizana's quiver; occult necklace and imbued Saradomin cape for magic
- Slot
- Hands, feet, ring
- Crossbow tier
- Saradomin or Zamorak bracers, matching d'hide boots, ring of the gods (i) or an Explorer's ring
- Crystal and bow of Faerdhinen
- Barrows gloves, pegasian boots, ring of suffering (ri)
- Twisted bow, or a shadow
- Zaryte vambraces, pegasian boots, ring of suffering or a Lightbearer if you lean on specials
One switch is worth carrying at every tier: a toxic blowpipe, and a serpentine helm if you own one. Envenoming the bodyguards at the start of a kill guarantees they take poison damage, so they whittle down while your attention is entirely on Zilyana. It matters most if you are not using a twisted bow, because a lower-damage setup takes longer over her and therefore spends longer next to bodyguards that are still at full health.
The Hunters' sunlight crossbow is listed as theoretically stronger than nearly every other crossbow and simultaneously as a bad idea for many players, and the reason is worth internalising: its faster attack speed means more clicks inside the same kiting pattern. If you are not confident with the footwork, a slower weapon is genuinely the better weapon here.
Magic is the outlier rather than an alternative. With equal resistance across styles and no defensive support from robes, magic only makes sense as a Tumeken's shadow build — and then it is exceptional, because Blood Barrage off the bodyguards plus an Eldritch nightmare staff special, with a Lightbearer shortening the cooldown, can keep you in her lair until you run out of runes, weapon charges or run energy. The barrier is that a single downgrade to an Ahrim's robetop meaningfully changes both kill speed and trip length, so two or more missing best-in-slot pieces means ranging is the stronger choice.
| Check | Value |
|---|---|
| Prayers for its own attacks | 2 — Protect from Melee and Magic |
| Its Defence level | 300 |
| Its Magic level | 300 |
| Its lowest defence bonus, per its infobox | heavy ammunition |
- Check
- Prayers for its own attacks
- Value
- 2 — Protect from Melee and Magic
- Check
- Its Defence level
- Value
- 300
- Check
- Its Magic level
- Value
- 300
- Check
- Its lowest defence bonus, per its infobox
- Value
- heavy ammunition
- 300 Magic level rewards magic-defence scaling weapons.
Inventory and Supplies
| What to pack | The reason |
|---|---|
| Saradomin brews and super restores in roughly a three-to-one ratio | Brews are the bulk because the damage is a steady trickle from one bodyguard rather than occasional spikes, and the restores exist to put back the combat levels the brews cost you. |
| One to four stamina potions | Optional rather than mandatory. Higher levelled players and anyone running an energy-neutral kiting pattern can cut these right back, and that reclaimed inventory space is the real prize of learning the tile method. |
| Divine bastion or divine ranging potions | Damage that lasts, which shortens the number of laps you have to hold the pattern for. |
| A toxic blowpipe, and a serpentine helm if you have one | Killing the bodyguards afterwards, and envenoming them at the start so they are already dying while you work on Zilyana. |
| Explorer's ring 4 | Run energy restoration and High Level Alchemy on rune drops regardless of your spellbook — an unusually good fit for a fight that spends run energy as its main hidden cost. |
| A divine rune pouch | Law, nature, dust and steam runes cover Trollheim teleport, house teleport, High Level Alchemy and bones to peaches. Blood Barrage and Ice Barrage runes if you are on Ancients instead. |
| Ghommal's hilt, or two Trollheim teleport tablets | Revert one of the tablets to a house teleport once you have arrived, which gives you a way in and a way out for two slots. |
| An ecumenical key | Optional, and the reason most players never bother with Saradominist killcount at all. |
- What to pack
- Saradomin brews and super restores in roughly a three-to-one ratio
- The reason
- Brews are the bulk because the damage is a steady trickle from one bodyguard rather than occasional spikes, and the restores exist to put back the combat levels the brews cost you.
- What to pack
- One to four stamina potions
- The reason
- Optional rather than mandatory. Higher levelled players and anyone running an energy-neutral kiting pattern can cut these right back, and that reclaimed inventory space is the real prize of learning the tile method.
- What to pack
- Divine bastion or divine ranging potions
- The reason
- Damage that lasts, which shortens the number of laps you have to hold the pattern for.
- What to pack
- A toxic blowpipe, and a serpentine helm if you have one
- The reason
- Killing the bodyguards afterwards, and envenoming them at the start so they are already dying while you work on Zilyana.
- What to pack
- Explorer's ring 4
- The reason
- Run energy restoration and High Level Alchemy on rune drops regardless of your spellbook — an unusually good fit for a fight that spends run energy as its main hidden cost.
- What to pack
- A divine rune pouch
- The reason
- Law, nature, dust and steam runes cover Trollheim teleport, house teleport, High Level Alchemy and bones to peaches. Blood Barrage and Ice Barrage runes if you are on Ancients instead.
- What to pack
- Ghommal's hilt, or two Trollheim teleport tablets
- The reason
- Revert one of the tablets to a house teleport once you have arrived, which gives you a way in and a way out for two slots.
- What to pack
- An ecumenical key
- The reason
- Optional, and the reason most players never bother with Saradominist killcount at all.
There is an advanced supply variant worth knowing about. Armadyl brews in place of Saradomin brews, paired with Menaphite remedies, keep your Divine ranging boost alive and save a sipping action: a remedy restores the Defence you lose every 15 seconds, so the rhythm becomes remedy, divine potion, two Armadyl brew sips per cycle. The caveat is real — Bree has a low maximum hit but lands very consistently against unboosted Defence, so you need genuinely high ranged defence to run it, and super restores rather than prayer potions, because drinking Armadyl brews back to back can drop your Defence faster than the remedy restores it.
The bodyguards can drop summer pies, and each bite restores 10% run energy for 20% in total. In a fight whose real consumable is movement, that is a more useful drop than it sounds.
Prayer and Spellbook
The prayer choice follows your weapon rather than her attacks. If you are ranging her, pray Protect from Magic; if you are maging her, pray Protect from Missiles. Get that right and the only damage you take in a clean kill comes from the one bodyguard you left uncovered — Bree if you are ranging, Growler if you are maging.
That is a genuinely different arrangement to the rest of the dungeon, where the prayer covers the boss and the minions are incidental. Here the prayer covers a bodyguard, because movement is what covers the boss.
Rigour at 74 Prayer is where the ranged gear tables assume you are, and it is worth the drain: faster kills mean fewer laps, and fewer laps mean less run energy and fewer chances to fall out of the pattern.
Keep your prayer topped up before the respawn rather than during the kill. Sipping mid-lap is one of the more common ways to lose the rhythm, and losing the rhythm is what lets a boss who attacks every 1.2 seconds reach you.
Mechanics That Decide the Fight
| Mechanic | How you see it coming | What it does | Your answer |
|---|---|---|---|
| Attack speed 2 | Nothing. This is not an attack, it is the property that makes all her attacks dangerous. | She attacks once every 1.2 seconds, with very high accuracy, which means a moment of standing still is several landed hits rather than one. | Keep moving. This is the entire reason kiting is the accepted method rather than one option among several. |
| Melee slash | She is adjacent to you. | Up to 27 damage per hit, at that attack speed, which is why the number looks harmless and is not. | Distance. She can only attack when in melee distance of a player, exactly like Graardor and K'ril, so a kite removes this attack rather than mitigating it. |
| Magic attack | A ranged attack from Zilyana while you are close enough for her to act. | Between 10 and 20 damage. | Protect from Magic if you are ranging her. If you are maging, this is the one attack of hers you accept, and you pray missiles instead for Bree. |
| Bree, Growler and Starlight | Three bodyguards, ranged, magic and melee, maximum hits of 16, 16 and 15. | Considerably less than the other generals' minions, but consistently, and Bree in particular lands reliably against unboosted Defence. | Pray against the one your style leaves exposed, envenom them early with a blowpipe if you can, and accept that Starlight will never reach a moving player. |
| Aggression transfer | In a team, she stops being able to reach the player she was chasing. | She switches her aggression to a nearby attacker instead of standing idle. | In a ranging team this is a feature — it is how groups pass her around and cut their stamina potion use. For a melee player in that team it is the thing to watch for, because inheriting her is not a slow process. |
| Bodyguard respawns | A bodyguard dies while Zilyana is still alive. | They are likely to respawn, which means the damage you dealt to them was wasted and there is a fresh one on the way. | Limit the damage you put into them before Zilyana is down. This is mostly a team consideration, and it is the opposite instinct to the one Bandos teaches. |
- Mechanic
- Attack speed 2
- How you see it coming
- Nothing. This is not an attack, it is the property that makes all her attacks dangerous.
- What it does
- She attacks once every 1.2 seconds, with very high accuracy, which means a moment of standing still is several landed hits rather than one.
- Your answer
- Keep moving. This is the entire reason kiting is the accepted method rather than one option among several.
- Mechanic
- Melee slash
- How you see it coming
- She is adjacent to you.
- What it does
- Up to 27 damage per hit, at that attack speed, which is why the number looks harmless and is not.
- Your answer
- Distance. She can only attack when in melee distance of a player, exactly like Graardor and K'ril, so a kite removes this attack rather than mitigating it.
- Mechanic
- Magic attack
- How you see it coming
- A ranged attack from Zilyana while you are close enough for her to act.
- What it does
- Between 10 and 20 damage.
- Your answer
- Protect from Magic if you are ranging her. If you are maging, this is the one attack of hers you accept, and you pray missiles instead for Bree.
- Mechanic
- Bree, Growler and Starlight
- How you see it coming
- Three bodyguards, ranged, magic and melee, maximum hits of 16, 16 and 15.
- What it does
- Considerably less than the other generals' minions, but consistently, and Bree in particular lands reliably against unboosted Defence.
- Your answer
- Pray against the one your style leaves exposed, envenom them early with a blowpipe if you can, and accept that Starlight will never reach a moving player.
- Mechanic
- Aggression transfer
- How you see it coming
- In a team, she stops being able to reach the player she was chasing.
- What it does
- She switches her aggression to a nearby attacker instead of standing idle.
- Your answer
- In a ranging team this is a feature — it is how groups pass her around and cut their stamina potion use. For a melee player in that team it is the thing to watch for, because inheriting her is not a slow process.
- Mechanic
- Bodyguard respawns
- How you see it coming
- A bodyguard dies while Zilyana is still alive.
- What it does
- They are likely to respawn, which means the damage you dealt to them was wasted and there is a fresh one on the way.
- Your answer
- Limit the damage you put into them before Zilyana is down. This is mostly a team consideration, and it is the opposite instinct to the one Bandos teaches.
Her chamber is large, and that is a mechanic rather than scenery. The room is what makes kiting viable at all, and the standard method is simply running laps of it. What separates a competent player from a comfortable one is not moving faster — it is spending less energy doing the same thing.
She has no weakness and no phase. Nothing about her behaviour changes as her health falls, which means a kill that has gone well for thirty seconds will keep going well as long as your footwork holds.
| Property | Value |
|---|---|
| Combat level | 596 |
| Attack styles | Crush, Magic |
| Attack speed | 2 ticks |
| Attacks on sight | Yes |
| Poisons you | No |
| Size | 2 tiles |
| Immune to cannon | No |
| Immune to thralls | No |
- Property
- Combat level
- Value
- 596
- Property
- Attack styles
- Value
- Crush, Magic
- Property
- Attack speed
- Value
- 2 ticks
- Property
- Attacks on sight
- Value
- Yes
- Property
- Poisons you
- Value
- No
- Property
- Size
- Value
- 2 tiles
- Property
- Immune to cannon
- Value
- No
- Property
- Immune to thralls
- Value
- No
Where Commander Zilyana Sits in Progression
Within the God Wars Dungeon group, the fights below Commander Zilyana are General Graardor and K'ril Tsutsaroth. Above it sit Nex.
Fight Strategy: Kiting paths
- Enter with Protect from Magic on if you are ranging, and start moving before she reaches you.
- Envenom the bodyguards early with a blowpipe if you brought one, then leave them alone until she is dead.
- Attack and step, attack and step. The hit-and-run pattern is the fight; every attack you take is a stationary tick you did not need to spend.
- Heal between attacks in the pattern rather than whenever your health bar looks low. A heal taken at the wrong point in a lap costs you the lap.
- Watch run energy as carefully as health. Running out is what converts a clean kill into a melee exchange with a boss who attacks every 1.2 seconds.
- When she dies, deal with the bodyguards at your leisure — they are the weakest set in the dungeon — and restore prayer in the last seconds before she respawns.
The specific pattern worth learning is the no-stamina bow of Faerdhinen route, because it solves the fight's real constraint rather than its obvious one. Following the tile markers, you attack on the red tiles and walk the yellow ones, which lets your character regain energy inside the pattern while never being reachable. Done properly it gets you up to twelve attacks on Zilyana without her getting one back, and at around 80 Agility a full lap costs roughly 10 to 12 run energy.
The lap itself is short to describe and fiddly to execute. Start on the first blue tile and attack twice. Run to tile two and attack once. Click the yellow tile so your character walks it, then run to tile three and attack. Click the next yellow, run to tile four, attack again, and continue that way. On the twelfth tile you attack and run back to tile two to restart. The one instruction people skip is the last one: turn run off once Zilyana is dead, because there is no reason to be burning energy while you clean up bodyguards.
The first kill of a trip uses a different opening. Start on the first green tile, attack once, run to the second green tile, then run to red tile four and rejoin the normal cycle from there. It exists because you enter the room from a fixed place and she has not started chasing you yet.
Positioning and Movement
Think of the chamber as a loop you are always somewhere on, rather than as a room you are standing in. The moment you think of it as a room, you stop, and stopping is the only mistake this boss needs.
The distinction between walking and running is a real tactical choice here, not a detail. Walking a tile keeps you out of her reach while your energy recovers; running the same tile does the same job and costs you the resource that keeps the method alive. The tile patterns exist to formalise exactly that trade.
Corners are where the pattern breaks. A lap that clips a corner too tightly leaves you standing still for a tick while the client works out where you meant to go, and at an attack every 1.2 seconds a tick of hesitation is a landed hit. If you are learning, take the wider line.
In a team, position relative to your teammates rather than relative to her. Because she transfers aggression to a nearby attacker when she cannot reach her current target, a group that spaces itself sensibly passes her around and barely spends stamina at all, while a group that clumps hands her to whoever is least ready.
Beginner Plan, Then the Advanced One
Your first trips
- Learn the plain running-laps kite before you touch a tile marker. The advanced patterns are energy optimisations of a thing you should already be able to do badly.
- Bring stamina potions on your early trips even though experienced players do not. Running out of energy while learning is the single most likely cause of your first death here.
- Do not fight for the bodyguards. Bree is the only meaningful damage source in a clean kill, and killing her early just means meeting her again — bodyguards killed before Zilyana are likely to respawn.
- Use an ecumenical key rather than grinding the killcount for your first few trips. You want to spend your attention on footwork, not on discovering that Saradominist followers are passive without 83 Slayer.
- Count your attacks rather than watching her health bar. The tile methods are built on numbers of attacks, and the habit transfers even if you are kiting freehand.
Once the kill is boring
- Commit to the twelve-attack tile lap properly, including the parts that feel unnecessary. Clicking the yellow tiles so your character walks them is what makes the whole thing run-energy neutral, and skipping them is how players conclude the method does not work.
- Set your recovery routine before you need it. When you fall out of the cycle, the answer is to get back onto the pattern's entry tile rather than to improvise a lap — improvising next to Zilyana costs several attacks at 1.2 seconds each.
- Pick up summer pies rather than stepping over them. Two bites is 20% run energy in a fight where run energy is the limiting resource, and the bodyguards drop them.
- The Armadyl brew and Menaphite remedy rotation is the genuine end-game supply optimisation here, and it only pays off if your ranged defence is high, because Bree punishes lowered Defence with quiet consistency rather than big hits.
- If you own a full best-in-slot magic setup, the Tumeken's shadow version of this fight is effectively unbounded: Blood Barrage off the bodyguards plus an Eldritch nightmare staff special on a Lightbearer cooldown means the trip ends when your runes, charges or run energy do, not when your food does.
Team Roles
| Role | The job | Gets it wrong by |
|---|---|---|
| The anchor | Holds Zilyana's attention with a kiting pattern while the rest of the group damages her, and hands her off deliberately when the pattern runs out of room. | Kiting into the group rather than away from it, which transfers her to whoever happens to be nearest instead of whoever is ready. |
| Ranged damage | Prays Protect from Magic, keeps moving enough not to be reachable, and relies on her switching aggression rather than on out-running her personally. | Standing still because someone else has aggro. She reassigns to a nearby attacker the moment she cannot reach her current target. |
| Melee damage | Viable only in a team, and only while somebody else is holding her. Melee gear also carries the ranged defence that makes Bree a non-issue. | Being caught flat-footed by an aggression switch, in the one part of the room where 27 damage every 1.2 seconds is being applied to them. |
| Bodyguard duty or an alt | Attacks Bree and Starlight instead of Zilyana. Because the bodyguards only target players who have damaged Zilyana, a player who never touches her is exposed to nothing but her magic attack. | Killing the bodyguards too early, which wastes the damage — they respawn if they die before she does. |
- Role
- The anchor
- The job
- Holds Zilyana's attention with a kiting pattern while the rest of the group damages her, and hands her off deliberately when the pattern runs out of room.
- Gets it wrong by
- Kiting into the group rather than away from it, which transfers her to whoever happens to be nearest instead of whoever is ready.
- Role
- Ranged damage
- The job
- Prays Protect from Magic, keeps moving enough not to be reachable, and relies on her switching aggression rather than on out-running her personally.
- Gets it wrong by
- Standing still because someone else has aggro. She reassigns to a nearby attacker the moment she cannot reach her current target.
- Role
- Melee damage
- The job
- Viable only in a team, and only while somebody else is holding her. Melee gear also carries the ranged defence that makes Bree a non-issue.
- Gets it wrong by
- Being caught flat-footed by an aggression switch, in the one part of the room where 27 damage every 1.2 seconds is being applied to them.
- Role
- Bodyguard duty or an alt
- The job
- Attacks Bree and Starlight instead of Zilyana. Because the bodyguards only target players who have damaged Zilyana, a player who never touches her is exposed to nothing but her magic attack.
- Gets it wrong by
- Killing the bodyguards too early, which wastes the damage — they respawn if they die before she does.
The reason ranging teams like this boss is arithmetic rather than safety. Every aggression transfer is a lap somebody did not have to run, which is why a group needs a fraction of the stamina potions a solo player does and can spend the reclaimed inventory space on supplies that actually extend the trip.
Drops and What Commander Zilyana Is Worth
Her table has an oddity that never stops being funny: the Armadyl crossbow, one of the better crossbows in the game and named for a different god entirely, drops from Saradomin's general rather than from Armadyl's. The saradomin sword and the hilt are the other two names people come for, and between them they cover a weapon upgrade, a godsword component and a crossbow that stays relevant long after you stop visiting this dungeon.
There is a smaller drop that changes how the fight feels rather than how your bank looks. All three bodyguards can drop summer pies, which restore 10% run energy per bite. In a boss fight where the limiting resource is movement rather than food, a pie on the floor is a genuine supply.
No prices are printed here. The Armadyl crossbow in particular has been repriced by every new crossbow and bolt combination that has entered the game, so check the Grand Exchange when the drop actually lands.
Drops worth the trip: Armadyl crossbow, saradomin sword and hilt. Whether that is worth your time depends on how many kills an hour you personally get, which is a function of kiting paths rather than of your gear list.
Combat Achievements
Commander Zilyana has Combat Achievement tasks. With a 27 max hit the restrictions are mostly about execution rather than survival.
Task lists move with updates — read the current list in game.
Ironman Notes
Slayer masters who assign Commander Zilyana: Konar, Nieve, Duradel. Each kill is 350 Slayer XP.
Without a Grand Exchange, armadyl crossbow, saradomin sword and hilt has to be earned rather than bought, and this is the fastest table it sits on.
Zilyana is an unusually good Ironman target because her fight rewards a skill rather than a bank. The kite works with a rune crossbow, and it works with an Armadyl crossbow, and the difference between those two setups is kill speed rather than survival. Very little else in this dungeon is that forgiving of a modest weapon.
The real Ironman constraints are the ropes and the Agility. Three ropes for a first visit is trivial to arrange and easy to forget, and 70 Agility is a training project rather than a purchase — there is no boost and no alternative entrance.
On supplies, learn a run-energy-neutral pattern early. Stamina potions are the consumable an Ironman feels most here, and the tile method exists precisely to stop needing them. Summer pies from the bodyguards cover the gap while you are learning.
Common Mistakes and Death Causes
| What happened | Why it happened | The fix |
|---|---|---|
| Standing still for a few seconds | At one attack every 1.2 seconds with high accuracy, a pause that would be harmless at any other general is four or five landed hits here. | Treat any moment of standing still as a decision you have made rather than a break you have taken. If you need to stop, be out of her reach first. |
| Running out of run energy mid-kill | No stamina potions, no energy-neutral pattern, and a long kill. The kite fails at exactly the point where she is closest. | Budget energy like a supply. Walk the tiles the pattern says to walk, carry stamina potions until the pattern is automatic, and eat summer pies rather than stepping over them. |
| Healing at the wrong point in a lap | A heal costs a tick you needed for a step, and the step was the thing keeping her off you. | Heal at the fixed points in your pattern, not when your health bar prompts you. The tile methods have specific windows for exactly this reason. |
| Inheriting her in a team without noticing | She switches aggression to a nearby attacker when she cannot reach her current target, and the switch is instant. | Keep moving even when someone else has her, and keep spacing between attackers so the transfer goes to someone who is ready for it. |
| Being ground down by Bree | Bree's maximum is only 16, but she lands consistently, and consistently is enough when your Defence has been lowered by repeated brew sips. | Prioritise ranged defence in the armour slots, and if you are running the Armadyl brew rotation, keep the Menaphite remedies on schedule. |
| Getting cornered while trying to be efficient | Tight lines around the chamber's corners produce a stalled tick, and a stalled tick is a free attack for her. | Take the wider line until the pattern is second nature. The time you lose is smaller than the time a death costs. |
- What happened
- Standing still for a few seconds
- Why it happened
- At one attack every 1.2 seconds with high accuracy, a pause that would be harmless at any other general is four or five landed hits here.
- The fix
- Treat any moment of standing still as a decision you have made rather than a break you have taken. If you need to stop, be out of her reach first.
- What happened
- Running out of run energy mid-kill
- Why it happened
- No stamina potions, no energy-neutral pattern, and a long kill. The kite fails at exactly the point where she is closest.
- The fix
- Budget energy like a supply. Walk the tiles the pattern says to walk, carry stamina potions until the pattern is automatic, and eat summer pies rather than stepping over them.
- What happened
- Healing at the wrong point in a lap
- Why it happened
- A heal costs a tick you needed for a step, and the step was the thing keeping her off you.
- The fix
- Heal at the fixed points in your pattern, not when your health bar prompts you. The tile methods have specific windows for exactly this reason.
- What happened
- Inheriting her in a team without noticing
- Why it happened
- She switches aggression to a nearby attacker when she cannot reach her current target, and the switch is instant.
- The fix
- Keep moving even when someone else has her, and keep spacing between attackers so the transfer goes to someone who is ready for it.
- What happened
- Being ground down by Bree
- Why it happened
- Bree's maximum is only 16, but she lands consistently, and consistently is enough when your Defence has been lowered by repeated brew sips.
- The fix
- Prioritise ranged defence in the armour slots, and if you are running the Armadyl brew rotation, keep the Menaphite remedies on schedule.
- What happened
- Getting cornered while trying to be efficient
- Why it happened
- Tight lines around the chamber's corners produce a stalled tick, and a stalled tick is a free attack for her.
- The fix
- Take the wider line until the pattern is second nature. The time you lose is smaller than the time a death costs.
The reset here is your own footwork rather than an item. If a kill goes wrong, break away, rejoin the pattern at its entry tile, and accept the two or three attacks it costs you — improvising a lap next to her is what turns a bad kill into a dead one.
If you cannot break away, leave. A Trollheim tablet reverted to a house teleport, or Ghommal's hilt, is one click, and the bodyguards are not worth dying to for a partially completed kill.
FAQ
Can I boost the 70 Agility requirement?
No. Saradomin's Encampment cannot be entered with a boosted Agility level, which makes it the only general's door in this dungeon that requires a genuinely trained non-combat skill.
Why does she kill me so fast when her max hit is only 27?
Because she attacks every 1.2 seconds with very high accuracy. The maximum hit is almost irrelevant; what matters is how many of those hits land while you are stationary. She also cannot attack unless she is in melee distance, which is why the answer is movement rather than armour.
Do I actually need stamina potions?
Not once you can run an energy-neutral pattern. The no-stamina bow of Faerdhinen method walks the tiles that do not need running and costs roughly 10 to 12 energy per lap at around 80 Agility, and teams need far fewer because she keeps transferring aggression. Bring one to four while you are learning.
Is magic worth using here?
Only with a Tumeken's shadow. She resists every style equally, magic armour gives you no defensive help, and the rune costs are real — but a fully maxed shadow setup with Blood Barrage healing and an Eldritch nightmare staff special can stay in her lair almost indefinitely. If you are missing best in slot in two or more magic slots, range her instead.
Should I kill the bodyguards first?
No. They are likely to respawn if they die before Zilyana, so early damage into them is wasted. Envenom them with a blowpipe if you can, ignore them while you work on her, and clear them afterwards — they are the weakest bodyguards of the four generals.
Can I melee her?
In a team, yes, provided somebody else is holding her attention and you understand that she reassigns aggression to a nearby attacker the moment she cannot reach her target. Solo melee is not a plan; the fight is built around never letting her reach you.
Related Guides
Bottom Line
Zilyana is the one general in this dungeon where the answer is not a prayer. Protect from Magic is one line of the solution and footwork is the other nine, and the reason her strategy page is full of numbered tiles is that a moving player takes no damage from her at all while a stationary one takes an attack every 1.2 seconds from something with excellent accuracy. Learn the plain lap, then learn the energy-neutral one, and the fight stops being frightening.
The genuine obstacle for most accounts is not her — it is the 70 Agility on her door, which no boost will open. If that is where you are stuck, training the Agility level that unlocks her encampment is the part of this worth handing off.
If Commander Zilyana is blocking a Combat Achievement or an unlock you actually want, our PvM service is done by hand — no automation. Otherwise the bosses list has the full index.
Commander Zilyana — GWD general (Saradomin), difficulty 4/5. Combat values here — hitpoints, max hits, attack styles and speed, Defence and Magic levels, immunities and Slayer requirements — were read from the Old School RuneScape Wiki infobox for Commander Zilyana on 2026-08-03. Kill rates, GP per hour and item prices are deliberately absent because they move with balance patches and the Grand Exchange. Mechanics, gear tiers and phase behaviour on this page were checked against Commander Zilyana/Strategies on 4 August 2026.
Need a trusted team? Bils Services
Enjoyed the guide?
Drop a like — it helps other Adventurers find the good stuff.
Community
Comments
Silence in the hall…
Be the first Adventurer to leave a mark.
Join the thread
Add a comment
Tips, drops, or “this carried my account” — keep it useful.
bilsservices · bils services · bilsservices.com

