


OSRS Kree’arra Guide: Chinning, Gear & Armadyl Drops
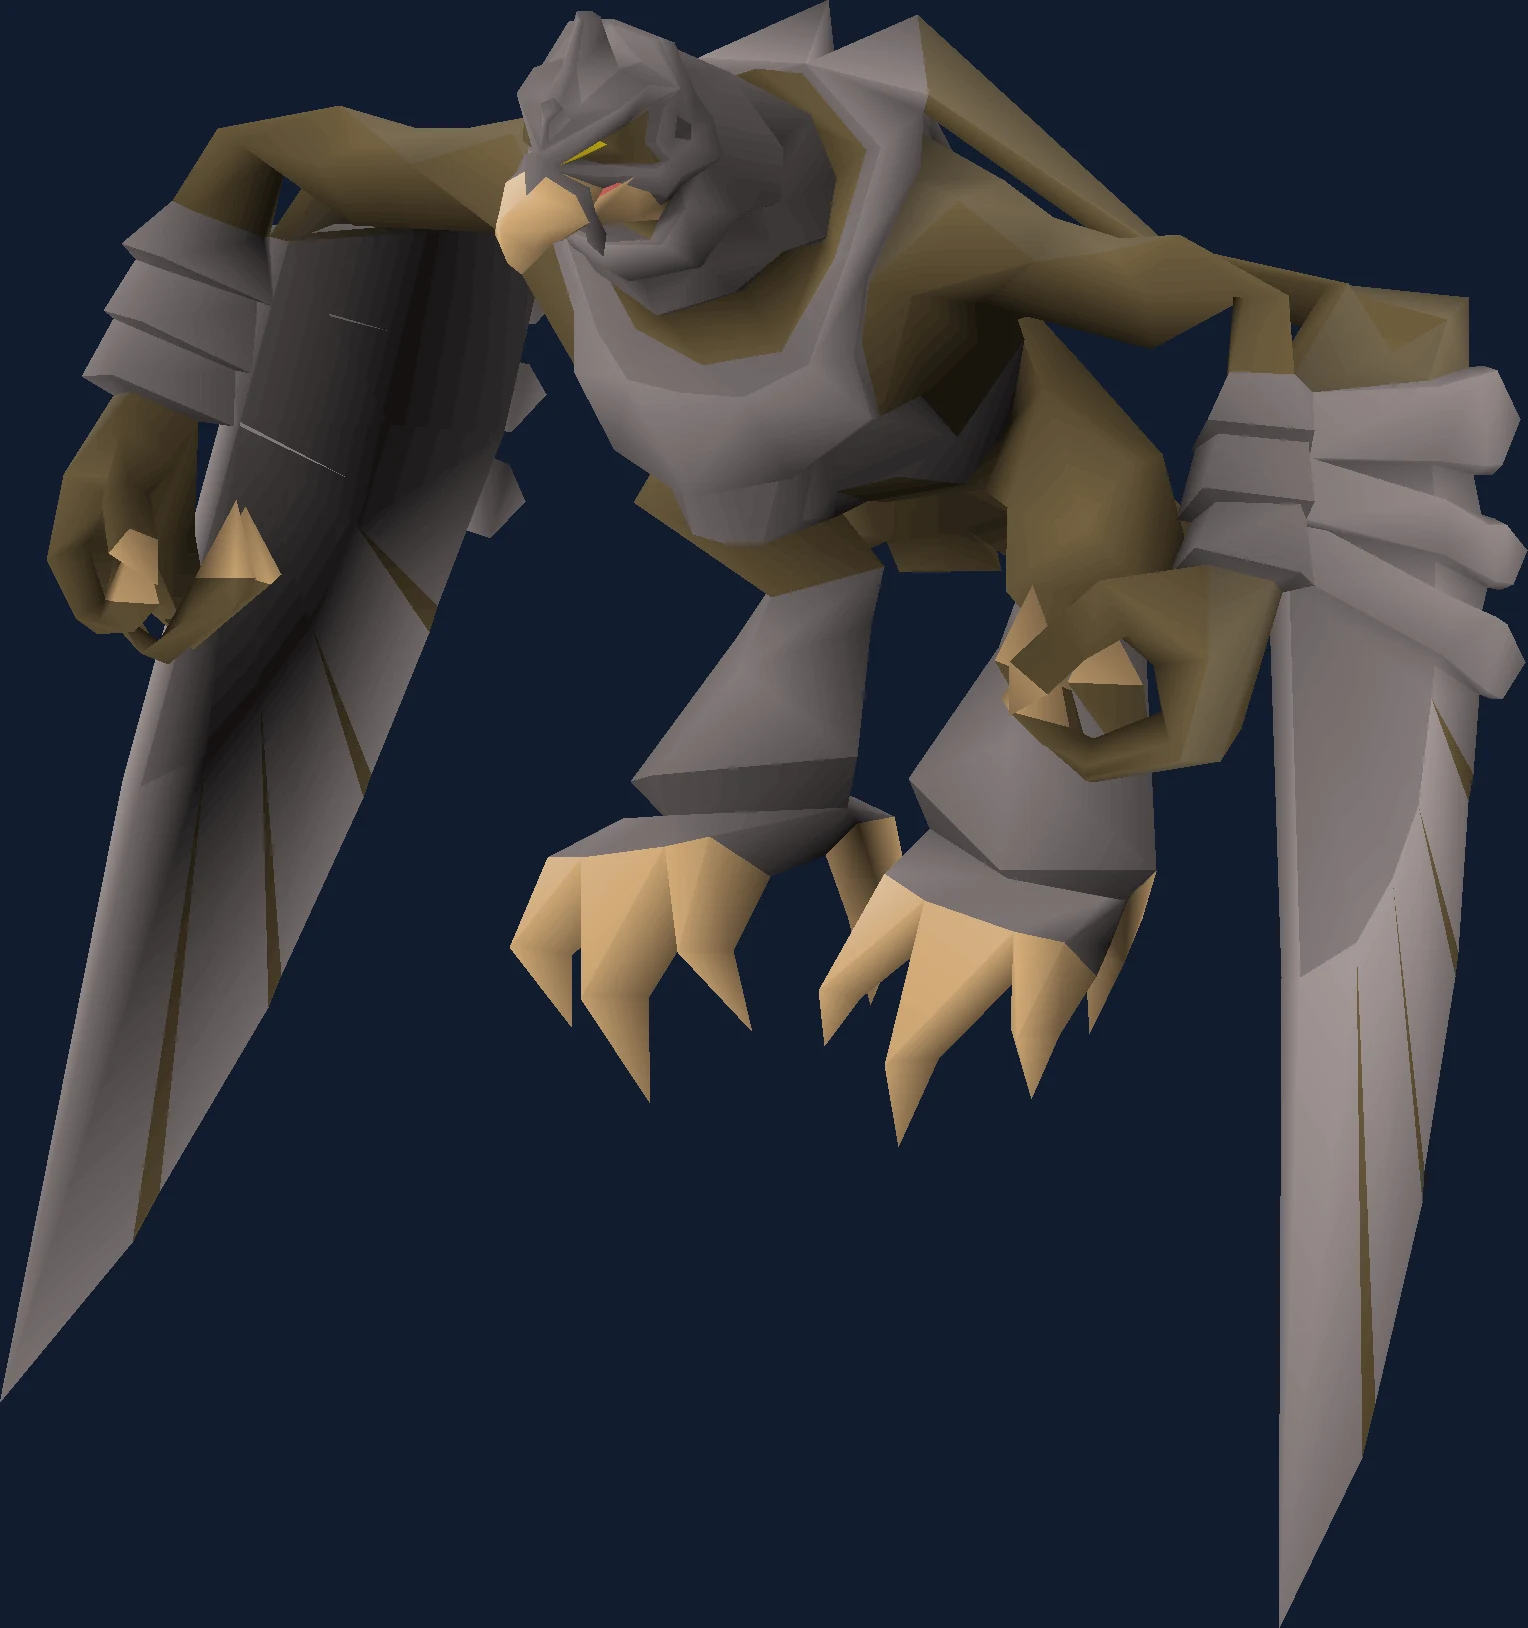
Kree’arra guide for chins, ranged setups, and Armadyl armour EV.
Why People Fight Kree'arra
Kree'arra is the general who takes an entire combat style off the table. He is airborne, so ordinary melee weapons cannot touch him, and the two exceptions — halberds and salamanders — run straight into melee defence high enough that the wiki dismisses them outright unless a small team is using a soulflame horn. Whatever your account is good at, at this boss you are a ranger or a mage.
He is also the only general whose main attack is aimed at the room rather than at a person. His ranged attack is a grey dust tornado that can take 69 off you, his magic attack is a blue one that reaches 21, and both of them hit every player present and can shove you back a tile unless you are standing in a corner. The instruction that follows from that is the shortest one in this dungeon: Protect from Missiles stays on for as long as Kree'arra is alive, with no exceptions and no clever flicking.
There is a genuinely strange detail buried in his magic attack. It is classified as ranged magic, which means its accuracy is rolled against your ranged defence rather than your magic defence. Mod Ash confirmed it and admitted he had no idea why. The practical consequence is that a ranged setup, which normally has a soft spot against magic, does not have one here — and a magic setup in ancestral robes is worse off against both of his attacks than a ranger is.
Then there is the reason he has a reputation for being expensive. His defensive stats are exceptional, so hitting him directly is markedly harder than hitting the other three generals with most weapons, and the classic answer is to not aim at him at all: throw chinchompas at his melee bodyguard and let the splash damage do the work. Armadyl armour and the armadyl hilt are what you are buying with all that ammunition.
Its own attacks are ranged, ranged magic and magical melee, so Protect from Melee, Missiles and Magic all have a job.
In our index it sits in the God Wars Dungeon group at difficulty 4 of 5, where kill times come down to chinchompa methods.
| Field | Detail |
|---|---|
| Classification | GWD general (Armadyl) (Boss) |
| Group | God Wars Dungeon |
| Difficulty | 4 / 5 |
| Solo or team | Solo or team |
| Access requirement | 70 Ranged + 40 kill count |
| Notable reward | Armadyl armour, armadyl hilt |
| Signature mechanic | Chinchompa methods |
| Hitpoints | 255 |
| Max hits | 69 (Ranged), 21 (Magic), 25 (Melee) |
| Released | 17 October 2013 |
- Field
- Classification
- Detail
- GWD general (Armadyl) (Boss)
- Field
- Group
- Detail
- God Wars Dungeon
- Field
- Difficulty
- Detail
- 4 / 5
- Field
- Solo or team
- Detail
- Solo or team
- Field
- Access requirement
- Detail
- 70 Ranged + 40 kill count
- Field
- Notable reward
- Detail
- Armadyl armour, armadyl hilt
- Field
- Signature mechanic
- Detail
- Chinchompa methods
- Field
- Hitpoints
- Detail
- 255
- Field
- Max hits
- Detail
- 69 (Ranged), 21 (Magic), 25 (Melee)
- Field
- Released
- Detail
- 17 October 2013
Is Kree'arra the Right Fight for You Yet?
Kree'arra's entry requirements look modest and his practical requirements are not. Nothing stops an 85 combat account walking in, but his defensive stats mean an average bow contributes very little, and the method that fixes that — chinchompas — has an ammunition bill instead of a stat requirement. The honest readiness question here is not what your levels are; it is which of the three viable damage plans you can actually afford.
You are ready for this fight if:
- You have a crossbow of any type and a mithril grapple. Both are needed to reach his lair, and both are easy to leave in the bank.
- You have 44 Prayer for Eagle Eye and the discipline to keep Protect from Missiles up for the entire time he is alive.
- You have 40 Armadyl killcount, a reduced requirement from Combat Achievements, or an ecumenical key in your inventory.
- You own one of: black or red chinchompas in quantity, a twisted bow or bow of Faerdhinen with the armour to support it, or a Tumeken's shadow.
- You have 92 Magic if you want Blood Barrage, which is how you heal off the bodyguards between kills.
Come back later if any of these are true:
- Your plan is a rune crossbow and patience. His defence makes direct damage from mid-tier weapons genuinely poor, and this is one of the few bosses where the wiki recommends a different damage source rather than a better version of the same one.
- You are on an aviansie Slayer task and intend to grind the killcount by hand. Aviansie killed for killcount count towards the task, which reduces the number of Kree'arra kills you get out of it.
- You cannot commit to the prayer. His ranged attack reaches 69 and lands on everyone in the room, and there is no positioning that avoids it.
Access Requirements
Kree'arra is gated behind 70 Ranged + 40 kill count.
70 Ranged + 40 kill count also tends to sit alongside the other God Wars Dungeon gates, so it is usually cheaper to clear them together than to come back for each one. The boss requirements checklist lists them by group.
Location and How to Get There
Kree'arra is found in Armadyl's Eyrie inside the God Wars Dungeon.
God Wars Dungeon, then the Armadyl section, which needs 70 Ranged and kill count. You arrive by crossing to the Eyrie, so bring the ranged setup you intend to fight in rather than switching on site.
The Trollheim approach is the same as the rest of the dungeon: Death Plateau and Troll Stronghold to the point where Dad is beaten, or Ghommal's hilt in place of both. What is different is the last stretch. Reaching his lair needs a mithril grapple and a crossbow of any type, which is why almost every inventory listing for this boss has a bronze crossbow sitting in a corner slot doing nothing else.
Armadylean killcount is the slowest of the four and, unusually, it costs prayer to collect, which is why an ecumenical key is close to standard practice rather than a shortcut. Combat Achievement tiers reduce the 40 requirement, and on an aviansie Slayer task the key becomes more valuable still: aviansie you kill for killcount tick down the task itself, so every one of them is a Kree'arra kill you will not get.
Two Trollheim teleports are the neat inventory trick here. Revert one after you arrive and you have a house teleport for the way out without spending a second slot on it.
Recommended Stats and Gear at Three Budgets
| Skill | Recommended | What it is buying |
|---|---|---|
| Combat level | 85 required, 100+ recommended | The stated floor for the encounter. The gap between the two figures is roughly the gap between surviving and enjoying it. |
| Ranged | 70+, 80+ recommended | Your damage, unless you own a Tumeken's shadow. Also the stat behind the chinchompa method, since chins roll accuracy against your current target. |
| Defence | 70+, 80+ recommended | How often Flight Kilisa lands. She is the only bodyguard that genuinely threatens you. |
| Hitpoints | 70+, 80+ recommended | Headroom against a 69-damage attack that arrives whether or not you are the target. |
| Magic | 92+ | Blood Barrage, which is how you refill between kills by healing off the stacked bodyguards. Not optional if you want long trips. |
| Prayer | 44+ | Eagle Eye alongside the Protect from Missiles you will never turn off. |
- Skill
- Combat level
- Recommended
- 85 required, 100+ recommended
- What it is buying
- The stated floor for the encounter. The gap between the two figures is roughly the gap between surviving and enjoying it.
- Skill
- Ranged
- Recommended
- 70+, 80+ recommended
- What it is buying
- Your damage, unless you own a Tumeken's shadow. Also the stat behind the chinchompa method, since chins roll accuracy against your current target.
- Skill
- Defence
- Recommended
- 70+, 80+ recommended
- What it is buying
- How often Flight Kilisa lands. She is the only bodyguard that genuinely threatens you.
- Skill
- Hitpoints
- Recommended
- 70+, 80+ recommended
- What it is buying
- Headroom against a 69-damage attack that arrives whether or not you are the target.
- Skill
- Magic
- Recommended
- 92+
- What it is buying
- Blood Barrage, which is how you refill between kills by healing off the stacked bodyguards. Not optional if you want long trips.
- Skill
- Prayer
- Recommended
- 44+
- What it is buying
- Eagle Eye alongside the Protect from Missiles you will never turn off.
The 92 Magic line is the one people are surprised by, because it has nothing to do with hitting him. Blood Barrage is the trip-extension mechanism at Kree'arra, and without it your food supply is the hard limit on how long you stay.
He and his bodyguards count towards aviansie Slayer tasks, and both a slayer helmet (i) and a black mask (i) give the 15% accuracy and damage bonus while you are on one.
| Slot | Chinchompas | Twisted bow or bow of Faerdhinen | Tumeken's shadow |
|---|---|---|---|
| Weapon | Black chinchompas, or red on a budget, with a bow switch for when Kilisa dies first | Twisted bow with seeking dragon arrows, or bow of Faerdhinen with the full crystal set | Tumeken's shadow, and nothing else — no other magic weapon is recommended for hitting him directly |
| Head | Slayer helmet (i) on task, otherwise justiciar faceguard, Verac's helm or an Armadyl helmet | Slayer helmet (i), Masori mask (f), or a crystal helm with the bow of Faerdhinen | Slayer helmet (i) on task, otherwise an ancestral hat or Virtus mask |
| Body and legs | Masori (f), Armadyl, Karil's, or Armadyl and Zamorak d'hide lower down | Masori (f) is the assumption for the twisted bow; crystal body and legs for the bow of Faerdhinen | Ancestral robe top and bottom, or Virtus |
| Shield or offhand | Elysian spirit shield, dragonfire ward, twisted buckler or a crystal shield | Both bows are two-handed, so this slot is a switch rather than a slot | Two-handed as well; Elidinis' ward (f) belongs to the ancient-magick switch |
| Neck and cape | Necklace of rupture or anguish, with Dizana's quiver or Ava's assembler | Necklace of rupture or anguish, with Dizana's quiver | Occult necklace with an imbued zamorak cape |
| Hands, feet, ring | Zaryte vambraces, Armadyl d'hide or pegasian boots, ring of suffering (ri) or a Lightbearer | Zaryte vambraces, pegasian boots, ring of suffering or Venator | Confliction gauntlets, eternal boots, magus ring or a Lightbearer with a special weapon |
- Slot
- Weapon
- Chinchompas
- Black chinchompas, or red on a budget, with a bow switch for when Kilisa dies first
- Twisted bow or bow of Faerdhinen
- Twisted bow with seeking dragon arrows, or bow of Faerdhinen with the full crystal set
- Tumeken's shadow
- Tumeken's shadow, and nothing else — no other magic weapon is recommended for hitting him directly
- Slot
- Head
- Chinchompas
- Slayer helmet (i) on task, otherwise justiciar faceguard, Verac's helm or an Armadyl helmet
- Twisted bow or bow of Faerdhinen
- Slayer helmet (i), Masori mask (f), or a crystal helm with the bow of Faerdhinen
- Tumeken's shadow
- Slayer helmet (i) on task, otherwise an ancestral hat or Virtus mask
- Slot
- Body and legs
- Chinchompas
- Masori (f), Armadyl, Karil's, or Armadyl and Zamorak d'hide lower down
- Twisted bow or bow of Faerdhinen
- Masori (f) is the assumption for the twisted bow; crystal body and legs for the bow of Faerdhinen
- Tumeken's shadow
- Ancestral robe top and bottom, or Virtus
- Slot
- Shield or offhand
- Chinchompas
- Elysian spirit shield, dragonfire ward, twisted buckler or a crystal shield
- Twisted bow or bow of Faerdhinen
- Both bows are two-handed, so this slot is a switch rather than a slot
- Tumeken's shadow
- Two-handed as well; Elidinis' ward (f) belongs to the ancient-magick switch
- Slot
- Neck and cape
- Chinchompas
- Necklace of rupture or anguish, with Dizana's quiver or Ava's assembler
- Twisted bow or bow of Faerdhinen
- Necklace of rupture or anguish, with Dizana's quiver
- Tumeken's shadow
- Occult necklace with an imbued zamorak cape
- Slot
- Hands, feet, ring
- Chinchompas
- Zaryte vambraces, Armadyl d'hide or pegasian boots, ring of suffering (ri) or a Lightbearer
- Twisted bow or bow of Faerdhinen
- Zaryte vambraces, pegasian boots, ring of suffering or Venator
- Tumeken's shadow
- Confliction gauntlets, eternal boots, magus ring or a Lightbearer with a special weapon
Choosing between the bows is a checklist rather than a judgement call. The twisted bow is stronger if you have at least two of the Masori body (f), Masori chaps (f) and dragon arrows; if you are missing two of those three, the bow of Faerdhinen with full crystal armour is stronger. Either way, walk under him after every shot, and especially with a twisted bow, whose slower attack speed gives him more opportunities than the bow of Faerdhinen does.
The Tumeken's shadow is the strongest conventional option and is described as far cheaper and more efficient than throwing chinchompas — but ancestral robes carry less defence than the ranged alternatives, so you take more from both his magic attack and from Kilisa. Freeze Kilisa whenever you can and step under him after every cast, because he attacks on a 3-tick cycle against the staff's 5.
One bolt note is worth carrying into the fight: ruby bolts (e) are only useful if your maximum hit is around 20 or less. Used at the start of a kill they strip 10% of his health, capped at 25, after which you switch back to your primary bolt for the rest of the fight. Above that damage level they are simply worse than diamonds.
Melee exists here as a curiosity with one legitimate form. A soulflame horn's special attack guarantees your next melee hit lands, which is the only way to reliably connect with his melee defence — but the special only works with another player nearby, so it is a duo or trio method, and it requires a halberd because he is airborne. The noxious halberd is the only viable one. Even in full melee armour you still pray Protect from Missiles, and you switch to Protect from Magic after he dies to handle Wingman Skree.
| Check | Value |
|---|---|
| Prayers for its own attacks | 3 — Protect from Melee, Missiles and Magic |
| Its Defence level | 260 |
| Its Magic level | 200 |
| Its lowest defence bonus, per its infobox | stab, slash, crush |
| Elemental weakness | 30% to air spells |
| Monster attributes | flying |
- Check
- Prayers for its own attacks
- Value
- 3 — Protect from Melee, Missiles and Magic
- Check
- Its Defence level
- Value
- 260
- Check
- Its Magic level
- Value
- 200
- Check
- Its lowest defence bonus, per its infobox
- Value
- stab, slash, crush
- Check
- Elemental weakness
- Value
- 30% to air spells
- Check
- Monster attributes
- Value
- flying
- 200 Magic level rewards magic-defence scaling weapons.
Inventory and Supplies
| Item | Why Kree'arra in particular wants it |
|---|---|
| Any crossbow, plus a mithril grapple | Not for fighting. Both are required to reach his lair, which is why a bronze crossbow appears in setups that never fire a bolt. Dizana's quiver can hold the grapple if you own one. |
| An ecumenical key | Armadylean killcount is the slowest in the dungeon and it costs prayer to gather. On an aviansie task, collecting it by hand also eats the task you came to do. |
| Saradomin brews, and a lot of them | His ranged attack hits everyone in the room regardless of target, so the damage is constant rather than conditional. This is the general where brews outnumber everything else in the bag. |
| Super restores | Prayer is a running cost from the moment you enter, because Protect from Missiles never comes off while he is alive. |
| A staff that autocasts Ancient Magicks, and Blood Barrage runes | The healing plan. A blood ancient sceptre, kodai wand or eldritch nightmare staff all work; the eldritch has the advantage of a special attack that restores prayer off a bodyguard rather than health. |
| Water runes for Ice Barrage | Freezing Flight Kilisa is the difference between one threatening bodyguard and none, and it lets you park her on top of the ranged bodyguard for the barrage stack. |
| Bones to peaches tablets | He and all three bodyguards drop bones, and peaches heal 8 each, so a full clear is 32 hitpoints you did not have to carry. |
| A toxic blowpipe | For the bodyguards after he dies, and for special attacks. It is the fastest way to remove Wingman Skree before you set up the heal. |
- Item
- Any crossbow, plus a mithril grapple
- Why Kree'arra in particular wants it
- Not for fighting. Both are required to reach his lair, which is why a bronze crossbow appears in setups that never fire a bolt. Dizana's quiver can hold the grapple if you own one.
- Item
- An ecumenical key
- Why Kree'arra in particular wants it
- Armadylean killcount is the slowest in the dungeon and it costs prayer to gather. On an aviansie task, collecting it by hand also eats the task you came to do.
- Item
- Saradomin brews, and a lot of them
- Why Kree'arra in particular wants it
- His ranged attack hits everyone in the room regardless of target, so the damage is constant rather than conditional. This is the general where brews outnumber everything else in the bag.
- Item
- Super restores
- Why Kree'arra in particular wants it
- Prayer is a running cost from the moment you enter, because Protect from Missiles never comes off while he is alive.
- Item
- A staff that autocasts Ancient Magicks, and Blood Barrage runes
- Why Kree'arra in particular wants it
- The healing plan. A blood ancient sceptre, kodai wand or eldritch nightmare staff all work; the eldritch has the advantage of a special attack that restores prayer off a bodyguard rather than health.
- Item
- Water runes for Ice Barrage
- Why Kree'arra in particular wants it
- Freezing Flight Kilisa is the difference between one threatening bodyguard and none, and it lets you park her on top of the ranged bodyguard for the barrage stack.
- Item
- Bones to peaches tablets
- Why Kree'arra in particular wants it
- He and all three bodyguards drop bones, and peaches heal 8 each, so a full clear is 32 hitpoints you did not have to carry.
- Item
- A toxic blowpipe
- Why Kree'arra in particular wants it
- For the bodyguards after he dies, and for special attacks. It is the fastest way to remove Wingman Skree before you set up the heal.
The bodyguards feed you as well as fight you: they occasionally drop two manta rays or three mushroom potatoes, healing 44 and 60 respectively. If your inventory is full when they land, juggle them — pick them up and drop them again — rather than watching a full inventory of healing evaporate.
Quantities are left out because the three methods consume at completely different rates. A chinchompa trip is limited by chinchompas, a bow trip by brews, and a well-run shadow trip by weapon charges and runes.
Prayer and Spellbook
There is only one prayer rule at this boss and it is absolute: Protect from Missiles stays on for as long as Kree'arra is alive. His ranged attack is the one that reaches 69, it lands on everyone in the room whether or not you are his target, and the wiki's own phrasing is that players who drop it will likely meet a swift death.
What makes this simpler than it sounds is the ranged magic quirk. Because his magic attack rolls its accuracy against your ranged defence rather than your magic defence, you are not choosing which of two prayers to hold — the missile prayer covers the dangerous attack and your ranged gear happens to defend the other one too. That is the opposite of the compromise a K'ril tank has to make.
The prayer only changes after he dies. Then you switch to Protect from Magic to deal with Wingman Skree, who is the bodyguard you have been ignoring because he is inaccurate, and afterwards you can flick between Flockleader Geerin and Skree — they generally attack on different ticks, since Skree spawns far to the east and out of visible range if you are standing on the western edge. With good timing all three bodyguards can be flicked, which is where the real food savings are.
Blood Barrage at 92 Magic is the other half of the prayer and spellbook question. Between kills you stack Kilisa and Geerin and barrage them back to full health; if Kilisa is dead or nearly dead, Blood Blitz on Geerin alone is the fallback.
Mechanics That Decide the Fight
| Mechanic | How you see it coming | What it does | Your answer |
|---|---|---|---|
| Airborne | He is flying. Permanently. | Ordinary melee weapons cannot hit him at all, and halberds and salamanders run into extremely high melee defence. | Range or mage him. The one exception is a soulflame horn duo or trio with a noxious halberd, which is a deliberate team method rather than a way to use your melee gear. |
| Grey dust tornado | Grey rather than blue. It is his ranged attack. | Up to 69 damage, hits every player in the chamber, and can knock you back a tile. | Protect from Missiles, held without exception. There is no positioning that dodges it and no target selection that spares you. |
| Blue dust tornado | Blue rather than grey. It is his magic attack. | Up to 21 damage, also room-wide, also knocks you back a tile. | Nothing specific, and that is the interesting part: it is classified as ranged magic, so it rolls against your ranged defence. Your anti-missile armour is already the answer. |
| Knockback | Your character slides a tile after one of his tornadoes lands. | Displaces you, which quietly ruins tick-perfect positioning and chinchompa alignment. | Stand in a corner of the chamber. Corners are the only tiles where the knockback cannot move you. |
| Talon swipe | He walks up to somebody instead of throwing a tornado. | Up to 26 damage in melee, used when he is not currently being targeted. | This is the attack the chinchompa method is built to avoid. Target him off-tick — click him when you are not attacking — and he never gets to use it. |
| Flight Kilisa | The melee bodyguard, closing on you. | Up to 15 damage, and she is the only bodyguard that is a genuine threat during the fight. | Freeze her if you can. In the chinchompa method she is also your target, which makes her simultaneously the danger and the delivery mechanism. |
| Wingman Skree and Flockleader Geerin | The magic and ranged bodyguards, at up to 16 and 25 damage. | Very little in practice. Skree is generally inaccurate, and Geerin's attacks are blocked by the prayer you are already holding. | Ignore them during the kill. Skree dies first afterwards, and Geerin is one half of your Blood Barrage stack. |
- Mechanic
- Airborne
- How you see it coming
- He is flying. Permanently.
- What it does
- Ordinary melee weapons cannot hit him at all, and halberds and salamanders run into extremely high melee defence.
- Your answer
- Range or mage him. The one exception is a soulflame horn duo or trio with a noxious halberd, which is a deliberate team method rather than a way to use your melee gear.
- Mechanic
- Grey dust tornado
- How you see it coming
- Grey rather than blue. It is his ranged attack.
- What it does
- Up to 69 damage, hits every player in the chamber, and can knock you back a tile.
- Your answer
- Protect from Missiles, held without exception. There is no positioning that dodges it and no target selection that spares you.
- Mechanic
- Blue dust tornado
- How you see it coming
- Blue rather than grey. It is his magic attack.
- What it does
- Up to 21 damage, also room-wide, also knocks you back a tile.
- Your answer
- Nothing specific, and that is the interesting part: it is classified as ranged magic, so it rolls against your ranged defence. Your anti-missile armour is already the answer.
- Mechanic
- Knockback
- How you see it coming
- Your character slides a tile after one of his tornadoes lands.
- What it does
- Displaces you, which quietly ruins tick-perfect positioning and chinchompa alignment.
- Your answer
- Stand in a corner of the chamber. Corners are the only tiles where the knockback cannot move you.
- Mechanic
- Talon swipe
- How you see it coming
- He walks up to somebody instead of throwing a tornado.
- What it does
- Up to 26 damage in melee, used when he is not currently being targeted.
- Your answer
- This is the attack the chinchompa method is built to avoid. Target him off-tick — click him when you are not attacking — and he never gets to use it.
- Mechanic
- Flight Kilisa
- How you see it coming
- The melee bodyguard, closing on you.
- What it does
- Up to 15 damage, and she is the only bodyguard that is a genuine threat during the fight.
- Your answer
- Freeze her if you can. In the chinchompa method she is also your target, which makes her simultaneously the danger and the delivery mechanism.
- Mechanic
- Wingman Skree and Flockleader Geerin
- How you see it coming
- The magic and ranged bodyguards, at up to 16 and 25 damage.
- What it does
- Very little in practice. Skree is generally inaccurate, and Geerin's attacks are blocked by the prayer you are already holding.
- Your answer
- Ignore them during the kill. Skree dies first afterwards, and Geerin is one half of your Blood Barrage stack.
Kree'arra is the only general with all three attack styles, and it barely matters, because the two he actually uses both roll against ranged defence and both are covered by one prayer. What makes him difficult is not variety — it is that his defensive stats are exceptional enough to make a well-geared player's damage feel wasted.
That is the whole logic of chinchompas. Chins roll accuracy against your current target, and when the hit lands, everything else in range takes damage regardless of its own Defence level and bonuses. You throw at the bodyguard you can hit reliably, and the boss you cannot hit reliably takes the splash. Monsters two tiles square or larger have their hitbox on their south-western tile, which is also where their drops appear, and that is the geometry the whole method depends on.
| Property | Value |
|---|---|
| Combat level | 580 |
| Attack styles | Ranged, Ranged magic, Magical melee |
| Attack speed | 3 ticks |
| Attacks on sight | Yes |
| Poisons you | No |
| Size | 5 tiles |
| Immune to cannon | No |
| Immune to thralls | No |
- Property
- Combat level
- Value
- 580
- Property
- Attack styles
- Value
- Ranged, Ranged magic, Magical melee
- Property
- Attack speed
- Value
- 3 ticks
- Property
- Attacks on sight
- Value
- Yes
- Property
- Poisons you
- Value
- No
- Property
- Size
- Value
- 5 tiles
- Property
- Immune to cannon
- Value
- No
- Property
- Immune to thralls
- Value
- No
Where Kree'arra Sits in Progression
Within the God Wars Dungeon group, the fights below Kree'arra are General Graardor and K'ril Tsutsaroth. Above it sit Nex.
Fight Strategy: Chinchompa methods
- Enter with Protect from Missiles already on, and move to the south-western corner of the chamber. Corners stop the knockback moving you.
- Wait for Kree'arra and Flight Kilisa to come to you and line up, then start throwing chinchompas at Kilisa so the splash reaches him.
- Between throws, left-click Kree'arra, then left-click Kilisa again just before your next attack. This is the off-tick targeting cycle and it is what stops him using melee.
- When Kilisa dies — and she will die well before he does at the start of an untouched room — switch to your bow and hit him directly while you wait for her to respawn.
- Walk under him after every shot. A crossbow and a twisted bow both fire every 5 ticks on rapid, and a bow of Faerdhinen every 4, so stepping under him after each attack reduces how often he gets to answer.
- When he dies, switch to Protect from Magic, take Skree out with a blowpipe, then stack Kilisa and Geerin and Blood Barrage yourself back to full.
- Cash your bones into peaches before the respawn, and pick up any manta rays or mushroom potatoes the bodyguards left.
The off-tick rule deserves restating because it is the single mechanical idea that separates a clean chinchompa kill from an expensive one. Medium Fuse — the throwing style chinchompas use — has the same attack rate as Kree'arra. If you target him on the same tick you are attacking, he takes that as his cue to close in and swipe. Clicking him in the gap and then returning to Kilisa keeps him in place taking splash damage and never gives him the opening.
Once the room has been cleared and he respawns, the geometry improves. When he tries to melee you, his hitbox collides with Flockleader Geerin, which means chinchompas thrown at that stack damage both of them at once and give you more consistent output. The trade-off is real, though: if your reactions are slow he drifts out of the splash radius, and then you have to lure him back onto Kilisa properly and you heal for less if Geerin has not respawned by the time he dies.
- Untouched room: he and the bodyguards are wandering, so go to the south-west corner and let them come to you rather than chasing the alignment.
- Kilisa dying early is expected, not a mistake. Have the bow switch ready rather than standing there with chinchompas and no target.
- If Kilisa is dead or nearly dead when Kree'arra falls, Blood Blitz on Geerin alone rather than trying to force a stack.
- In a team nobody tanks, so nobody waits. Everyone brings their best ranged weapon and chinchompas become unnecessary.
Positioning and Movement
The south-western corner is the position, and it is doing two separate jobs at once. It is the only kind of tile where his knockback cannot displace you, and it is where Kree'arra and Flight Kilisa naturally line up so chinchompas thrown at her reach him.
Walking under him is the other half of the footwork, and it is not the same move as the corner. Stepping onto his tile after each of your attacks reduces how often he attacks at all, which is why every direct-damage method in the strategy page repeats the instruction regardless of weapon.
The east side of the room matters for one specific reason. Wingman Skree spawns far enough east that he is out of visible range from the western edge, which is what puts his attacks on different ticks to Geerin's and makes flicking between the two bodyguards possible after the kill.
Beginner Plan, Then the Advanced One
Your first trips
- Bring the crossbow and the grapple before you think about anything else. The most common failed Kree'arra trip is one that never reaches his lair.
- Use an ecumenical key on your first trips even if you would normally grind killcount. Armadylean killcount is slow, it costs prayer, and if you are on an aviansie task it actively competes with the kills you came for.
- Set Protect from Missiles and then genuinely forget about it. Every other general rewards prayer switching; this one punishes it.
- Learn the corner before you learn the chinchompa cycle. Being un-knockable and correctly aligned solves half the method on its own.
- Do not chase Kree'arra around an untouched room. He and the bodyguards are wandering when you arrive, and standing in the south-west corner waiting for them to arrive is faster than trying to catch them.
- Get 92 Magic before you plan long trips. Blood Barrage off the bodyguards is how trip length works here, and food alone will not get you far.
Once the kill is boring
- Practise the two-target chinchompa stack on a respawned Kree'arra. When he tries to melee you his hitbox overlaps Geerin's, and throwing into that overlap gives more consistent damage than aiming at Kilisa alone — provided you are quick enough to keep him inside the splash.
- Flick all three bodyguards rather than praying against one. Geerin and Skree usually attack on different ticks because of where Skree spawns, and once you can add Kilisa into that rotation the food cost of a clear drops noticeably.
- The eldritch nightmare staff special is a prayer restore, not a damage tool. Used on the melee or ranged bodyguard between kills it pays for a portion of the Protect from Missiles bill you have been running all trip.
- With a Tumeken's shadow, freeze Kilisa every time the spell is available and go under him after every cast. His 3-tick cycle against the staff's 5 means every skipped step-under is a free attack for him, and ancestral robes are the worst armour in the fight to be taking free attacks in.
- If you have a duo or trio and a soulflame horn each, the halberd method is a real option rather than a novelty — the horn's special guarantees the hit that his melee defence would otherwise deny you. Everyone stands under him, everyone specs from under him, and everyone still prays Protect from Missiles.
- Carry a bracelet of slaughter if you are on an aviansie task. Extending the task is worth more here than at most bosses because the killcount competes with it.
Team Roles
| Role | The job | Gets it wrong by |
|---|---|---|
| Everyone, equally | There is no tank at this boss. His tornadoes hit every player in the room, so each person is responsible for their own prayer, their own health and their own damage. | Waiting for someone to establish aggro, as you would at Bandos. Nobody is going to, and the delay just extends the kill. |
| Ranged damage | Best available bow or crossbow. In a team chinchompas become unnecessary, because the group's combined direct damage is enough on its own. | Bringing chinchompas anyway and spending the ammunition bill for a problem the team has already solved. |
| The freezer | Ice spells on Flight Kilisa, who is the only bodyguard that meaningfully damages anyone during the fight. | Freezing her somewhere useless. Parked on top of Geerin she becomes half a Blood Barrage stack; parked in a corner she is just delayed. |
| The healer between kills | Blood Barrage on the stacked bodyguards to top the group up, and bones to peaches on the drops for another 32 hitpoints per clear. | Barraging a single target because nobody bothered to stack them, which turns a group heal into a rounding error. |
| Soulflame horn melee, in duos and trios only | Noxious halberds, standing under him, using the horn's special to guarantee hits. Everyone should carry a horn rather than passing one around. | Running out of special attack energy on the single shared horn mid-kill, which leaves the whole team unable to land hits. |
- Role
- Everyone, equally
- The job
- There is no tank at this boss. His tornadoes hit every player in the room, so each person is responsible for their own prayer, their own health and their own damage.
- Gets it wrong by
- Waiting for someone to establish aggro, as you would at Bandos. Nobody is going to, and the delay just extends the kill.
- Role
- Ranged damage
- The job
- Best available bow or crossbow. In a team chinchompas become unnecessary, because the group's combined direct damage is enough on its own.
- Gets it wrong by
- Bringing chinchompas anyway and spending the ammunition bill for a problem the team has already solved.
- Role
- The freezer
- The job
- Ice spells on Flight Kilisa, who is the only bodyguard that meaningfully damages anyone during the fight.
- Gets it wrong by
- Freezing her somewhere useless. Parked on top of Geerin she becomes half a Blood Barrage stack; parked in a corner she is just delayed.
- Role
- The healer between kills
- The job
- Blood Barrage on the stacked bodyguards to top the group up, and bones to peaches on the drops for another 32 hitpoints per clear.
- Gets it wrong by
- Barraging a single target because nobody bothered to stack them, which turns a group heal into a rounding error.
- Role
- Soulflame horn melee, in duos and trios only
- The job
- Noxious halberds, standing under him, using the horn's special to guarantee hits. Everyone should carry a horn rather than passing one around.
- Gets it wrong by
- Running out of special attack energy on the single shared horn mid-kill, which leaves the whole team unable to land hits.
The absence of a tank is the most under-appreciated thing about a Kree'arra team. It means the fight scales cleanly — more players is simply more damage against a very tanky boss, with no coordination overhead and no role somebody has to be talked into.
Drops and What Kree'arra Is Worth
Armadyl armour is the reason this room stays busy, and it has an unusual property among God Wars drops: it is the best ranged armour of its class for players who are not yet buying Masori, which means the boss that most punishes weak ranged gear is also the boss that fixes it. The armadyl hilt is the rarer prize sitting on top of that.
What is worth noticing about his table is how much of it is supplies. He and all three bodyguards drop bones, so every clear converts into 32 hitpoints through bones to peaches, and the bodyguards occasionally hand over two manta rays or three mushroom potatoes, healing 44 and 60 respectively. On a boss whose damage output is relentless and unavoidable, food on the floor is worth more than it would be anywhere else in the dungeon.
Prices are not printed here, and Armadyl armour is a good example of why. Its value has moved substantially every time a new ranged armour set has entered the game, so check the Grand Exchange rather than trusting a number in an article.
Drops worth the trip: Armadyl armour, armadyl hilt. Whether that is worth your time depends on how many kills an hour you personally get, which is a function of chinchompa methods rather than of your gear list.
Combat Achievements
Combat Achievement tiers reduce the Armadyl killcount requirement, and that matters more here than at the other three generals precisely because Armadylean killcount is the slowest and the only one that costs prayer to gather. Every tier you complete makes every future trip start sooner.
Kree'arra has Combat Achievement tasks, and a 69 max hit is the number to plan them around: any task that restricts your supplies or your gear is a materially different fight at that damage.
Task lists move with updates — read the current list in game.
Ironman Notes
Slayer masters who assign Kree'arra: Chaeldar, Konar, Nieve, Duradel. Each kill is 357 Slayer XP.
Without a Grand Exchange, armadyl armour, armadyl hilt has to be earned rather than bought, and this is the fastest table it sits on.
Kree'arra is the general where an Ironman's method choice is genuinely constrained. Chinchompas need to be caught rather than bought, which turns a Hunter grind into a prerequisite for a boss fight, and the alternatives — a twisted bow, a bow of Faerdhinen with full crystal, or a Tumeken's shadow — are all substantial projects in their own right. A rune crossbow will technically damage him and will not produce a trip worth taking.
The compensating factor is that this is one of the more self-supplying rooms in the dungeon. Bones on every clear, manta rays and mushroom potatoes from the bodyguards, and Blood Barrage healing between kills mean the supply cost of a long trip is far lower than the brew count in a setup list suggests, as long as you juggle the food rather than letting a full inventory waste it.
The Armadyl armour you are farming is also the armour the fight wants you in, so progress compounds. And because he counts as an aviansie, an Ironman can fold the whole project into Slayer tasks rather than treating it as a separate grind — just remember to bring the ecumenical key so the killcount does not eat the task.
Common Mistakes and Death Causes
| What happened | Why it happened | The fix |
|---|---|---|
| Turning Protect from Missiles off for a moment | His ranged attack reaches 69 and hits everyone in the room, so a lapse is not a gamble on whether you are targeted. | Treat the prayer as a fixed cost of being in the room, and bring the restores to pay for it rather than trying to economise on it. |
| Being swiped in melee during a chinchompa cycle | You targeted him on the same tick you were attacking. Medium Fuse shares his attack rate, so an on-tick click invites him to close in. | Click him in the gap between your attacks and click the bodyguard again just before the next one. The rhythm, not the reflex, is what keeps him planted. |
| Knocked out of position and then knocked out of the fight | His tornadoes displace you a tile if you are not in a corner, which breaks alignment and stops you being where your next click expected you to be. | Fight from the south-western corner. It is the only kind of tile where the displacement does not apply. |
| Slowly losing to Flight Kilisa in ancestral robes | A Tumeken's shadow setup has less defence than the ranged alternatives, so both his magic attack and Kilisa land more often. | Freeze her whenever the spell is up, and step under him after every cast rather than only when it feels necessary. |
| Running out of food halfway through a trip | You skipped Blood Barrage, or you had a full inventory when the bodyguards dropped manta rays and let them despawn. | Bring the runes and the ancient autocast staff, and juggle surplus food instead of ignoring it. His damage never stops, so the healing plan has to be structural rather than improvised. |
| Never reaching the boss at all | No mithril grapple, or no crossbow to use it with. | Keep a bronze crossbow and a grapple in your Kree'arra setup permanently. They cost nothing and their absence costs a whole trip. |
- What happened
- Turning Protect from Missiles off for a moment
- Why it happened
- His ranged attack reaches 69 and hits everyone in the room, so a lapse is not a gamble on whether you are targeted.
- The fix
- Treat the prayer as a fixed cost of being in the room, and bring the restores to pay for it rather than trying to economise on it.
- What happened
- Being swiped in melee during a chinchompa cycle
- Why it happened
- You targeted him on the same tick you were attacking. Medium Fuse shares his attack rate, so an on-tick click invites him to close in.
- The fix
- Click him in the gap between your attacks and click the bodyguard again just before the next one. The rhythm, not the reflex, is what keeps him planted.
- What happened
- Knocked out of position and then knocked out of the fight
- Why it happened
- His tornadoes displace you a tile if you are not in a corner, which breaks alignment and stops you being where your next click expected you to be.
- The fix
- Fight from the south-western corner. It is the only kind of tile where the displacement does not apply.
- What happened
- Slowly losing to Flight Kilisa in ancestral robes
- Why it happened
- A Tumeken's shadow setup has less defence than the ranged alternatives, so both his magic attack and Kilisa land more often.
- The fix
- Freeze her whenever the spell is up, and step under him after every cast rather than only when it feels necessary.
- What happened
- Running out of food halfway through a trip
- Why it happened
- You skipped Blood Barrage, or you had a full inventory when the bodyguards dropped manta rays and let them despawn.
- The fix
- Bring the runes and the ancient autocast staff, and juggle surplus food instead of ignoring it. His damage never stops, so the healing plan has to be structural rather than improvised.
- What happened
- Never reaching the boss at all
- Why it happened
- No mithril grapple, or no crossbow to use it with.
- The fix
- Keep a bronze crossbow and a grapple in your Kree'arra setup permanently. They cost nothing and their absence costs a whole trip.
A one-click teleport is the recovery, and it is worth being decisive about. Because his attacks reach everyone in the chamber, there is no safe pocket to retreat to and stabilise in — either you can afford to keep praying and healing or you cannot.
If the problem is health rather than supplies, remember the two free sources before you burn brews: bones to peaches on whatever is already on the floor, and Blood Barrage on a bodyguard. Both of those work mid-trip and not just after a clean clear.
FAQ
Why can't I hit him with my melee weapon?
He is airborne, so regular melee weapons do not reach him. Halberds and salamanders technically can, but his melee defence is extremely high, and the only recommended melee approach is a small team using soulflame horns with noxious halberds, where the horn's special attack guarantees the hit.
Chinchompas or a bow?
Chinchompas are the answer for players without a strong direct-damage weapon, because his defensive stats make hitting him directly much harder than at the other generals. If you own a twisted bow with Masori and dragon arrows, a bow of Faerdhinen with full crystal, or a Tumeken's shadow, use those instead — the shadow in particular is described as far cheaper and more efficient than throwing chins.
Why do I need 92 Magic for a ranged boss?
For Blood Barrage. It is how you heal off the stacked bodyguards between kills, and it is the mechanism that makes long trips possible at a boss whose attacks hit you constantly and unavoidably.
His magic attack keeps hitting me through my magic defence — why?
Because it is not rolling against your magic defence. Kree'arra's magic attack is classified as ranged magic and rolls its accuracy against your ranged defence, which Mod Ash confirmed and had no explanation for. In practice it means your ranged setup already covers it and there is nothing to switch to.
Do I have to stand in the corner?
It is strongly worth it. Both of his attacks can knock you back a tile unless you are in a corner of the chamber, and the south-western corner is also where he and Flight Kilisa line up for the chinchompa method.
Should I get killcount or use an ecumenical key?
Use the key. Armadylean killcount is the slowest of the four factions and it burns prayer to collect, and if you are on an aviansie Slayer task, killing aviansie for killcount reduces the number of Kree'arra kills the task will give you. Combat Achievement tiers reduce the requirement too.
Related Guides
Bottom Line
Kree'arra rewards a completely different kind of preparation to the other three generals. There is no prayer puzzle and no tank role: you hold Protect from Missiles, you stand in a corner so nothing moves you, and you accept that a boss with defensive stats this high may need to be damaged indirectly through his own bodyguard rather than hit in the face. Get the off-tick click right and he never swipes at you at all.
The awkward part is everything before the fight — the grapple, the crossbow, and the slowest killcount in the dungeon. If you would rather skip straight to the Armadyl drops, having the Kree'arra trips handled for you is the cleanest way round that.
If Kree'arra is blocking a Combat Achievement or an unlock you actually want, our PvM service is done by hand — no automation. Otherwise the bosses list has the full index.
Kree'arra — GWD general (Armadyl), difficulty 4/5. Combat values here — hitpoints, max hits, attack styles and speed, Defence and Magic levels, immunities and Slayer requirements — were read from the Old School RuneScape Wiki infobox for Kree'arra on 2026-08-03. Kill rates, GP per hour and item prices are deliberately absent because they move with balance patches and the Grand Exchange. Mechanics, gear tiers and phase behaviour on this page were checked against Kree'arra/Strategies on 4 August 2026.
Need a trusted team? Bils Services
Enjoyed the guide?
Drop a like — it helps other Adventurers find the good stuff.
Community
Comments
Silence in the hall…
Be the first Adventurer to leave a mark.
Join the thread
Add a comment
Tips, drops, or “this carried my account” — keep it useful.
bilsservices · bils services · bilsservices.com

